Discord is one of the most used and well-liked communication platforms that connect users with theory friends, family, and colleagues. To use Discord, users need to sign up for a Discord account. Upon doing so, Discord assigns the unchangeable unique tag number to a username ranging from “#0001” to “#9999”. This tag number is used to uniquely identify each user on Discord.
However, the Discord user tag can be changed through Discord Nitro. Nitro is a premium subscription for obtaining some extra features like updating the custom tag number, animated profile, and much more.
In this blog, we will teach you the procedure to add custom Discord tags with Nitro.
How to Add Custom Discord Tags with Nitro?
Before adding the custom Discord tag, the user should consider the following things in mind:
1. Tag Availability
The only tag that would be available with a combination of usernames will be allowed to change. So, there is no surety for the availability of the particular tag that you choose.
2. Tag Duration
The changed tag number will last till the Nitro subscription is over. After that, the tag number will be changed to the random one. Furthermore, there is no saving for the old tag of the user so it will be just random.
3. Tag Changing Limit
If the user is changing the tag number over and over again, Discord might put a time limit to prevent the user from any security issues like the user can try again after an hour.
For adding a custom tag in Discord, follow the provided procedure.
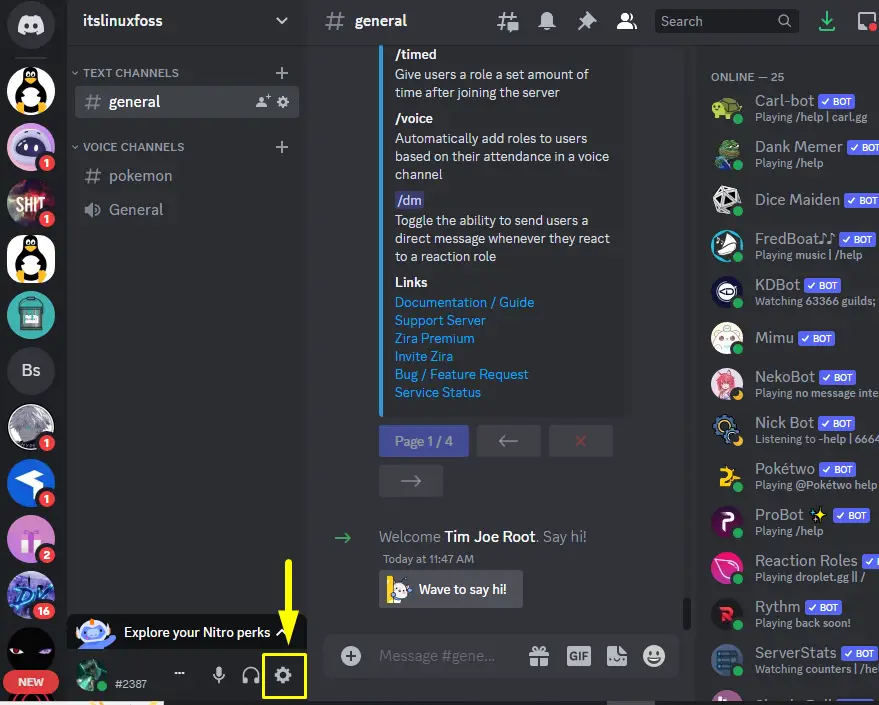
Step 1: Access User’s Settings
Launch the Discord app and hit the settings “Gear” icon to jump into the user’s settings:
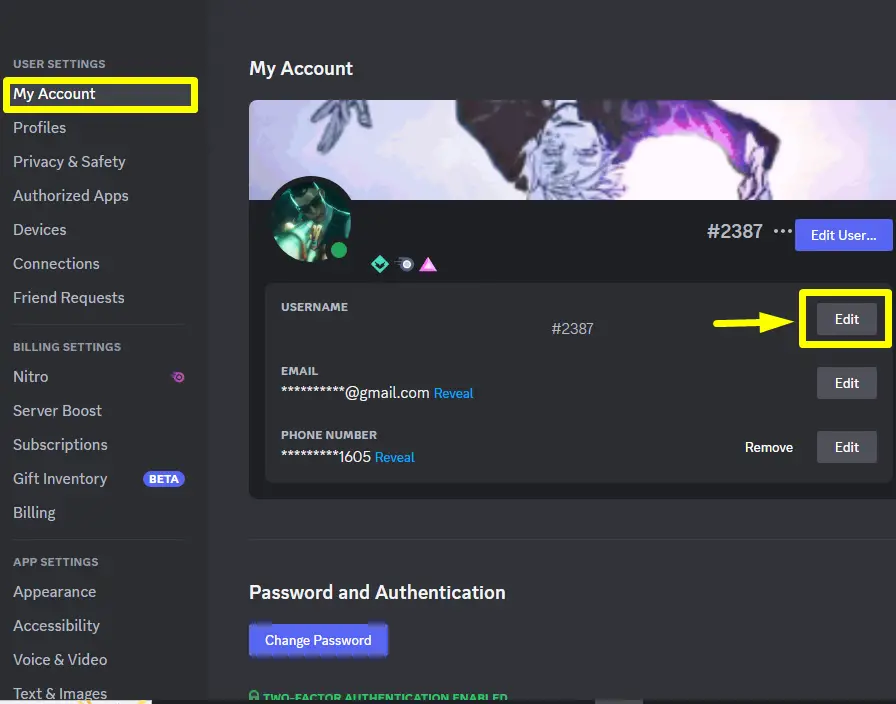
Step 2: Edit Username
Afterward, edit the username by clicking on the “Edit” button of the “USERNAME” field under the “My Account” settings:
Step 3: Add Custom Tag
Click on the tag number and change it with the custom one according to your desire. Then, enter the password of the account and press the “Done” button:
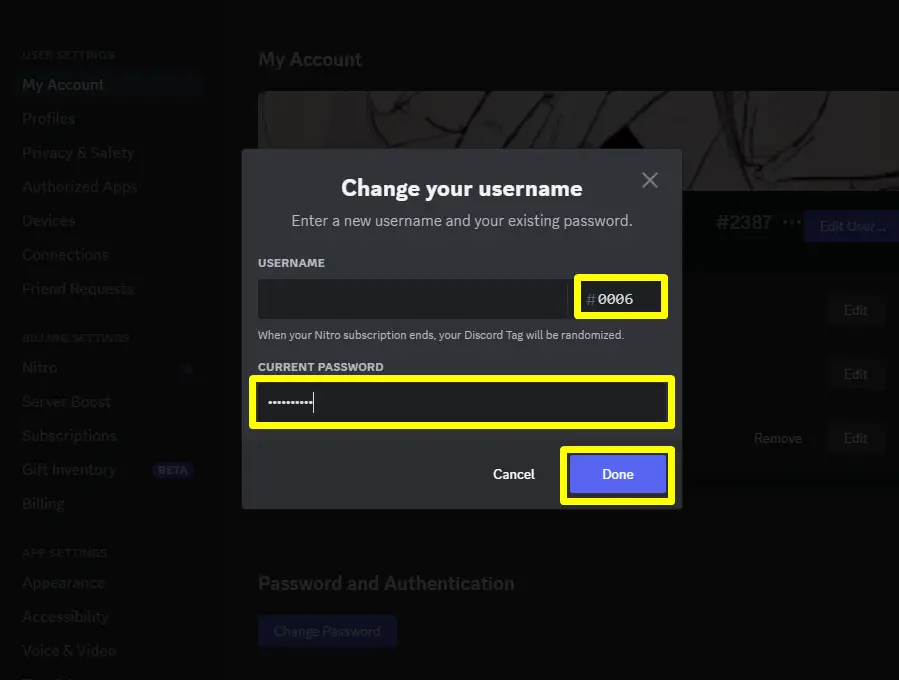
The particular tag number will be changed.
Bonus Tip: Mobile App Method
Users can also change the custom tag number from Discord mobile app. Follow the following guide to add the custom tags with Discord Nitro in Discord mobile app.
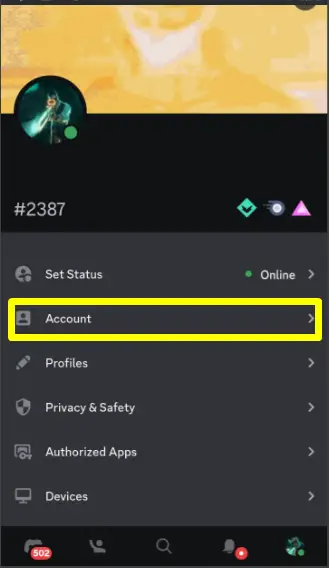
Step 1: Access User’s Settings
Launch the Discord mobile app and go to the user’s settings by pressing the “Profile” icon:
Step 2: Open Account
From the settings, open the “Account” settings and proceed:
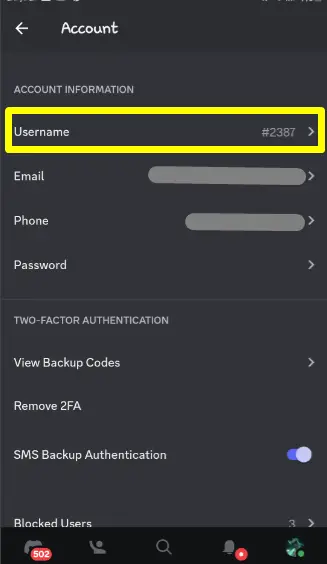
Step 3: Go to Username
Then, go to the “Username” section as highlighted below:
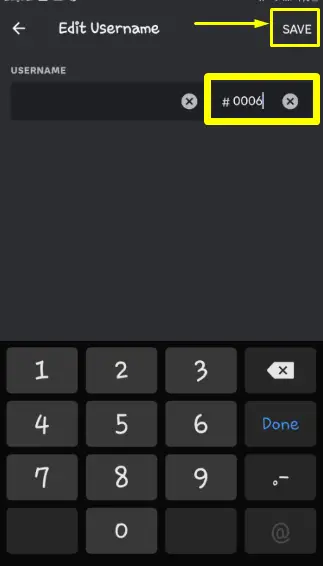
Step 4: Add Custom Tag
Now, change the tag number with a custom one based on the need and click on the “SAVE” button:
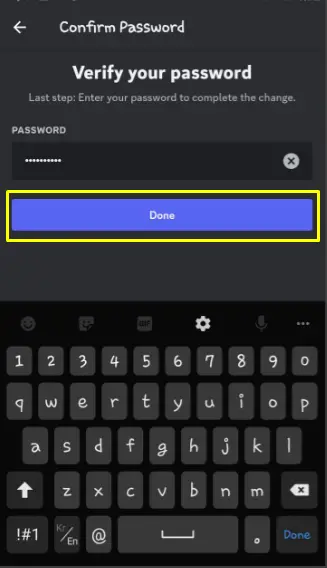
Step 5: Enter Password
Lastly, provide the password of the account and click on the “Done” button:
The tag number will be changed. This is all for adding the custom Discord tags with Nitro.
Conclusion
To add the custom Discord tags with Nitro, access the “USER SETTINGS” and edit the username of the account under the “My Account” settings. Then, change the tag number which is available, enter the password for the account, and hit the “Done” button. These instructions also assist Discord mobile app users. This post has enlightened the instructions to add the custom Discord tags with Nitro.
