Various operating systems are available on the market, all of which have pros and cons. For example, some software is only available on Windows. However, there are certainly a few uses for them that can only be used on Linux, mainly Ubuntu. This adventure of using different OS can occupy lots of disk space, and there is a good chance of losing all your data, so what is the solution? Well, you need the image or iso of the required OS, windows operated computer and a USB stick.
This article will explain the procedure for creating a Ubuntu 22.04 Live USB on Windows or installing a portable version of Ubuntu on a USB stick.
How to Create a Live USB for Ubuntu 22.04 on Windows?
To create a Live USB for Ubuntu 22.04, you should know that the functionality is limited on the USB. It is recommended to have at least 4GB of free space on the USB and 4GB RAM on the system for smooth performance and a fast port (USB 3.0 preferred).
Pro Tip: Use a USB with bigger space if you are looking to install lots of Ubuntu programs.
The following steps should be followed to create a Live USB for Ubuntu 22.04.
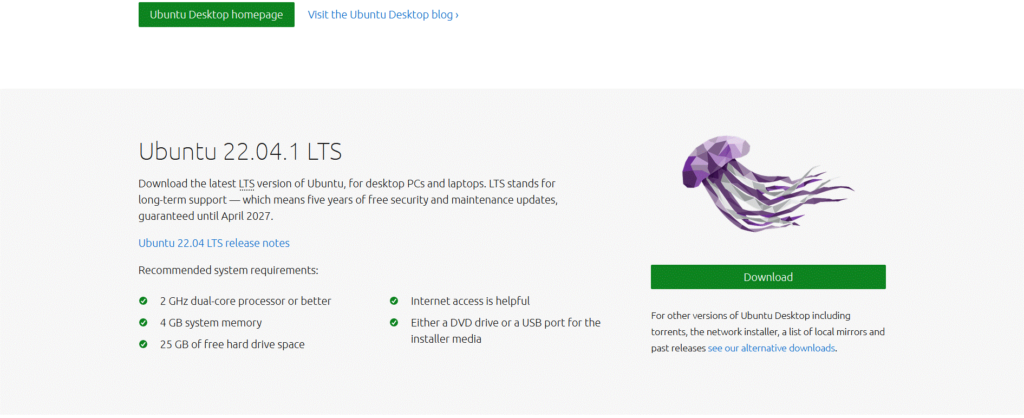
Step 1: Download the ISO file
The first step requires you to download the image or ISO file, which is free and available on the official download page.
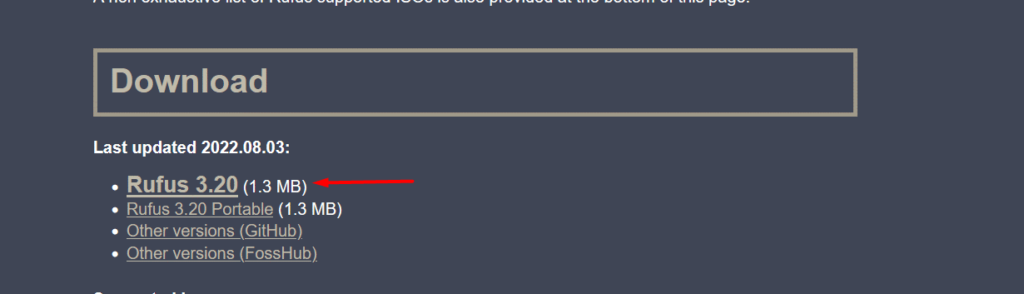
Step 2: Download Rufus
Rufus is an excellent tool for creating live or bootable USBs, and it can be downloaded on this page.
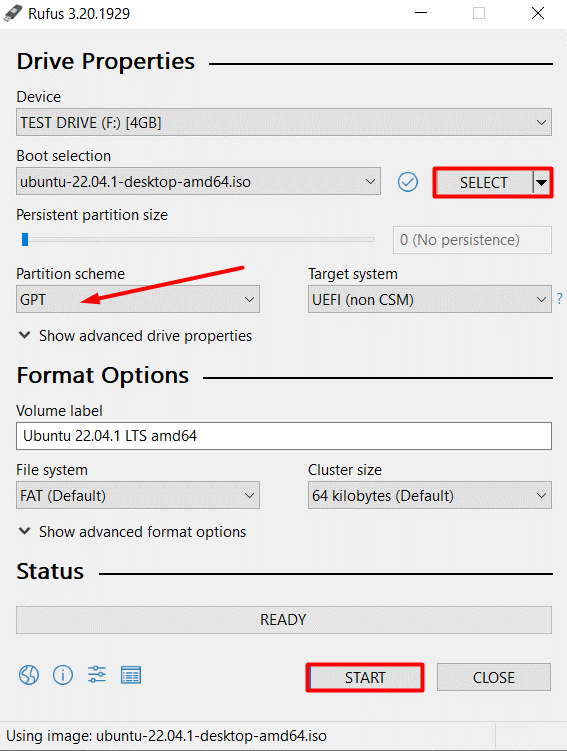
Step 3: Run Rufus
When the downloading is complete, you must run Rufus and select the ISO file and the USB you wish to install. Upon clicking the “SELECT” button, a new pop-up window appears where you must choose the ISO file. Choose “Partition scheme” as GPT for Live and MBR for dual-boot installation. Click on the “START” button once done:
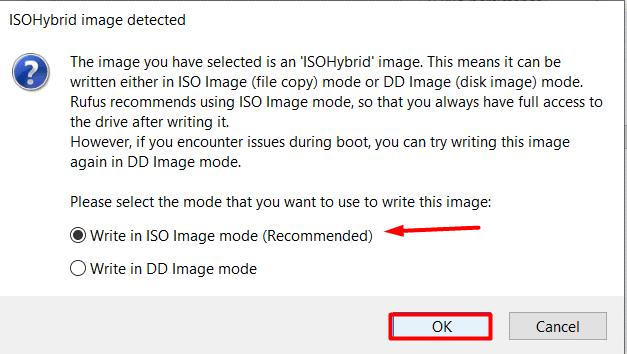
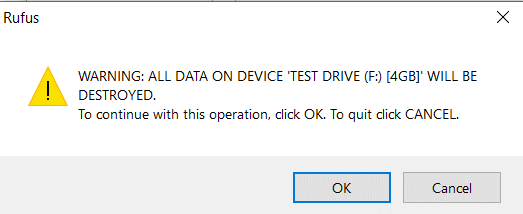
You will now see a message like this, where you must select “Write in ISO mode” and then click “OK”:
The wizard will now format your USB stick, do it when ready:
Note: For detailed usage of Rufus, read out this article. “Rufus Bootable USB Ubuntu 22.04”
Step 4: Reboot
The USB is now ready to be used as Ubuntu 22.04 Live, so reboot your PC to see what you’ve done.
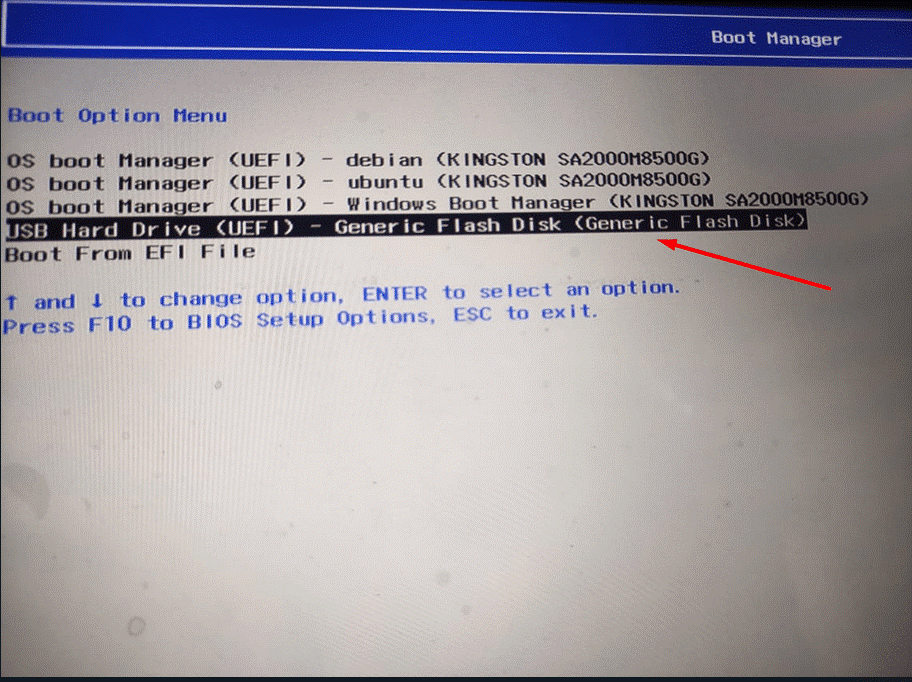
Upon rebooting, enter your Boot menu. To do so, you have to access the boot menu by repeatedly processing the shortcut key as per your system, and some of them are listed below:
For HP Machines: F10 Key
For Dell Machines: F12 Key
For Mac Machines: Press and Hold Power Key
For Lenovo Machines: F12 Key
Select the USB drive you’ve just created using Rufus from this menu by pressing the “Enter key”:
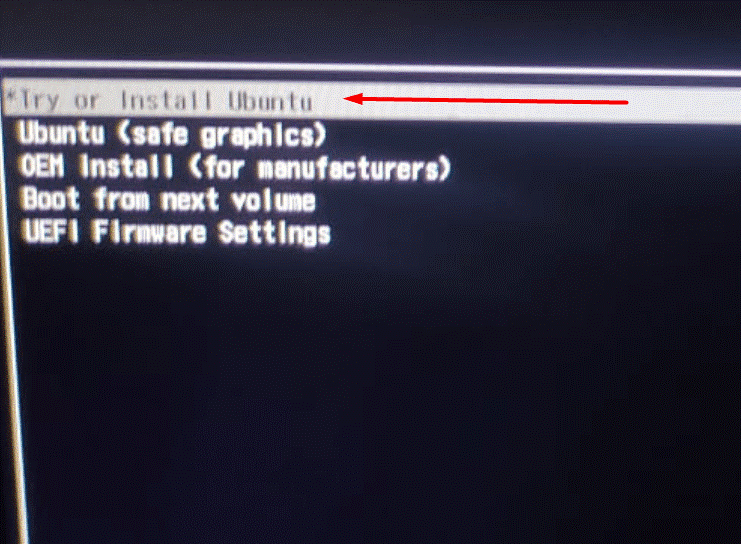
You will be taken to another menu where “Try or Install Ubuntu” must be selected for Live USB:
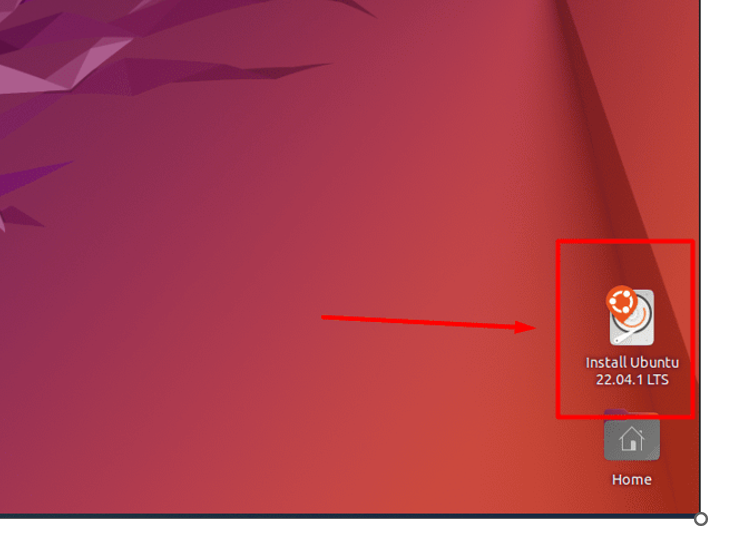
After a few seconds, your PC will boot into the Live USB, where you will see an interface like this, and on the bottom-right corner, you will also see “Install Ubuntu 22.04 LTS,” which can be used to install Ubuntu on your system.
That’s all from this post!
Conclusion
To create a live USB of Ubuntu 22.04, you need to get a USB of recommended storage and then make it bootable with Ubuntu’s ISO. All this process has been demonstrated in a step-by-step procedure defined in this guide. Using a Live USB, you can do almost anything, and if your PC has a fast USB port, you can also enjoy Ubuntu’s fast processing speed without installing it on your system.