Ubuntu is an open-source, modern Debian-based Linux operating system. It is considered a suitable Linux distribution for beginners because of its simple, user-friendly interface and the large community support. In addition, it is also famous for its customization support that allows you to change its terminal, font styles, dock panel, sets of themes, and much more.
Many free and open-source customization tools change GNOME’s default look in Ubuntu and give it a new, better look. This post explains the complete procedure to customize GNOME in Ubuntu 22.04.
How to Customize GNOME in Ubuntu For a New Look?
The GNOME can be customized in various ways to transform Ubuntu into a new look. Let’s see how it can be customized:
Step 1: Install Extension Manager
The “Extension Manager” application is in the standard Ubuntu 22.04 repository. It can be installed simply using the “apt” default package manager:
$ sudo apt install gnome-shell-extension-manager
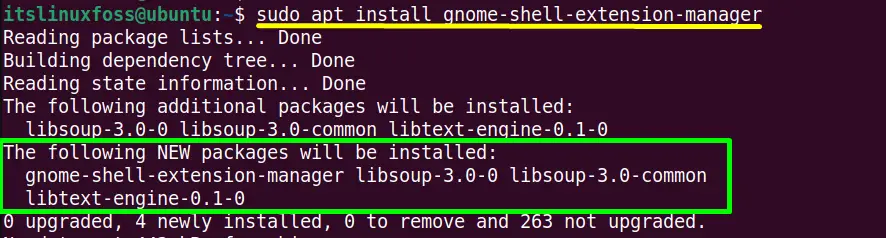
The installation of “Extension Manager” has been completed.
Step 2: Launch Extension Manager
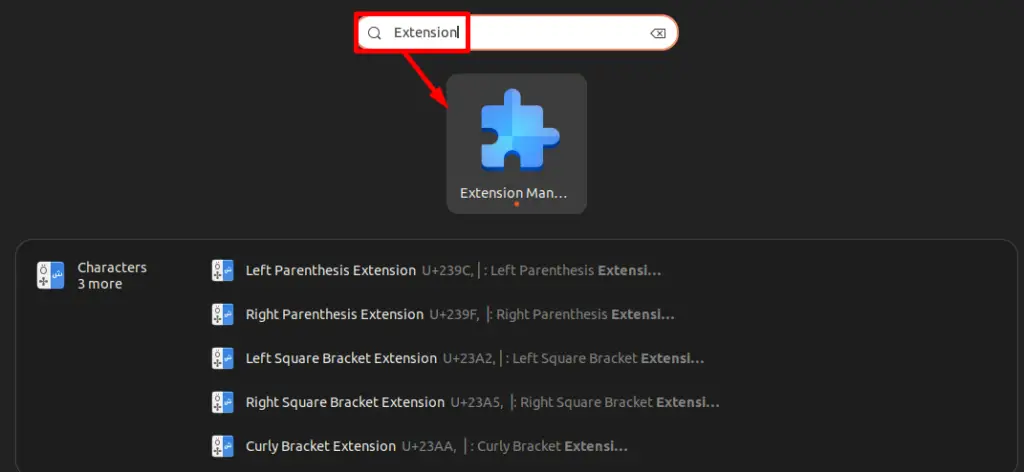
Open up the “Extension Manager” application by using the search bar of the application menu:
The interface of the “Extension Manager” looks like this:

The window contains two tabs, “Installed” for installed extensions by default and “Browse” for the required extensions.
Step 3: Install Particular Extensions
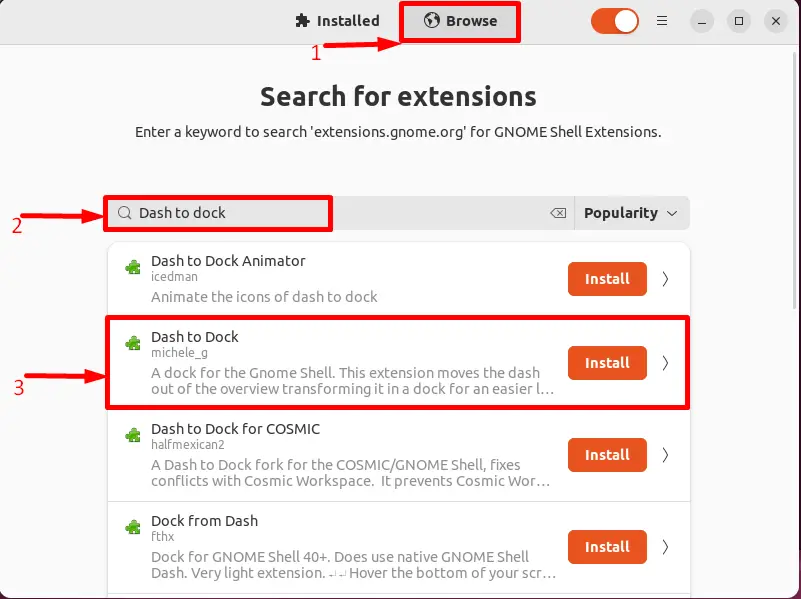
From the Extension manager, use the “Browse” tab to search for the three applications, i.e., “dash to dock,” “Transparent top bar,” and the “Archmenu.”
First, search the “Dash to Dock” tool in the search bar of the Browse tab and install it using the “Install” button:
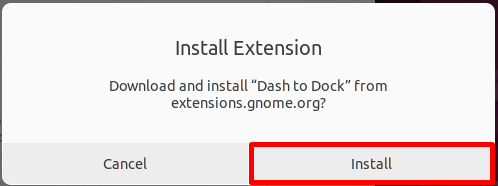
Confirm the installation of the “Dash to Dock” application:
The installed application will appear in the “User-installed Extensions” section of the “Installed” tab window:
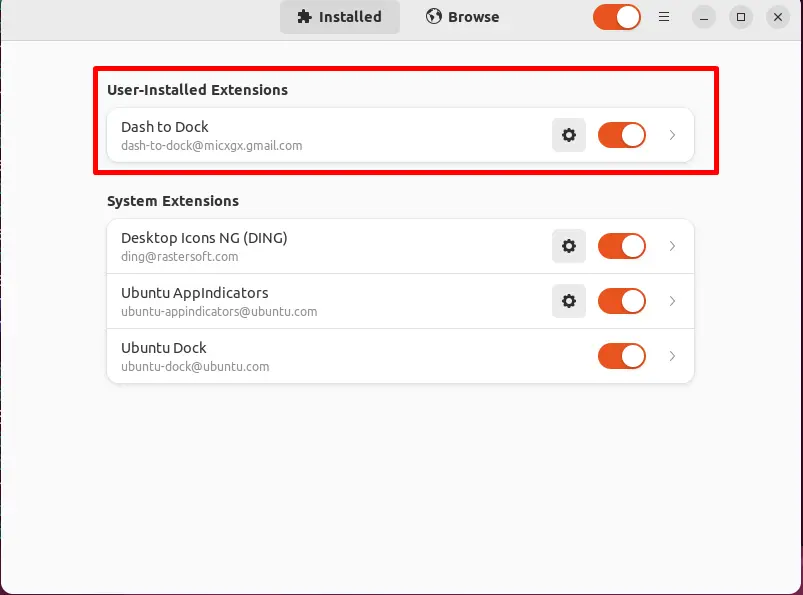
Use the “toggle” button to enable or disable it.
The same procedure will be followed to install the “Transparent top bar”, and the “Archmenu”. It will also appear in the “User-Installed Extensions” once their installation is completed:
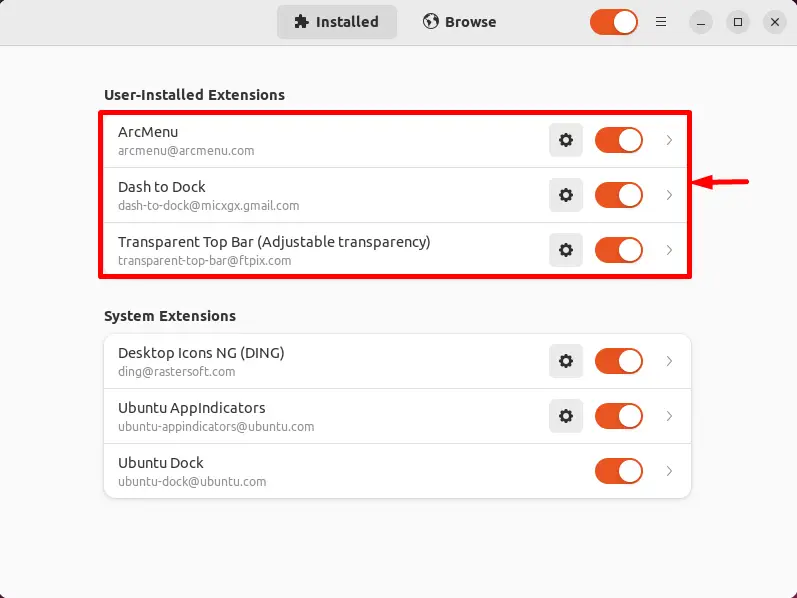
The highlighted application has been installed in Ubuntu 22.04.
Start Customizing the GNOME
The installed extension managers applications allow the user to customize the default Ubuntu look in different ways per the user’s choice. There are two major customizations that are necessary to have a new look. Let’s practice these ones by one:
Adjust The Dock Position and Appearance
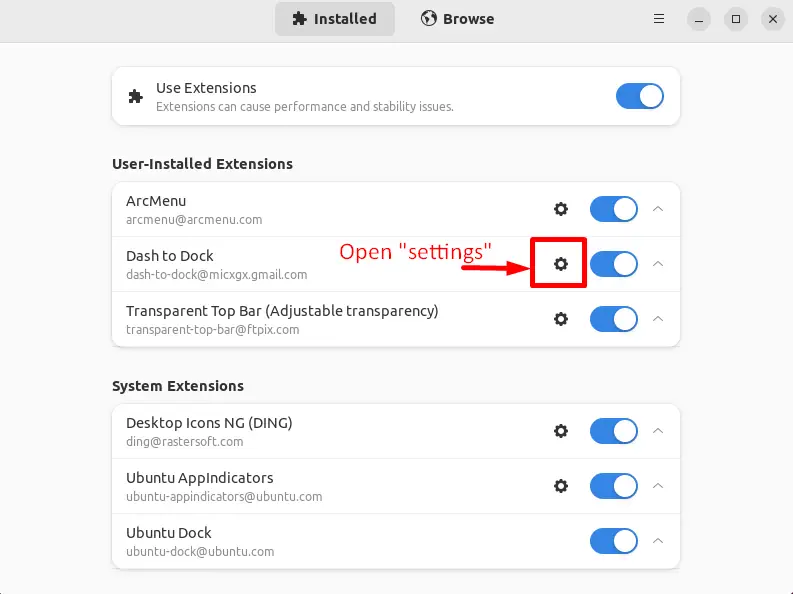
Open the Extension Manager application and navigate to the “Dash to Dock” tools settings icon highlighted in an image:
The “Dash to Dock” settings window is opened. By default, the position of the “Dock” panel is at the bottom. For instance, it is changed to the “Right” side via the “Position and size” tab:
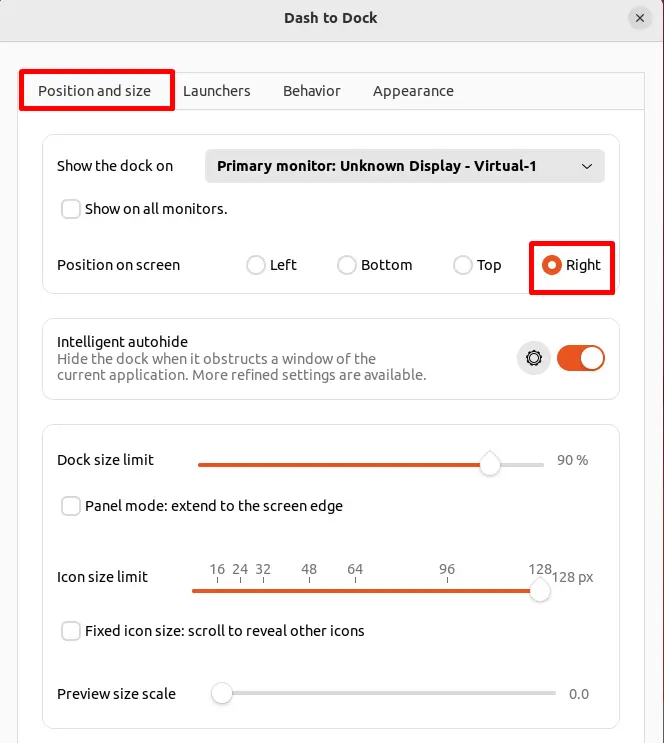
The “Dock” panel has been set at the right side of the Ubuntu window.
Navigate to the last tab “Appearance” and change the “Dock” appearance from the last field “Customize opacity”. In front of it, the “Default” option generates a drop-down list in which “Fixed” is selected:
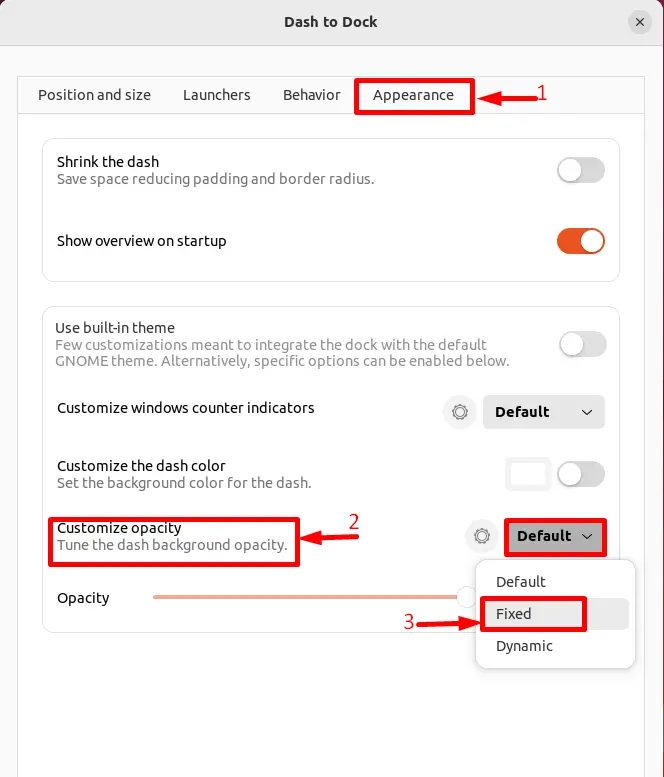
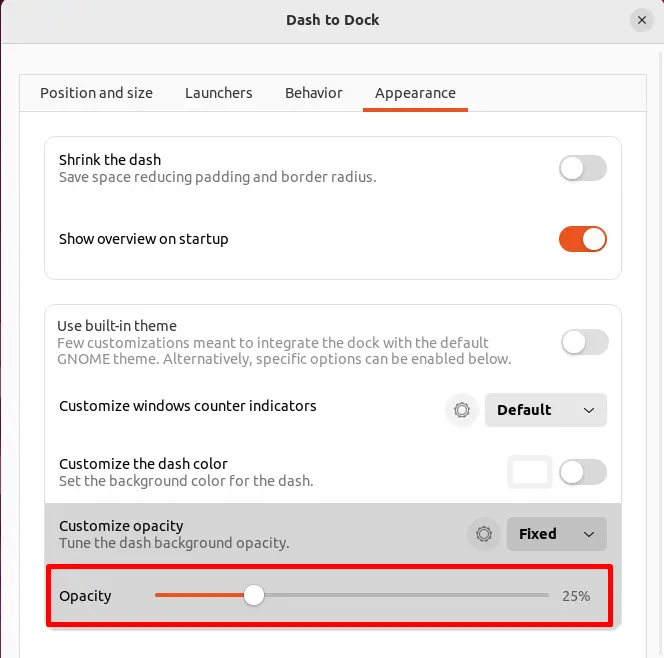
Now, change the “Opacity” of the “Dock” as per requirements, i.e., “25%” is fixed for this scenario:
In order to adjust the size of the “Dock” panel as per the desktop adjustments, turn on the “Shrink the dash” option:
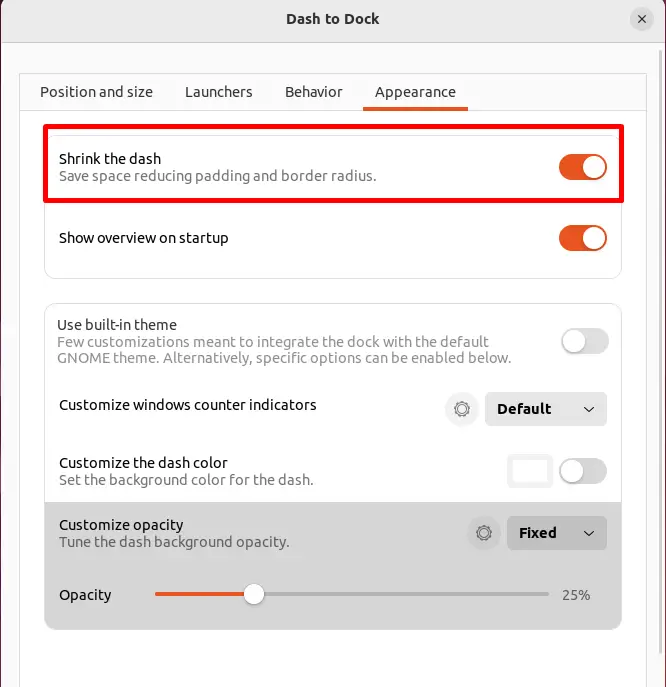
The default dock panel look has been successfully customized due to the “Dash to Dock” application:
Customize the ArchMenu
The “ArcMenu” application provides built-in GNOME search, menu layouts, quick access to system shortcuts, and much more.
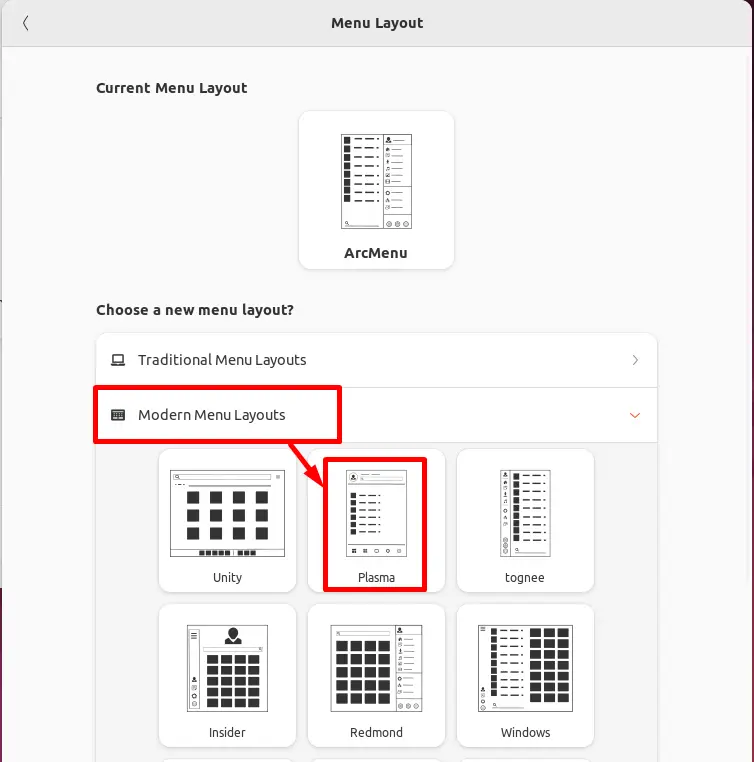
To customize the ArcMenu access it “Settings” window using the “settings” icons in front of it. Navigate to the “Menu” tab to change the “Menu Layout”:
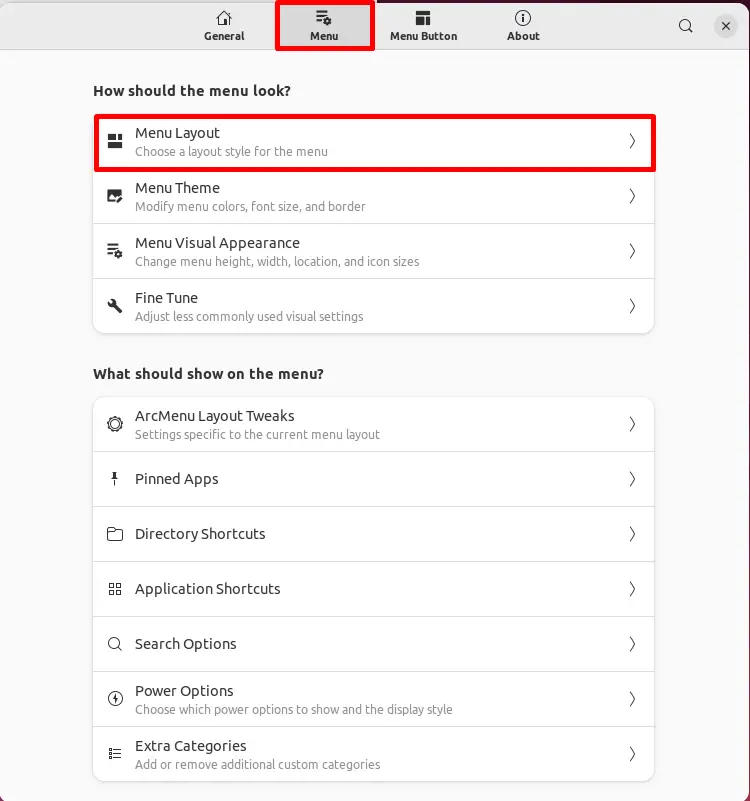
From the “Modern Menu Layout” category, the “Plasma” menu layout is selected:
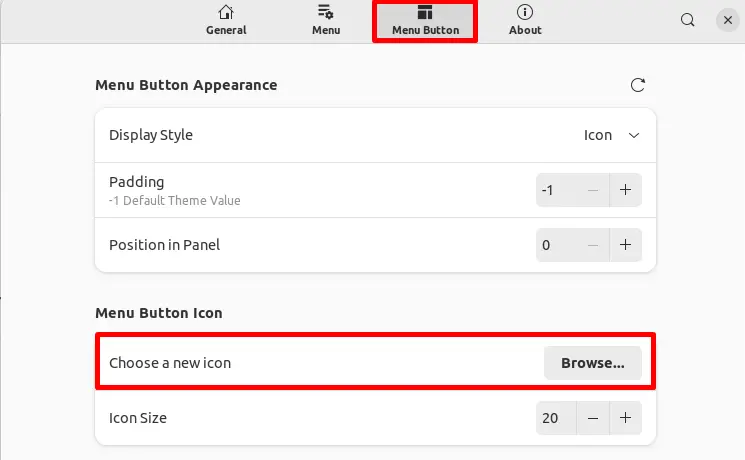
After that move to the “Menu Button” tab and “Browse” for the “Menu Button Icon” style:
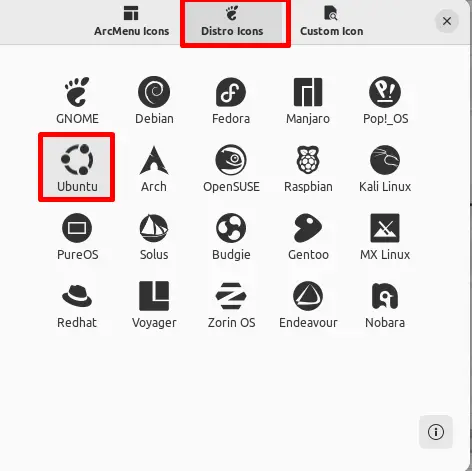
The “Menu Button Icon” opens up a new window from which the “Ubuntu” icon is selected available in the “Distro Icons” section:
The user can also customize the other settings provided in the “ArcMenu” tools.
After modifying all the settings of the installed application the new look of Ubuntu looks like this:
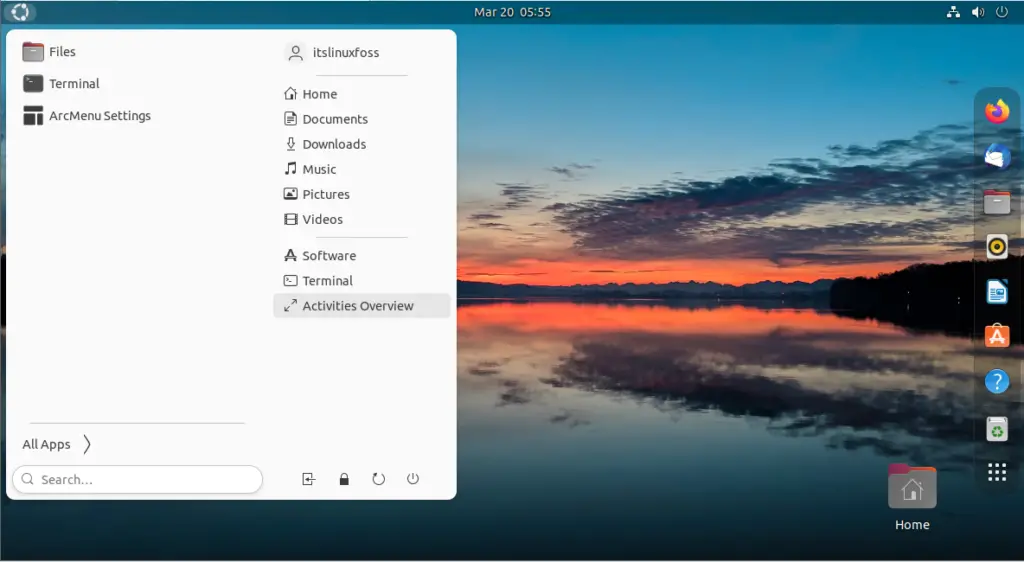
The default look of Ubuntu has been changed successfully.
Note: This is one type of customization, the users can follow the same process and choose some other customizations to have a different and interactive look.
Conclusion
To customize the GNOME in Ubuntu install the “Extension Manager” tool using the external “flatpak” package manager. Browse for the desired extensions and install them. Change the default settings of the installed extension as per user requirements.
This post has provided a brief description to customize GNOME in Ubuntu 22.04.
