The “crontab” is also called the “cron-table” text file that schedules the defined commands for execution periodically. The “Crontab” file can be created, modified, deleted, and viewed using the “Crontab” command. This article explains the procedure to edit the crontab file with the “nano” default text editor.
The guideline of this article is written below:
Let’s start with the basics of crontab.
How Does the Crontab Work?
The “Crontab” uses a demon “crond” which runs in the background to check whether any scheduled jobs need to be executed. Typically it depends on its basic syntax.
Crontab Syntax
The generalized syntax of the crontab command is written below:
minute(s) hour(s) day(s) month(s) weekday(s) command(s)
OR
* * * * * command
In the syntax, the first five fields specify the “time”. However, the time is further divided into five fields:
- 1st* specifies minutes(0-59)
- 2nd* denotes hours(0-23)
- 3rd* represents day of the month(1-31)
- 4th* identifies month(1-12)
- 5th* shows day of the week(0-7)
How to Edit Crontab with nano?
The crontab command “crontab -e” allows the users to add a cron job to the crontab file via the “nano” text editor. To see how this process happens follow the step-by-step instructions that are described below:
Step 1: Check the cron Service Status
Before editing a crontab file first check the “crontab” service status whether it is “active” or not. To perform this task use the “systemctl” command in this way:
$ sudo systemctl status cron
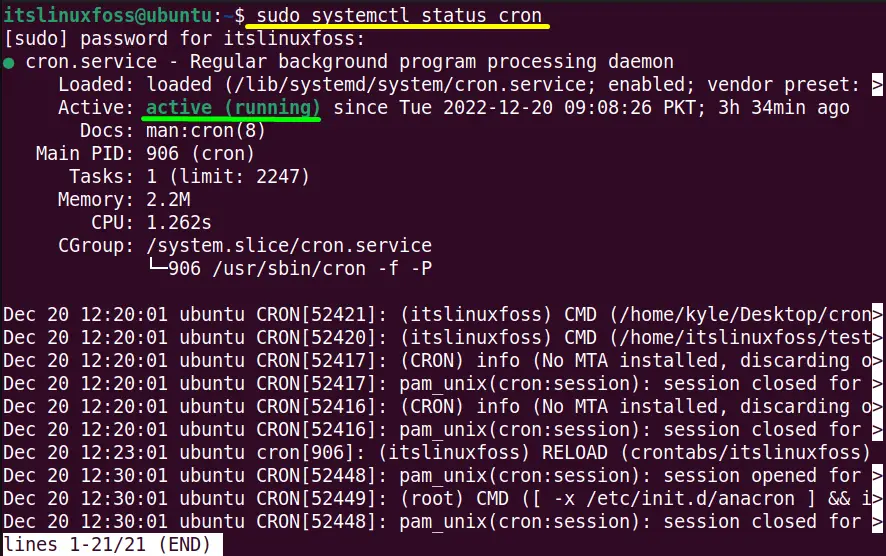
The green indicator shows that the crontab service is in an “active (running)” state. Press the “q” tab to exit the above command from the terminal.
Tip: Start the Crontab Service (If Inactive)
Sometimes the “crontab” service is not active and shows the “inactive” status as shown in the below image:

In this situation use the below-mentioned “systemctl start” command to start it:
$ sudo systemctl start cron

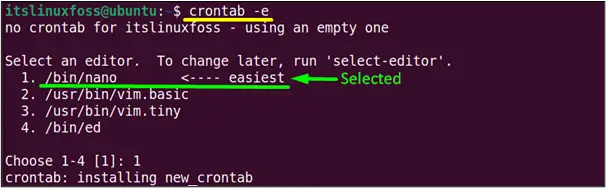
Step 2: Create a crontab File
The “crontab” file is not created by default. Run the below command to generate the crontab file in the current working system.
This command asks you to select the text editor if you are creating the “crontab” file for the first time. In this scenario, the “1. /bin/nano” is selected as per requirements:
$ crontab -e
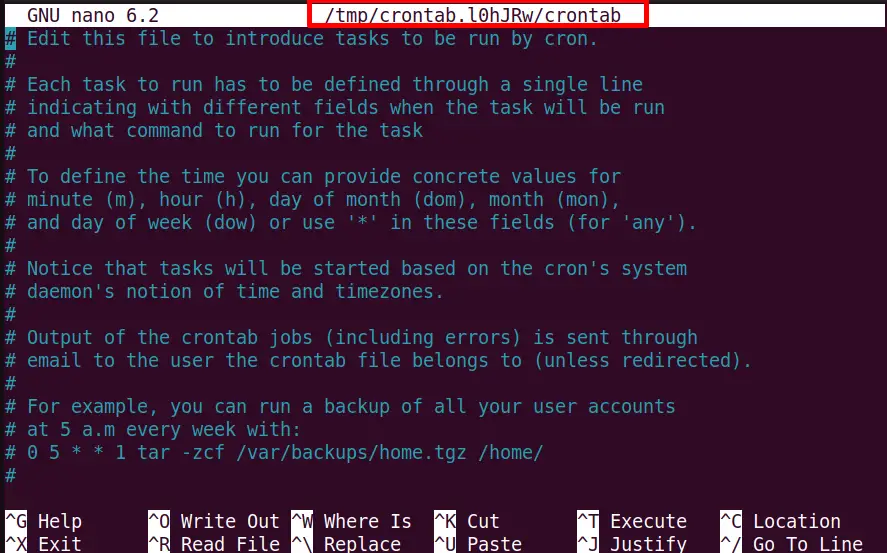
The above command opened the new crontab “/tmp/crontab.l0hJRw/crontab*” file is created and opened:
Step 3: Add a Particular cron Job
Scroll down the file window and add a new cron job at the end of the file that is defined below:
*/10 * * * * rm File1.txt ; cat>NewFile.txt ; ls -l NewFile.txt
The above cron job contains three commands that are joined with the “;(Semi-Colon)” symbol. All of these commands will execute as one cron job after every “10” minutes:
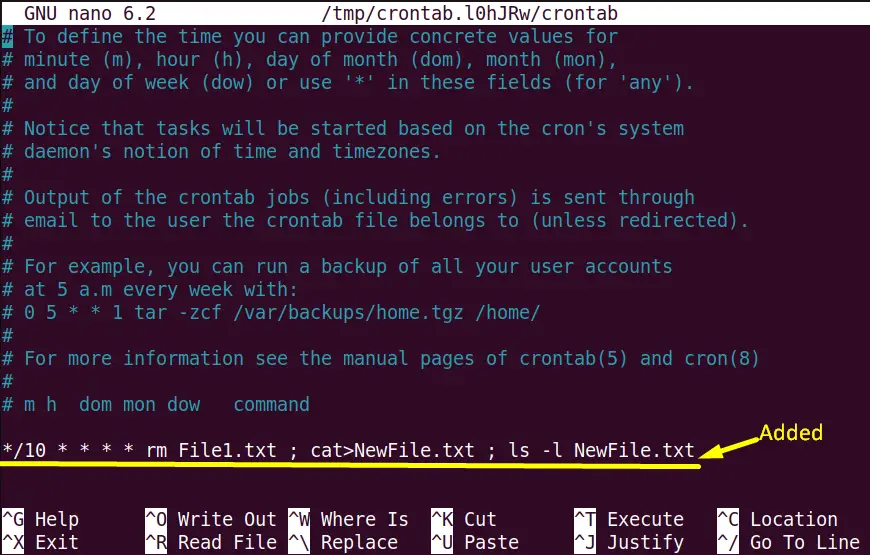
Save the file (Ctrl+S) and quit the text editor from the terminal (Ctrl+X).
Step 4: Verify the cron Job
When the file has closed, the status of the “crontab -e” command will be changed or modified as it looks like this:

The output is displaying that the new job is successfully installed or added to the crontab file.
Moreover, the user can also execute the following command for more verification:
$ sudo ls -l /var/spool/cron/crontabs

The output confirms that the cron job is successfully added to the crontab file using the “nano” editor.
It’s all about editing crontab with a “nano” text editor.
Conclusion
The “crontab -e” command helps the user to edit a crontab file into the “nano” text editor. When a crontab file is created for the first time, this command asks the user to select the text editor as per the requirements. In this article, we used the “nano” text editor to edit the crontab file and add a new cron job. This article has briefly illustrated the whole procedure to edit a crontab with a “nano” editor.
