In Google Docs, dictation is used to type the text from the user’s voice. It is a useful way to write a document by speaking words. Google Docs allows users to use the microphone to type text into documents. It can be used for short and long documents like notes, meetings, agendas, etc.
This article will demonstrate how to enable dictation in Google Docs.
Let’s start with this guide.
How to Enable Dictation in Google Docs?
Google Docs enables users to dictate to the system, which then writes the text. It is possible through the “Voice typing” option, available from the “Tools” tab of the menu bar. To enable dictation in Google Docs, a step-by-step procedure is provided below:
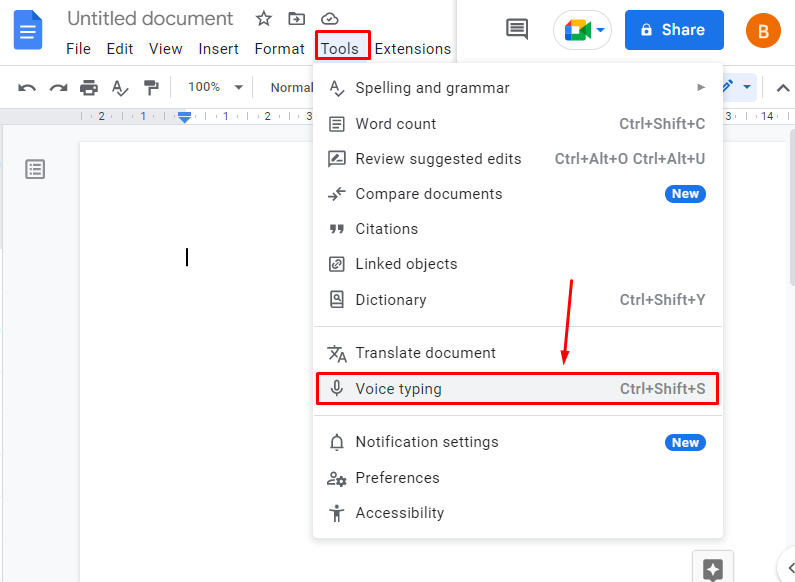
Step 1: Click on the Voice Typing
After opening the blank document in Google Docs, click on the “Tools” option. It provides the various options in the dropdown list. Choose the “Voice typing” option from the drop-down list:
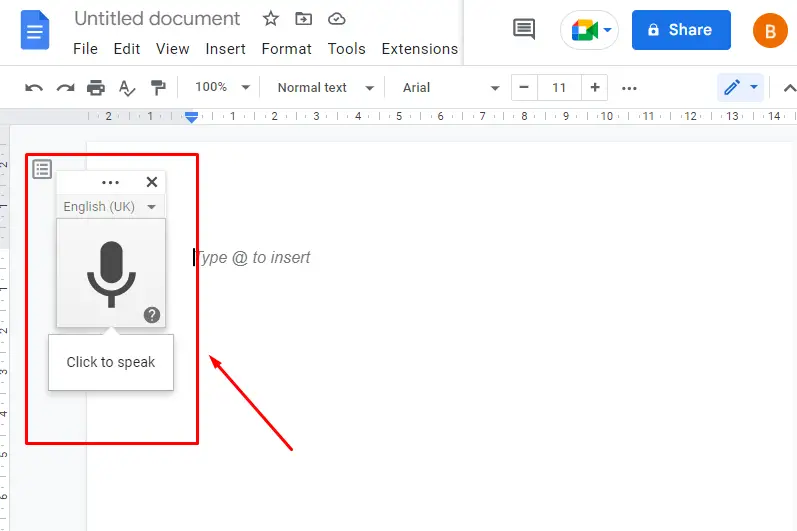
Step 2: Click on the Microphone to Speak
It navigates to the new small window of the microphone. In the window, press “Microphone” to enable it on Google Docs:
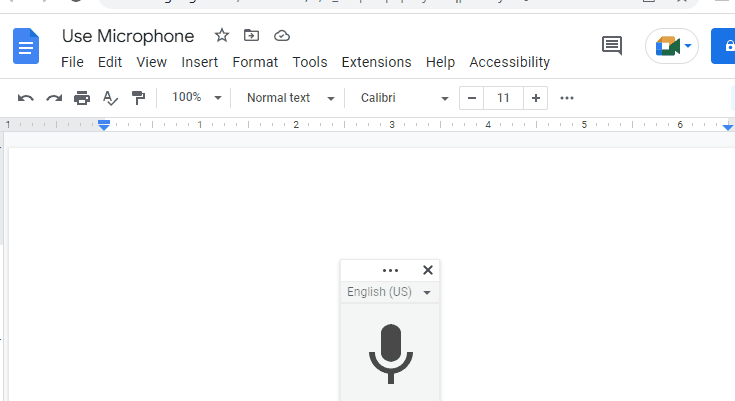
Step 3: Speak and Verify the Results
After clicking on the microphone, the microphone will turn red, then dictate clearly into the microphone to write text. Google Docs will type your voice into the document as shown below “GIF”:
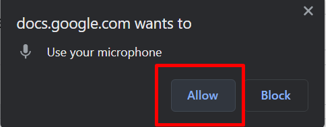
Important: Users may need to grant access to the microphone for the first time they use voice typing:
Note: An alternate way to enable dictation in Google Docs is through the “Ctrl+Shift+S” shortcut key.
That’s it for this guide.
Conclusion
In Google Docs, dictation is enabled using the “Voice Typing” option from the “Tools” tab or using the “Ctrl+Shift+S” shortcut key. After that, it acquires permission for microphone access. It is an effective method for writing the text from the voice. This guide has explained the step-by-step procedure to enable dictation in Google Docs.
