The “PGP” (Pretty Good Privacy) enables the user to encrypt and decrypt the information of data and create private and public encryption keys. Usually, PGP is used for sharing texts, documents, and emails for better security. So that the specific user only uses the data using your public or private encryption key. The “GPG” (GnuPG) is a free and open-source encryption software based on PGP.
This article will demonstrate the methods to generate PGP keys with GPG in Linux. The content for the post is:
- Installation of GPG
- Method 1: Generating PGP Keys With –gen-key
- Method 2: Generating PGP Keys With –full–generate-key
- Method 3: Generating PGP Keys With –quick-gen-key
- Bonus Tip: List PGP Keys Using GPG Utility
Let’s start with the installation of PGP utility.
Installation of GPG
Most Linux distributions have GPG pre-installed but can be installed using the given commands if it is not found.
For Debian/Ubuntu/Mint/Kali:
$ sudo apt install gnupg
For CentOS/Fedora/RHEL:
$ sudo yum install gnupg
To verify the installation of GPG, you can type the given command for checking the version of GGP:
$ gpg --version
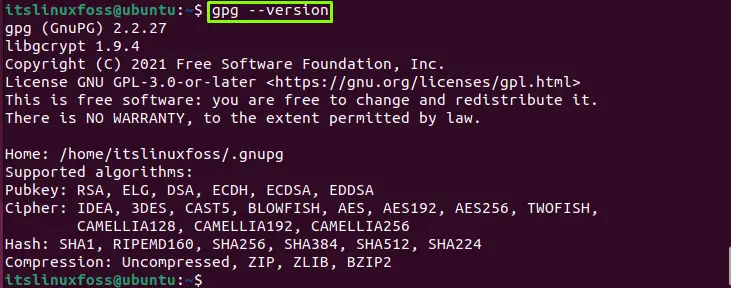
The GPG version 2.2.27 is installed.
Let’s move and create the PGP encryption keys using various methods.
Method 1: Generating PGP Keys With –gen-key
User can use the “–gen-key” option with the “gpg” command, which will ask for the real name and email address of the shared user:
$ sudo gpg --gen-key
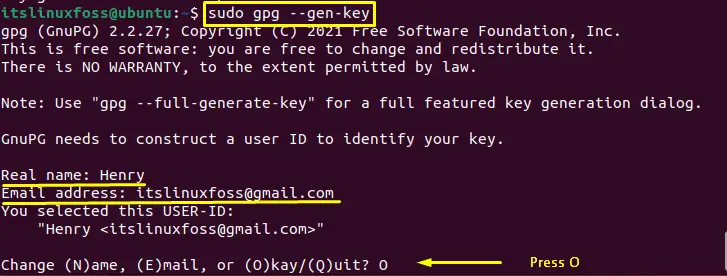
After adding the real name and email address, press “O” (Okay) to continue.
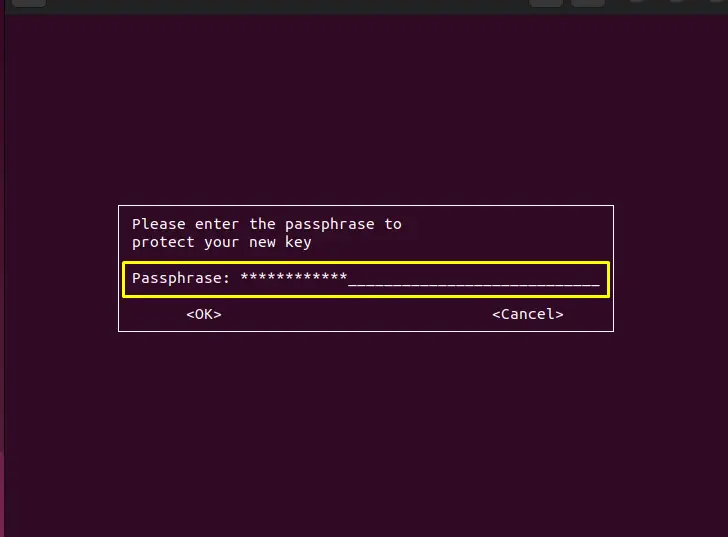
Now, add the strong encryption password with both alphabetic and numeric values:
Re-enter the password:
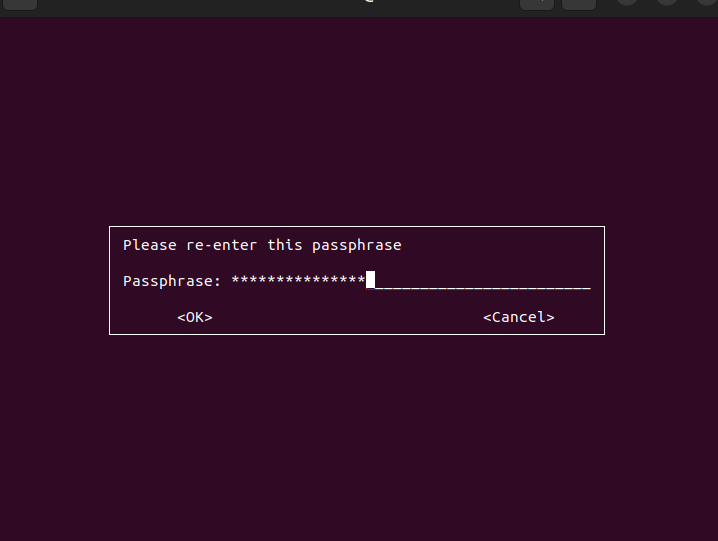
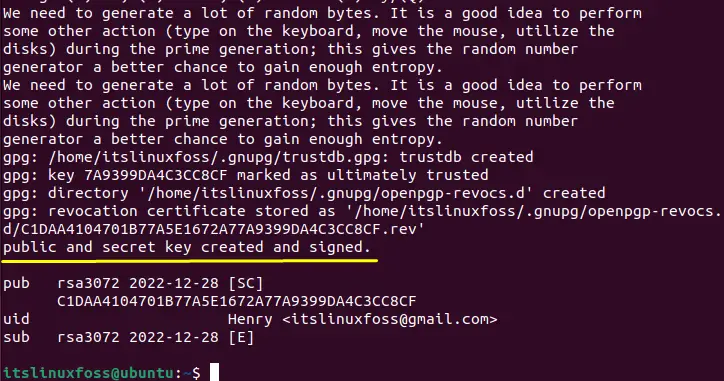
The key will be generated after performing the above operations that can be seen in the below image:
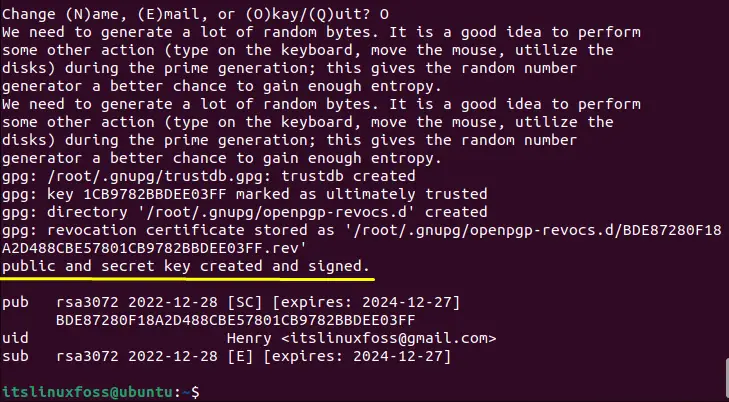
The key has been created and signed.
Method 2: Generating PGP Keys With –full–generate-key
To generate the PGP key using “–full–generate-key” just type it with the “gpg” command. It is the user-friendly method that enables the user to create the PGP key in the batch mode:
$ gpg --full-generate-key
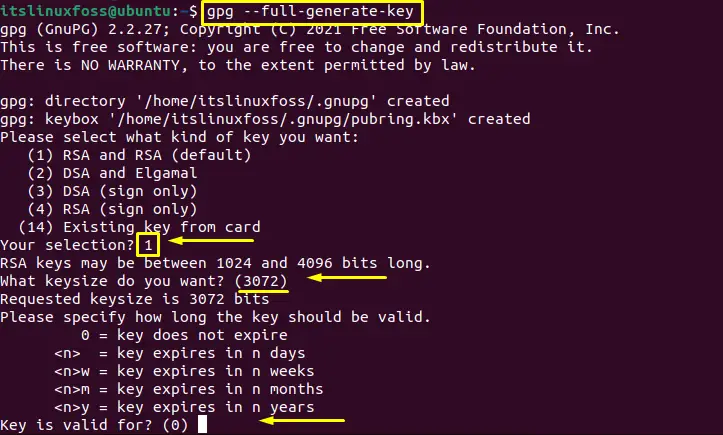
First, select the type of key using the specified numbers (1 to 4), then type key size if you are not satisfied with the given key size (3072) and press enter. After that, enter the duration in the number of days, weeks (w), months (m), years (y), or “0” for never expires as described in the image and press enter.
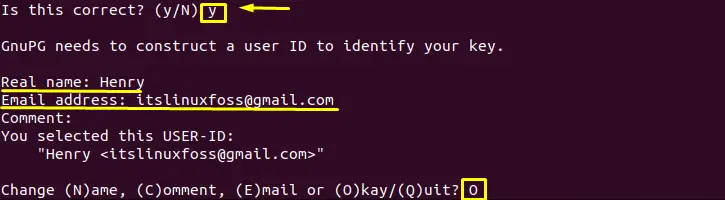
Linux will confirm whether the information is correct or not. Press “y” and then type the real name and email address for the shared user:

Press “O” to okay the report:
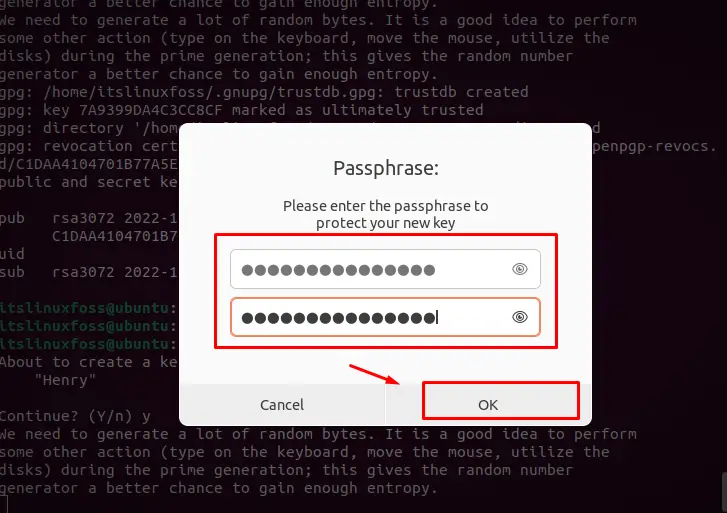
After pressing “O”, enter the strong password for the encryption key:
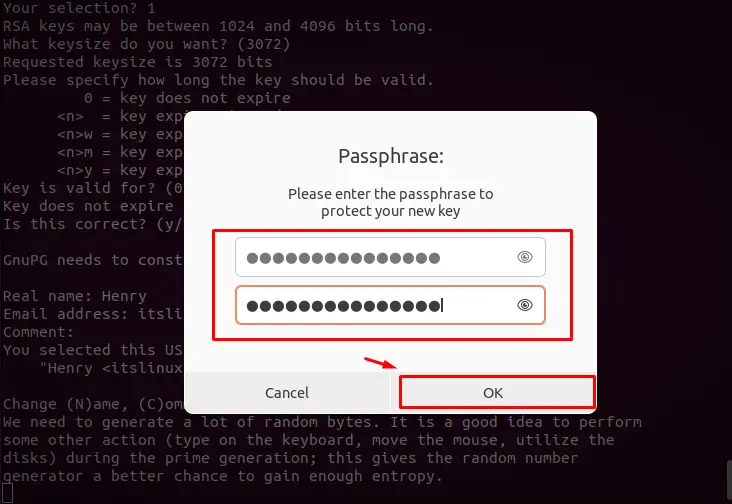
Enter the password and press “Ok”:
The PGP key has been created.
Method 3: Generating PGP Keys With –quick-gen-key
The “–quick-gen-key” is the quick method to create the PGP keys that only need the user id. The user id will be given in the command:
$ gpg --quick-gen-key Henry

Press “y” to continue, and enter the password for the PGP Key:
Hit the “Ok” button and wait for the key to be generated:
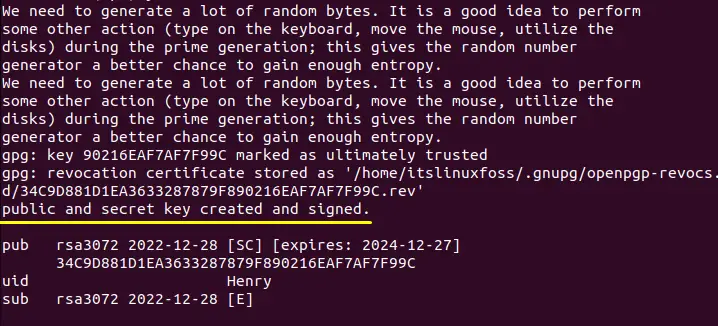
The PGP key has been created.
Bonus Tip: List PGP Keys Using GPG Utility
To list down the PGP keys created by the “gpg” command, use the “k” flag in the command:
$ gpg -k
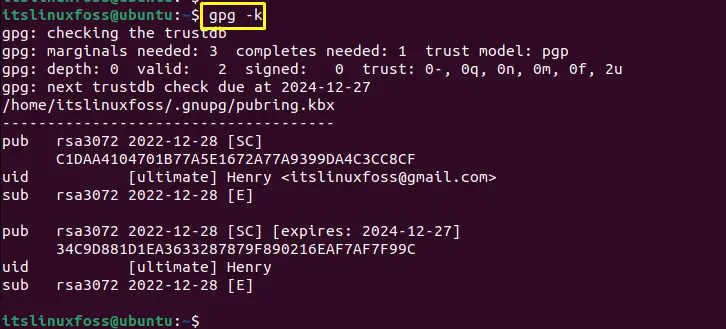
All the keys created by “gpg” utility will be listed.
That’s all about the generation of the PGP keys.
Conclusion
To generate the PGP keys with the GPG command in Linux, there are 3 ways. Use “–gen-key”, “–full–generate-key” or “–quick-gen-key” with the “gpg” utility. The “–gen-key” option is used for specified purposes, the “–full–generate-key” option to create the key in user-friendly and batch mode, “–quick-gen-key” option for quickly generating the key. This write-up has illustrated the methods for generating the PGP keys with GPG utility.
