Margins are the empty spaces sets on the documents’ top, bottom, left, and right sides. Margins help to present a paper more attractive and professional. Google Docs uses the margins to provide a gap between the text and the page boundaries. However, sometimes margins are removed to increase the text area of the document. Today’s guide will illustrate the method to get rid of margins in Google Docs. The guidelines of the post are as follows:
Let us starts with the first method.
Method 1: Using the Margins Option in the Menu Bar
This method demonstrates that the user can remove the margins with the help of the “Margins” option. To perform this task, below mentioned steps are required:
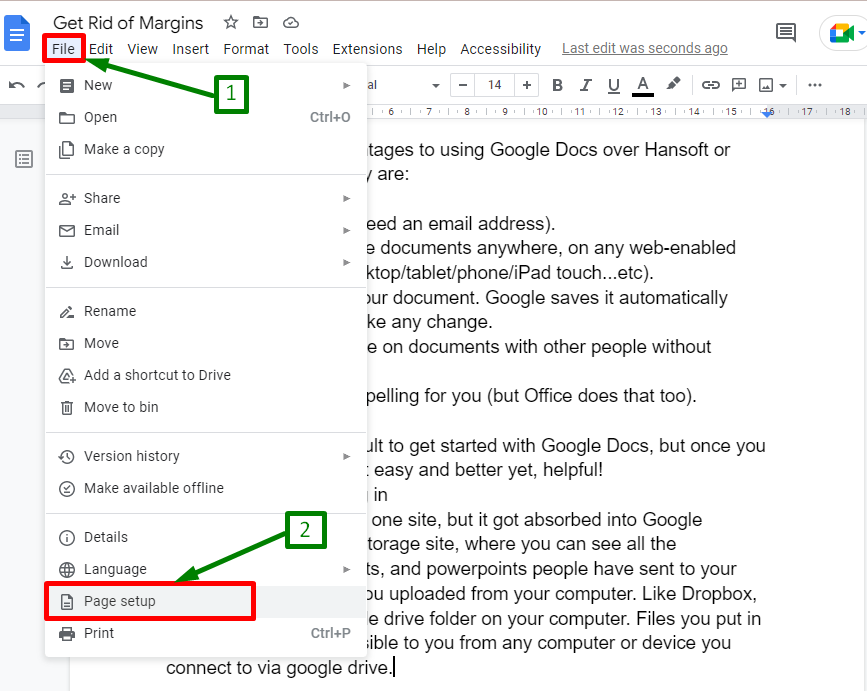
Step 1: Open the File Tab
Press the “File” tab from the menu bar of Google Docs. It generates a drop-down list with various options. Click on the “Page setup” option:
Open the “Page setup” window. The current window contains many sections. Move to the “Margins” section:
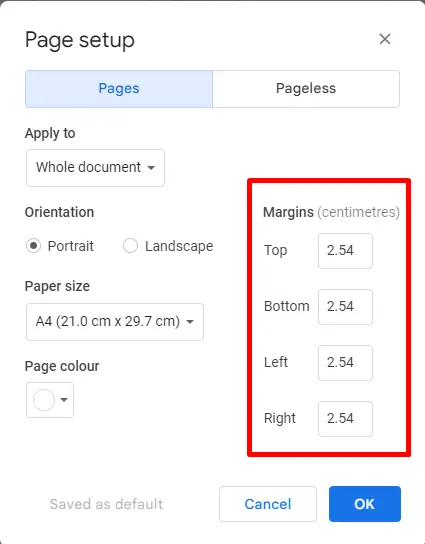
Step 2: Adjust the Margins
Now change the default values of the margins section. Set the new values of “Top”, “Bottom”, “Left”, “Right” input fields. Now, the values are set to “0.00“:

Press the “OK” button to save the new changes:

Hence all the margins of the current document are removed, and the text is just on the edges, as shown below:

This was all about the first method.
Method 2: Using the “Ruler” From Toolbar
The “Ruler” is a key feature of Google Docs used to set the margins of the page. On the ruler, there are two sides through which the margins can be adjusted. One is a left-indent arrow, and the second is a right-indent arrow. Let’s see how they can be used to get rid of margins:
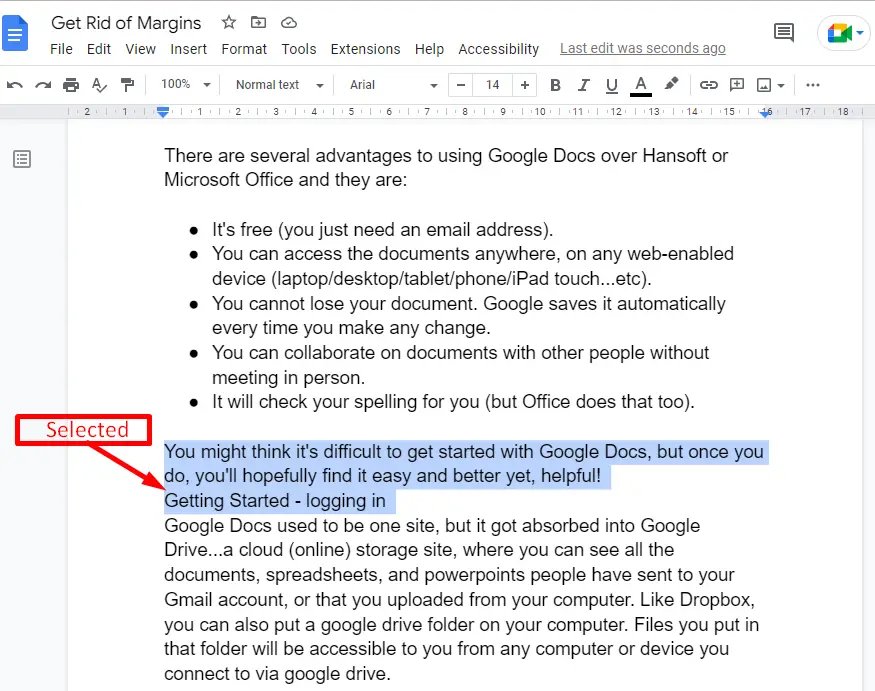
Step 1: Select the Specific Part
Select the specific part or section (or the whole page) where you need to remove margins:
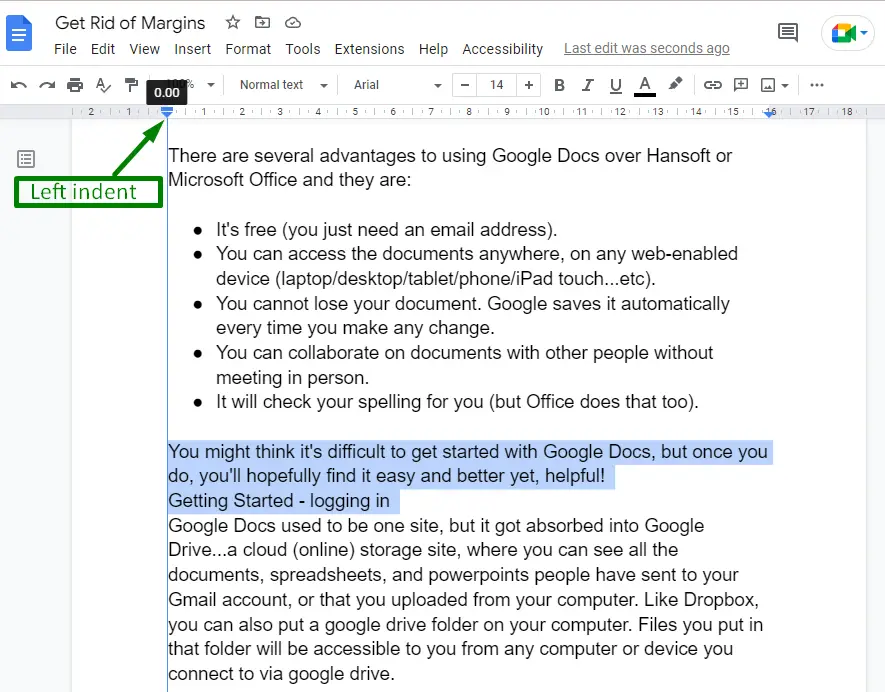
Step 2: Remove the Margins
There are two ends of the ruler. One is the “Left indent arrow“, and the other is the “Right indent arrow“. The “Left indent arrow” is used to change the left margin of the selected section or document:
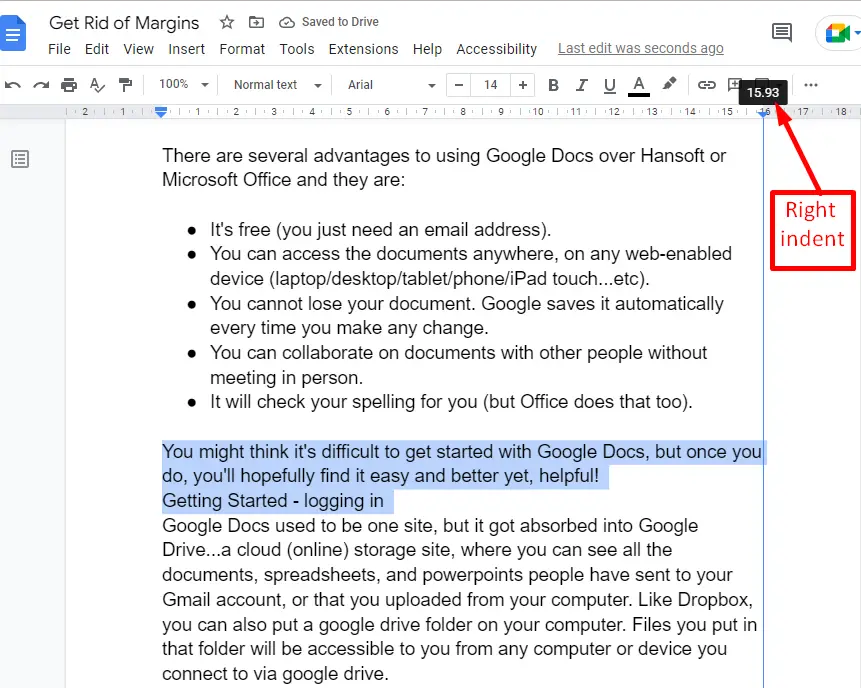
The “Right indent arrow” is used to change the right margin of the selected part or document:
Step 3: Move the Both Ends of the Ruler
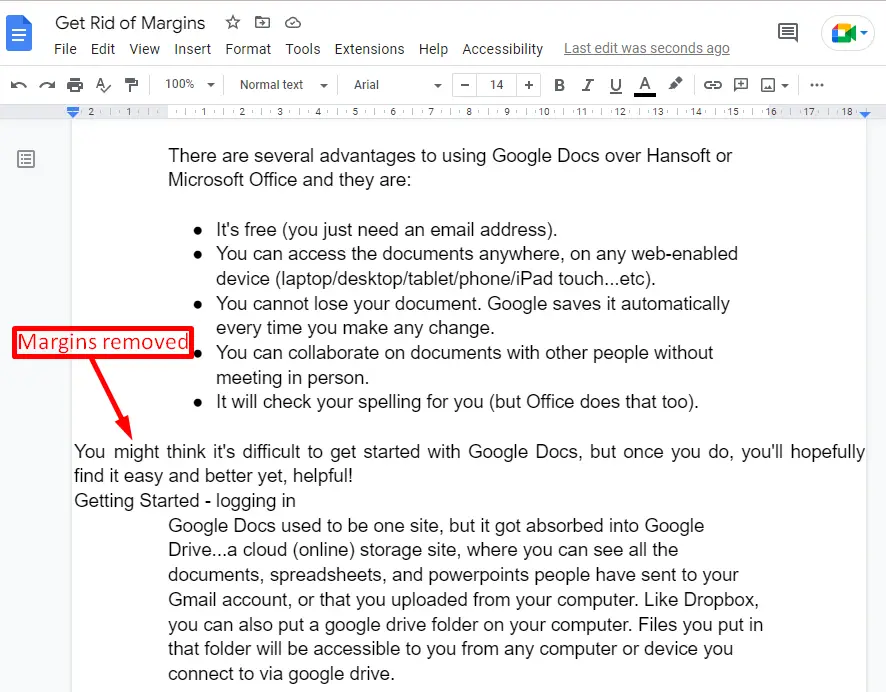
Hold the “Left indent arrow” and “Right indent arrow” and move to the end point of the ruler to remove the margins of the selected part of the current document. After doing this, the margins of the selected section are removed, as can be seen below:
The ruler can be used to eliminate the margins of a specific paragraph, section, or the whole document.
That was all about this post.
Conclusion
In Google Docs, the margins can be removed from the “Margins” option in the “page setup window” Furthermore, this task can also be done by using the “Ruler”. The “Ruler” is located at the bottom of the menu bar and toolbar. This post demonstrated all the possible methods to get rid of margins in Google Docs.
