In Linux, the gzip is the frequently used command to compress or decompress any files or folders. It’s just like a zip file in the Windows operating system. Compression of the file is useful while sharing the file, as it compresses the file and keeps it error-free.
This article will discuss the usage of gzip command in detail. The content for this post is shown below:
- What is gzip Command in Linux?
- How to Use gzip Command in Linux?
- Bonus Tip: How to Compress a Whole Directory Into One File?
Let’s begin this tutorial.
What is gzip Command in Linux?
In Linux, the “gzip” command is a utility to compress files by reducing their size. It compresses the file, adds the “.gz” extension in its name, and deletes the original file if no option is given. Gzip command works on single as well as multiple files. It can also be applied to the whole directory to compress all the files in the directory, as well as in the sub-directory.
The syntax of the gzip command is shown below:
Single File Syntax:
$ gzip [Option] [File Name]
The [Option] entity represents the options that can be used with the gzip command. Moreover, the [FileName] represents the file being compressed.
Multiple File Syntax:
$ gzip [Options] [Filename1] [Filename2] [Filename3].......[Filename n]
The files to be compressed must be put in the arguments of the “gzip”.
Directory Structure:
$ gzip -r [DirectoryName]
The components of the syntax are:
- Use the gzip keyword to apply compressing on the file.
- Type the “-r” option for the directories.
- Type the name of the directory folder which you want to compress
The “gzip” command offers multiple options; some of the most used options are discussed below:
| Options | Function |
| -v | Display percentage while compressing. |
| -d | Decompress the compressed file. |
| -f | Forcefully compress the file with the same name of the file. |
| -k | Keeps the original file name. |
| -L | Display license for gzip file. |
| -l | Display a list of compressed files. |
| -c | Keeps the original file by copying. |
| -r | Compress the directories. |
For more details on the gzip options, use the following command:
$ gzip --help

Let’s check and use this command in linux.
How to Use gzip Command in Linux?
To use the gzip command in Linux, open the terminal by pressing “Ctrl+Alt+T” from the keyboard. Below are implementations of a few examples for gzip command:
Example 1: Display the Percentage of Compression
To display the percentage of any compressed file, the “-v” option of the gzip command is as follows:
$ gzip -v itslinuxfoss.txt
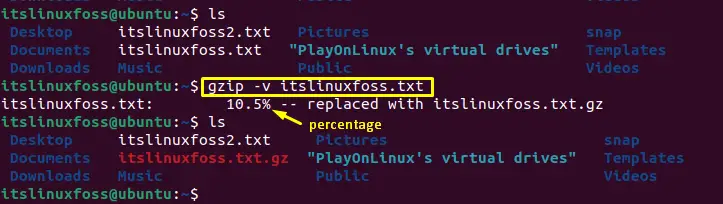
The above output of the command shows the percentage of how much file size is compressed.
Example 2: De-Compressing the File
To de-compress the compressed file, you can use the gzip command as follows:
$ gzip -d itslinuxfoss.txt.gz
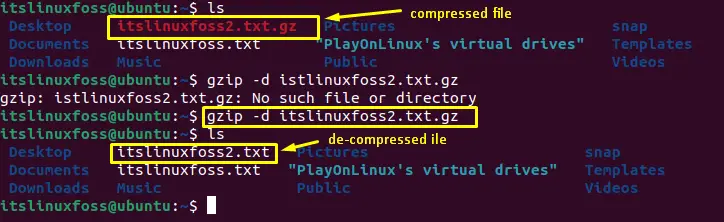
The process to convert a compressed file into a decompressed file is shown in the above image.
Note: In Linux, “gzip” is the alternate command used to decompress the “gz” files in Linux.
$ gunzip <filename>.gz
Example 3: Display Content of Compressed File
To display the content of the compressed file, use the “gzip” command with the option “-l” as follows:
$ gzip -l itslinuxfoss2.txt.gz
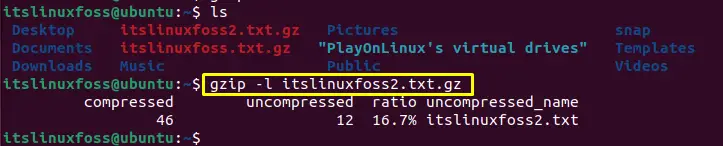
The above image shows the content of the file, it displays the percentage of compression, no of compressed and uncompressed content.
Example 4: Keeping the Original File
To keep the original file while applying compression, use the “-k” option with the “gzip” command as written below:
$ gzip -k itslinuxfoss.txt

The above command will compress the file but keep the original file as shown in the above image.
Example 5: Save the Compressed File Output to the New File
Another option to keep the original file is by saving the output of compression to the new file is obtained as follows:
$ gzip -c itslinuxfoss.txt > newfile.txt
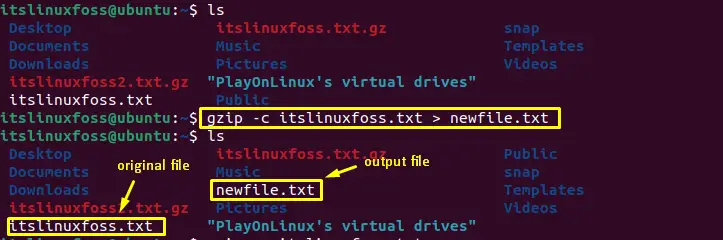
The above command keeps the compressed file but forward the output of compression to the new file given by the user.
Example 6: Compress Multiple Files
To compress multiple files in the folder, use the “gzip” command and write the names of the files to be compressed:
$ gzip itslinuxfoss.txt itslinuxfoss2.txt itslinuxfoss3.txt
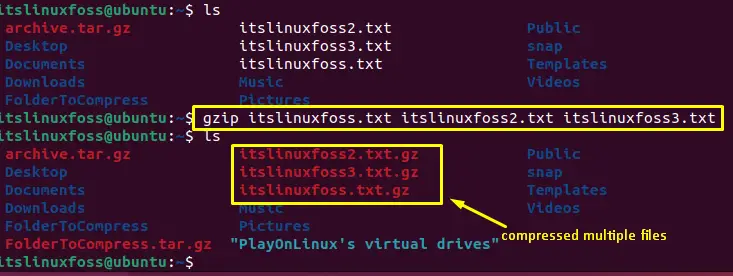
The above output image shows that all 3 files have been compressed. Users can also use options such as “v”, “c”, “d”, etc., which are explained in the above examples.
Example 7: Compressing the Folder
Gzip command can also compress all the files in the folder and the sub-folders. To obtain this, execute the following command:
$ gzip -r FolderToCompress
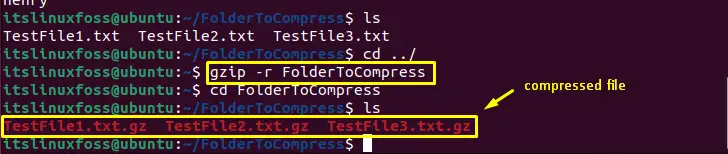
All the files in the folder have been compressed, as shown in the above image.
Note: the above command will not generate a single folder in “gz” such as “FolderTocompress.gz”.
For more usage and information on the “gzip” command, execute the –help command in the terminal:
$ gzip --help
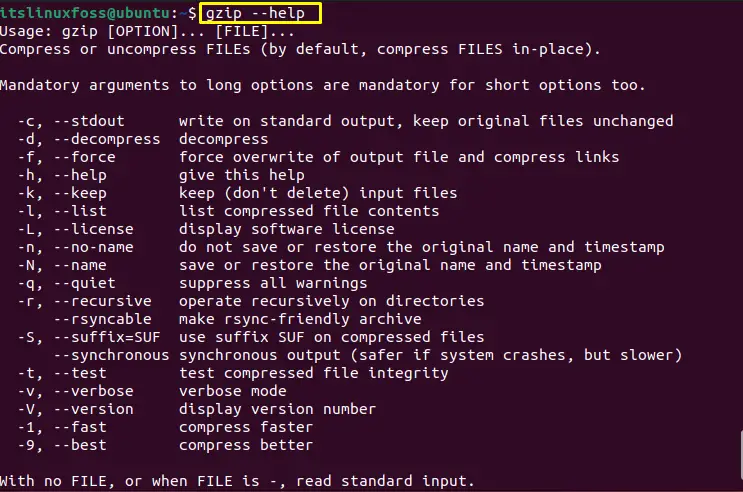
Help command will display all possible options that can be used with gzip command.
Bonus Tip: How to Compress a Whole Directory Into One File?
Gzip command will not allow you to create a single file of the compressed directory, but it’s possible using the “tar” command in Linux. To use this feature, execute the following command:
$ tar -czvf FolderToCompress.tar.gz FolderToCompress
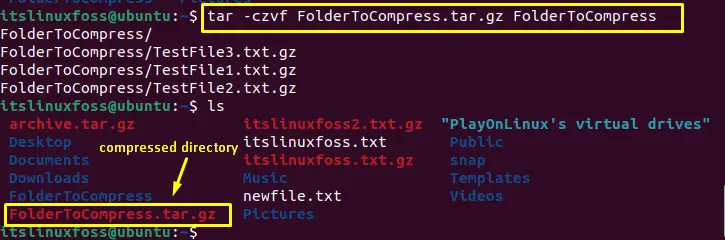
The tar command will compress the whole directory into one file, as shown in the above image.
That’s it from this guide.
Conclusion
In Linux, the “gzip” command is a utility to compress any file or directory using the terminal. Gzip command can also be applied to the folders which will compress all the files in the folders. In this article, the usage of gzip command in Linux has been demonstrated with the help of examples. Apart from that, a method to compress the whole directory into one file using the “tar” command has also been illustrated in this post.
