Indentation in Google Docs is to align the text/paragraph left or right no matter where you want to break the text/paragraph. By pressing the “tab” key, we can easily indent the first line in Google Docs, or we can also indent the lines using “ruler” (on the top menu bar of the document). Likewise, the second line indentation also has a key role in writing a paragraph or working in Google Docs.
In this write-up, we will discuss methods to indent the second line in Google Docs.
The content of the post is shown below:
Let’s start this guide!
Method 1: Using the Ruler or the Tab Key
Normally, a user indents the first line to make it different from each other, but when the user has to follow a specific format like writing research papers or a book, the second line indentation is important. In this method, the “ruler” and “tab” is used to apply the indentation on the second line in Google Docs. let’s check how it can be performed:
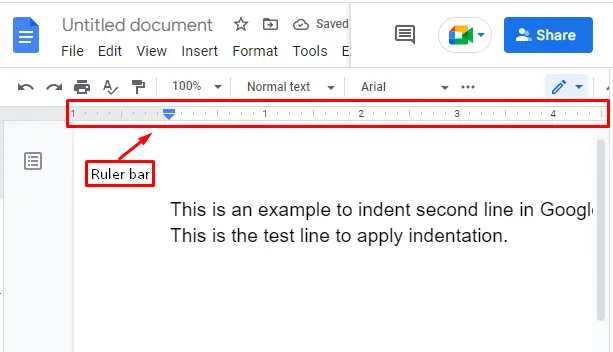
Using the Ruler Bar
One more way to apply indentation is by using “a ruler”. At the top of the toolbar, the ruler can be seen right at the bottom of the menu bar/toolbar. Check the screenshot below:
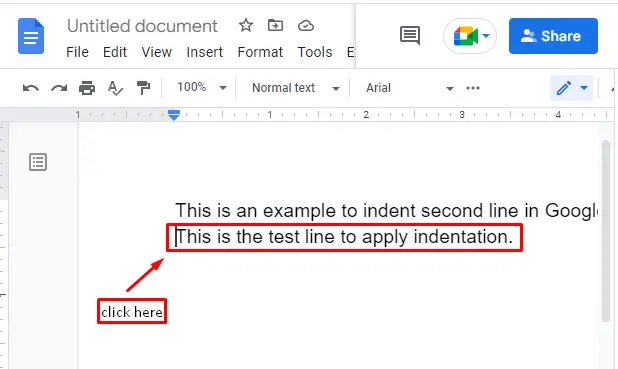
Let’s apply the indentation on the second line. For this, click at the start of the “second line” in which you want to apply indentation:
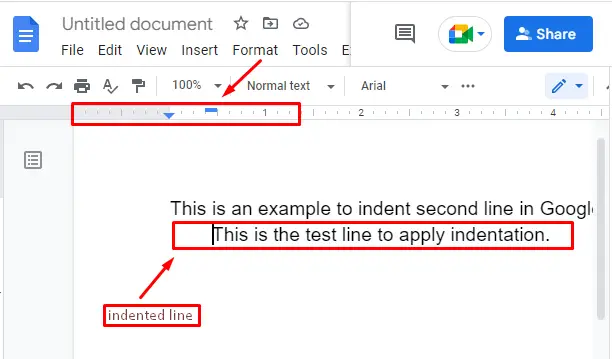
Now, drag the “indent line” tool (represented by a small rectangular icon on the ruler) towards the right side:
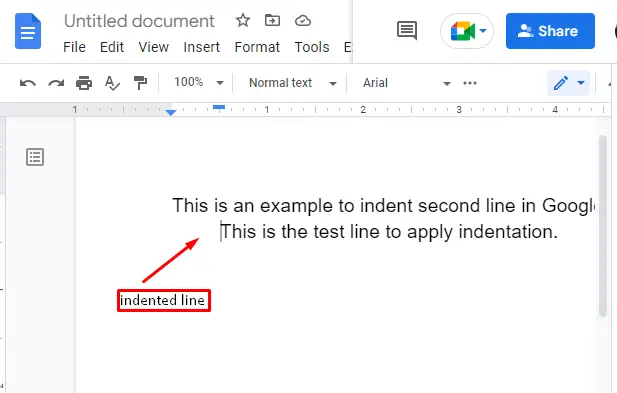
The second line of the paragraph is indented, as shown in the above figure.
Let’s explore the tab key method to indent the second line.
Using the Tab Key
Open up a Google Docs file (as shown below) and click on the start of the second line where you want to perform indentation. Once the mouse cursor is placed before the line, press the “tab” key:
It can be seen that the second line is indented.
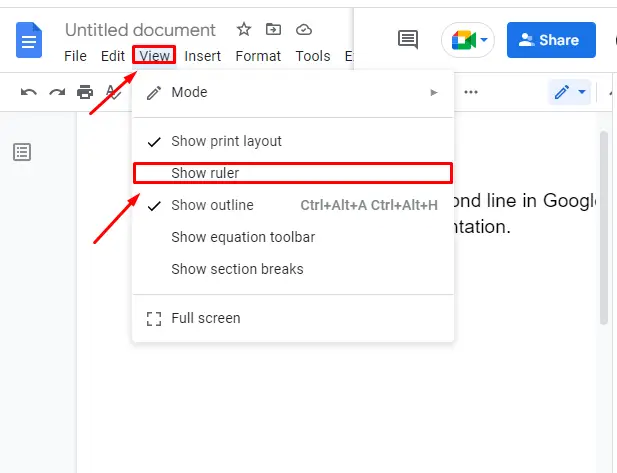
Note: What to Do if the Ruler is not showing?
If the ruler bar is not showing in your Google Docs, then no need to worry about that; just follow the below steps to show the ruler bar. To enable the ruler, click on the “view” tab and then click on the “show ruler” option as shown below:
Let’s head over to the second method.
Method 2: Using Google Docs Settings
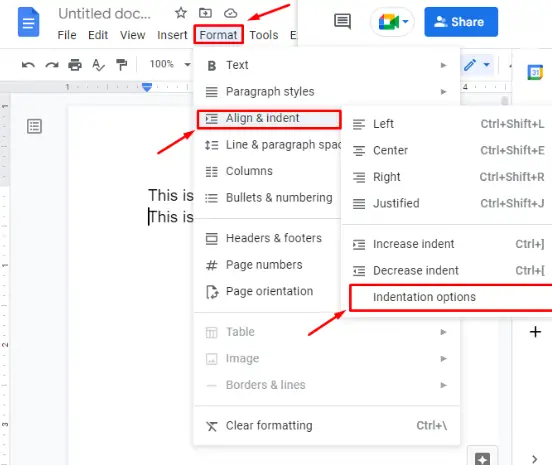
In this method, the “Format” option from the menu bar of Google Docs to indent the second line.
From the toolbar, navigate to the “Format” option and click on the option “Align and Indent” from the dropdown menu. After clicking on the “Align and Indent” option, another dropdown menu will appear; choose “indentation options” from those, as seen below:
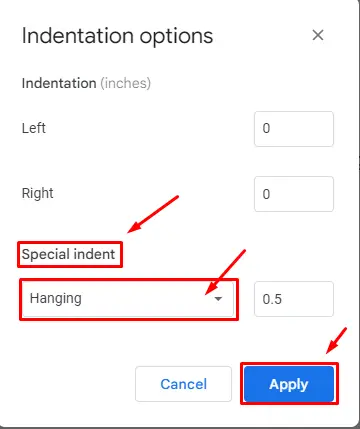
A pop-up will appear where you need to opt for the “Hanging” option and set its value per your requirement. Finally, click on the “Apply” button:
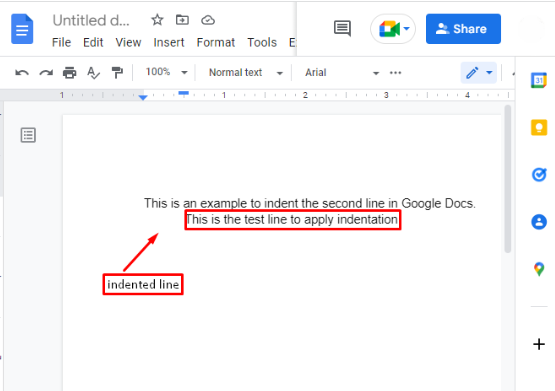
For the output, check the screenshot below:
The above methods are for “web apps” (desktop applications). However, Google Docs support is available for mobile apps as well. Let’s practice how the second line can be indented on a mobile version of Google Docs.
Bonus Tip: Indent Second Line on a Mobile App
There is no concept of a ruler bar in the mobile application; just follow the simple steps to apply indentation. These steps are the same for “Android” as well as “iPhone”.
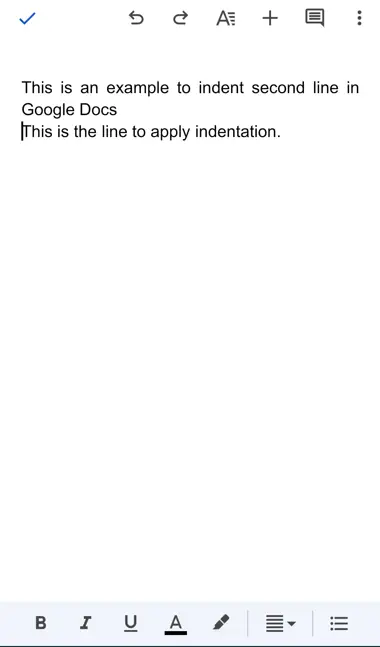
First, open your “Google Docs” application and open the document. Then, tap on the start of the “second” line as shown below:
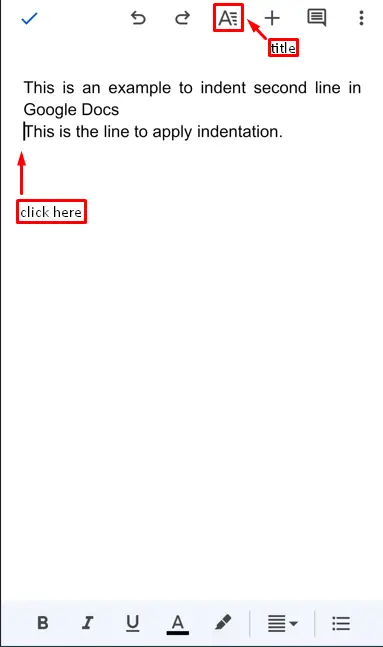
Now, click on “title” on the toolbar:
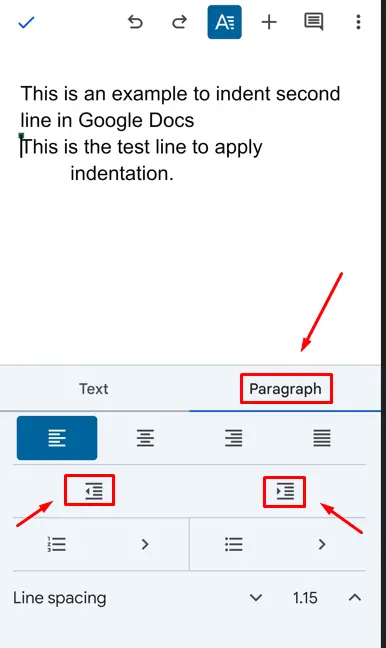
After that, click on the “paragraph” option, and then you will have two options, “left indent” and “right indent” in the “paragraph”. Check the below screenshot:
For the “right indent” output, check the screenshot below:
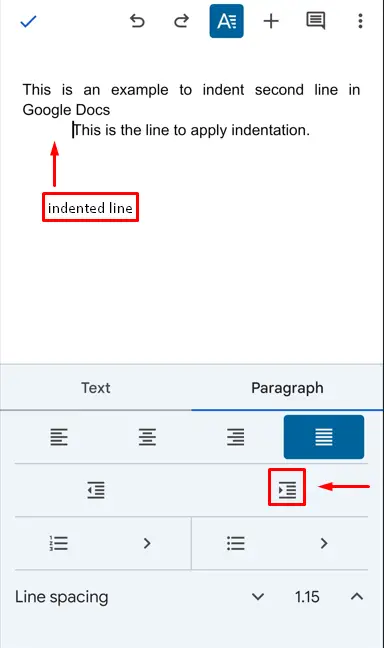
And the second line is indented on the mobile version of Google Docs.
That’s it from this Google Docs guide.
Conclusion
In Google Docs, the second line can be indented by pressing the “tab” key or using the “ruler bar”. The second method is by using Google Docs “Settings”. In this post, we have demonstrated these two methods to apply indentation on the second line in Google Docs. We have also discussed the method to indent the second line on a mobile version of Google Docs.
