The “export” command is a pre-defined command utility of the “bash” shell. It is utilised to ensure the environment variables and functions are passed to a child process and do not affect the existing variables. Moreover, it facilitates the users to save the new changes in the exported variables often made in the current shell by updating it.
This post illustrates a detailed view of the export command with the support of practical examples. The outcomes of this post are specified below:
- How Does the export Command Work?
- Display All Exported variables and Functions
- Get Only the Current Shell Variables
- Export the Particular Function
- Remove the Specific Variable or Function
- Assign a Value to the Variable Before Exporting
- Export Multiple Variables at the Same Time
- Set a Default Value of a Variable
- Set an Environment Variable
Let’s start with the working of the “export” command.
How Does the export Command Work?
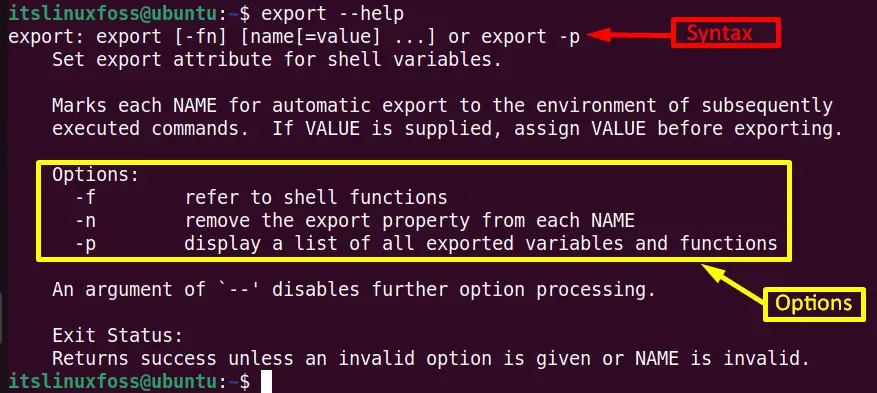
Linux “export” command depends on its syntax. The generalised syntax of the “export” command is typed here:
Syntax
$ export [-f] [-n] [name[=value] ...]
OR
$ export -p
The components of both the above syntax are described here:
- Export: Main keyword denotes the “export” command.
- -f: Exports the specified function.
- -n: Removes the particular variable or function.
- name=value: Shows the variable name and assigned value.
- -p: Displays all exported variables and functions of the current shell.
The “export” command offers limited options that can be easily accessed through its “help” command in this way:
$ export --help
Now move on to the various examples for the practical implementation of the “export” command options.
Example 1: Display All Exported Variables and Functions
Execute the “export” command without any of its supported options. It will display all the exported environment variables and functions:
$ export
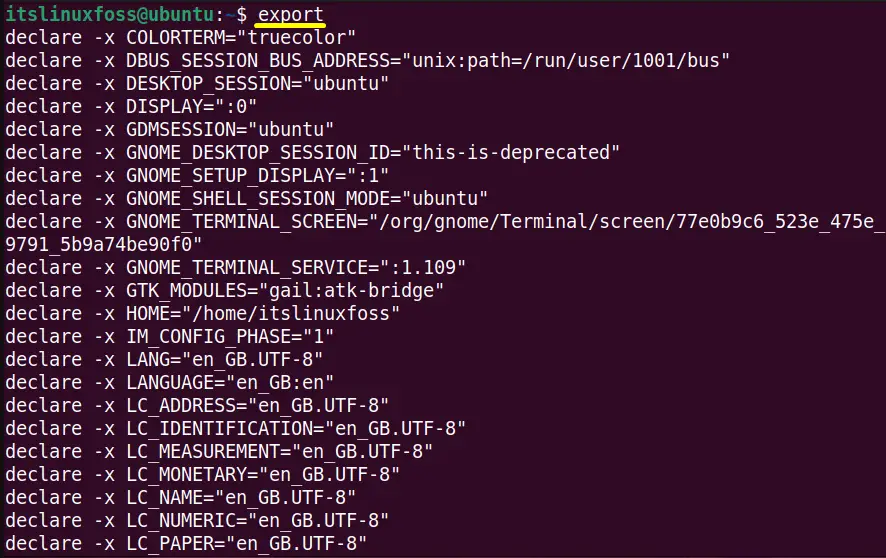
The output displays a complete list of environment variables and functions of the current system “Ubuntu 22.04”.
Example 2: Get Only the Current Shell Variables
The “export” command offers the “-p” option that only displays the current shell environment variables in the list format. Check the current shell of the system by using the command:
$ echo $SHELL

Use the “-p” option of the “export” command to get the variables available in the current “bash” shell:
| $ export -p |
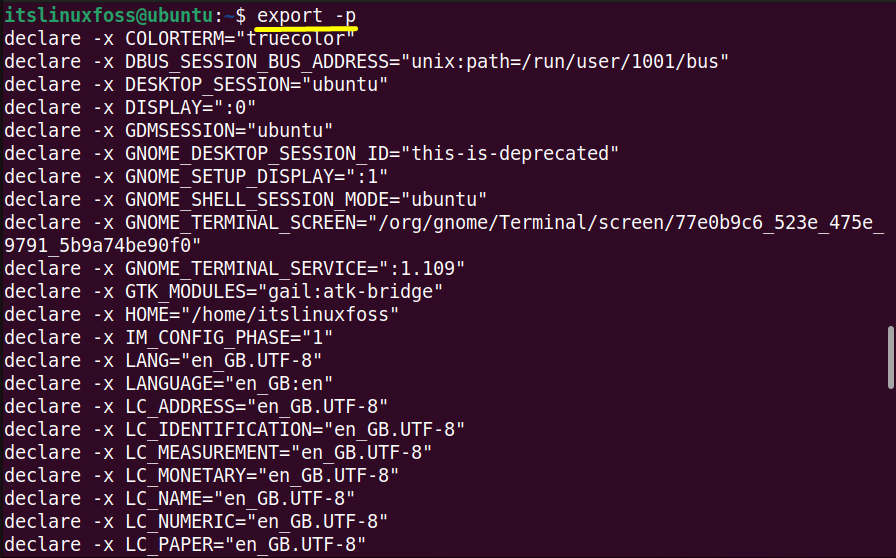
The above output is the same as the output of the “export” command without any argument.
Example 3: Export the Particular Function
The “-f ” argument takes the variable name as the specified created function and exports it. If it is not used with the “export” command, then it will take the function as a variable.
Let’s see the practical implementation of the “-f” flag by calling the “get-msg” function:
function get_msg (){
 echo "Welcome to itslinuxfoss"
}

Export the above function by utilising the “-f” argument of “export” command in the new “bash” shell session:
$ export -f get_msg

Now invoke the function by just typing its name in the console:

The “export” command has exported the “get_msg” function.
Example 4: Remove the Specific Variable or Function
Here, “-n” is another flag of the “export” command that is beneficial to remove the particular function or variable from the system.
As the below image contains the “TESTVAR” environment variable having a key value “12345”:
$ export -p
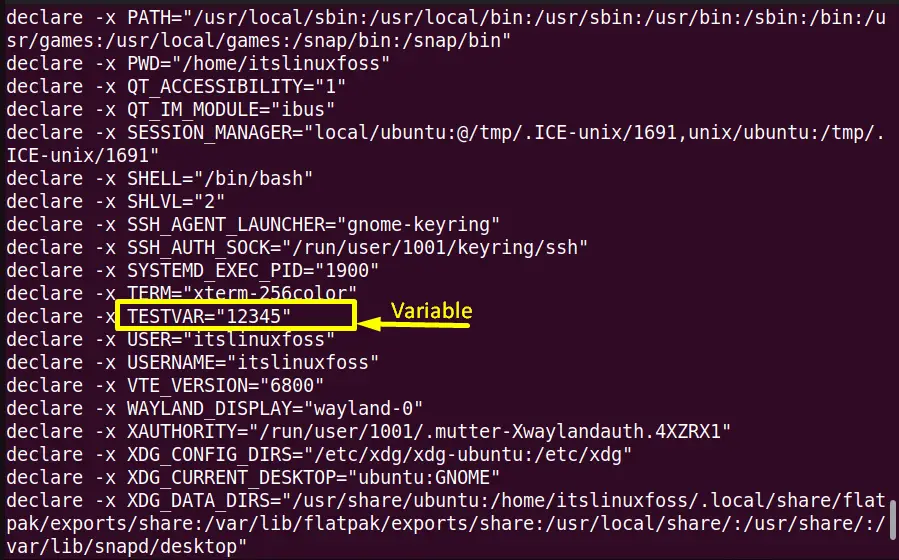
Use the “export” command with the “-n” flag and the highlighted variable name to remove it from the system:
$ export -n TESTVAR
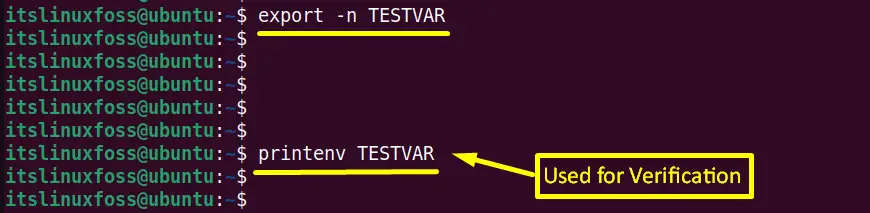
The “TESTVAR” was successfully removed from the system as it did not return any key value in the output.
Example 5: Assign a Value to the Variable Before Exporting
The “export” command is also beneficial to “assign a value” to the variable before exporting the particular variable.
In this example, the variable “EXTRAVAR” is assigned a new value of “567” as its old value is “34” as shown in the screenshot:
$ EXTRAVAR=567

Now export the “EXTRAVAR” variable and get its new value in this way:
$ export EXTRAVAR
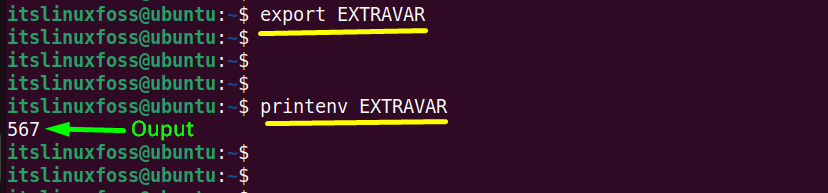
The output verifies that the “EXTRAVAR” variable has assigned a new value “567” before exporting it.
Example 6: Export Multiple Variables at the Same Time
The user can easily export more than one variable simultaneously. For this purpose, type the “export” command with the multiple variable ones after the other:
$ export EXTRAVAE USERNAME USER
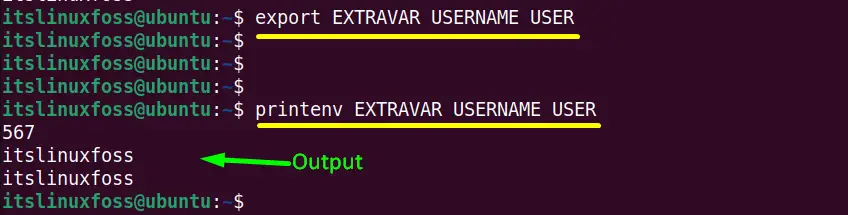
All the three specified variables are exported simultaneously. The “printenv” command printed its key values after exporting them.
Example 7: Set a Default Value of a Variable
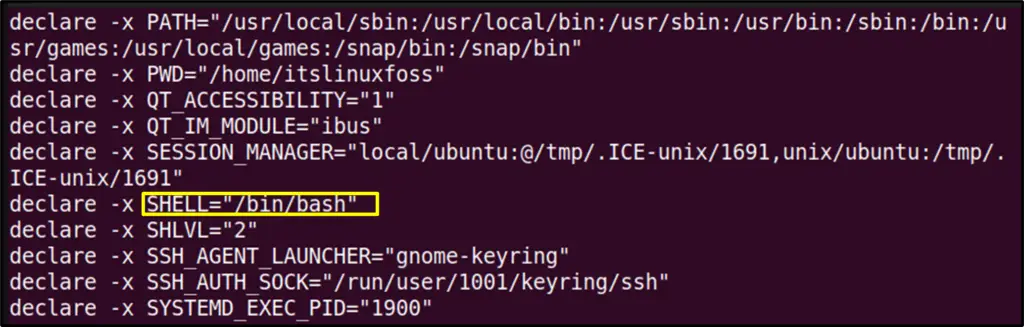
With the help of the “export” command, the user can set a default value of a specified variable. The current “SHELL” variable in this scenario contains the “/bin/bash” shell by default.
$ export -p
To set the “sh (Bourne shell)” shell as the default shell use the “export” command in this way:
$ export SHELL=/bin/sh

The output confirms that the default shell “bash” has been updated to “sh (Bourne Shell)”
Example 8: Set an Environment Variable
The export command facilitates the users to set the environment variable in the system. The environment variable contains a name and a key value.
Suppose an environment variable “NEWVAR” is set containing a key value “00012” via the “export” command:
$ export NEWVAR=00012

The “NEWVAR” variable has been set in the system having a “00012” key value.
It’s all about the purpose and working of the “export” command.
Conclusion
The Linux built-in command line utility “export” marks the environment variables to be exported with the newly forked child process. The “export” command is also helpful for “assigning a value before exporting”, “setting a default value”, and “setting environment variables”. This post has briefly described the objective, working, and usage of the “export” command with the help of various practical examples.
