The “telnet” command line tool is used to access the system remotely over a “TCP/IP” network. This command opens up the “telnet” session in front of the user. Once the user is connected to another machine using its IP address, he can edit files, create directories, run programs, and do many other tasks using the command line interface.
This guide illustrates the basics, working, and usage of the “telnet” Linux command. The outlines of this guide are as follows:
- Prerequisites: Install telnet Utility
- How to Use the Linux Telnet Command?
- Create a New directory
- Create Files in a Directory
- List down the Directory’s Content
- Open the telnet Shell
- Display the help Page
- Exit the Login User
Let’s start with the installation procedure of the “telnet” utility.
Prerequisites: Install telnet Utility
The “telnet” command line tool is available in the latest Linux distributions. However, if it is not installed by default, follow this article, Install telnet on Debian-Based Distributions.
to install it properly to the Debian-Based Linux distribution. For other distributions, follow the below-mentioned commands:
$ sudo yum install telnet-server xinetd -y                    # For Fedora
$ yum install telnet telnet-server -y                         # For CentOS
$ yum install telnet-server telnet                            # For RHEL
How to Use Linux Telnet Command?
Before using the “telnet” command line tool, first, get the IP address of the desired machine that the user wants to connect. Also, ensure that the “telnet” utility is properly installed in your system and that port “23” is enabled.
Connect the Other Machine Remotely
Connect the current machine with the target machine “ubuntu” that is having “192.168.59.132” IP address. Use the telnet command with the specified IP address.

Enter the “ubuntu” username “milton” to log in and then enter its correct password for completing the logged-in procedure:
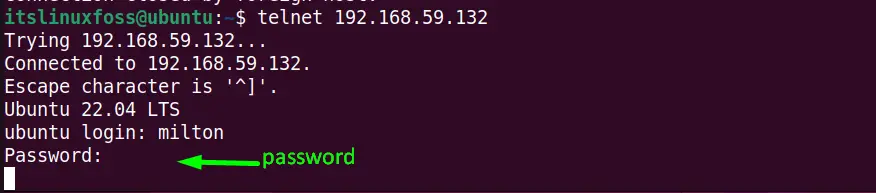
Type the “milton” user password, and the process will be completed successfully. The below image verifies that the current system is remotely connected to the targeted “ubuntu” host.
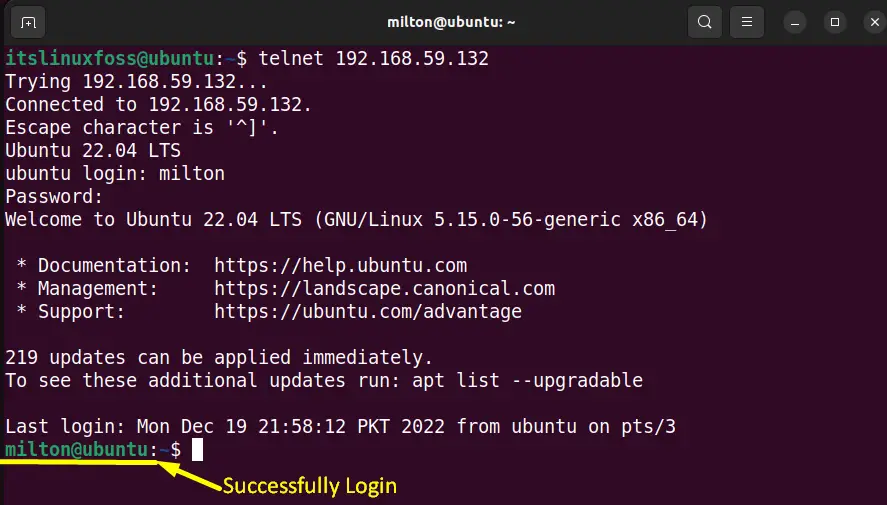
The “milton” user is now logged in successfully.
Example 1:Create a New directory
Create a “Sample” directory in the “milton” machine “ubuntu” with the help of the “mkdir” command that is defined below:
$ mkdir Sample

Here the “Sample” directory is created into the “milton” machine
Example 2: Create Files in a Directory
The user can also create single or multiple files in the particular directory into the “milton” machine. In this example, three files, “File1.txt”, “File2.txt”, and “File3.txt”, are created into the “Sample” directory:
$ cat>File1.txt
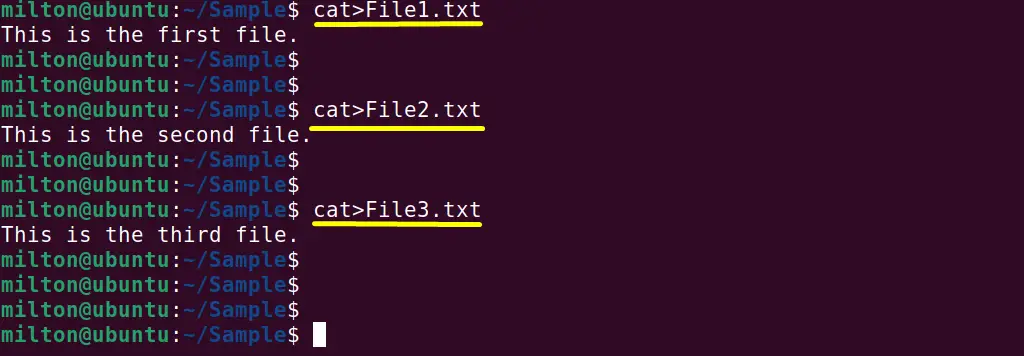
All of the above three files have been created in the “Sample” directory of the “milton” system.
Example 3: List Down the Directory’s Content
The current user can easily access the content of a specified directory or files available in the “milton” machine.
Suppose, in this case, the “ls -l” command is used to list down the content of the “Sample” directory in the following way:
$ ls -l Sample

Example 4: Open the Telnet Shell
In the “milton” machine “ubuntu” the user can easily connect to the “telnet” shell by running the “telnet” command:
$ telnet

Now the user is in the “telnet” console.
Example 5: Display the Help Page
Getting the “telnet” command help page, write the “h” flag into the “telnet” console like
telnet>h
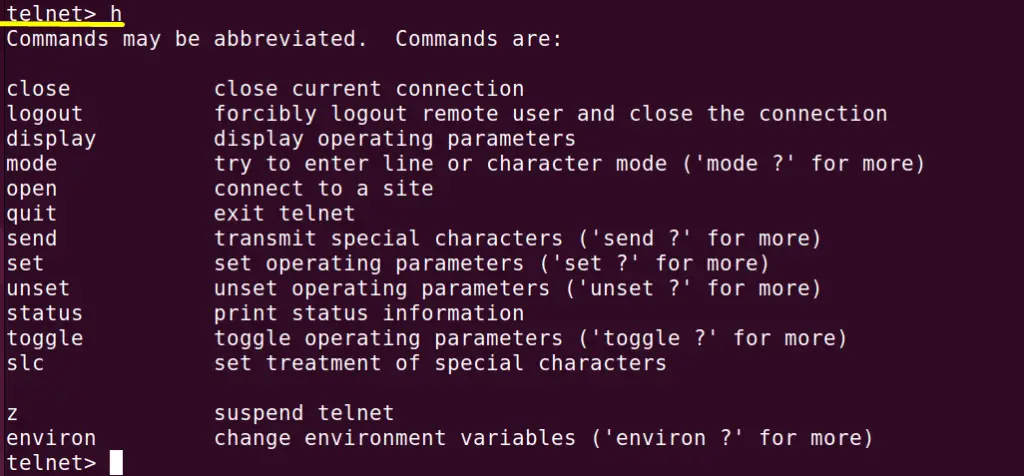
All the options of the “telnet” command are displayed in its console as shown in the above screenshot.
Type the “quit” flag to exit out from the “telnet” shell:
telnet>quit
Example 6: Exit the Login User
At the end, enter the “logout” argument in the terminal to log out from the “milton” system or disconnect it:
$ logout

At this point, the remote connection to the “milton” machine is closed.
That’s all about the objective and usage of the Linux “telnet” command.
Conclusion
Linux and most of its distributions offer the “telnet” command that is used to connect the machines remotely. However, it is the old Linux command line utility. The “telnet” commands need the IP address of the target machine that the user wants to connect “remotely”. This guide has briefly described the objective, working, and usage of the “telnet” command with the help of various practical examples.
