In Linux, the file system is organized as a hierarchy of directories, with all objects (including files and directories) treated as files. The user lists down the disks to ensure the free/available space, disk health, etc to keep using the disk in a secure manner.
This guide enlists all the possible aspects to list down all the disk devices in Linux.
- Method 1: Using the “lsblk” Command
- Method 2: Using the “fdisk” Command
- Method 3: Using the “cfdisk” Command
- Method 4: Using the “hwinfo” Command
- Method 5: Using the “df” Command
- Method 6: Using the “parted” Command
- Method 7: Using the “ls” Command
- Method 8: List All Disk Devices Using the “Disks” Application (GUI)
Method 1: Using the “lsblk” Command
The “lsblk” refers to the “list block devices” command that lists down the detailed view of all the available block devices in a tree format. It is generally pre-installed into most Linux distributions.
Simply run it without any option or flag to get the list of all Linux disk devices:
$ lsblk
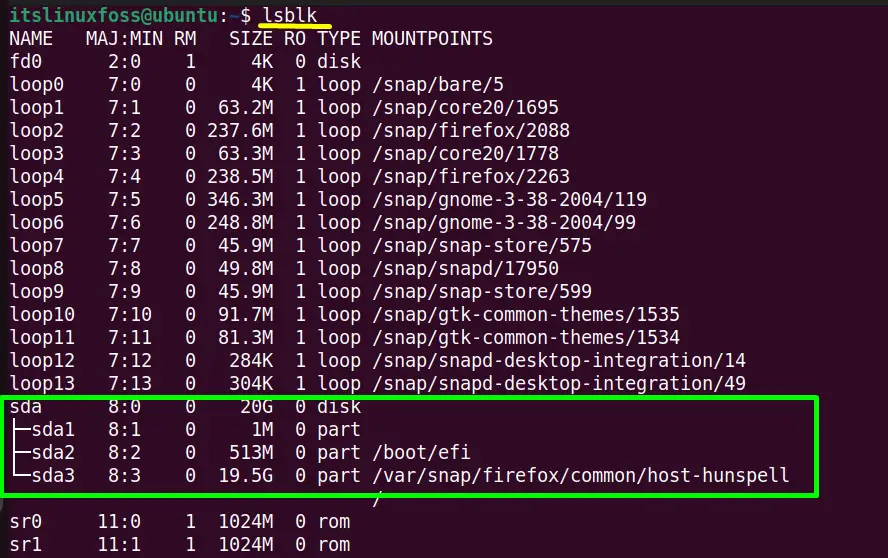
The above output displays the “Disk” and “loop” device information.
Tip: To get only the storage disk devices and partition, use the above “lsblk” command with “-f(file system detail)” and the “-e(exclude the devices separated by comma)” argument in this way:
$ lsblk -f -e7
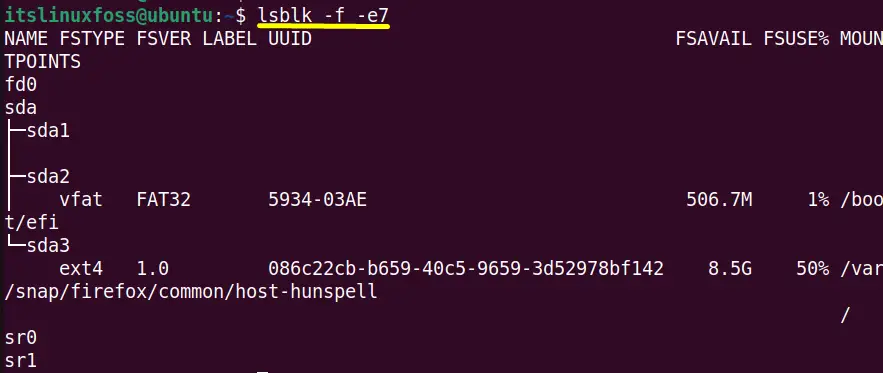
At this time the output is concise and the user can easily identify the disk devices.
Method 2: Using the “fdisk” Command
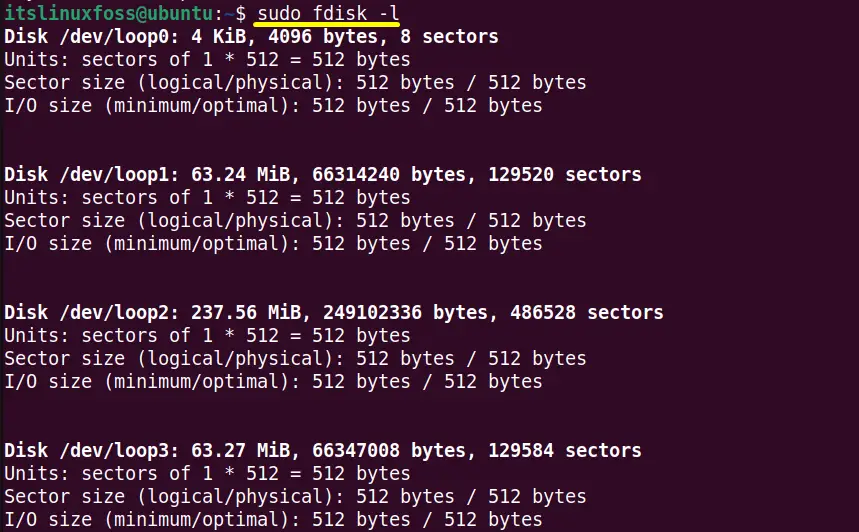
The “fdisk” stands for the “format disk”, and that is utilized to create, view, alter, and delete the disk partitions. It shows the summary of the devices that includes the disk partitions “Start and End” of the sector, “Size”, and the “Type” of the partition.
Execute the “fdisk” command followed by the “-l(list)” argument to view the list of disk devices.
Note: It is to be noted that without the super/root user privileges, it can’t be run, so type the “sudo” command with it in this way:
$ sudo fdisk -l
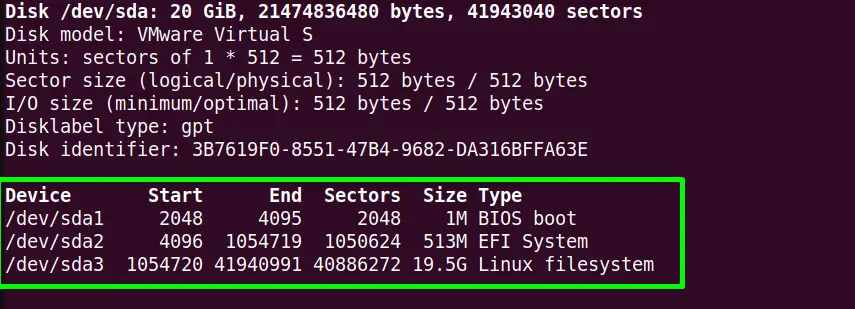
The above list contains disk device “/dev/sda” along its several partitions.
Method 3: Using the “cfdisk” Command
The “cfdisk” command is similar to “fdisk” as both manage the disks/partitions. But the “cfdisk” utility is a covenant and user-friendly tool because it displays the disk and associated partitions table in a text-based “graphical” interface.
Execute the “cfdisk” command with “sudo” privileges to view the list of all disk devices and partitions:
$ sudo cfdisk
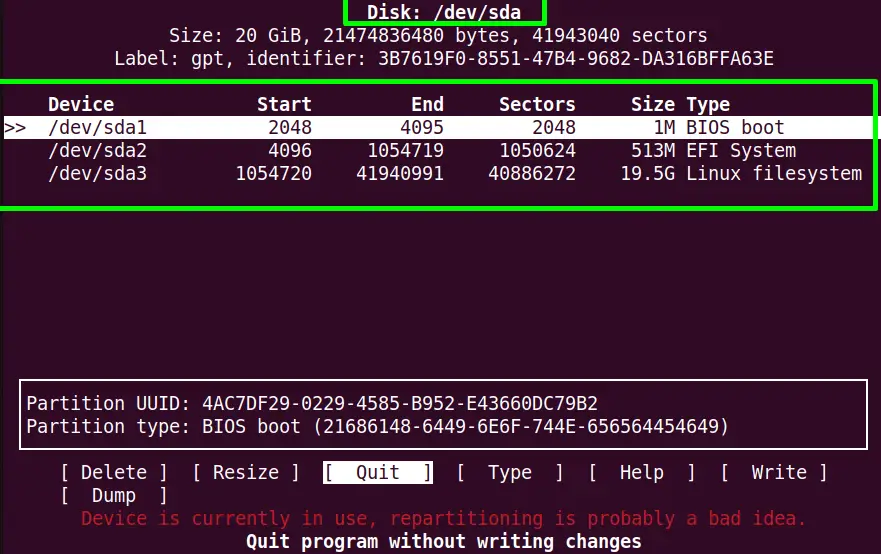
The output shows the “Disk: /dev/sda” and its associated devices/partitions in the table format.
Method 4: Using the “hwinfo” Command
The “hwinfo” is the “Hardware Information” command line tool utilized to get the information of hardware components in a Linux system. This information includes the “RAM”, “CPU”, “USB controllers” and many others. It comes to the “libhd” library to perform this task.
Here it is used to list all hardware disks along with the “–short” and “–disk” flag to get only the brief information about the disk and not the details:
$ sudo hwinfo --disk --short

The output shows the available disks of the current Linux system.
Method 5: Using the “df” Command
The “df” is known as the “disk free” command and displays the file system information such as total and available space in the disk. It can also display the disk partitions and all the mounted storage devices.
For this purpose, execute the “df” command followed by the “-h” to display the file size in human-readable format:
$ df -h
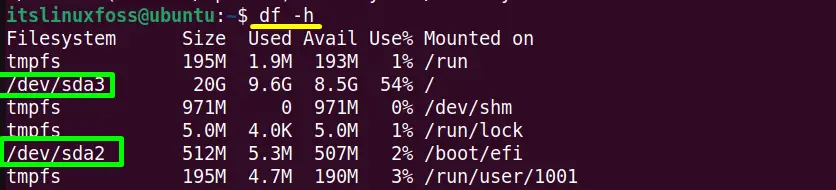
In the above output, the first column displays the “/dev/sda3” and “/dev/sda2” disk partition.
Method 6: Using the “parted” Command
Here, “parted” is another well-known tool that lists down the disk devices in Linux. Its main purpose is to list and manage all the hard disk partitions. Apart from the above commands, it also provides the disk devices’ model, brand, and connectivity type.
Type the “parted” command followed by the “-l(list)” flag to get the disk details in the following way:
$ sudo parted -l
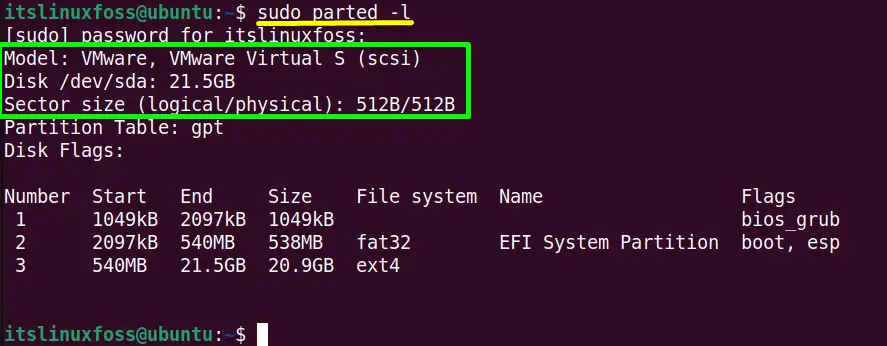
The output highlights the connectivity type “scsi”, Model “VMware” of the disk “/dev/sda”
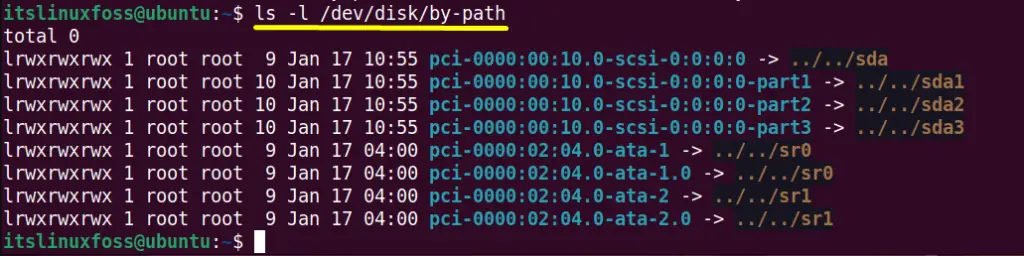
Method 7: Using the “ls” Command
The “ls” is the most frequently used command in daily routine to list down the files and directories of the Linux system. But it is also beneficial to list the disk devices in the “dev/disk” directory.
From the “/dev/disk” directory, the devices can be fetched out by “id”, “partuuid”, “path”, and “uuid”. In this case, we used the “by-path” parameter with the “ls -l(list)” followed by the “/dev/sda” directory to get the disk devices by their paths:
ls -l /dev/disk/by-path
Method 8: List All Disk Devices Using the “Disks” Application (GUI)
All the majorly used Linux distribution offers the “Disks” by default. This tool creates and lists the disks associated with the Linux system. Follow the step-by-step guidelines to utilize this tool for listing the disk devices.
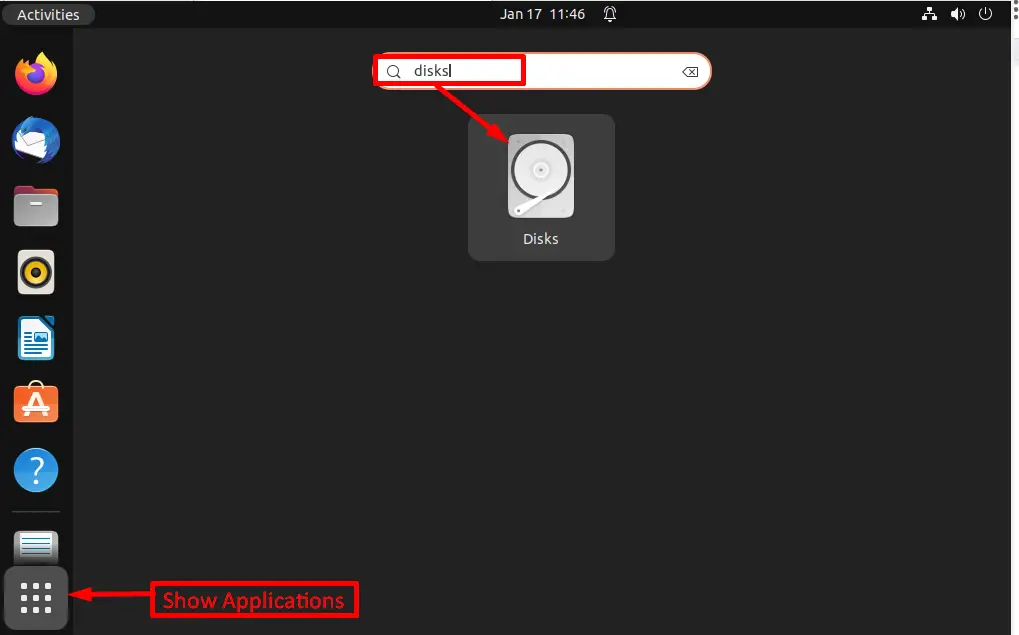
Step 1: Open the “Disks” Application
Open the “Disks” application from the applications menu of the system by typing the “Disks” in the “Search” bar:
Step 2: View the Linux Disk Devices
The “Disks” window will be opened immediately. The “Hard Disk” of size “21GB” contains three partitions “/dev/sda1”, “/dev/sda2”, and “/devsda3” of the “/dev/sda” disk in the “Device” field. The “Volumes” displays the specified partitions occupied space:
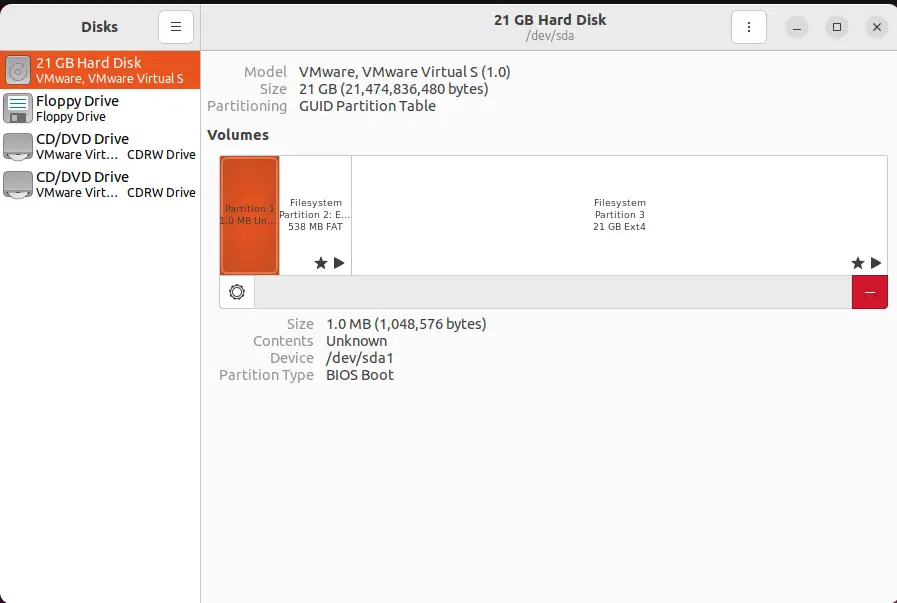
In addition, the other entries of the “Disks” window show the disk partition “Size”, “Partition Type”, “Model” and much more as shown in the above image.
Conclusion
Linux disk devices can be quickly listed down by using the “lsblk”, “fdisk”, and “cfdisk” command line tools. This task can also be performed with the help of “hwinfo”, “parted”, “df”, and “ls” commands. If the user is not comfortable with the command line then the “Disks” gnome application is available to view the available Linux disk devices. This guide briefly listed CLI and GUI methods to get the Linux disk devices.
