Discord is a messaging platform that comes with great features like live streaming, text, and voice chat. Discord brings people closer to each other through the Discord server. Servers are communities where people with similar interests can communicate with each other. Discord has millions of servers. Therefore, to stand out among millions of servers, users are required to have a unique server icon.
This post will determine the process to make and set the animated server icon on Discord.
How to Make an Animated Server Icon?
To make animated server icons for Discord, go through the following demonstration.
Step 1: Go to Auto Creative
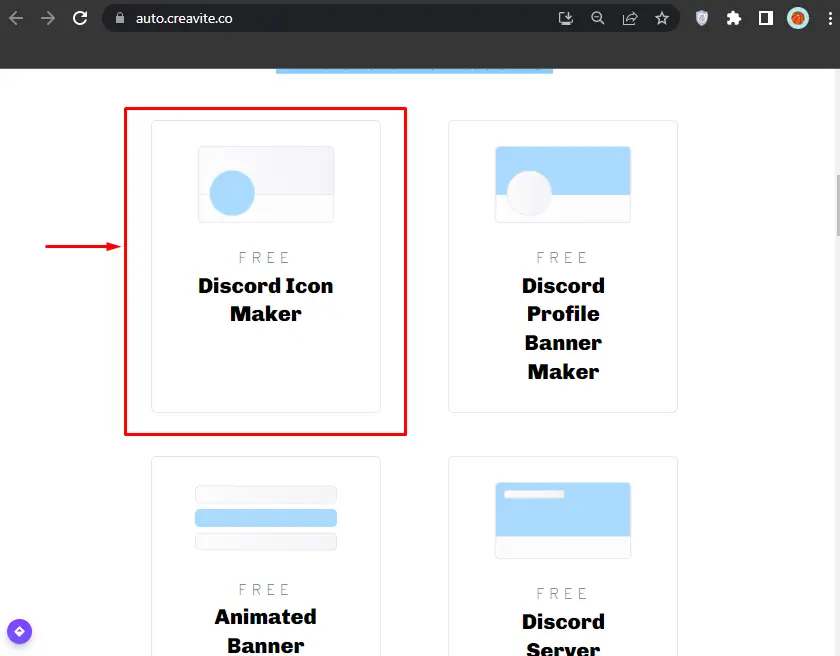
Launch your favorite browser, navigate to the “Auto Creative” site, and click on the “Discord Icon Maker” option:
Step 2: Select Icon Template
A couple of free templates is displayed, click on any of the template based on the preferences:
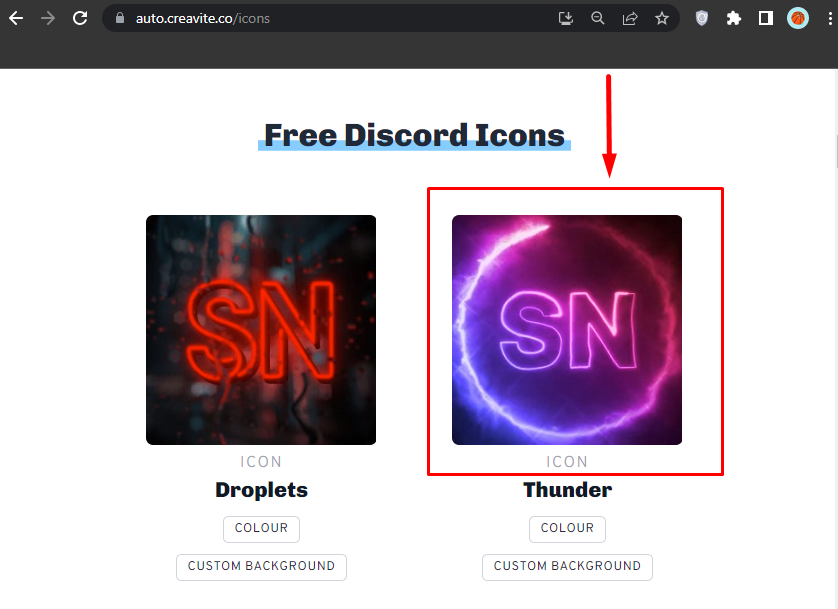
In our case, the “Thunder” template is chosen.
Step 3: Enter Name
Enter the icon in the given field and select the color for the template. Additionally, upload the background image (paid feature) if required and click on the “Render” button:
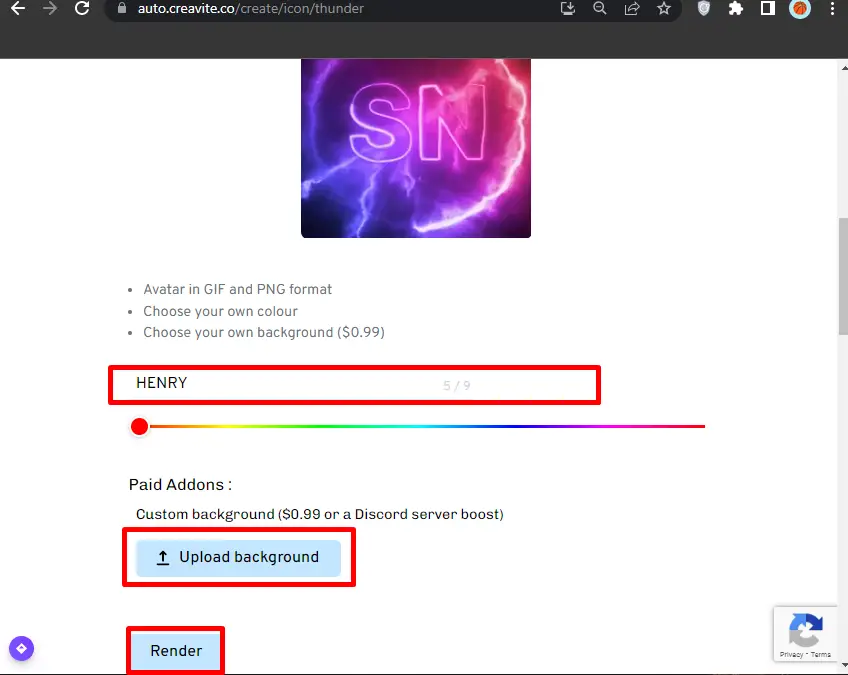
The rendering process will start.
Step 4: Download the Animated Icon
Once the rendering process is done, choose the “Animated” frame and click on the “Download” button to save it:
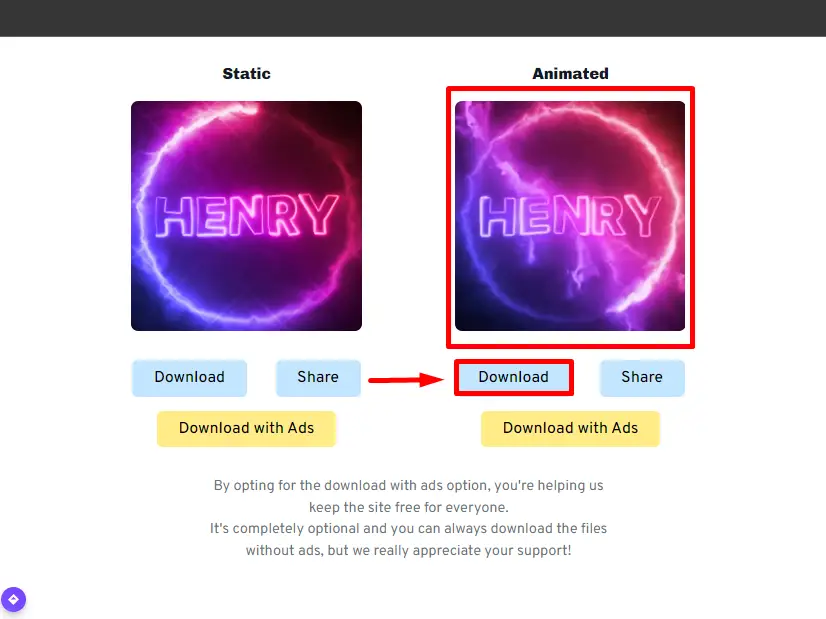
The animated server icon will be downloaded.
How to Set An Animated Server Icon on Discord?
To set the Discord animated server icon, users are required to buy the nitro subscription. After that, follow the listed steps to set the animated server icon on Discord.
Step 1: Select Server
Launch the Discord, approach the preferred server, and click on its name:
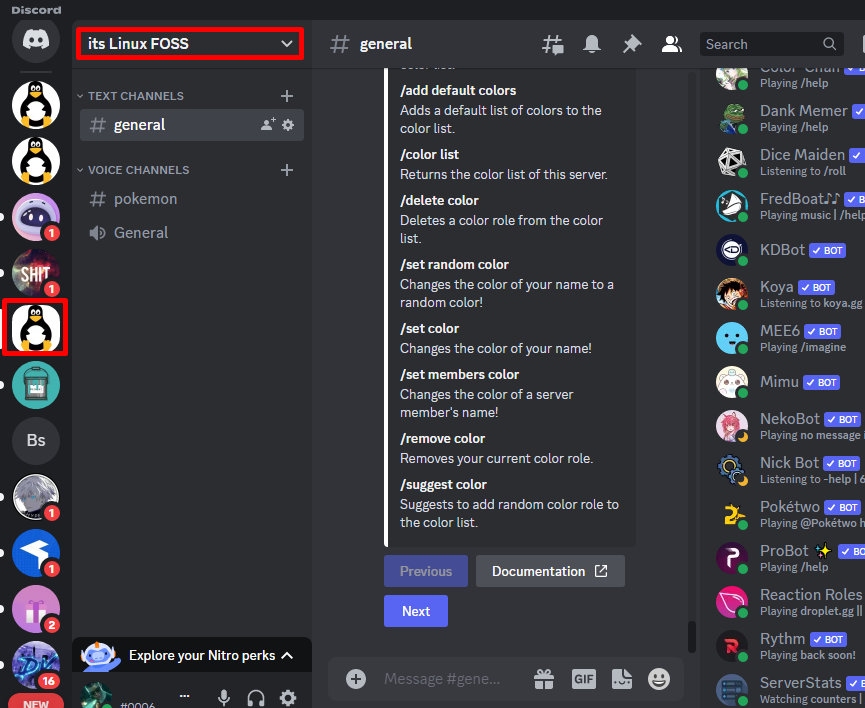
Step 2: Approach Server’s Settings
From the opened drop-down, click on “Server Settings” to approach it:
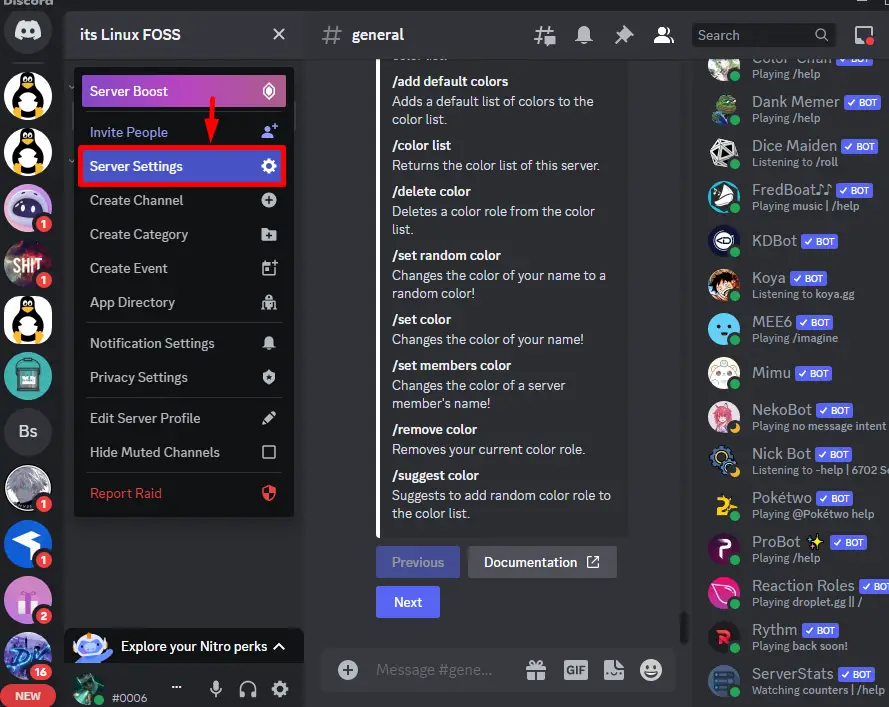
Step 3: Upload Image
From the “Overview” settings, click on the “Upload Image” option:
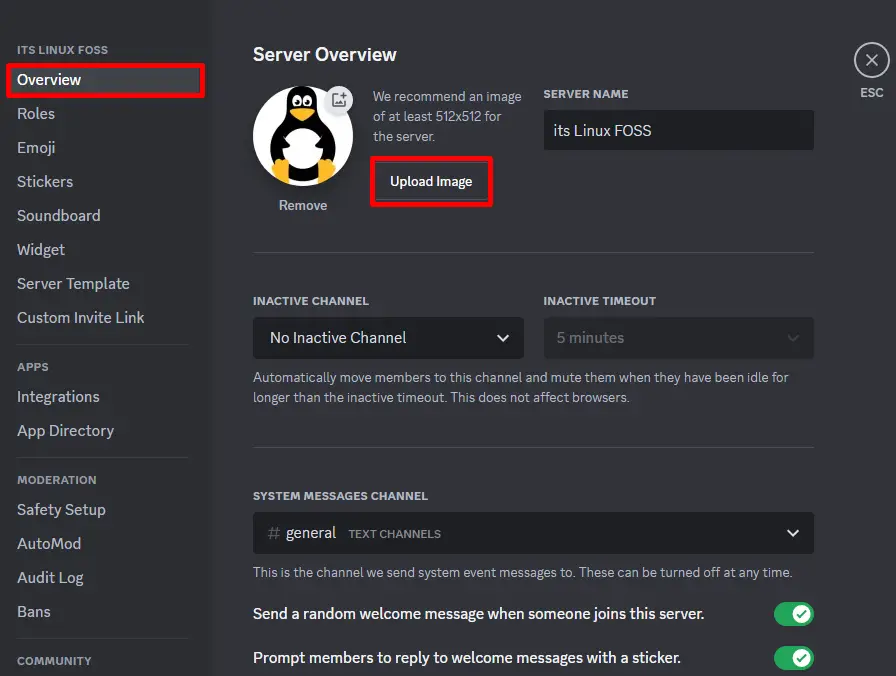
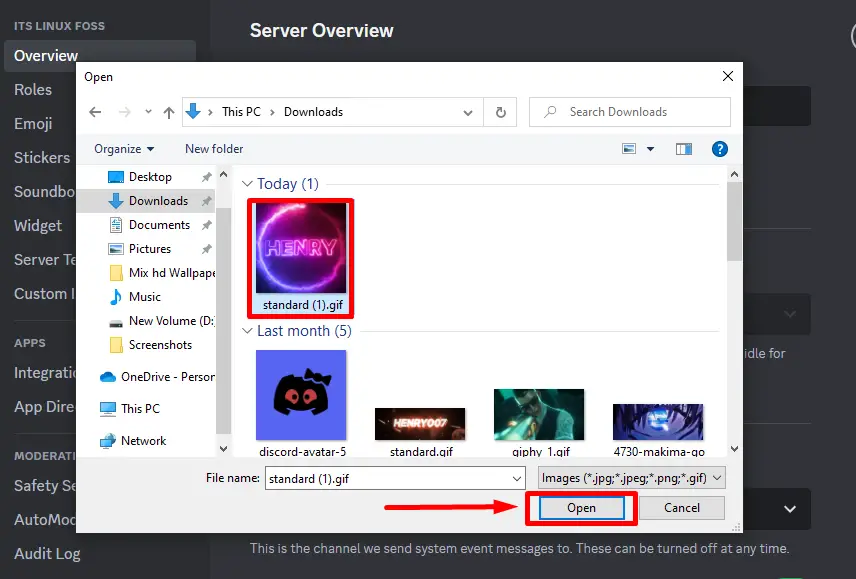
Step 4: Select Image
Select the downloaded animated Gif from the storage and open it:
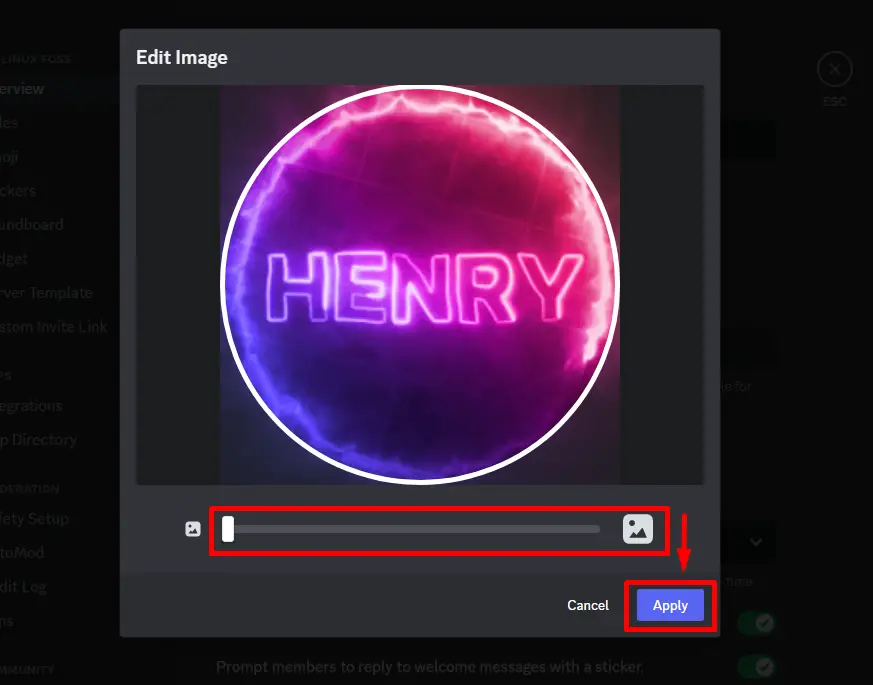
Step 5: Edit Image
Perform the little zoom edit on the GIF if required then click on the “Apply” button to proceed:
Step 6: Save Changes
Lastly, hit the “Save Changes” to see the new changes:
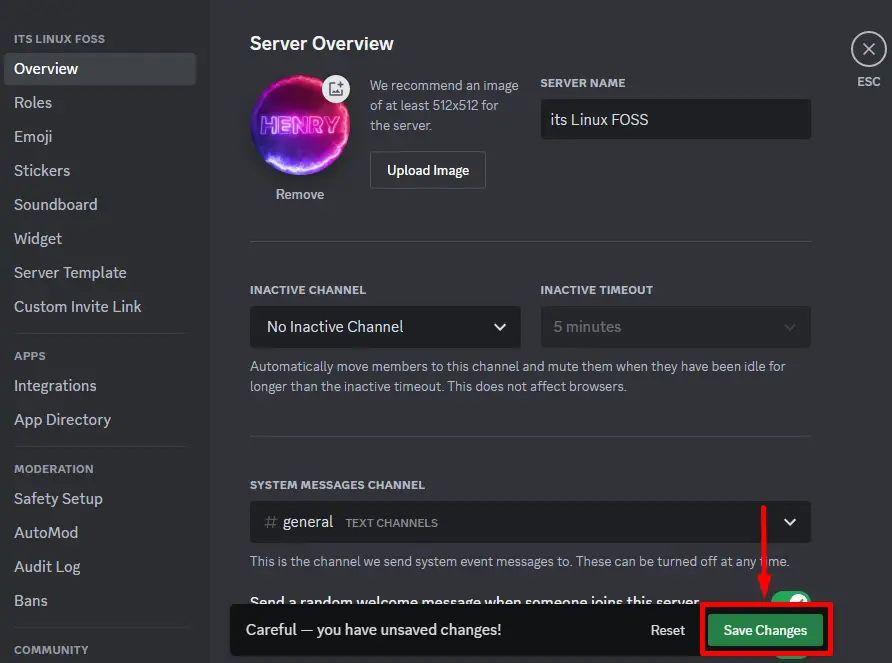
The animated server icon will be set. This is how the server icon is made and uploaded on Discord.
Conclusion
To make the server icon for Discord, go to the “Auto Creative” site and select the “Discord Icon Maker” option. Then, choose the template from the given interface, add the server name, and select the color from the scroll bar. After that, click on the “Render” button to render and download the “Animated” icon. To set the animated server icon on Discord, go to the particular server settings and upload the server icon from the “Overview” settings. You have learned the procedure to make an animated server icon on Discord.
