International Organization for Standardization or ISO file is also called an ISO image, a single file filled with the entire contents of a CD or DVD. It is mainly used for software distribution because it allows burning and transferring to some physical media. In Linux, it is widely used as a mounted virtual system that enables you to access the files and directories within the ISO file.
Now the question is how to mount iso files on Linux.
The content of this article is listed below:
Let’s start with the command line method.
How do You Mount an ISO File on Linux Using the Command Line?
The best feature of Linux is its powerful, swift, and highly customizable command line, also known as the terminal or shell. You can do anything supported on your system by executing a few commands, and mounting an ISO file is one of them, which can be done by following these steps.
Step 1: Confirm if your system supports “iso9660”
The iso9660 is a filesystem supported by all the distributions of Linux, which can be verified using this command.
$ man filesystems
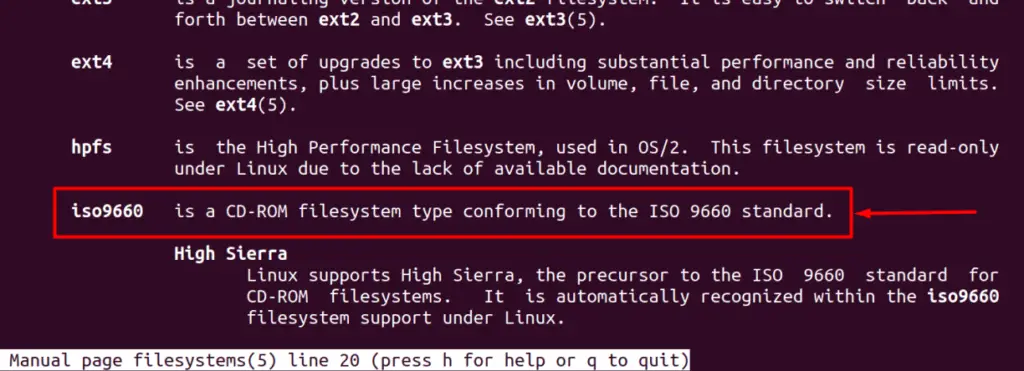
When the above command is executed, you must keep pressing the “Enter” key until you find iso9660 or reach the end of the file.
Step 2: Create a mount point
The mount point is the directory where you want to get the ISO file mounted, and to create it, this command is used.
$ sudo mkdir /media/cdrom

Using the above command (mkdir), we’ve created a new directory named “cdrom” in the “\media” directory, and this is to be used as the mounting point for the ISO file.
Step 3: Mount the ISO file
The mount command with the “-o loop” option is used in this format to mount the ISO file.
$ sudo mount -o loop /path/to/image.iso /path/to/mount-point
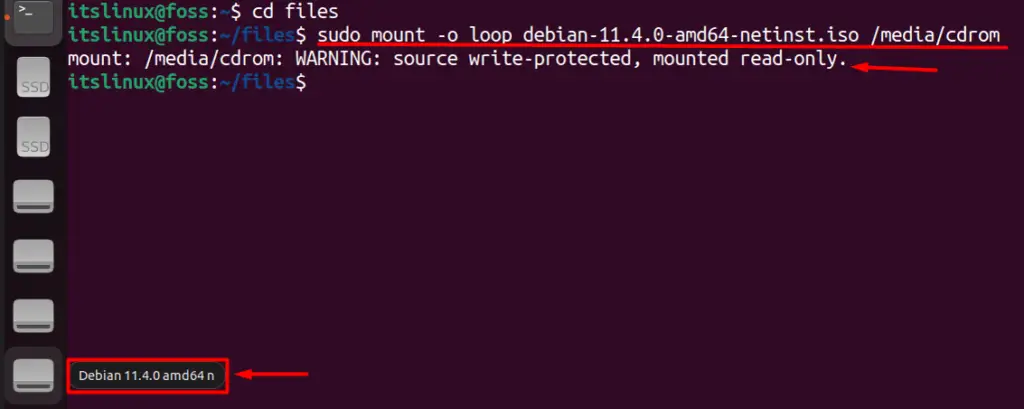
The file was stored in the “files” directory, so we used the cd command to navigate it.
$ cd files
Using this command, let’s mount the ISO file to the mount point created in step 2.
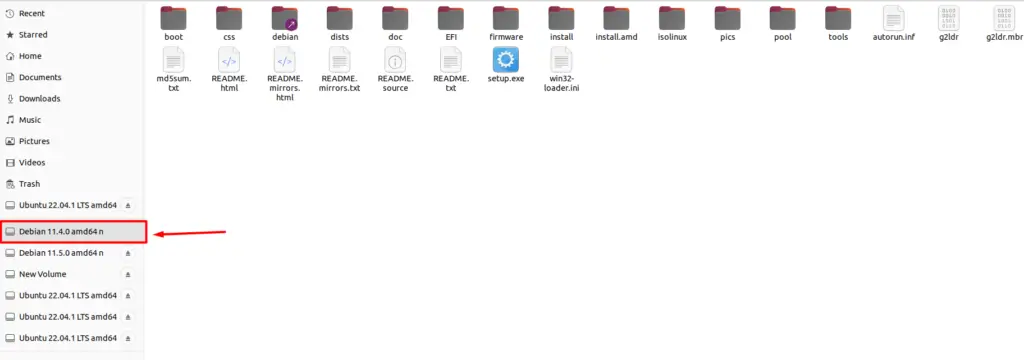
$ sudo mount -o loop Debian-11.4.0-amd64-netinst.iso /media/cdrom
When executed, the above command creates a new directory in the side menu highlighted in the above image, and you can now access the files and directories in it.
To confirm if it is mounted or not, use this command to explore the contents of the directory that was set as a mounting point (media/cdrom in our case).
$ sudo ls -l /media/cdrom
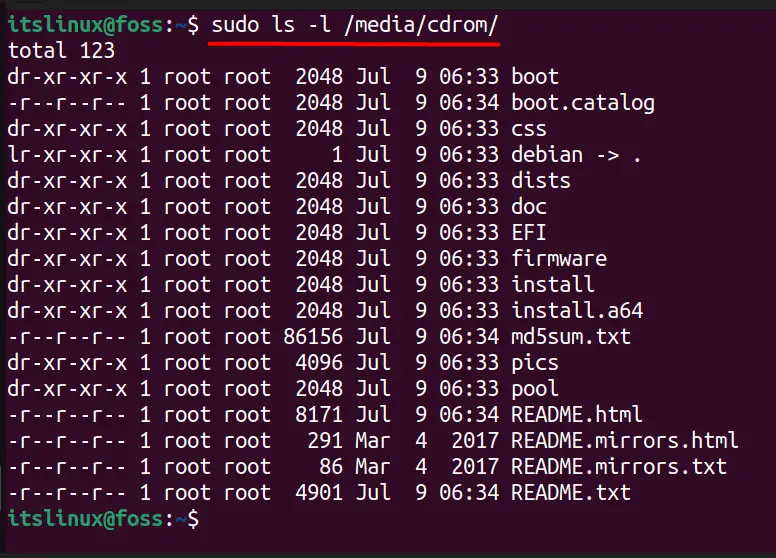
Looking at the above image, it is confirmed that the ISO file is mounted, and you can now access its files and directories.
How to Unmount an ISO File on Linux Through the Command Line?
Once you’ve mounted the ISO file, it can be unmounted using this command.
$ sudo mount /media/cdrom/

To check if it is unmounted, use this command.
$ sudo ls -l /media/cdrom

The above image shows no files in the directory, indicating that the ISO file is unmounted.
How to Mount an ISO File on Linux Using the GUI?
Mounting an ISO File on Linux can also be done through the GUI, and here we’d do it on Ubuntu 22.04, which can be different from your distro in terms of utility, but the method is identical. Here is how it can be done.
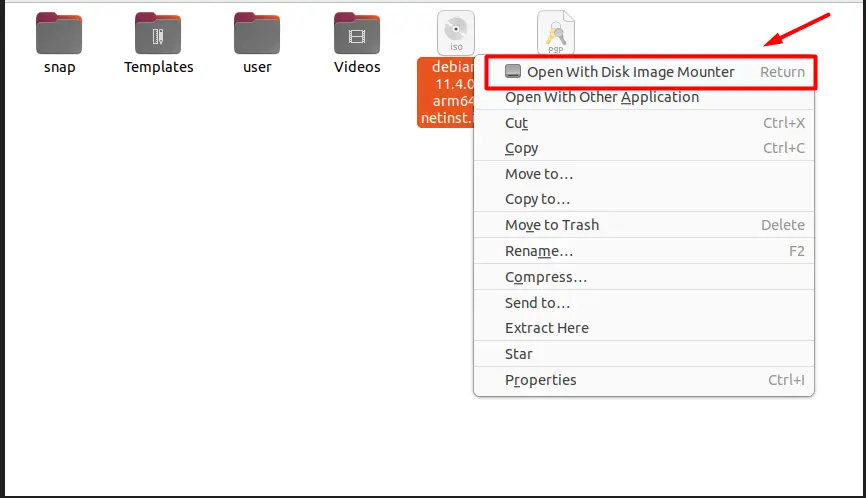
The first step requires you to navigate to the ISO file’s location on your system, open it by right-clicking, and select “Open With Disk Image Mounter,” as seen in the below image.
Once the selected option is clicked, you’ll notice a few new things highlighted in the image below.

You’ll see a notification pop-up and a new directory with the file name you’ve mounted on the left side, and it is ready to be used by you.
How to Unmount an ISO File Using the GUI on Linux?
To unmount open the mounted ISO file on Linux, a pop-up menu will appear where you can select the options.
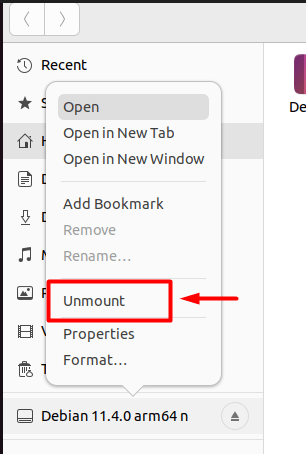
When you click on unmount, it’ll no longer be present on the sidebar, and you’ll have to re-mount it again to use it.
Conclusion
In Linux, mounting can be done using the command line and the GUI methods. By mounting the ISO files on Linux, users can access the file’s contents without burning them, making it easier for software distributors. This guide has enlightened how users can mount an ISO file using CLI and GUI methods.