The “xrandr” is a built-in command line tool to customize screen resolution, orientation, and refresh rates and fix monitor-related bugs. This tool is also beneficial for setting a system-supported custom resolution unavailable in the default display settings. The “xrandr” tool first adds the specified screen resolution in the display settings and then enables it on the screen.
This guide enlists the complete procedure to set the custom resolution using the “xrandr” command line tool.
- Check The System Resolution
- Generating the Custom Display Resolution
- Add the New Mode
- Verify the Custom Resolution
How to set Custom Resolution Using xrandr Via Command Line?
First, the resolution of the current system is checked. Then, the custom resolutions are generated which are added as a mode using the xrandr utility. This process will set the custom resolution to your system.
Let’s dig into the steps:
Step 1: Check The Current System Resolution
First, execute the “xrandr” command without passing any argument to display the current screen resolution of the Linux system:
$ xrandr
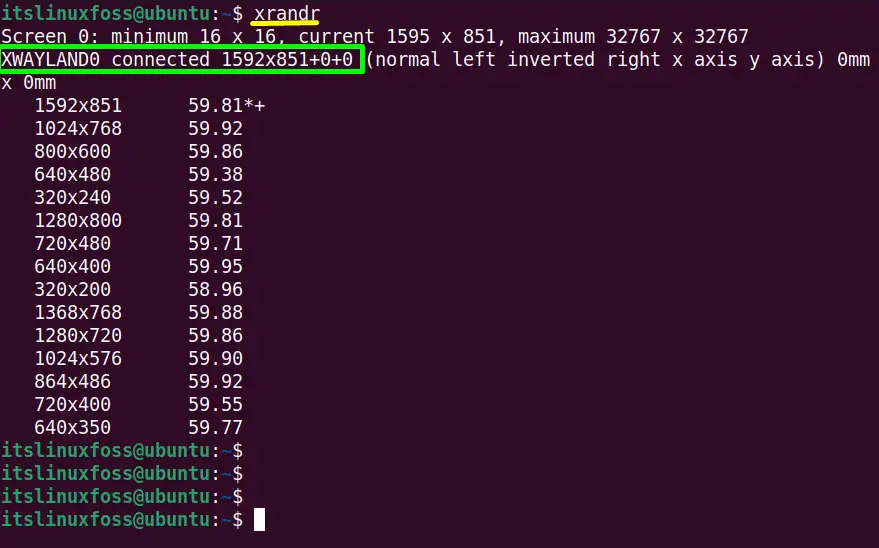
The output shows an active system monitor “XWAYLAND0” having a “1595×851” resolution and also the list of its other associated resolution.
Step 2: Generating the Custom Display Resolution
The “gtf(General Transfer Format)” provides the horizontal and vertical resolution and refresh rate in “Hz”. In this case, it is used to get the modeline (set screen resolution) string for the “xrandr” utility.
For this, specify the desired screen resolution, i.e., “1920 1080” and the refresh rate (60) with the “gtf” as a command like this:
$ gtf 1920 1080 60
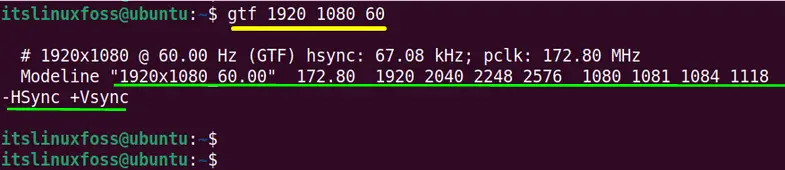
Copy the highlighted part of the “gtf” command output and run the “xrandr” command with the “– -newmode” option in this way:
$ xrandr --newmode "1920x1080_60.00" 172.80 1920 2040 2248 2576 1080 1081 1084 1118 -HSync +Vsync
In the command:
- The values “172.80 1920 2040 2248 2576 1080 1081 1084 1118” represents the parameters of the new mode which specify the timing and resolution of the new mode.
- The “HSync” denotes the “horizontal sync” used for horizontal columns which indicates the beginning of the new line. The “VSync” represents the “Vertical sync” for vertical rows that denotes the start of the new field:

Step 3: Add the New Mode
Now, add the above specified “newmode” for the current monitor device “XWAYLAND0” using “xrandr” command with “addmode” flag:
$ xrandr --addmode XWAYLAND0 "1920x1080_60.00"

Step 4: Verify the Custom Resolution
Execute the “xrandr” command again to check whether the new custom version is applied or not:
$ xrandr
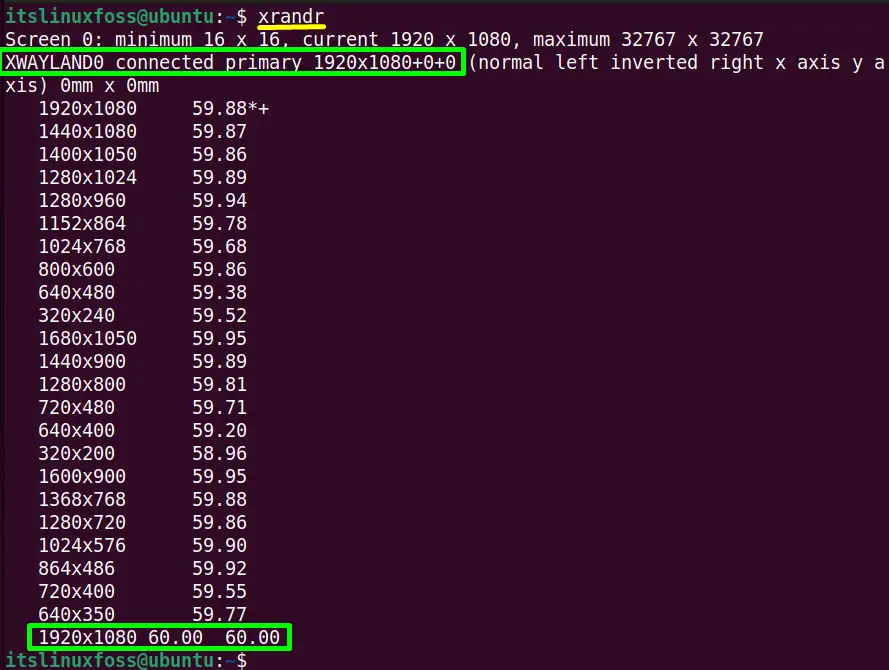
The custom display resolution “1920x1080_60” has been set as shown with the device name and at the bottom of the list.
Step 5: Set the Custom Resolution Permanently
The “XWAYLAND0” device screen resolution is set temporarily. After the system reboots, it will set back to the default resolution.
Now, open the “~/.profile” to save it permanently:
$ gedit ~/.profile
Add the “newmode” and “addmode” commands in the “~/.profile” file using the following command:
xrandr --newmode "1920x1080_60.00"  172.80  1920 2040 2248 2576  1080 1081 1084 1118  -HSync +Vsync
xrandr --addmode XWAYLAND0 "1920x1080_60.00"
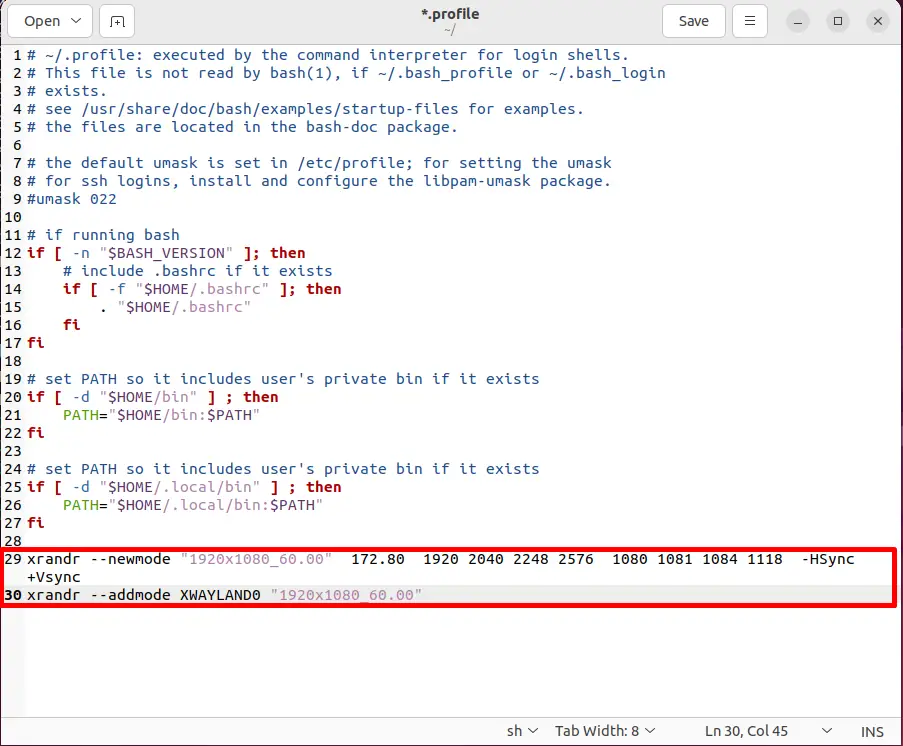
Click on the “Save” button to save the new changes in the file. The custom resolution has been set permanently for device “XWAYLAND0”.
Conclusion
In Linux, the pre-installed “xrandr” command offers the “newmode” and the “addmode” flags to set the custom resolution of the system monitor. The custom resolution is set temporarily, i.e., before rebooting. Access the “~/.profile” to permanently set the specified custom resolution.
This guide has illustrated a brief description of setting the custom resolution using the xrandr command in Linux.
