The firewall is used while connecting the servers locally or remotely. It allows the users to create a protected and authenticated connection. The uncomplicated firewall, commonly known as ufw, provides a user-friendly framework to configure the firewall and creates a secure connection. The ufw firewall is used in several Linux distributions by default to create an SSH connection.
This guide will cover the methods and options for using the ufw firewall to allow SSH connections in Linux with these helping topics:
- How to Allow SSH Ufw Firewall?
- Enable ufw Firewall for SSH
- Allow ufw Firewall for SSH and Different Type of Connections
- Set up Default ufw Settings
- Allow SSH on Particular IP Address
- Allow ufw Firewall for SSH on a Particular Port Number
- Limit ufw Firewall SSH Connections
- Bonus Tip: Remove ufw Firewall for SSH and Other Connections
How to Allow SSH Ufw Firewall?
There are several ways to allow the SSH ufw firewall in Linux. Before allowing the SSH ufw firewall, it must be installed in your working Linux distribution. To install the ufw firewall in Ubuntu 22.04, run the below-stated command:
$ sudo apt install ufw
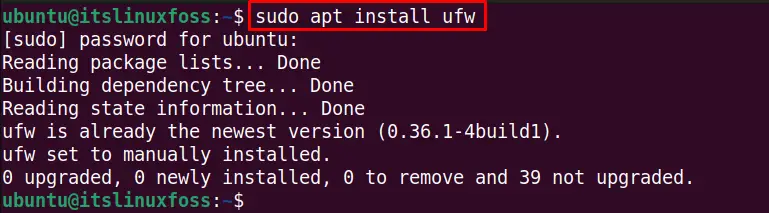
The ufw firewall is already installed in my system.
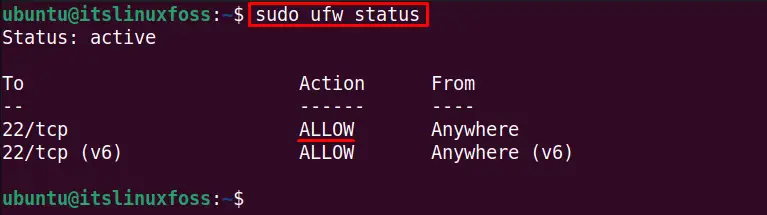
Let’s check the current status of the ufw firewall if it’s active or not using this command:
$ sudo ufw status

The ufw firewall is currently inactive.
Enable ufw Firewall for SSH
It is necessary to enable the ufw firewall to use it. To enable the ufw firewall for creating the secure SSH connection, use the “enable” with the ufw command as shown below:
$ sudo ufw enable

After enabling the UFW firewall, check its status:
$ sudo ufw status
The output shows the port number/service status of the SSH firewall as “ALLOW”.
Allow ufw Firewall for SSH and Different Type of Connections
The ufw firewall can reject incoming connections automatically. These firewall changes can be made to system security policies to allow SSH connections if other connections are blocked. To allow the ufw firewall to create the SSH connections, use the below-mentioned command:
$ sudo ufw allow ssh

The security policy rules are updated, and SSH is allowed from the ufw firewall.
Similarly, to allow any other connection to avoid the ufw firewall, we can allow it. For instance, the below command allows the TCP connection at port 22:
$ sudo ufw allow 22/tcp

Set up Default ufw Settings
To avoid the manual ufw firewall changes every time you try to set up a connection, allow the incoming or outgoing communications in the default security policy using the command line method. By default, the outgoing connections are enabled, while incoming connections are blocked. To allow the incoming communications by default, run this command:
$ sudo ufw default allow incoming

The incoming default policy is changed.
Similarly, execute the below command to allow the outgoing communications by default:
$ sudo ufw default allow outgoing

The default ufw firewall outgoing policy is changed.
Allow SSH on Particular IP Address
We can allow the ufw firewall by default for a specific IP address only, whose general syntax is as follows:
$ sudo ufw allow from <ip-address> to any port 22
- ip-address: Put your desired IP address here.
- 22: Replace it with your port number if it’s not the default 22 port.
To allow the ufw firewall automatically on default SSH port 22 for the IP address “192.168.141.130”, execute this command:
$ sudo ufw allow from 192.168.141.130 to any port 22

To allow the SSH connection on any particular subnet (in my case, 192.168.141.130/24) of an IP address, use this command:
$ sudo ufw allow from 192.168.141.130/24 to any port 22

The rule is changed to the ufw security policy.
Allow ufw Firewall for SSH on a Particular Port Number
The uncomplicated firewall (ufw) can also be allowed on a specific port. This port will always listen to incoming communications. For example, to allow all the incoming communications on port “80”,run this command:
$ sudo ufw allow 80

The rule is updated, and port 80 is permanently opened to listen to the incoming connections.
Limit ufw Firewall SSH Connections
We can limit the SSH connections to make limited connections. For example, the below-stated command limits the connection to 6 attempts in the last 30 seconds:
$ sudo ufw limit ssh

Bonus Tip: Remove ufw Firewall for SSH and Other Connections
We can delete the SSH service from the list of ufw firewall-allowed users. The following command deletes the SSH connection from the ufw firewall allowed users:
$ sudo ufw delete allow ssh

We can remove the specific port number and service from the ufw allowed users list. For instance, the below command deletes the port 22 TCP service from the default allows users:
$ sudo ufw delete allow 22/tcp

To disable the ufw firewall to allow all the connections to the system, use the “disable” option with the ufw command:
$ sudo ufw disable

We have disabled the UFW firewall.
You can check its status after disabling it by typing the below command:
$ sudo ufw status

The ufw firewall is inactive.
Conclusion
The ufw firewall allows the SSH service to create secure and authenticated communication between servers. We can enable it to create a connection via SSH. The ufw service can be allowed for specific IP addresses, subnets, port numbers,s and a specific connection.
Moreover, we can disable and delete the SSH service from allowed users by updating the security policies mentioned in this guide.