The arp (Address Resolution Protocol) command in Linux shows and modifies the Kernel network interface cache. This command helps resolve a different machine’s IP address to the mac address by creating a connection with the network interface.
The arp command performs several powerful functions with a single command.
This post will discuss these topics:
Let’s start with understanding the arp command utility.
What is an arp Command in Linux?
An arp is part of the net-tools package, a powerful networking tool to convert the IP address to a mac address. Different machines are added/connected to a local server, which can be configured using the IPv4 network interfaces to modify the IP address to the mac address.
Install net-tools utility:
The arp command is present in the net-tools package. To use the arp command, we must install the net tools. The command to install net-tools in the system is:
$ sudo apt install net-tools                   #For Ubuntu/Debian-Based
$ sudo dnf install net-tools                   #For Fedora
$ sudo yum install net-tools                   #For CentOS
Before using the arp command, let’s check the general syntax of the arp command, which is as follows:
Syntax of the arp Command:
$ arp [-v] [HW] [-i if] -a [hostname]
- v: Shows the verbose feature of arp command, which lists every step details in the terminal.
- HW: Specifies the hardware address, also called “mac address”. Default Ether.
- i: Specifies the network interface. Like eth0.
- hostname: Replace it with the hostname or host IP address.
- a: Shows the all flag of the arp command, which displays all the hosts on the machine.
The arp command has several built-in options which add functions to it. To get the options/flag available in the arp command, utilize the below-written command:
$ arp --help
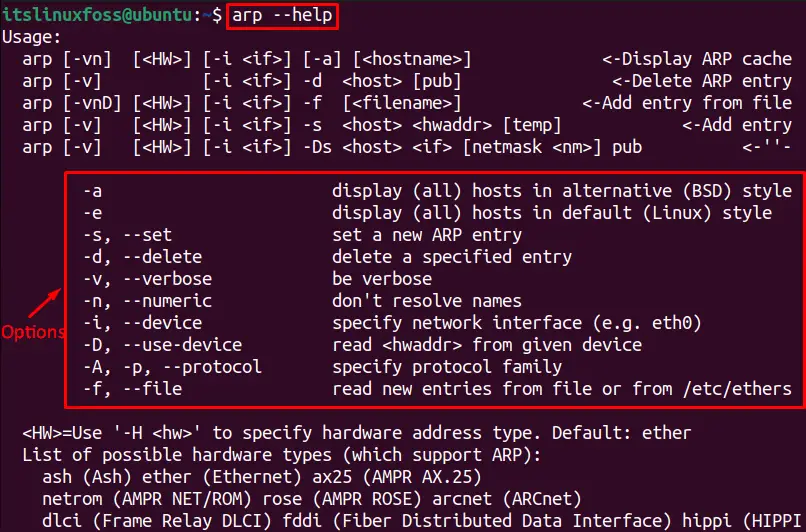
The arp options are mentioned in the above picture.
How to Use the arp Command in Linux?
Let’s use the arp command to do different tasks in Linux.
Example 1: Use the arp Command to Get the arp Cache Details
The arp command helps to change the system arp cache. To check the content of a machine’s arp cache, the “arp” command is used:
Note: By default, the arp is used with the “e” flag.
$ arp

The arp command shows the following details about the machine:
- Address: It shows the machine’s IP Address.
- HWtype: Shows type of hardware.
- HWaddress: Represents the “mac address” of the machine.
- Flag Mask: It shows the flag for the machine.
- C: Complete Entry.
- P: Published Entry.
- M: Permanent Entry.
- Iface: Interface of the machine.
If you want to get all the host’s details on the system, the “a” flag of the arp command is used. To display all the entries on the machine, use this command:
$ arp -a

Use the below-mentioned command to get all the information of a specific IP address:
$ arp -a 192.168.227.1

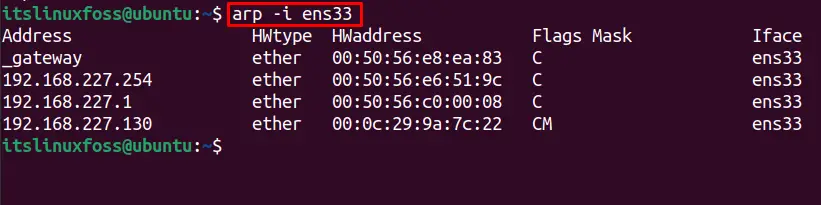
Example 2: Use the arp Command to Get Entries for Specific Interface
The option allows users to find the information about a specific interface. For getting the entries of the “ens33” interface, run this command:
$ arp -i ens33
Example 3: Use the arp Command to Get Numeric Details
To show the output in numeric form, the “n” option is used. For instance: to get numeric details of the IP “192.168.227.1”, the below command is used:
$ arp -n 192.168.227.1

Example 4: Use the arp Command to Add/Set a New Entry
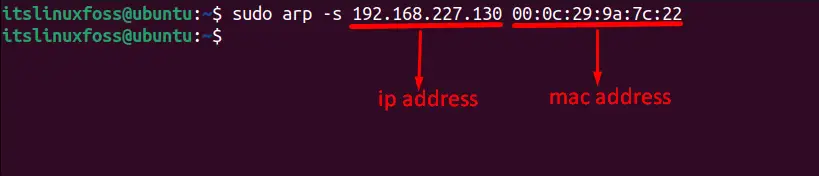
The best use of the arp command is adding/setting up a new machine/user to the local server. The add a new entry to the machine, the “s” option of the arp command is used with IP and mac address. Let’s check the syntax for that:
$ sudo arp -s <ip-address> <mac-address>
Another machine with IP address “192.168.227.130” and mac address “00:0c:29:9a:7c:22” can be added to the system’s local server by utilizing this command:
Note: we can find out the machine mac address (HWaddress) using the “arg” or “ifconfig” commands.
$ sudo arp -s 192.168.227.130 00:0c:29:9a:7c:22
To verify the new user is successfully added, the “arp” command is used:
$ arp
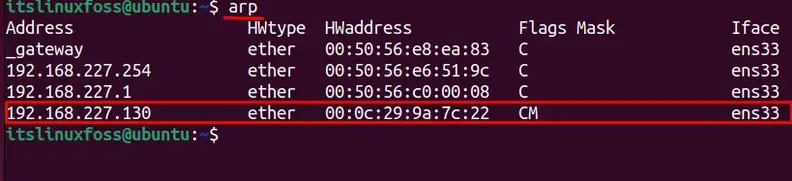
The highlighted entry shows the new machine has been successfully added to the local machine server.
Example 5: Use the arp Command to Add a New User From the File
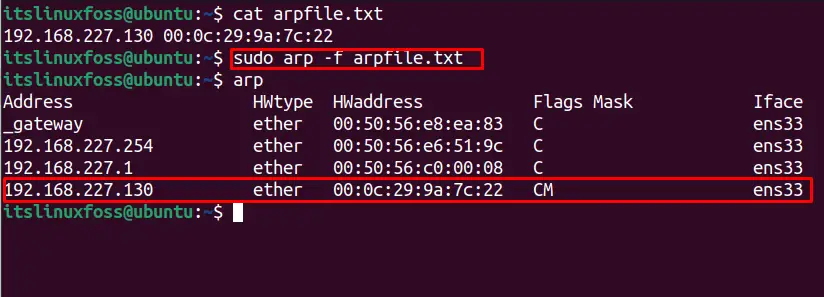
We can add/set up new or multiple users/machines on our system’s local server from the file. Both the mac address of the machine and the ip address of the new machine should be included in the file. Similarly, a file named “arpfile.txt” having ip address “192.168.227.130” and mac Address “00:0c:29:9a:7c:22” can be used to add a new machine as follows:
Note: The “cat” command shows the file text.
$ cat arpfile.txt
$ sudo arp -f arpfile.txt
Example 6: Use the arp Command to Remove the Entry
The “d” option of the arp command helps you to remove a user/machine on the local machine. The removal of a machine with IP address “192.168.227.130” can be performed using:
$ sudo arp -d 192.168.227.130
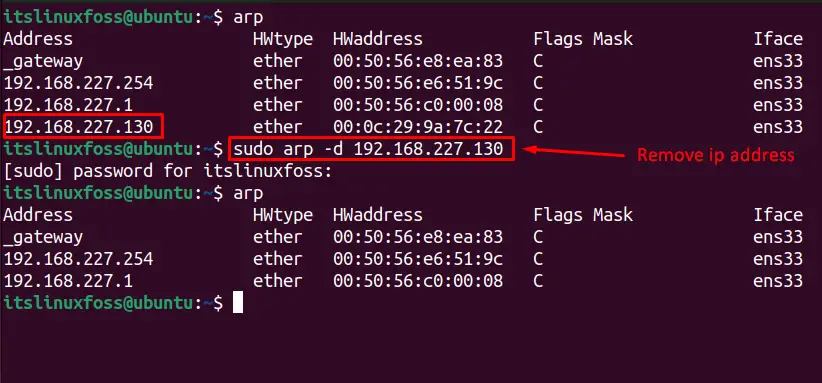
The output displays the removal of the user after executing the command.
Pro Tip: Adding the User with ping
Here, we will add an IP address to the arp list manually. To do so, the ping command is used with an IP address “192.168.227.130” (IP address refers to any user-defined address) as follows:
$ ping 192.168.227.130
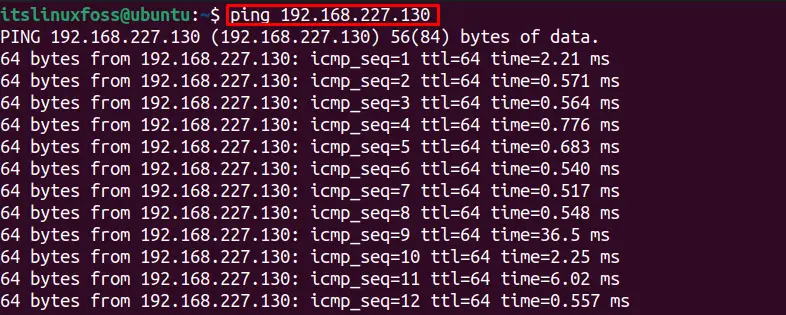
To verify the connection of a new entry to the local server host, use the following command:
$ arp

It can be seen that the newly pinged IP address is added to the arp list.
That’s the end of this guide!
Conclusion
In Linux, the arp command is used to resolve the machine IP address to the physical address to connect and communicate the two devices. We can use this command to get the detail of machines connected to the local server, connect a new machine and remove an existing user/machine. Moreover, different uses of the arp command are discussed throughout this article.