The “whoami” command of Linux allows you to view the currently logged-in user on the terminal. It has a simple syntax that only outputs the name and requires no arguments. It is officially included with Linux and Windows operating systems. It is useful when users there is a requirement to know the current user’s identity before executing/running a script. Or you can utilize the “whoami” command to check if the current user has the “root” privileges.
This guide explains the details of the “whoami” command of Linux.
Quick Outline
- Understanding the whoami Command in Linux
- How to Use the whoami Command in Linux?
- whoami vs Other Commands
Let’s explore the secrets of the “whoami” command!
Understanding the whoami Command in Linux
As explained earlier, the “whoami” command prints the username of the current user effective in the shell. Before moving on to practical usage, let’s understand its syntax.
Syntax
whoami [option]
Here, the “whoami” invokes the command while the “option” refers to the flags, which are explained below:
| Option/Flag | Explanation |
| –help | Displays the help and then exits. |
| –version | Use this option for viewing the version and copyright information of the “whoami” command. |
How to Use the whoami Command in Linux?
Let’s understand using the “whoami” command via the following examples:
Example 1: View the Current User’s Effective Username
The effective username of the user who is currently logged in. To view the current effective username, run:
whoami

In the above output, the “linuxuser” is displayed, which is the effective username of the currently logged-in user. The effective username is the actual username and can be rooted when the command is used with “sudo”.
Example 2: Check if the Currently Logged-in User has Root Permissions Using the whoami Command
Use the “sudo” keyword before the “whoami” to check if the currently logged-in user has sudo privileges, as seen below:
sudo whoami
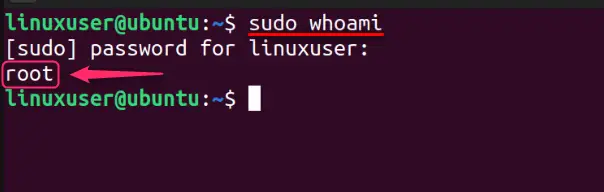
When you run the above command, it will show the username as “root” if you have sudo privileges. If a non-sudo user tries to do the same, an error arises “The user is not in the sudoers file”. However, you can fix it by following this guide.
Or the following script can be used to verify if the user has the sudo privileges:
if [[ "$(whoami)"!= 'root' ]]
then
echo "The current user does not have the sudo or root privileges"
fi
By executing the above script (named script1.sh), we get the following:
bash script1.sh

The specified message was displayed since the current user did not have sudo or root privileges.
Example 3: Check the Version of the whoami Command in Linux
Use the “–version” option to view the current version of the “whoami” command, as seen below:
whoami --version
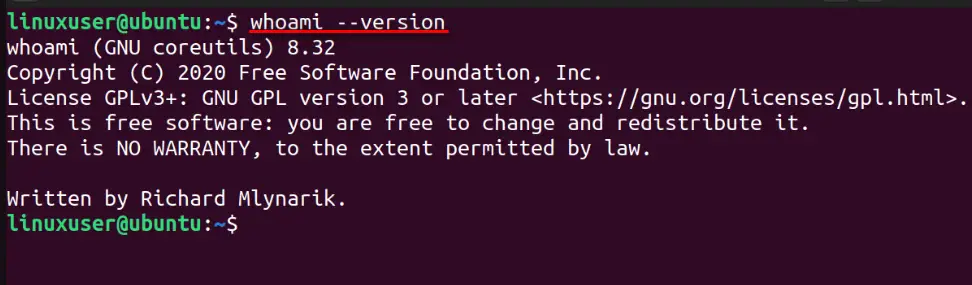
After running the above command, the version (8.32 in this case) and copyright information of the “whoami” command are displayed.
Example 4: View Additional User Details Using the whoami Command
The “whoami” command can be pipelined with other commands as well. For instance, the “id” command when used with the “whoami” command, displays the user and group information of the current user:
whoami | id

The above command displays the “uid (user ID)”, “gid (group ID)”, and other details as seen.
Example 5: View the Input/Output Statistics Using the whoami and iostat Commands
By pipelining the “whoami” and “iostat” commands, users can view their system’s input/output statistics for performance analysis. It requires no arguments and is used as follows:
whoami | iostat
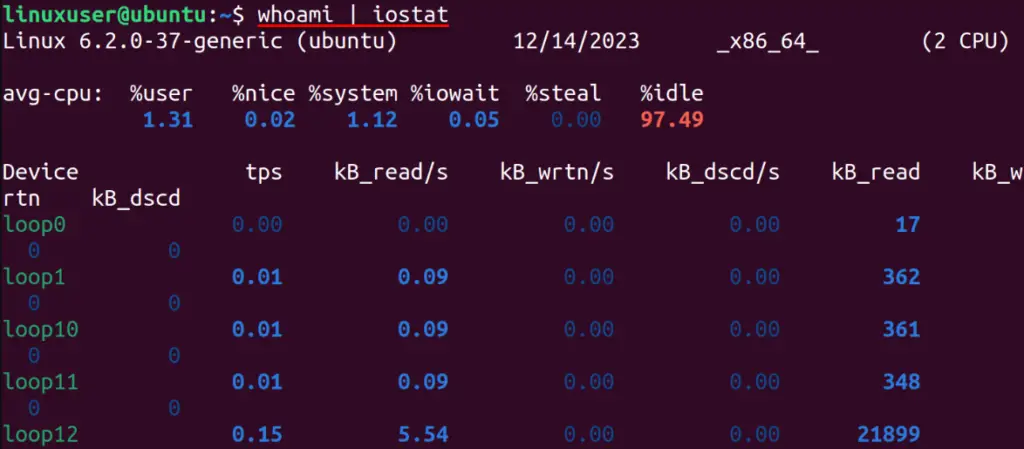
The above command takes the output of the “whoami” command and is then sent to the “iostat” command as the input. It shows the I/O statistics of the currently logged-in effective user.
Example 6: View Processes of the Current User Using the whoami and ps Commands
To view a list of current user processes, pipeline the “whoami” and “ps” commands. It displays “PID”, “TTY”, “Time” and “CMD”:
whoami | ps
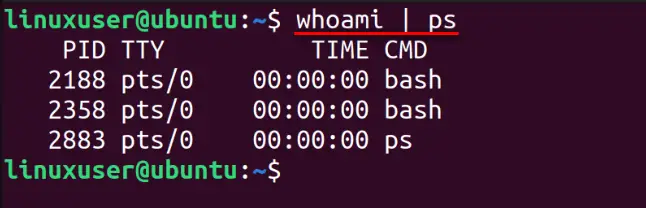
In the above snippet, the output of the “whoami” is pipelined with the “ps” command. It displays the “PID (process ID)”, “TTY (virtual terminal)”, “TIME (total CPU usage)” and “CMD (process’s name).
whoami vs Other Commands
A few commands that are like the “whoami” command but give distinct outputs are as follows:
whoami vs. the w Command
While comparing the “whoami” and the “w” command, it was found that the “w” command displayed more information. The “w” command shows the “current time”, “number of users on the system”, “load average (of the CPU), “USER (username)”, “TTY”, “LOGIN@ (login time)”, and much more. The outputs of both commands can be compared below:
whoami
w

The above snippet compares the output of the “whoami” and “w” commands and concludes that the “w” command is better regarding the output information.
whoami vs. who Command
The main difference between the output of the “whoami” and “who” commands is that the “whoami” command only shows the current user. While the “who” command displays all the logged-in users, their login time and the tty. The difference is illustrated below:
whoami
who
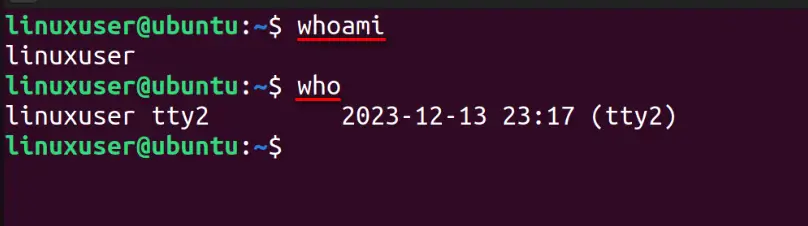
In the above snippet, the output of the “whoami” and the “who” commands are compared, and it finds that the “who” command displays more information. The output of the “who” command shows username (linuxuser), tty2 (the virtual terminal session) and date & time the user logged in.
whoami vs. the logname Command
The “whoami” and “logname” commands work the same when used without the “sudo” keyword. However, while using the “sudo”, the output is different. It is because the “who” command displays the currently logged-in user that can have the “root” privileges. While the “logname” displays the same username, whether it is used with or without the “sudo” keyword:
sudo whoami
sudo logname
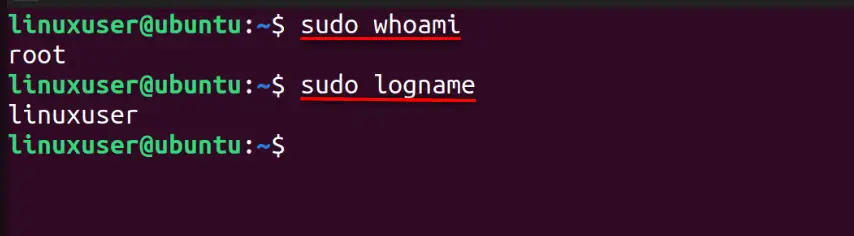
The above snippet illustrates the difference between the “whoami” and the “logname” commands; nobody wins here.
whoami Command vs. the echo $USER
The “$USER” outputs the username of the user who is logged-ins. The output will be the same, with or without using the “sudo”. It is because its function is to display the username and ignore the “sudo” keyword:
whoami
echo $USER
sudo whoami
sudo echo $USER
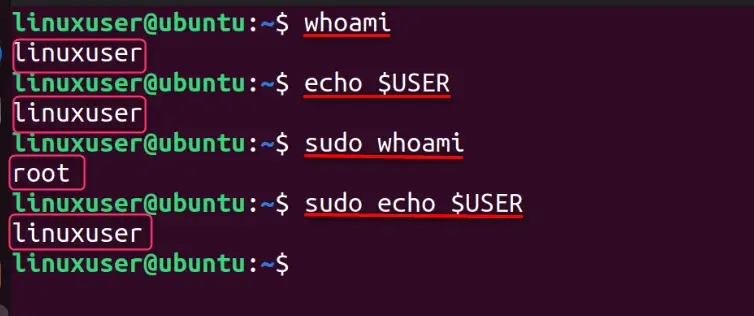
The above snippet illustrates the difference between the “whoami” command and “echo $USER”. Both commands have their functionality, so there is no clear winner.
whoami vs. the id Command
The “id” command prints all the details about the currently logged-in user, including the “uid”, “gid” and other attributes. The “whoami” command lacks the information outputted by the “id” command, as seen below:
whoami
id
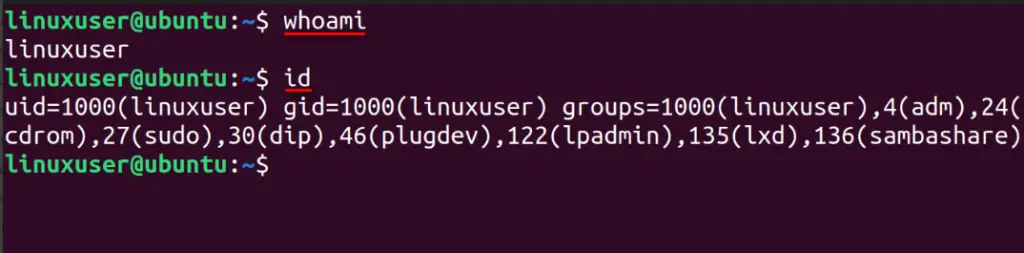
The above output shows that the “id” command displays more information, thus better than the “whoami” command. However, a flag/option (“-un”) of the “id” command works exactly like the “whoami” command, as illustrated below:
whoami
id -un
sudo whoami
sudo id -un
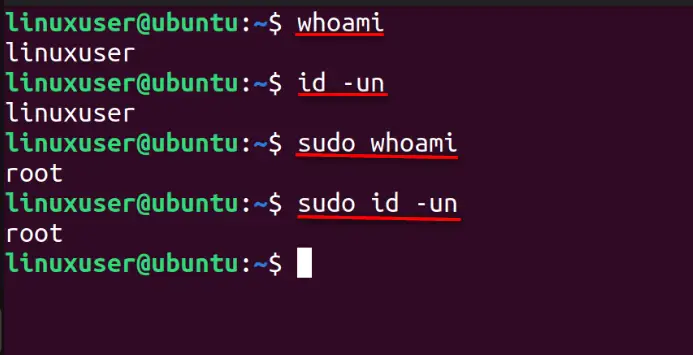
The above output shows the similarity between the “whoami” and “id -un” commands in Linux.
That’s all for explaining the “whoami” command of Linux.
Final Words
The basic functionality of the “whoami” command is to view the currently logged-in effective user. It includes the options “–help” to view help and “–version”. It can be pipelined with other commands such as “ps”, “iostat” and others. Both these commands allow users to monitor the system performance for other users as explained in this detailed guide on the “whoami” command in Linux.