SCP (Secure Copy Protocol) utility allows you to copy files/directories between multiple machines. It is backed up by the SSH server for the connection. SCP provides multiple security levels to create a copy of a file/directory. By default, it uses the basic SSH password-based authentication. However, you can enhance this layer by using SSH keys or changing the default port. Thus, SCP is also referred to as the secure medium to copy files from local to remote and vice versa.
In this post, we will demonstrate how you can use the SCP command to securely transfer files/directories.
- Prerequisites: Setup SSH Server on Remote Machines
- How to Use SCP Command to Securely Transfer Files
- How Does SCP Command Work
- Basic Syntax and Options of the SCP Command
- Use Case 1: Copy Files/Directories From Local to Remote
- Use Case 2: Copy Files/Directories From Remote to Local
- Use Case 3: Copy Files/Directories Between Servers Through Your Local Computer
- Tip: How to Make SCP File Transfer More Secure
- Bottom Line
Prerequisites: Setup SSH Server on Remote Machines
Since the SCP command works on the SSH thus the SSH server must be installed and configured on the remote machines. Here are the steps to setup SSH on Linux systems:
Step 1: Install SSH Server
sudo apt install ssh                     #Debian/Ubuntu/Kali/Mint
sudo dnf install openssh-server          #Fedora/CentOS/Redhat
sudo pacman -S openssh                   #Arch/Manjaro
sudo zypper install openssh              #SUSE Linux
Step 2: Configure SSH
Now, you need to enable and start the SSH service.
sudo systemctl enable ssh                   #Debian/Ubuntu ...
sudo systemctl enable sshd                  #Fedora and Its Derivatives
sudo systemctl enable sshd                  #Arch and Its Derivatives
Then, restart the SSH service to apply the changes, i.e., just use the “restart” keyword instead of enable in the above commands.
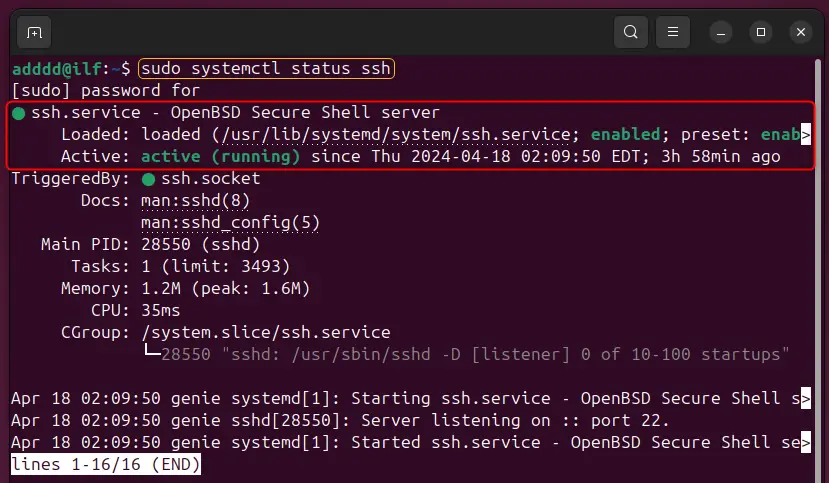
Finally, Check its status to confirm the successful installation. Just ensure the service is running actively in a smooth state, as in our case:
Let’s dig into the working/usage of the SCP command.
How to Use SCP Command to Securely Transfer Files
This section demonstrates the basic working, syntax, and examples of the scp command.
How Does SCP Command Work
SCP command performs the copy in two steps:
- First, an SSH connection is established with the remote machines. Thus, you need to Install/set up SSH on your remote machines before using it.
- Once connected, the files/directories are copied to or from one machine to another.
Basic Syntax and Options of the SCP Command
The syntax of the SCP command is written below:
scp [options] [source] [target]
Here:
- [Options]: Likewise each Linux command, the scp command also supports a list of options to enhance the basic usage of the command.
- : It is the address of the source file (from where the file will be copied). There are two possibilities:
- Local Machines: To copy a file to or from the local machine, just the path of the file is provided.
- Remote Machines: The remote source/target is written as: “username@hostname/IP:/path/to/file” where the username and hostname refer to the remote machine. After the colon, the path is provided which refers to the file being copied or where the file will be copied.
- [target]: It is the address where the file will be copied. The naming conventions for local and remote are the same as discussed above.
The SCP command supports a list of options. Some of the most used are:
| Option | Description |
|---|---|
| -P | Used to connect to remote using a specific port. To connect via a specific SSH port. |
| -p | To preserve (retain) the metadata of the file. |
| -q | Quiet mode. Does not show the copying progress. |
| -r | Copy the directories and all its data. |
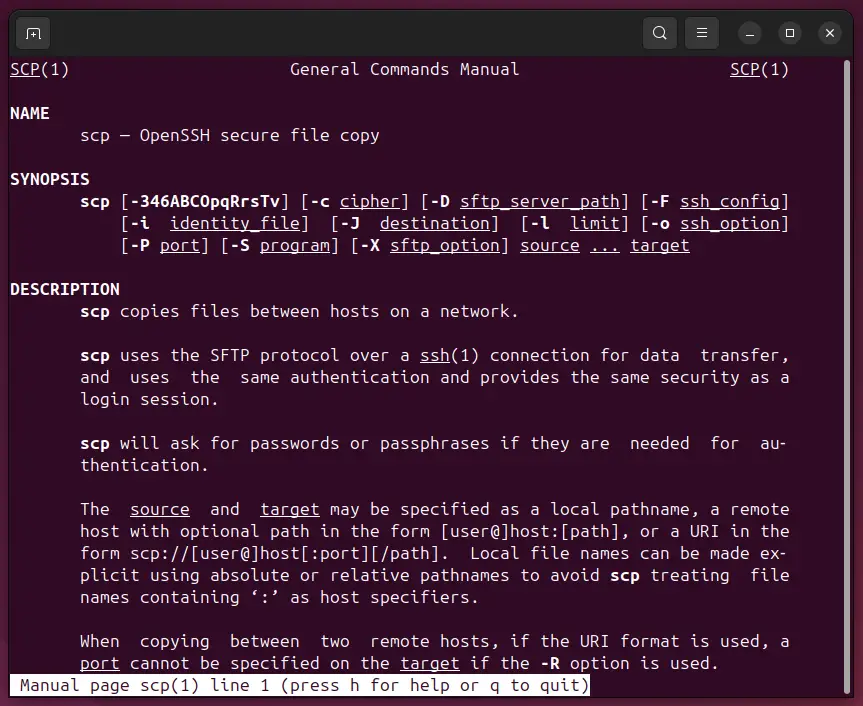
For more options, you can check out the following manual page of the scp command:
man scp
Let’s discuss the possible use cases of the SCP command.
Use Case 1: Copy Files/Directories From Local to Remote
SCP copies the files/directories from local to remote using the below syntax:
Syntax:
scp /file/path/on/local/machine username@hostname:/path/
Example 1: Copying a File With Default Parameters
The following scp command copies the file “test.txt” on the remote system.
scp test.txt [email protected]:/home/tom/
Here:
- “test.txt”: is the file name/path on the local computer.
- “[email protected]”: is the username and the IP address of the remote machine.
- “:/home/tom/”: denotes the location on the remote machine where the “test.txt” file will be placed.

You can verify whether the file has been copied or not? For that, use the ssh command to establish a connection and use the “ls” command:
ssh [email protected] ls
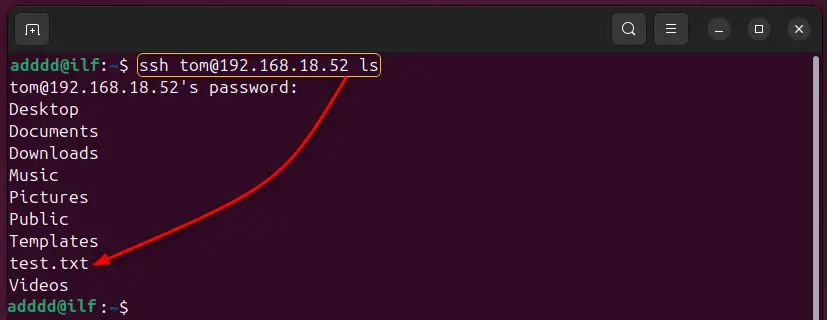
It can be confirmed that the file “test.txt” has been copied to the remote system
Example 2: Copy a File With a Specific Port | Recommended
As SCP uses SSH to connect to a remote machine, thus it uses the Port 22 of the remote system by default. You can change this port using the “P” option of the SCP command. Changing the port enhances the security of your copy as you have changed the default port.
Note: Before trying to connect via any port (other than default), you must open the port on the remote machine.
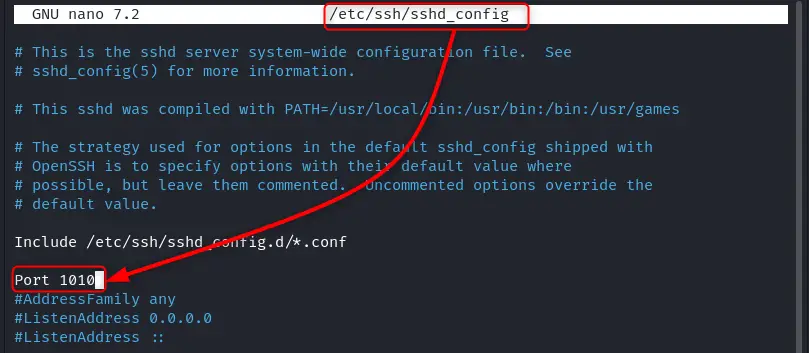
Add the port rule using ufw and reload the firewall. Lastly, restart the SSH server to integrate the changes:
sudo ufw allow <port>/<protocol>
sudo ufw reload
sudo systemctl restart ssh
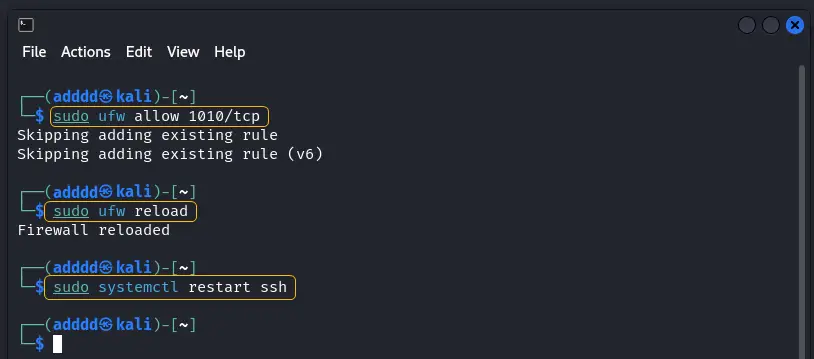
The following command copies the file named “reverse.txt” from the local to the remote machine (accessing the remote machine through port 1010):
scp -P 1010 reverse.txt [email protected]:/home/tom/

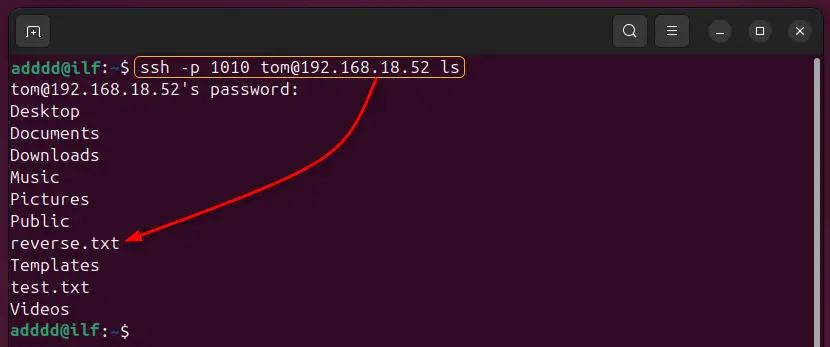
Let’s verify the copying by accessing the remote machine through the same port. Here’s the way to run the “ls” command on the remote machine:
ssh -p <portnum> username@hostname ls
Example 3: Copying a Directory and All of Its Files | Recursive Copying
Likewise files, the SCP command is effective enough to copy the directory and its content. Use the “r” option of the SCP command with the same pattern to copy the directory recursively from local to remote.
scp -r /home/adddd/menie/ [email protected]:/home/tom/Downloads/
Here:
- “/home/adddd/menie/”: Is the directory’s (to be copied) address on the local machine.
- “/home/tom/Downloads”: Path on the remote machine where the directory will be copied.

Let’s verify it on the remote machine:
ssh [email protected] ls-R /home/tom/Downloads
We used the “ls -R” command to list the directories and their data of the “/home/tom/Downloads” (where the menie directory was copied):

It can be verified that the directory and its content have been copied.
Use Case 2: Copy Files/Directories From Remote to Local
You can copy a file/directory from remote to local. Keep your SSH active on a remote server and use the following syntax:
scp username@hostname:/home/user/file_name /path/on/local/machine
Where:
- “username@hostname”: It connects your local system to the server.
- “:/path/to/file/on/server”: After the colon “:”, write the path of the file/directory (on a remote machine) that you want to copy.
- “path/on/local/machine”: Write the path of the local machine where the file will be copied.
Note: All the options can be used in each SCP’s command usage. Let’s exercise some examples of this use case.
Example 1: Copying in Quiet Mode
By default, the SCP command shows the progress while copying. However, you can quietly copy the content using the “-q” flag. Here’s the command:
scp -q [email protected]:/home/tom/rank.txt /home/adddd/Downloads/

You can see there is no progress of SCP in the above output.
Example 2: Preserve the Metadata While Copying
By default, when the file is being copied, the scp command changes the permissions and the modification time. However, the SCP’s “p” option allows you to keep the timestamp and the permissions as it is at the source end.
Let’s check the permissions and timestamp of the file at the source end:
ls -al res.txt

Now, make a copy of it using the “p” option:
scp -p res.txt [email protected]:/home/tom/

Let’s check the data on the remote machine:

You can see the data is preserved as it was on the source machine.
How the Preserve Mode is Differentiated From the Simple SCP?
If you do not use the “p” option then the timestamp will be updated to the time when the copy is being carried out and with the restricted permissions, as you can see in the following output of the same file copy:

Let’s dig into the remote-to-remote copy use case.
Use Case 3: Copy Files/Directories Between Servers Through Your Local Computer
SCP can remotely interact with two different servers to copy the files/directories from one server to another. In such a case, the local computer just uses the SSH/SCP protocol to make the copy happen, i.e., the local machine is neither a target nor a destination:
Syntax:
scp username1@hostname1:/file/path username2@hostname2/IP:/path/
The username1@hostname1/IP refers to the username and the hostname/IP of the source remote machine and username2@hostname2/IP denotes the info of the target remote machine.
Example: Copying a File From One Remote to Another Remote Through a Local Machine
Here, we have copied the file “dual.txt” from one remote machine to another (local is just used to connect them):
scp [email protected]:/home/tom/dual.txt [email protected]:/home/adddd/Downloads/
Here, the remote machines have IPs “192.168.18.103” and “192.168.18.52”:

To verify the transfer of files on the remote server, use the ssh command as follows:
ssh [email protected] ls /home/adddd/Downloads/

Remember to use the username and IP address of the target remote machine:
Tip: How to Make SCP File Transfer More Secure
As discussed, the SCP command uses the SSH protocol to carry out the copying. Thus, you can make the SSH connection more secure to enhance the overall security of the SCP process. You can use the Public/Private keypair authentication or change the default port for SCP connections. The changing port method has already been discussed in one of the above Use Cases. Here, we will demonstrate how you can set up public/private key-pair authentication for SSH:
Step 1: Generate SSH Key Pair | Local Machine
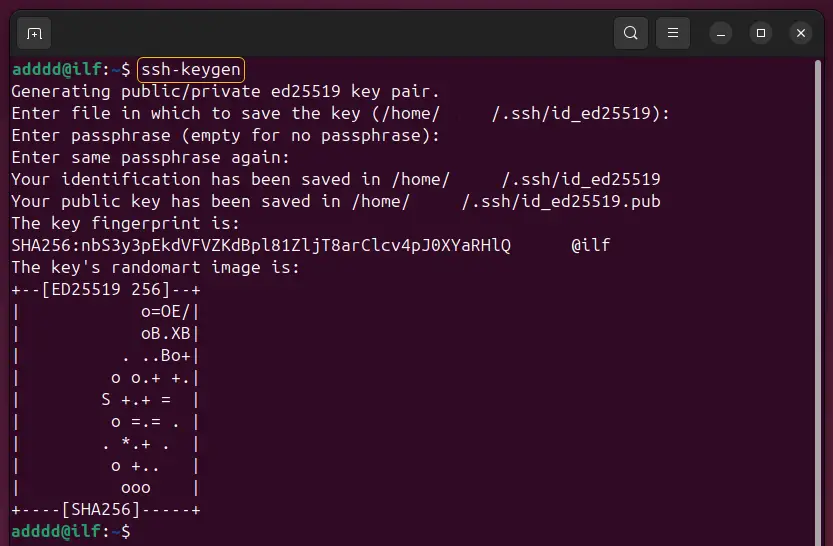
First, generate the SSH key-pair using the “ssh-keygen” utility, i.e., run this command on your local machine:
ssh-keygen
While generating keys, you will be asked to:
- Choose the location for the public/private keys or go with the default.
- Choose whether you want to set the passphrase for the private key. This passphrase is used when any other system connects via SSH.
- Add the Passphrase for the Private key, when asked.
Step 2: Copy the Keys From the Local to the Remote Machine
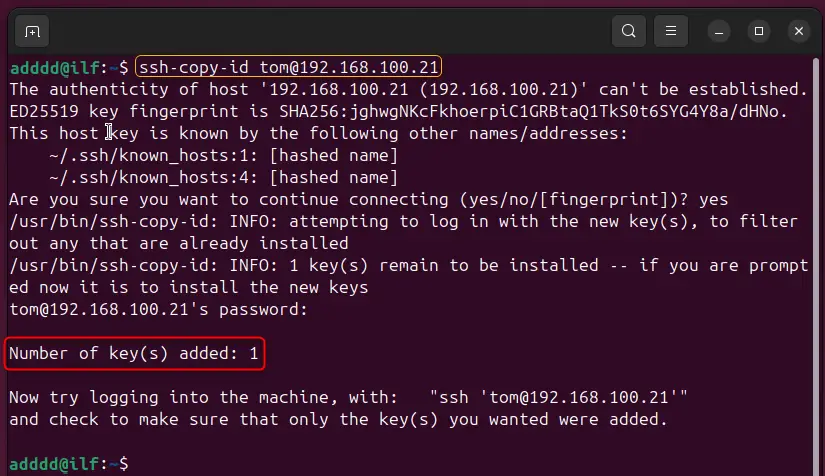
Once the key-pair is generated, copy the generated keys from the local to a remote machine, using the following command:
ssh-copy-id username@hostname/IP
Here, use the username and the hostname of the remote machine. The command automatically copies all the keys from local to remote:
Step 3: Change the Default Port For SSH Connections
It is suggested to change the default port for the SSH connections. Open the SSH configuration file on the remote machine and change the port:
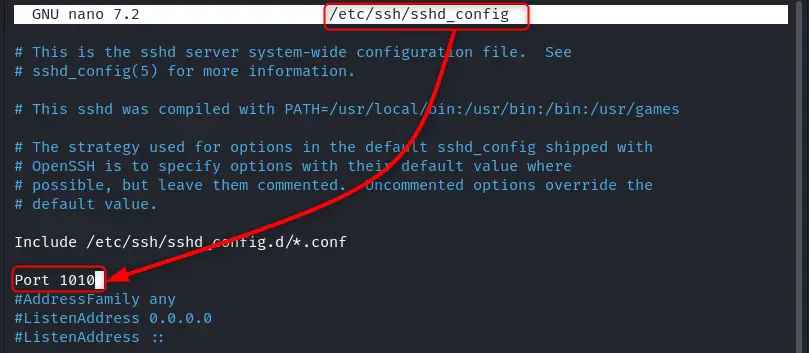
Allow that port on the firewall using the ufw utility:
sudo ufw allow 1010/tcp
Reload the firewall to apply the changes:
sudo ufw reload
Confirm that the SSH now listening on Port 1010 (or the one you set):
sudo ss -tulpn | grep ':1010'

Step 4: Use the SCP (With Specific Port and Keys to Authenticate)
Once, the keys are generated and the port is changed, you can now use the SCP command with the “-P” flag to establish an SSH connection and perform a copy action:
scp -P 1010 test.txt [email protected]:/home/tom/Downloads/
Upon execution, you will be asked to enter the key passphrase (that you set while generating key pair):

And here’s the output upon successful execution:

Note: Here, you can use any of the SCP’s use cases discussed above.
Bottom Line
SCP is a renowned copying protocol used on Linux as well as on Windows. SCP offers a long list of useful options that enhance the user experience as well as the functionality of the tool.
However, the default function of SCP is secure way because of password authentication by the SSH. However, you can make it a foolproof copying tool by strengthening the SSH authentication mechanism.
This post has briefly explained the SCP’s usage to securely transfer files and provided a step-by-step guide to make it more secure as compared to the default.
