Jenkins is an automation and integration Server. In the software development process where Jenkins is deployed, the developer has to just code, the rest of the job (build, test, and deploy) is done by Jenkins. Thus, it acts as a connector between the Development and Operations in a Software development cycle to carry out the repetitive (build, test, and deploy) tasks effectively.
Jenkins has various competitors such as GitLab CI, CircleCI, Travis CI, etc. However, Jenkins has outperformed all these, to date because of its integration with other tools, customizability, and successful track record.
Let’s see how you can install Jenkins on the latest LTS of Ubuntu, i.e., 24.04 codename Jenkins.
Outline:
- Requirements to Install Jenkins on Ubuntu/Linux
- How to Install Jenkins on Ubuntu 24.04
- How to Configure Jenkins for the First Time on Ubuntu 24.04
- Tip: How to Run Jenkins on Port Other Than 8080
- How to Remove Jenkins Completely From Ubuntu 24.04
- Bottom Line
Requirements to Install Jenkins on Ubuntu/Linux
Jenkins has provided the minimum set of hardware and software requirements for Ubuntu users. For the smooth performance, do check the requirements before installing Jenkins:
Hardware Requirements
| Component | Minimum | Recommended |
|---|---|---|
| RAM | 256MB | 4GB |
| Storage | 1GB or 10 GB (if running Jenkins inside Docker) | 50GB |
Software Requirements
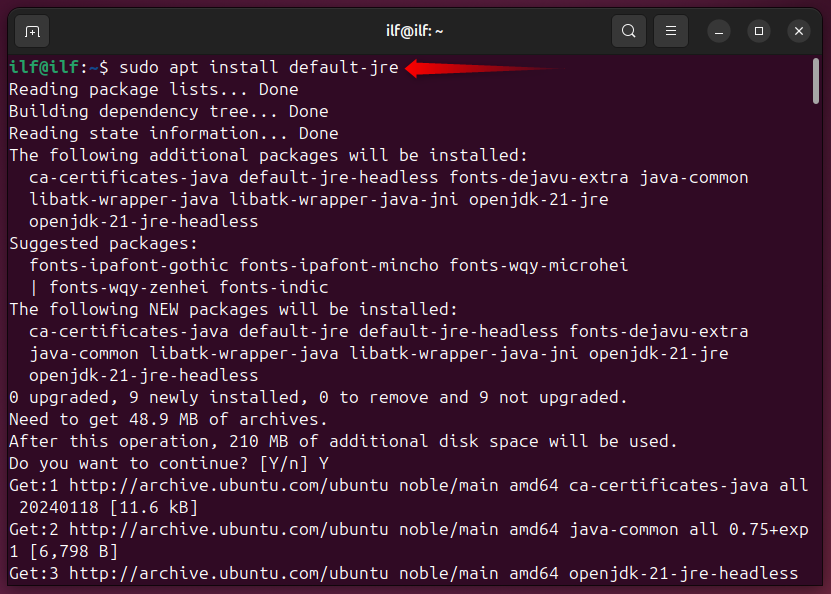
Jenkins is a Java-based server, so you need to have Java installed on your system prior to the Jenkins:
sudo apt install default-jre
Let’s confirm the Java by checking its installed version:

Other Software:
- Browser: This could be either Chrome, Firefox (available on Ubuntu by default), Safari, or Edge.
- Linux OS: which we are using, i.e., Ubuntu.
How to Install Jenkins on Ubuntu 24.04
Jenkins is available through its own repository. This repository is not available on Ubuntu by default. However, it can be added as a trusted repository to get Jenkins safely.
To install Jenkins on Ubuntu 24.04, follow the below steps:
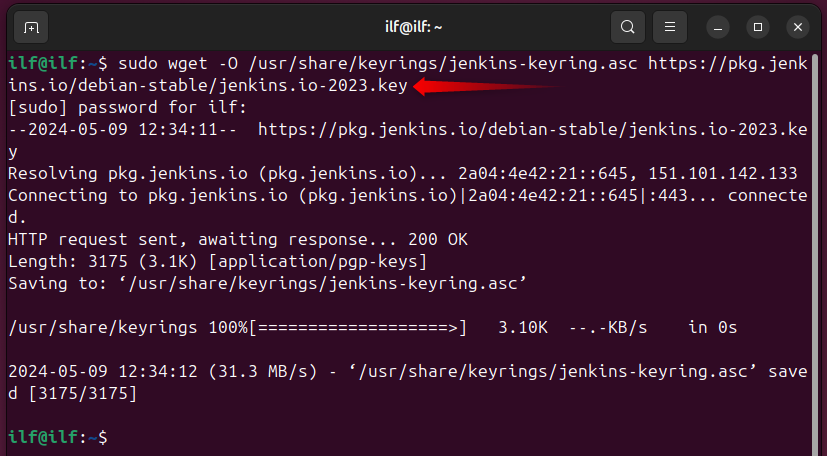
Step 1: Add the GPG Key
Use the below command to download and add the Jenkins repository key:
sudo wget -O /usr/share/keyrings/jenkins-keyring.asc https://pkg.jenkins.io/debian-stable/jenkins.io-2023.key
Note: We are installing the Long-Term Support release of Jenkins. However, Jenkins releases weekly builds (not stable), you can get those weekly builds from their Official Website.
Step 2: Add the Repository
Now, add the Jenkins repository to your apt sources list:
echo "deb [signed-by=/usr/share/keyrings/jenkins-keyring.asc]" https://pkg.jenkins.io/debian-stable binary/ | sudo tee /etc/apt/sources.list.d/jenkins.list > /dev/null

Step 3: Install Jenkins
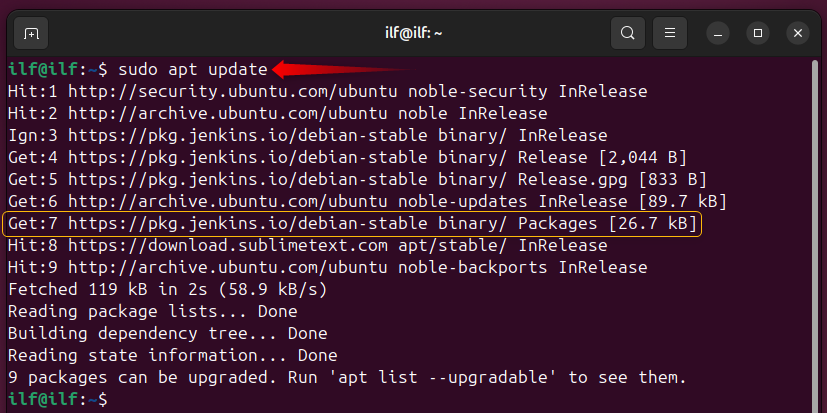
Now, load the latest packages into systems packages list:
sudo apt update
Jenkin has now been integrated into systems packages. Let’s install Jenkins now:
sudo apt install jenkins

Let’s quickly check the Jenkins version to confirm the installation:
jenkins --version

Let’s proceed with the initial setup of Jenkins on Ubuntu 24.04.
How to Configure Jenkins for the First Time on Ubuntu 24.04
The Jenkins server depends on the system service that handles it and the firewall restrictions. Thus, to get started with Jenkins, you need to configure (enable, start, and confirm its status) the Jenkins service and the Firewall port.
Configure the Firewall for Jenkins
Jenkins listens to port 8080, which is not set up by default. First, allow the connections on the Port 8080 using the command:
sudo ufw allow 8080/tcp
sudo ufw reload

Confirm the port is opened:
sudo ufw status

The basic firewall configuration for Jenkins is done now.
Configure the Jenkins Service
To use any program/server depending upon the system service, its relevant service must be running actively. Here are the commands that you can use to enable, start, and check the server’s status:
sudo systemctl enable jenkins
sudo systemctl start jenkins
sudo systemctl status jenkins
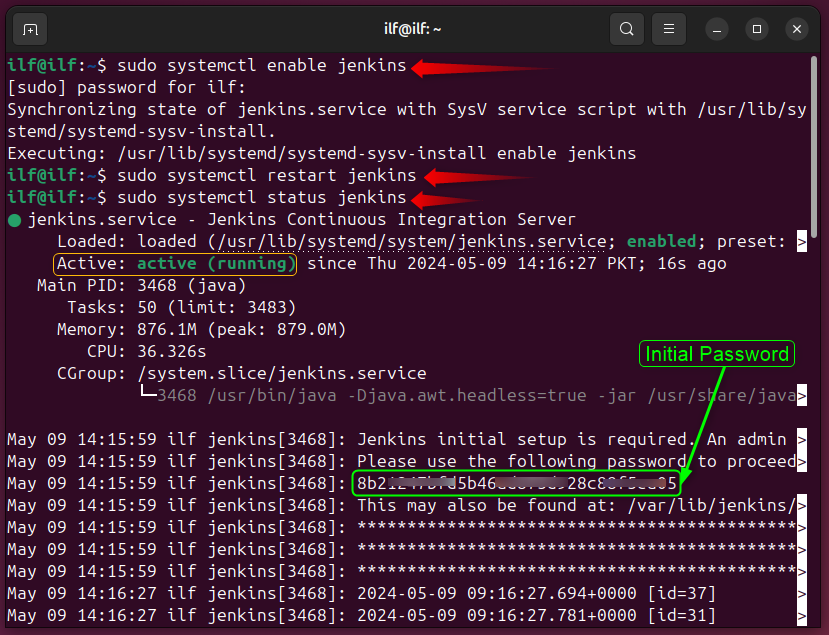
In the status commands’ output, you will see the initial password, you need to copy this password which will be required for an initial login while accessing Jenkins.
Access the Jenkins
Check the IP address of the server:
ip a
Now, use the server IP and the port number to access the Jenkins server:
http://server-ip:8080
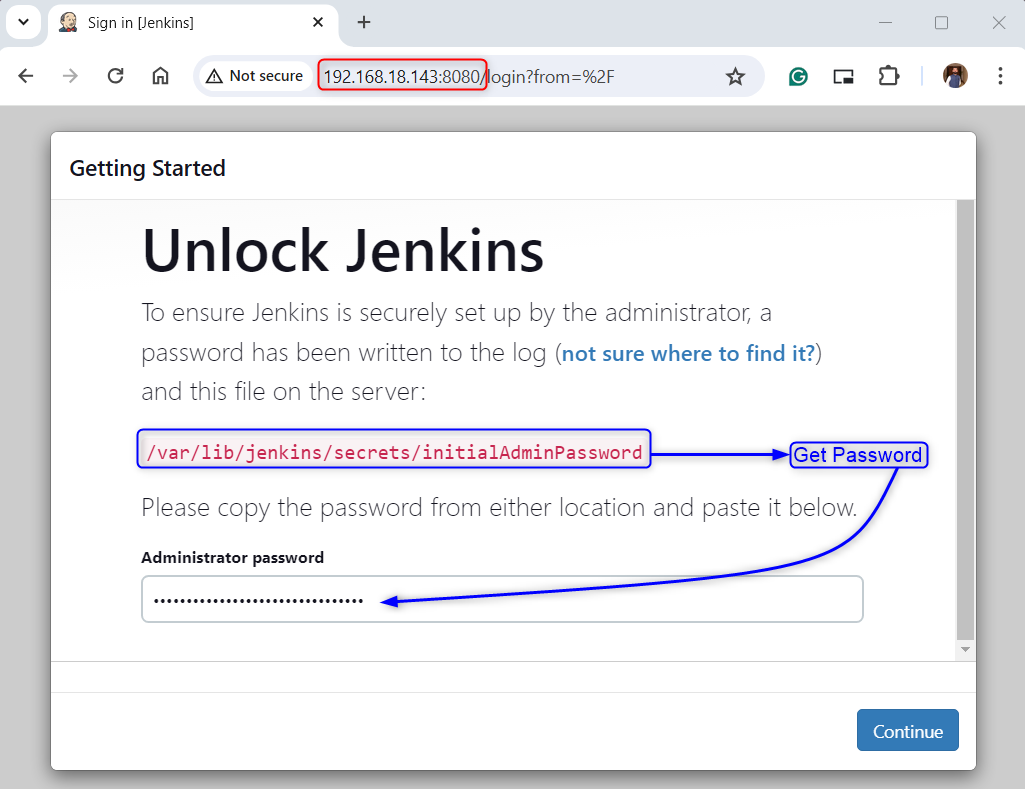
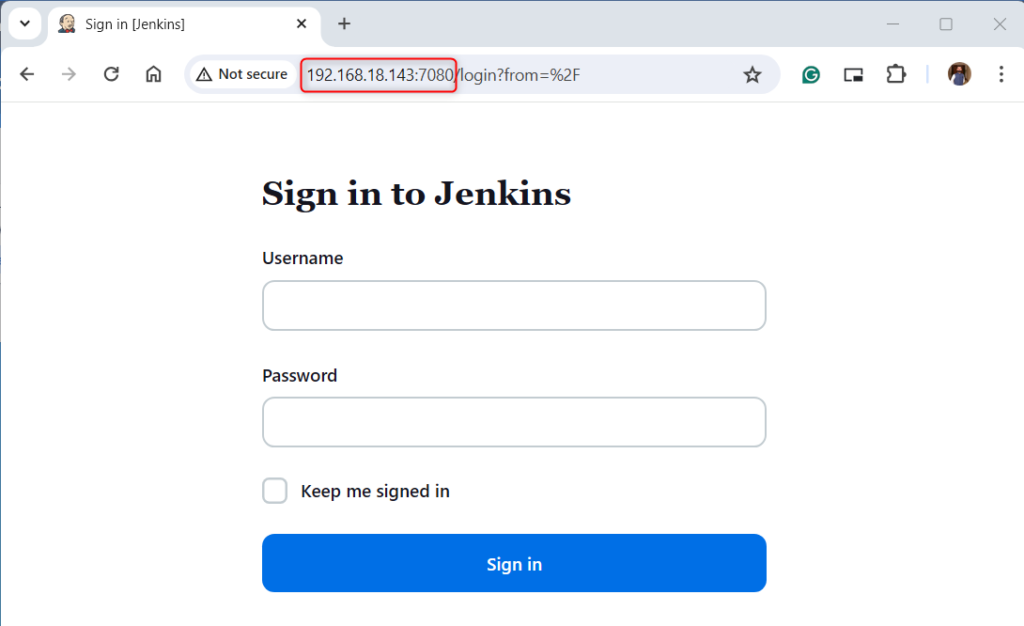
Here, you will be asked to enter the initial administrator password. You can get this password in the service status command (as shown above) or you can get it from the file “/var/lib/jenkins/secrets/initialAdminPassword”:

Here’s the login page of Jenkins:
Once authenticated successfully, you will get the following screen, i.e., Plugin installation. If you know what plugins you require, you must go with the “custom”, else opt for the “suggested plugins” option:

After that, you can now set up an admin user. It is optional but recommended, as you can move with admin as well:

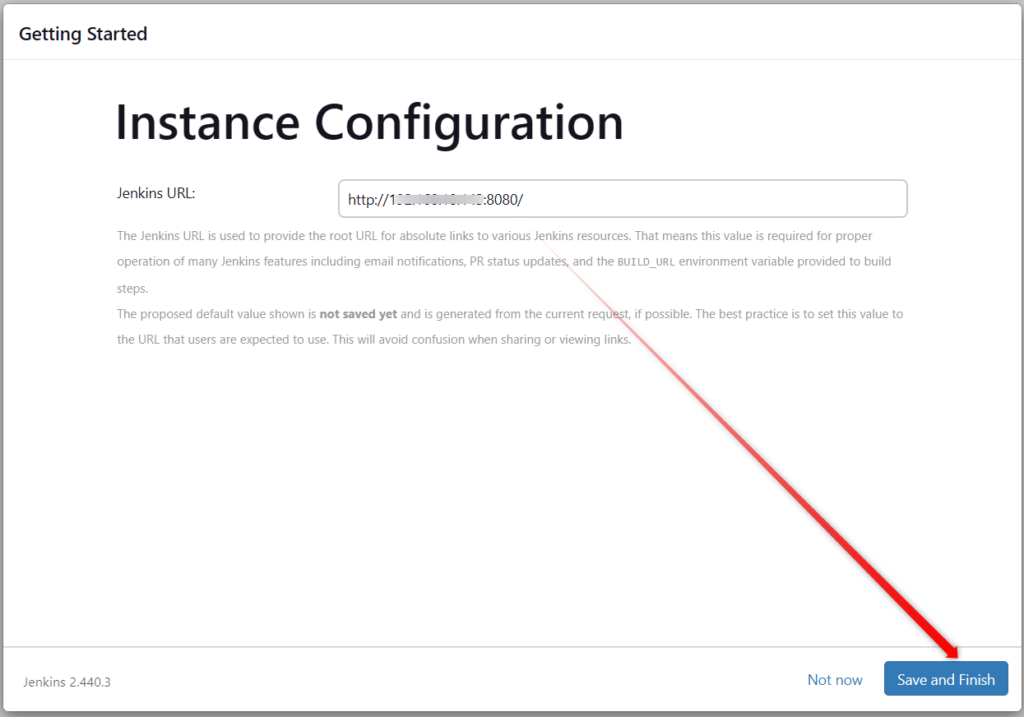
Customize the Jenkins instance URL, i.e., to be provided to the services that will be integrated:
That’s it, the initial setup of Jenkins has been completed, and here’s the first look of the Jenkins dashboard:
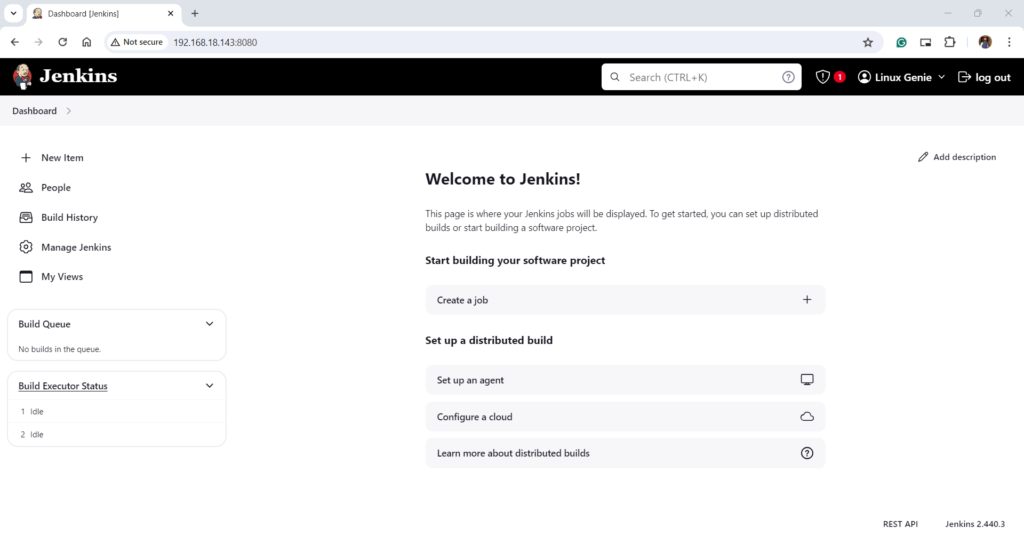
That’s how you can set up Jenkins on Ubuntu 24.04.
Tip: How to Run Jenkins on Port Other Than 8080
Can we change the default Jenkins port? Yes, it is possible and recommended to make Jenkins more secure. The port-changing method of Jenkins is a bit different from the traditional servers, i.e., in recent Jenkins updates, it does not allow changing through its configuration file (where the init system is systemd). Let’s do it:
Step 1: Stop the Jenkins Service
To change the Jenkins default port, first, stop the Jenkins service:
$ sudo systemctl stop jenkins

Step 2: Change the Port
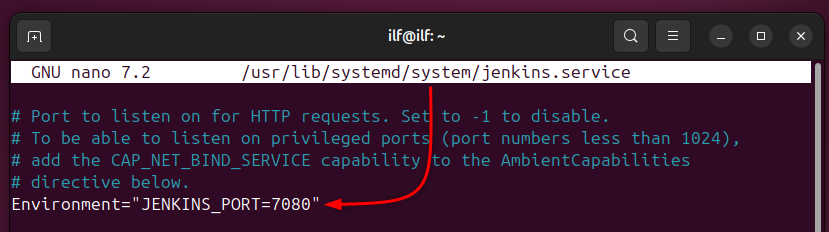
On Ubuntu 24.04, the Jenkins service is controlled by the “systemd” and its port will be changed in the service file of the Jenkins. The jenkins service file is located at “/usr/lib/systemd/system/jenkins-service”.
Open it using any editor and locate the following line:
Environment= "JENKINS_PORT=new-port-num"
This line is already available, you just need to locate it and change the port:
Save the changes and run the following command to reload the systemd units:
sudo systemctl daemon-reload

Allow this port on the firewall:
sudo ufw allow port-num

Note: Also, delete the ufw rule that refers to the previously configured port:
sudo ufw delete allow 8080/tcp
Reload the firewall and also restart the Jenkins service:
sudo ufw reload
sudo systemctl restart jenkins

Step 3: Access Jenkins From New Port
Access the Jenkins using the Server-IP with the newly configured port:
http://server-ip:new-port
That’s how you can change the port for Jenkins on Ubuntu 24.04.
How to Remove Jenkins Completely From Ubuntu 24.04
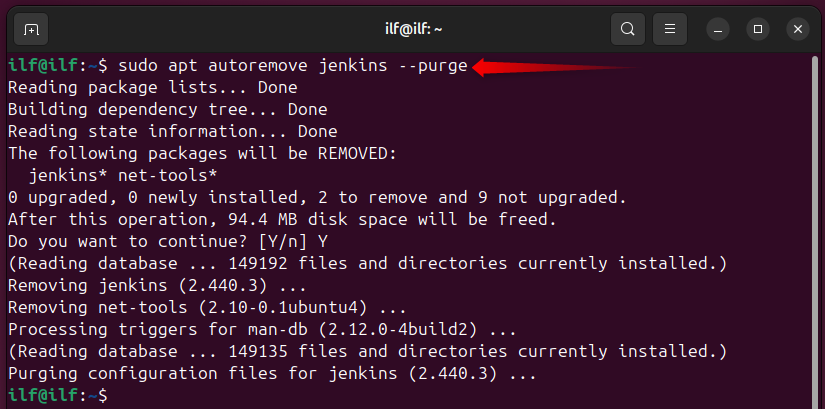
Jenkins can be removed using the command, i.e., partial removal as the repository, and the key remains:
sudo apt autoremove jenkins --purge
To root out the repository and its key from Ubuntu sources, follow the upcoming sections’ commands.
Remove Jenkins Repository
First, check the presence and exact name of the Jenkins repository:
ls /etc/apt/sources.list.d/

As the name is “jenkins.list”. Remove the repository using the command:
sudo rm /etc/apt/sources.list.d/jenkins.list

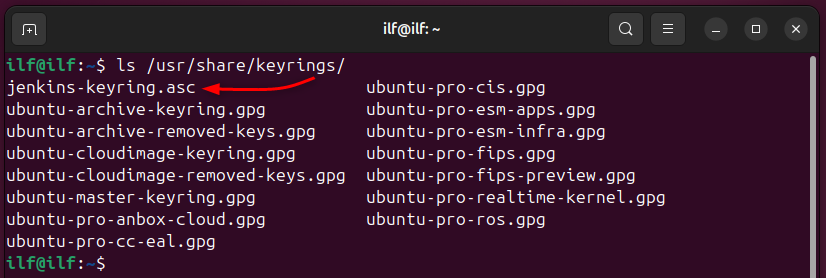
Remove the Jenkins GPG Key
Let’s check the Jenkins’ key name using the command:
ls /usr/share/keyrings/
Remove the Jenkins Key using the command:
/usr/share/keyrings/jenkins-keyring.asc

Remove the Jenkins Data
Jenkins cache and other unnecessary (after uninstallation) data are kept at the two places, i.e., “/var/lib/jenkins/” and “/var/cache/jenkins”. You can also remove these using the “rm -rf” command with root privileges,
That’s all from this Jenkins guide.
Bottom Line
To get Jenkins on Ubuntu 24.04: First, install Java, then, add the Jenkins repository/GPG key and use the command “sudo apt install jenkins”. After installation, Jenkins requires an initial setup to get started. All the installation as well as configuration steps are demonstrated in this guide.
