
When the user logs in to a password-protected account on the Ubuntu system, it asks for the password to verify whether the user is authentic. However, when a single account is used by all the users on the computer, then an automatic login feature is enabled. The automatic login will not ask for a password until this feature is disabled.
This post will demonstrate how to enable or disable the automatic login on Ubuntu with the following outcomes:
- Method 1: Enable or Disable Automatic Login in Ubuntu Using the Terminal
- Method 2: Enable or Disable Automatic Login in Ubuntu Using the GUI
Method 1: Enable or Disable Automatic Login in Ubuntu Using the Terminal
We can enable and disable the automatic login in Ubuntu using the “custom configuration” file. To make the automatic login enable or disable, follow the below steps.
Step 1: Find the Location of Custom Configuration File
First, find the location of the custom.conf file:
$ locate custom.conf
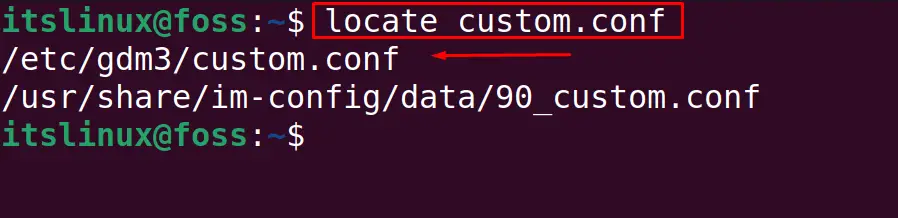
In our case, it is located at /etc/gdm3.
Step 2: Open the File
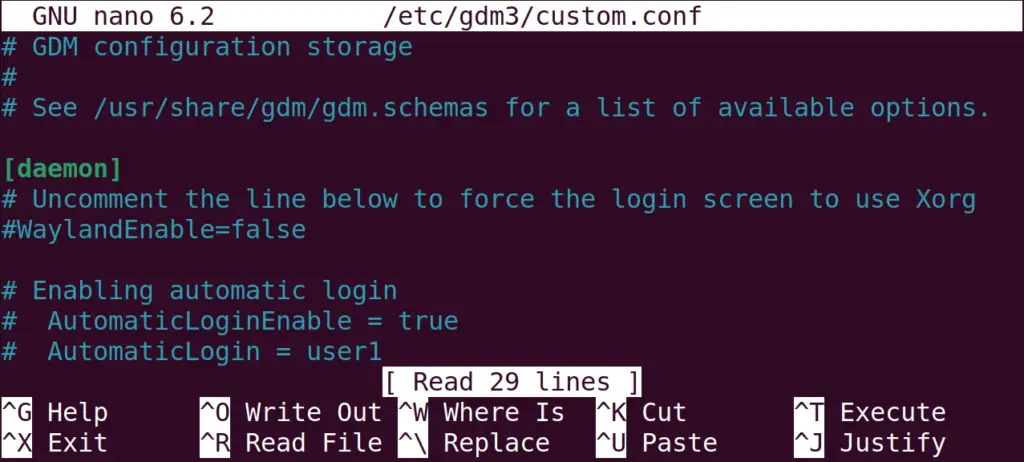
The next step is to open the custom configuration file with the nano text editor:
$ sudo nano /etc/gdm3/custom.conf

The file open should be looks like the below figure:
Step 3: Edit the File
Now its time to edit the file and for it, find the “Enabling automatic login” section, which is by default disabled:
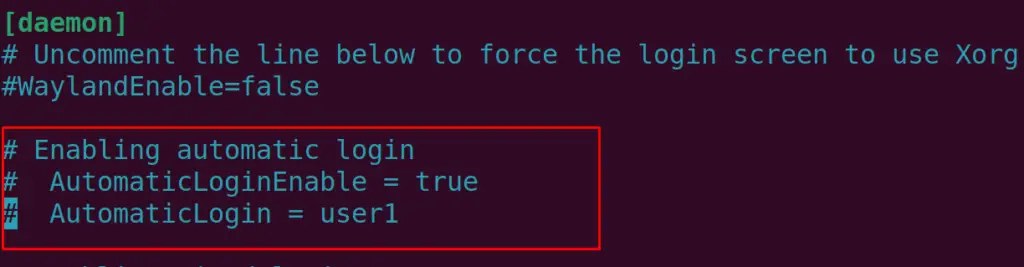
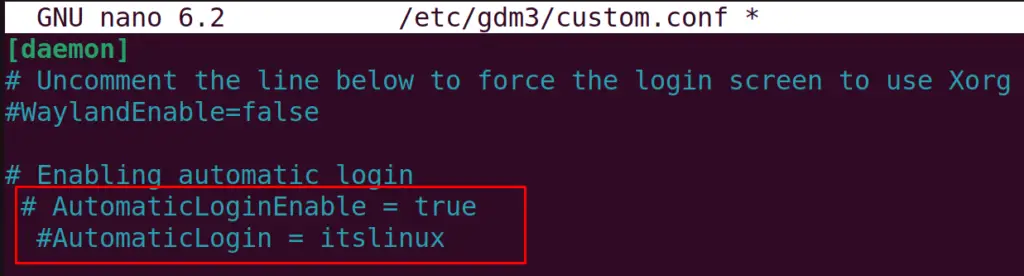
To make it enable, remove the comments from “AutomaticLoginEnable” and “AutomaticLogin”. Also, replace the “user1” with the username for whose you want to customize these settings. For example, we will enable the automatic enable for user “itslinux”:

Save the file using CTRL+S and close the file with CTRL+X.
Similarly, to disable the automatic login, open the file again and comment on both lines:
In this way, the automatic login can be enabled or disabled using the terminal in Ubuntu.
Method 2: Enable or Disable Automatic Login in Ubuntu Using the GUI
All the steps listed here are demonstrated on Ubuntu Jammy Jellyfish, the latest LTS of Ubuntu.
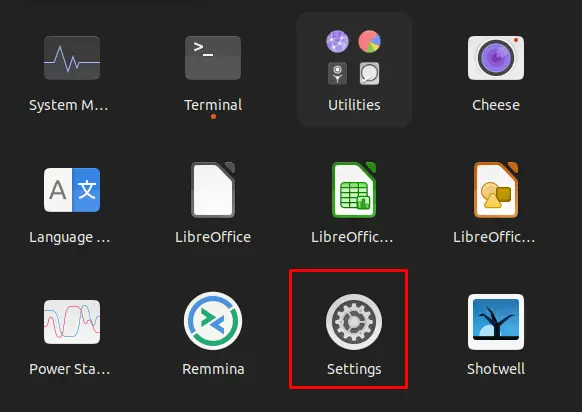
Step 1: Open the Settings
This method is quite convenient because it uses the Graphical Interface to do this; first, open “Settings” from the applications menu:
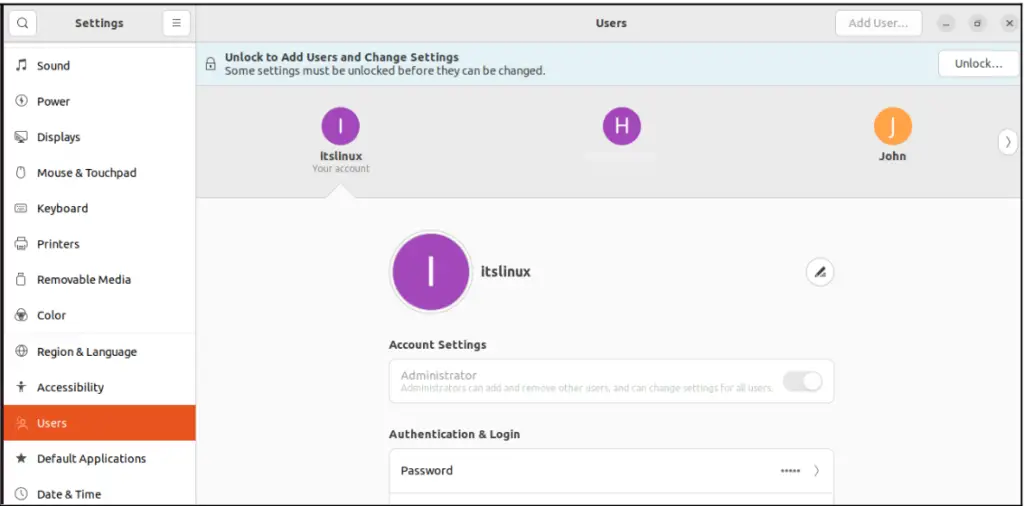
Step 2: Unlock the User Accounts
Then, go to the “Users” option available on the left side of the screen, next to the “Accessibility” option, and then click on the “Unlock…” option present at the right top of the screen:
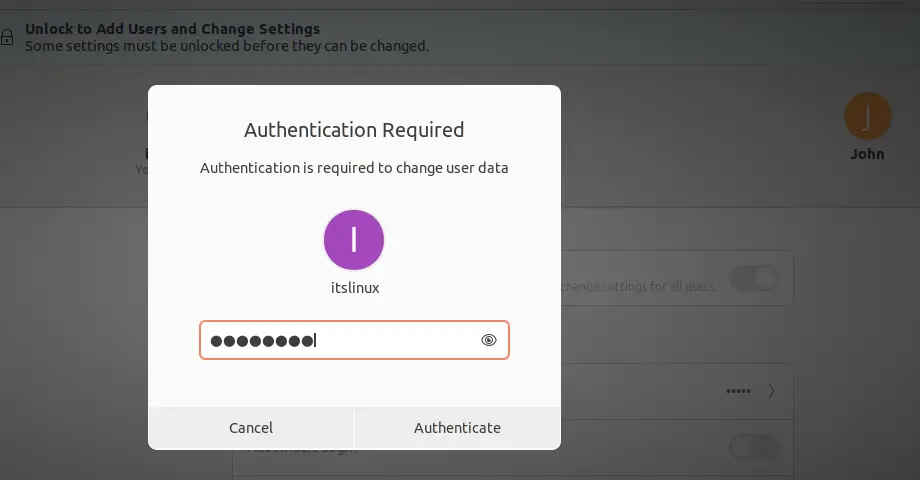
It will ask for the user account password for the authentication purpose, enter the password and click on the “Authenticate” option:
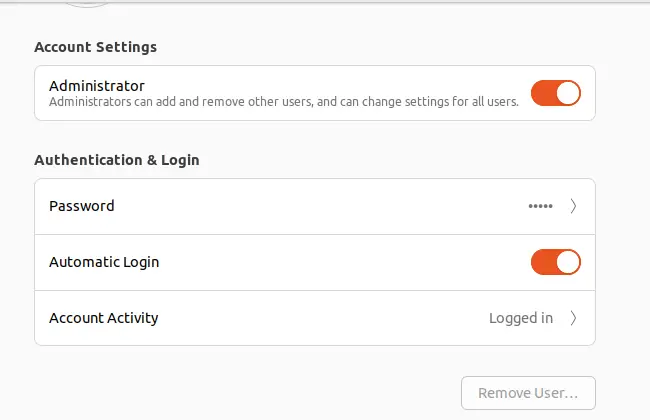
Step 3: Enable/Disable Automatic Login
Then a box will pop up with different options, find the “Automatic Login” with a toggle button:
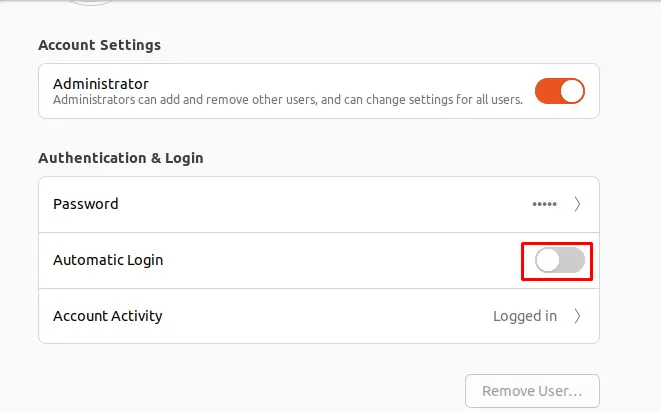
If the toggle button of “Automatic Login” is off, it means that the Automatic Login has been disabled, and if it is on, then the “Automatic Login” is enabled:
When the settings of the “Automatic Login” are set, close the window and exit from the Settings to save the new changes made.
Conclusion
To enable and disable the automatic login in Ubuntu, open the settings, find the Automatic Login option with its toggle button in the “User” section and turn it on or off. Another method is by editing the custom configuration file in Ubuntu which is located at /etc/gdm3/custom.conf. In this blog, both the command line and the graphical interface-based method of enabling and disabling Automatic Login have been discussed.
