
Linux Mint 21 is the latest Long Term Support release of Linux Mint and is also a Debian-based distribution like Ubuntu and offers more or less the same features as Ubuntu. Linux Mint comes with three desktop environments that are Cinnamon, XFCE, and Mate. It also supports multimedia drivers and comes with around 30000 packages.
This Linux-based post will demonstrate the method to install Linux Mint from USB.
How to Install Linux Mint 21 From USB?
To install Linux Mint 21 from USB, the following steps are performed:
These steps are explained in detail in the next sections.
Step 1: Download the ISO File of Linux Mint 21
To download the latest version of Linux Mint, open the mentioned link in your favorite web browser and then choose any of the three displayed desktop environments. Then by clicking on the “Download” button, the iso file of the Linux Mint 21 will be downloaded.
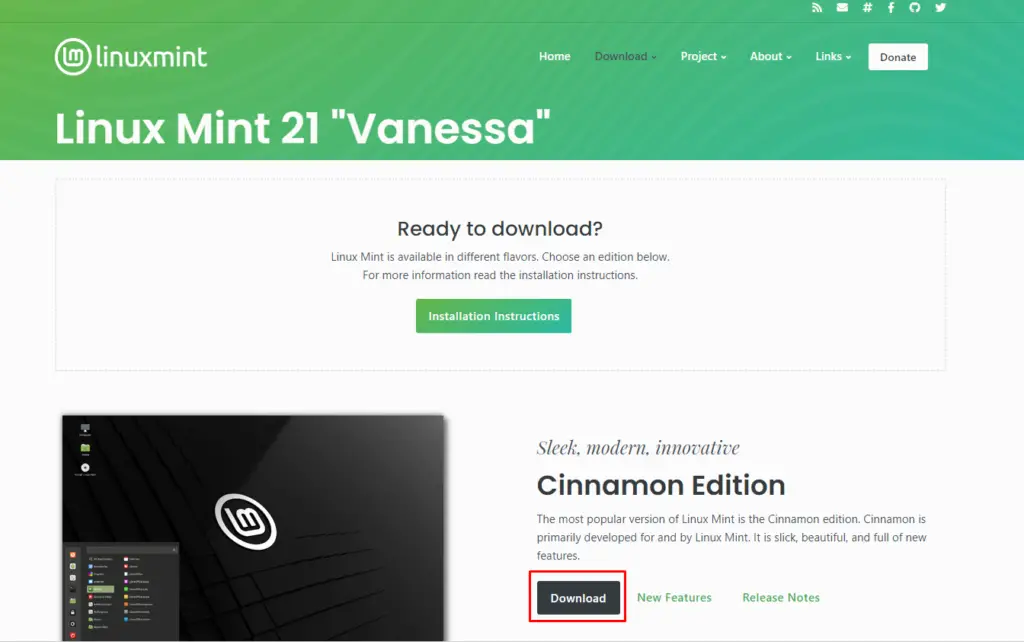
We have downloaded the ISO file of the Linux Mint 21 with the Cinnamon desktop environment.
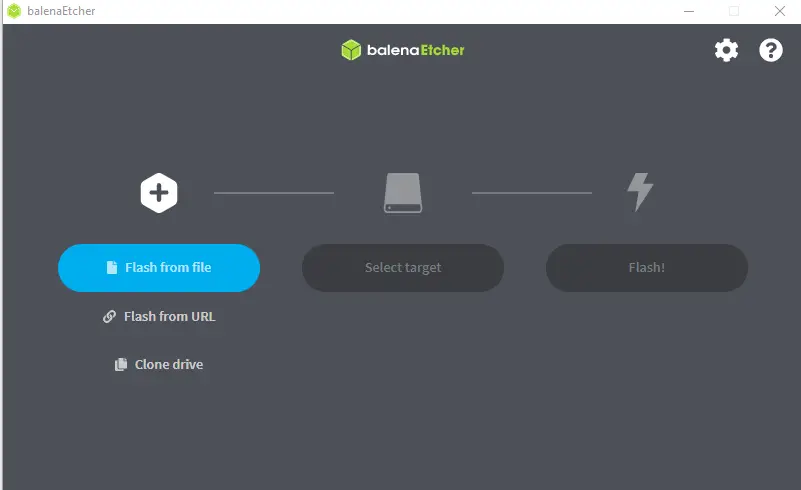
Step 2: Make the USB Bootable With Linux Mint 21
The next step is to make the USB bootable, and for this purpose, download any flash tool for the disk images. We have the “BalenaEtcher”; launch it: choose the option “Flash from file” and select the downloaded ISO file of the Linux Mint 21:
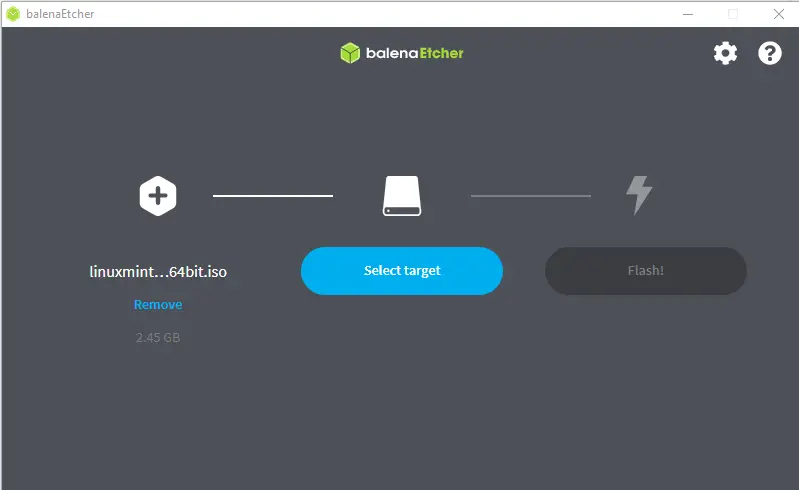
Then, select the USB by choosing the “Select target” option:
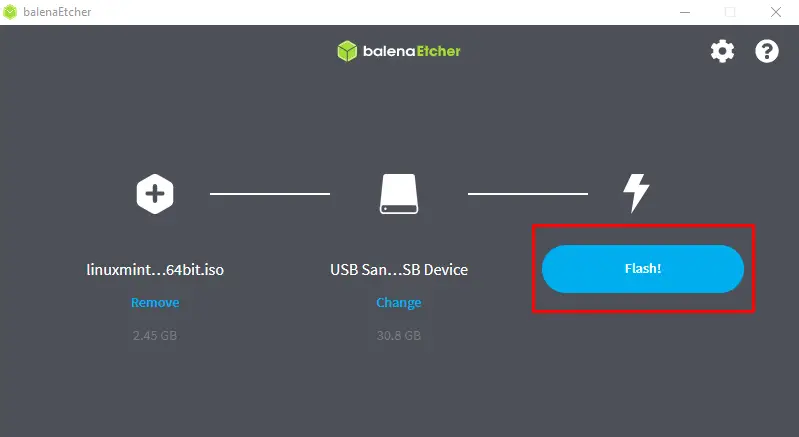
Finally, click on the “Flash!” option to start making the USB bootable:
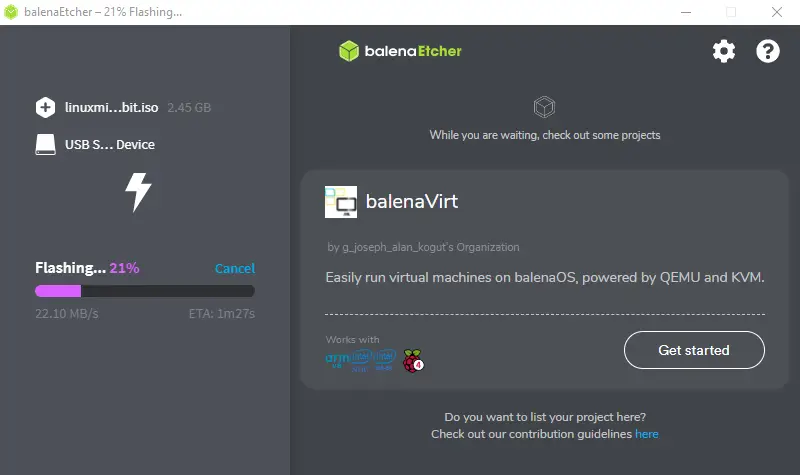
The USB will start to be flashed with the disk image of Linux Mint 21:
When the “Flash Complete” option is displayed on the left pane. Close the BalenEtcher:

Now, let’s move to the next step to install Linux Mint 21.
Step 3: Install Linux Mint 21 on the Computer
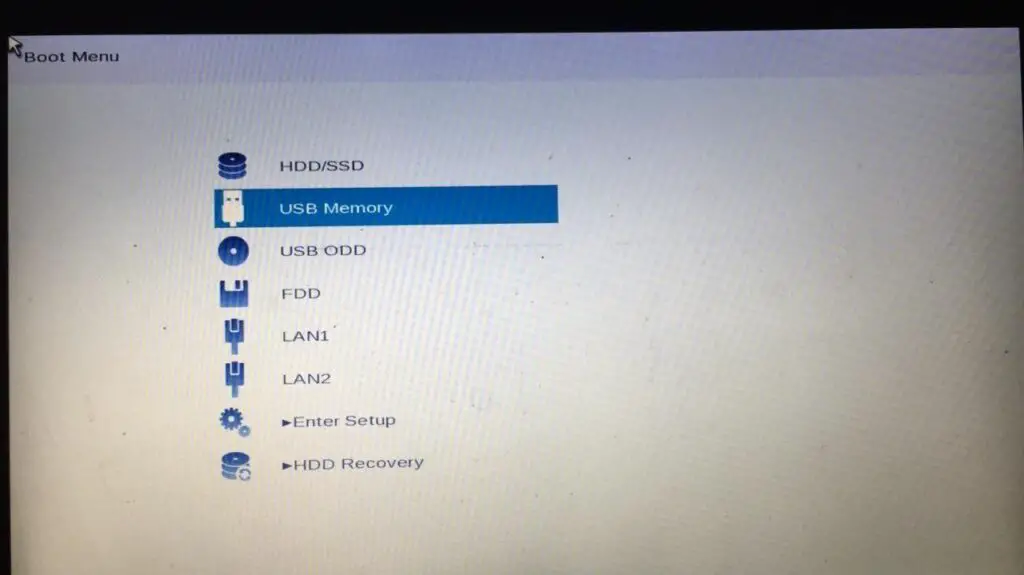
Restart the computer after connecting the bootable USB. Press the boot key of the computer to open the boot menu and boot the computer from the USB:
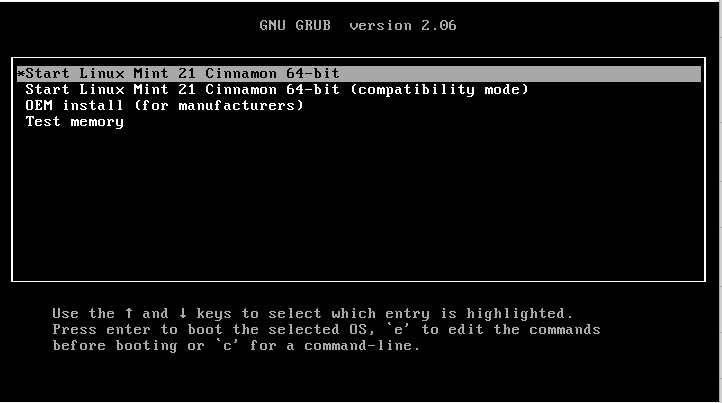
Choose the “Start Linux Mint 21 Cinnamon 64-bit” option from the GNU GRUB and press the “ENTER” key:
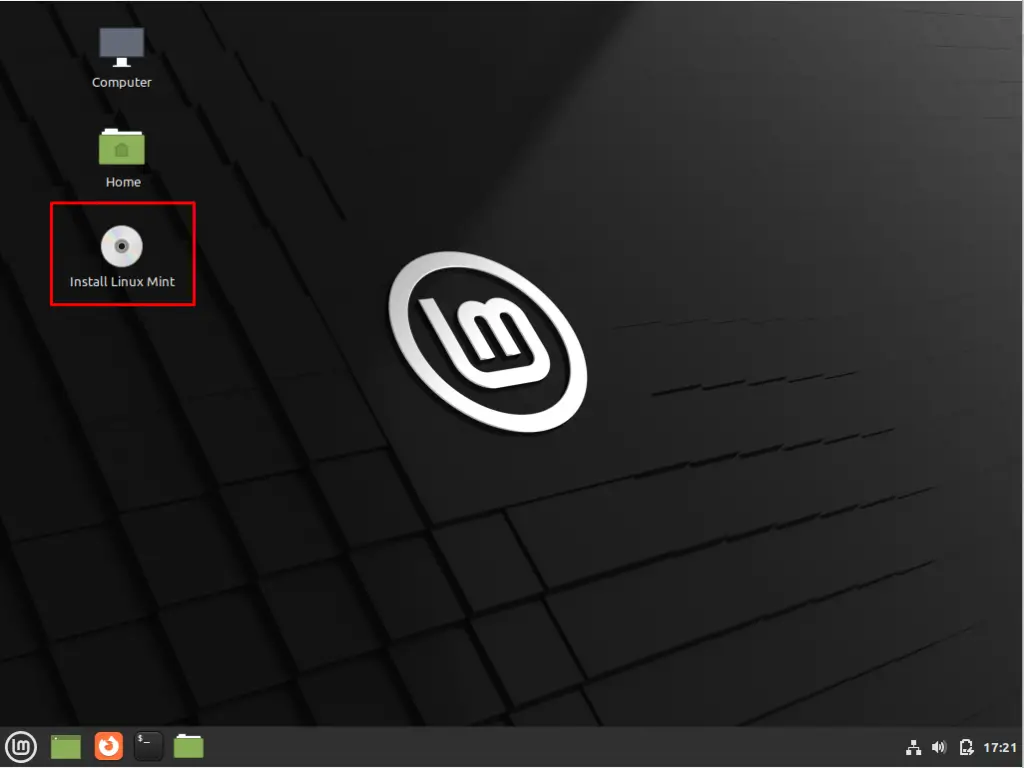
Click on the “Install Linux Mint” icon to start the installation:
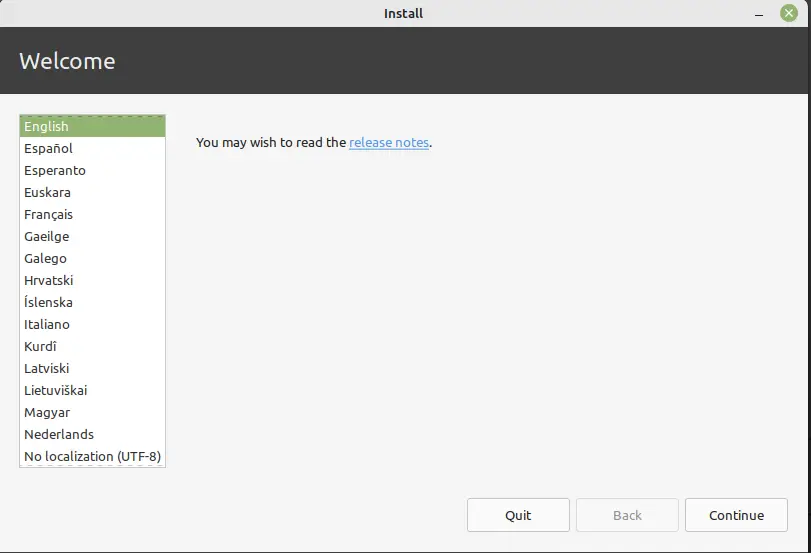
Select the language for the installation process as well as for the operating system:
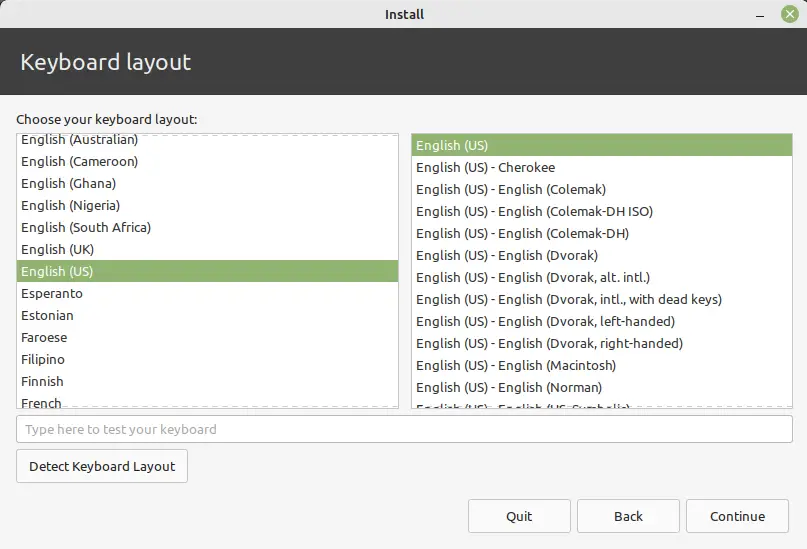
Then, select the layout of the keyboard which is attached to the computer:
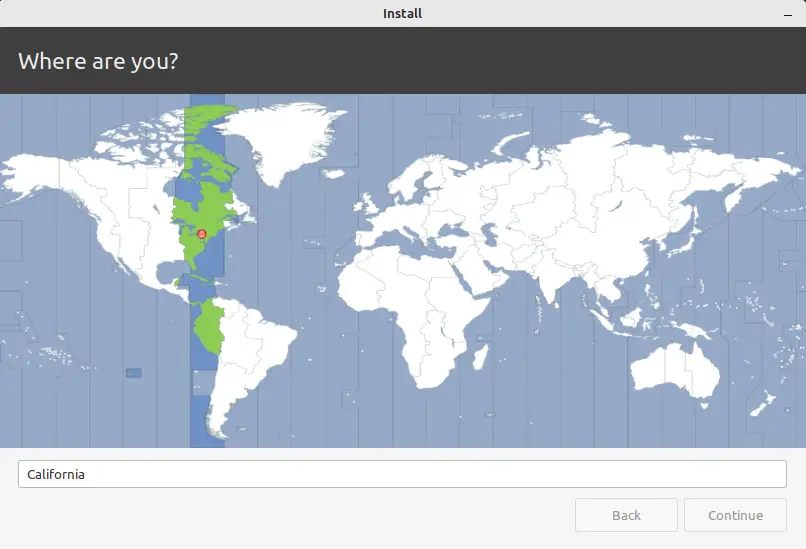
Select the region carefully, as it will configure the time and date for the computer according to that region:
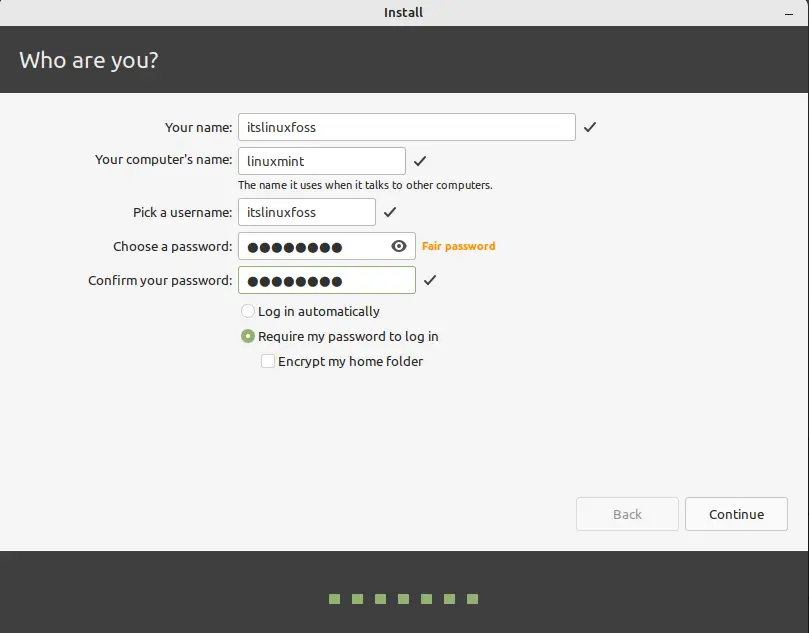
Then, create the user and set a password for it. This user can use the computer after providing the set password. Also, set the computer name by which the computer can be recognized:
When all is done, click on the “Continue” button to start the installation:
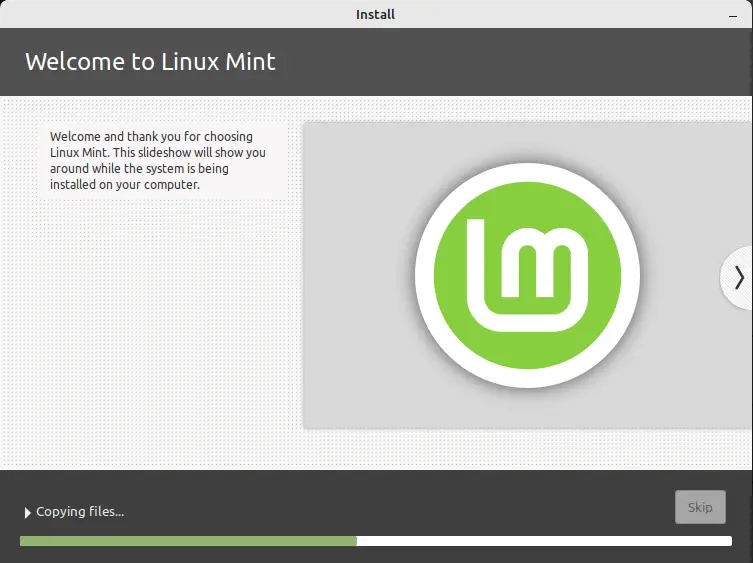
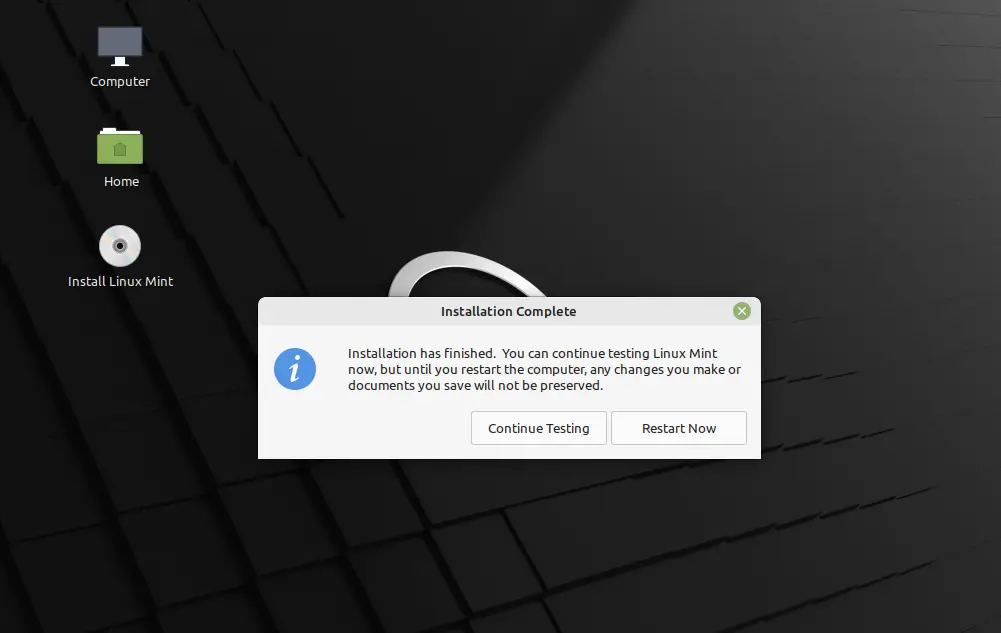
When the installation is completed, either you can test the installed Linux Mint 21 or can restart the computer to use the Linux Mint 21. We are going to restart the computer to use the Linux Mint 21:
Type the password set in the previous steps:
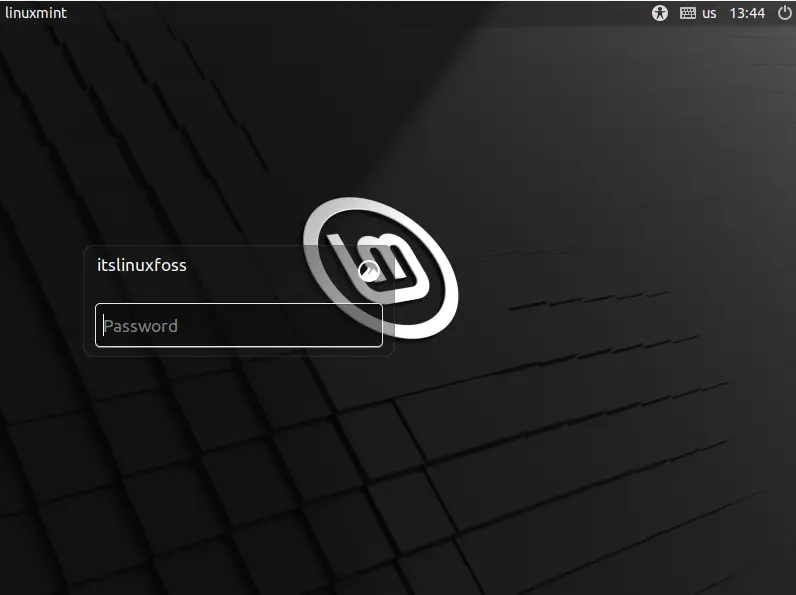
After successful authentication, the home screen of the Linux Mint 21 is displayed on the screen:

That’s all about the installation of Linux Mint 21.
Conclusion
To install Linux Mint 21 from USB, first, download the iso file of Linux Mint 21, make the USB bootable with the downloaded iso file, and finally install it on the computer. This post demonstrates a step-by-step guide to installing Linux Mint 21 from USB.

Check our LinkedIn company page