MySQL is a database management system widely used to integrate databases with web services. It implements a relational model, meaning the data is saved in tables and managed through Structured Query Language also known as SQL. Many high-profile web services like Facebook, YouTube, and Yahoo use MySQL as their database management system.
This guide will provide comprehensive step-by-step instructions on installing the latest MySQL version on Ubuntu 24.04, codenamed Noble Numbat. Moreover, the steps to secure the database system will also be provided.
- Preparing for Installation
- Installing MySQL on Ubuntu 24.04
- Securing MySQL on Ubuntu 24.04
- Using MySQL on Ubuntu 24.04
- Allowing Remote Access to MySQL
- Uninstall MySQL from Ubuntu 24.04
Preparing for Installation
To install the latest MySQL on Ubuntu 24.04 the following requirements must be met.
- Ubuntu Server or Ubuntu Desktop
- A user with sudo privileges
- Network Connection
Installing MySQL on Ubuntu 24.04
The step-wise instructions to install Ubuntu 24.04 are listed below:
Step 1: Update the Packages List
Start by updating the local packages index.
sudo apt update
The apt update command grabs information from the local package repository located at /etc/apt/sources.list.
Step 2: Install MySQL on Ubuntu 24.04
The MySQL package is available for free on the default Ubuntu repository. To get MySQL server on Ubuntu 24.04 LTS use the apt install command.
sudo apt install mysql-server

The MySQL package will be downloaded and installed on Ubuntu.
Step 3: Verify Installation by Checking MySQL Version and Service Status
To verify the installation, let’s check the installed version of MySQL.
mysql --version

Once the installation is completed, the MySQL service automatically starts in the background. To check the MySQL service status, use the command given below:
systemctl status mysql.service
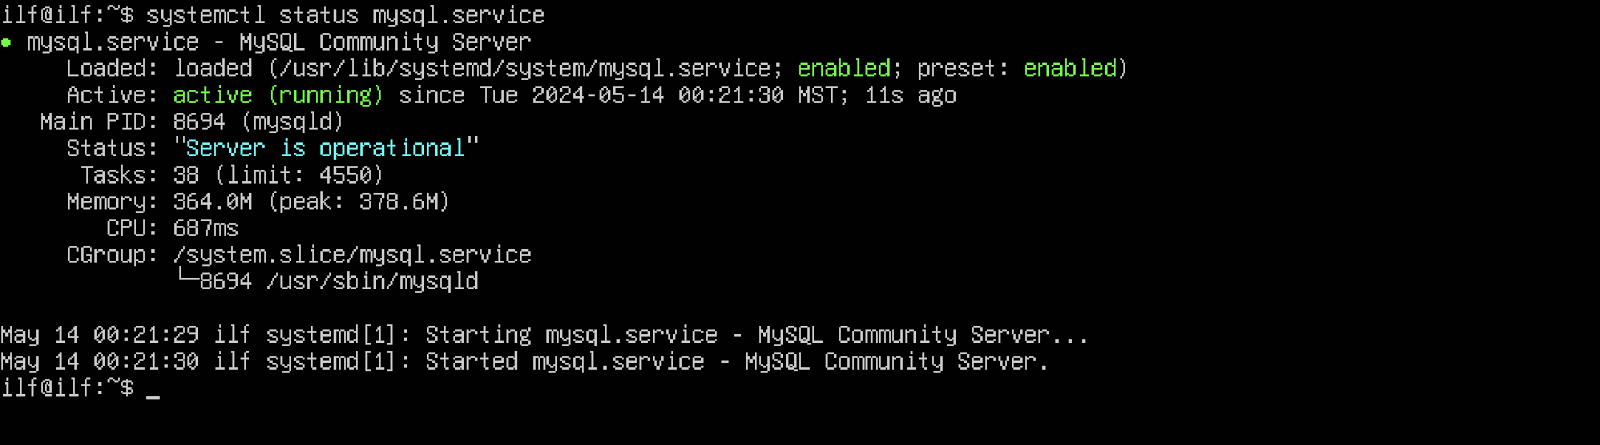
The output shows that MySQL is successfully installed and its daemon is actively running.

If MySQL is loaded but not running then to start the service use the command given below:
sudo systemctl start mysql.service
Securing MySQL on Ubuntu 24.04
The MySQL comes with a script that is used to make MySQL installation secure. By default, MySQL uses the auth_socket plugin to authenticate the user connects from a local computer. So, as long as you are using MySQL for testing purposes you can use the auth_socket plugin. But for production and commercial usage, it is essential to set a password and secure the installation.
Step 1: Set Root User Password
Before running the secure installation script, it is advised to create a password for the root user. It will immediately secure MySQL from unknown access.
First, access the MySQL shell by using the command given below:
sudo mysql
On executing the command, you will have to enter the password. At this point provide the system password to proceed.
Now, run the ALTER USER query to set the password for the root user.
ALTER USER ‘root’@’localhost’ IDENTIFIED WITH mysql_native_password By ‘set_password’
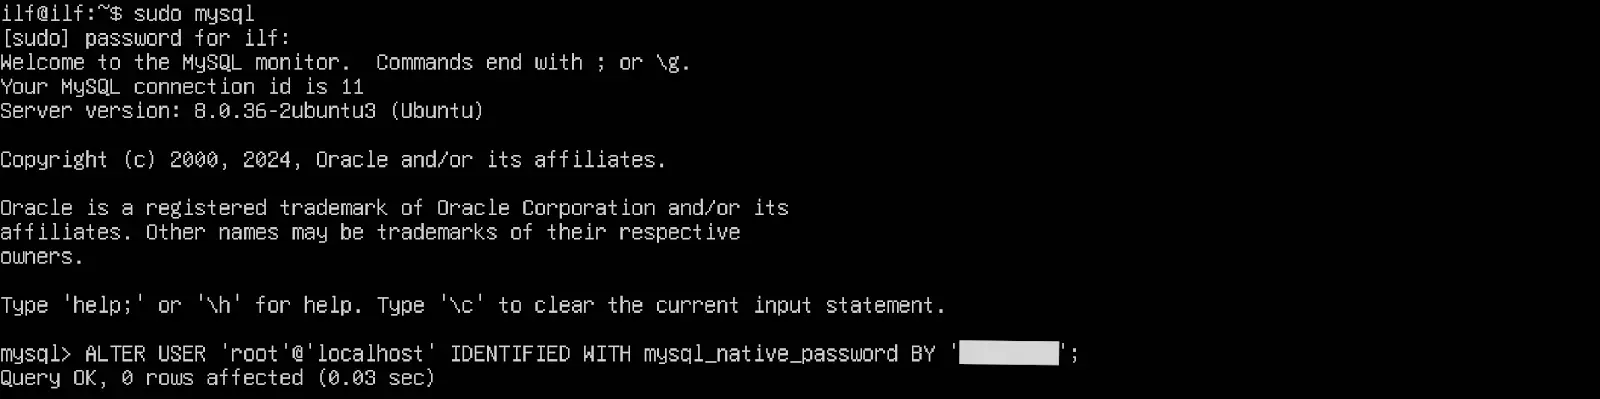
Don’t forget to replace the set_password with a strong password.
The mysql_native_password is a plugin for user authentication.
Save the modification by flushing the privileges and exiting the MySQL session.
FLUSH PRIVILIGES;EXIT;

Step 2: Run Secure Installation Script
To make MySQL database secure, it comes with a secure installation script that performs the following tasks:
- Validate the Root Password
- Remove the anonymous user
- Remove the test database
- Remove root account access from outside the local machine
Execute the secure installation script with sudo.
sudo mysql_secure_installation
Enable Password Validation
First, it will prompt you to enable password validation for users. If you want to validate the password strength for the current and new users press Y and then Enter.
It will give you 3 options for password strength LOW, MEDIUM, and STRONG. Press 0, 1, or 2 for LOW, MEDIUM, and STRONG respectively. Now, any current user and all the new users will be validated by the password security level set at this point.
Next, it will test the root password and prompt with a strength score, if you want to change the root password then press Y and then Enter.
Now, provide the new password and then verify it by re-typing it.
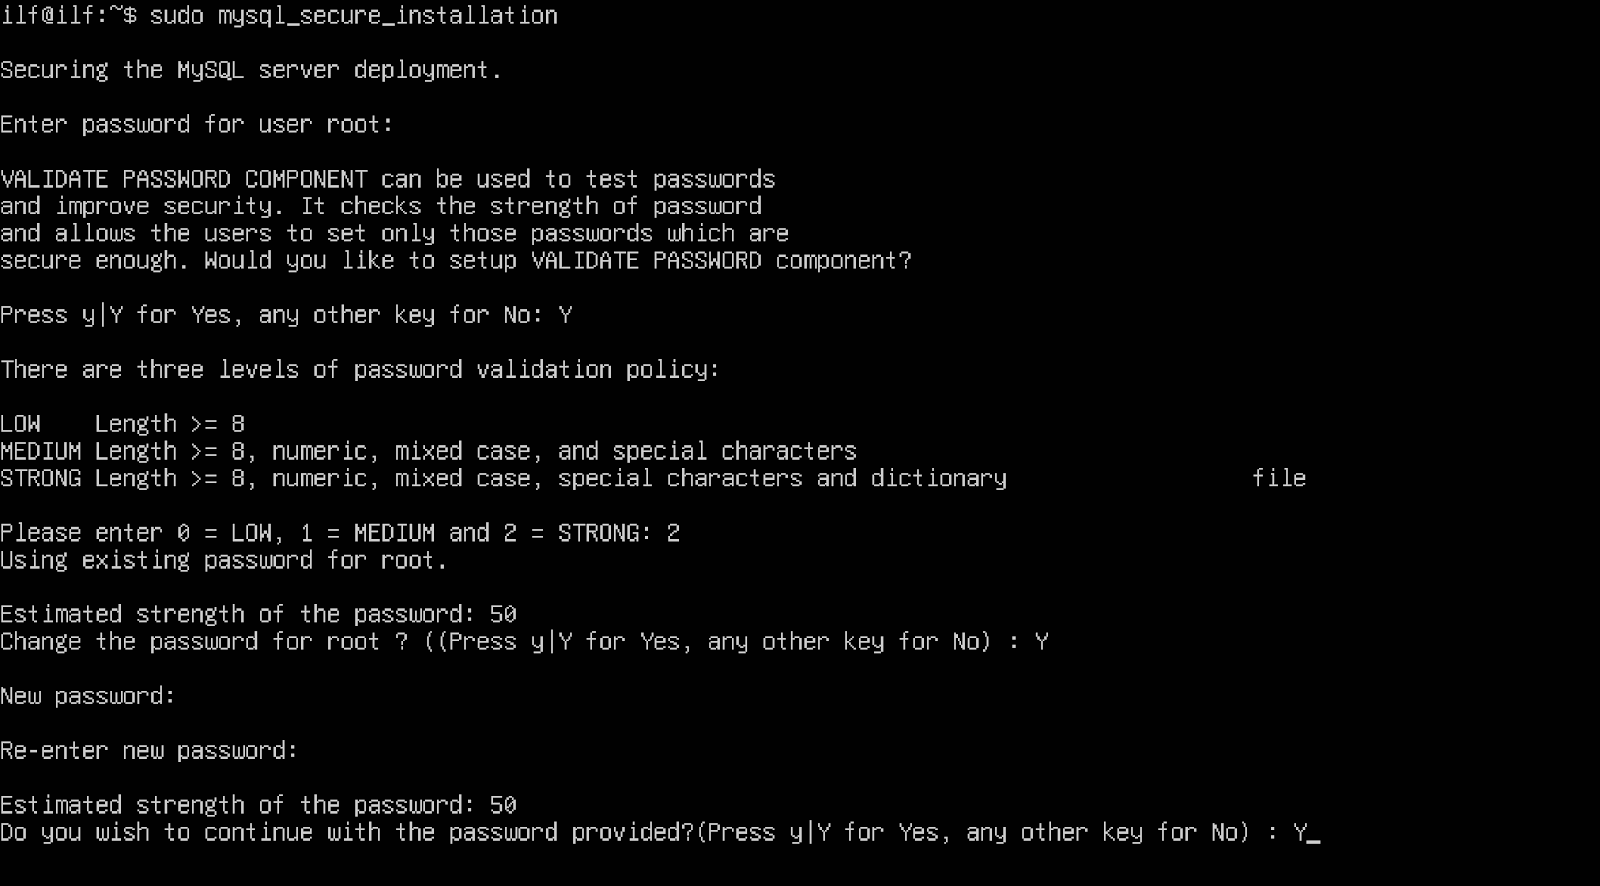
Or if you don’t want to modify the password simply press Enter to move to the next step.
Remove Anonymous User
By default, MySQL has an anonymous user so anybody can access the MySQL shell without any user account. To enhance security, remove the user by pressing Y and then Enter.

Remove Root Login Access from Remote
Next, disallow the remote access of MySQL from the remote by pressing Y and then Enter.

Remove the Test Database
MySQL comes with a test database for testing purposes which is accessible to all users including anonymous. It is recommended to remove it and privileges to it.

The MySQL installation has now been made secure.
Using MySQL on Ubuntu 24.04
This section will demonstrate the basic usage of MySQL on Ubuntu through the terminal commands and SQL queries.
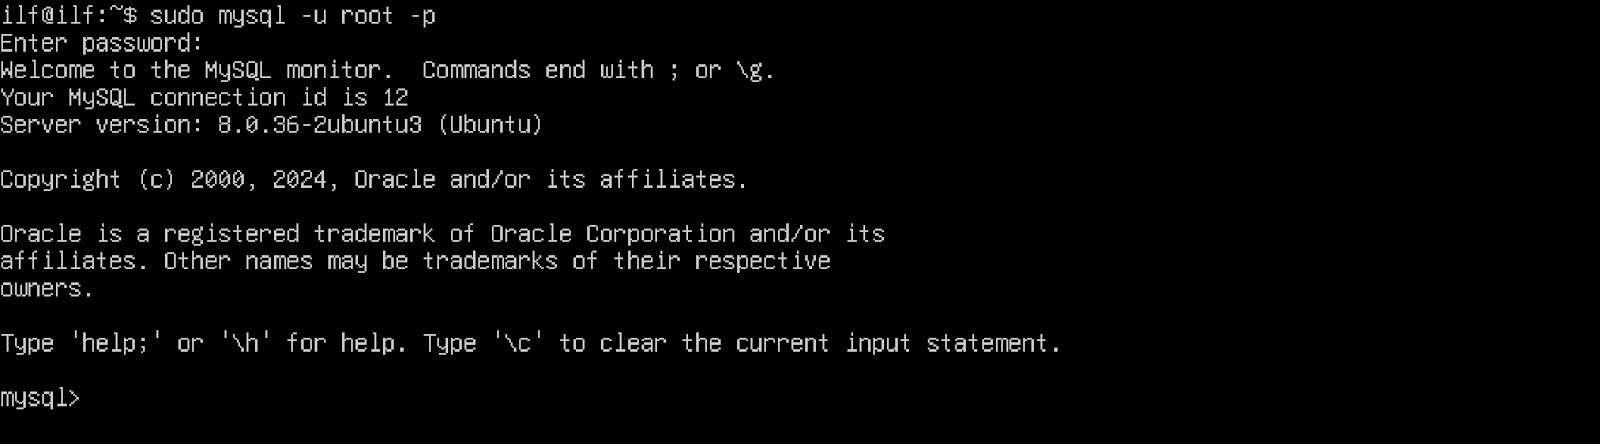
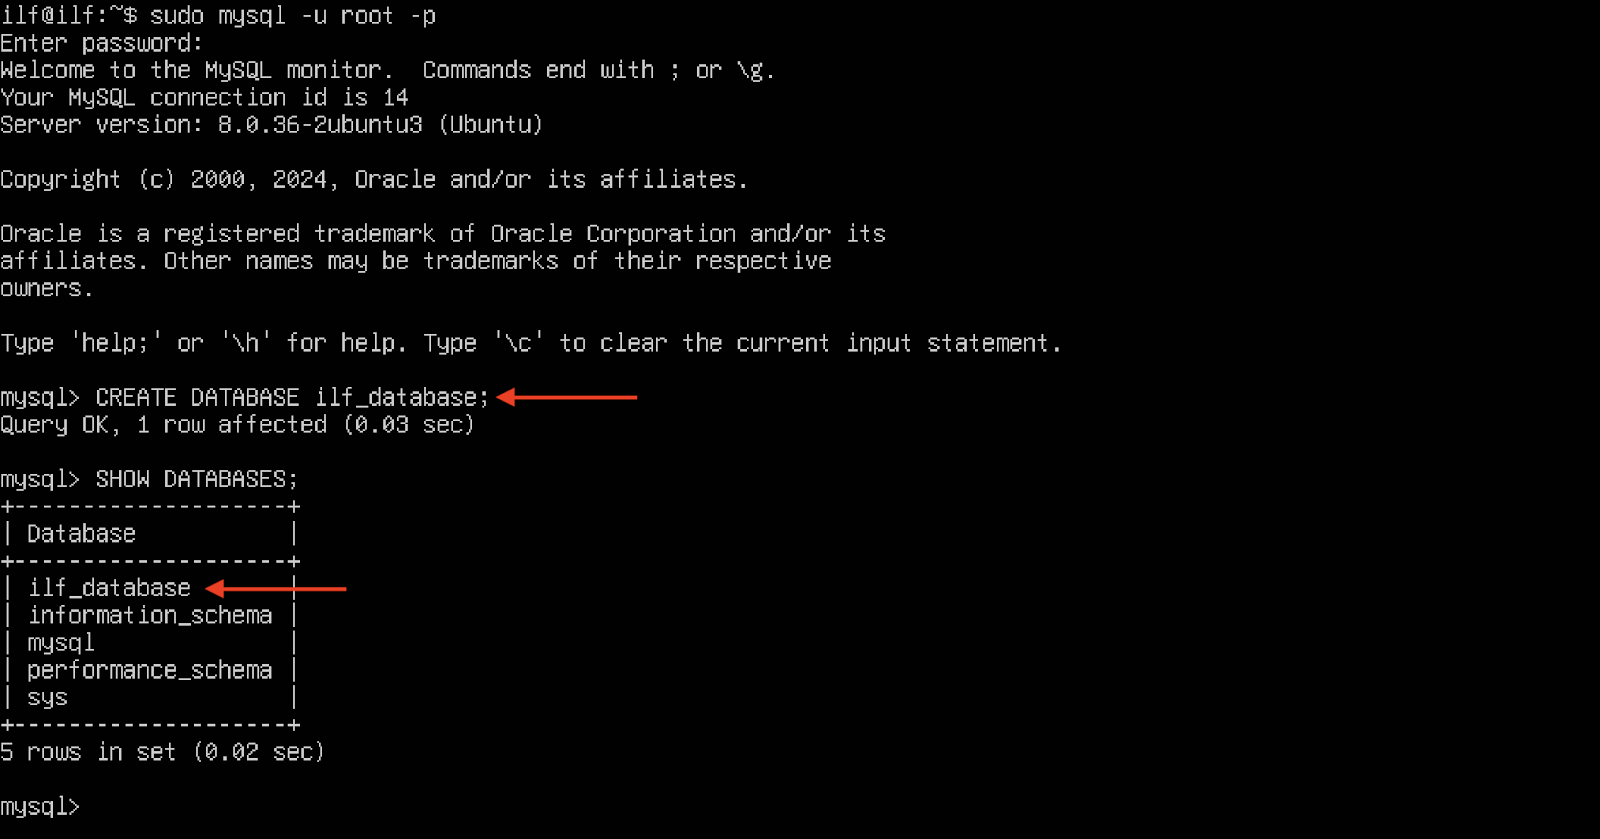
Log in to MySQL Shell
First log in to the MySQL shell using the command given below:
sudo mysql -u root -p
Type the password set in the secure installation section.
Create a New User
The root user is the main user that can access MySQL and modify it. For better security, and giving MySQL access outside administrative operations, it is recommended to create a separate user.
The CREATE USER query is used to create a new MySQL user.
CREATE USER ‘ilf’@’localhost’ IDENTIFIED WITH mysql_native_password BY ‘demo’;
There are various password security plugins, that can be used.
| mysql_old_password | Old and is no longer in use |
| mysql_native_password | Use SHA1, less secure and predictable |
| sha256_password | Use SHA256, recommended. |
The sha256_password is highly recommended; however, it has some known issues with PHP.
The new user does not own permission the modify the MySQL databases. Use the query given below to give this user the required privileges.
GRANT ALL PRIVILEGES ON *.* TO ‘ilf’@’localhost’ WITH GRANT OPTION;
Refresh the MySQL privileges using the FLUSG PRIVILEGES query.
FLUSH PRIVILEGES;
Now the new user is ready to manage the databases.
Create a Database
The database is a sort of parent directory that contains all the tables associated with that database. The MySQL database can be created using CREATE DATABASE query with the database name.
CREATE DATABASE <database_name>;
To view databases, use the following query.
SHOW DATABASES;
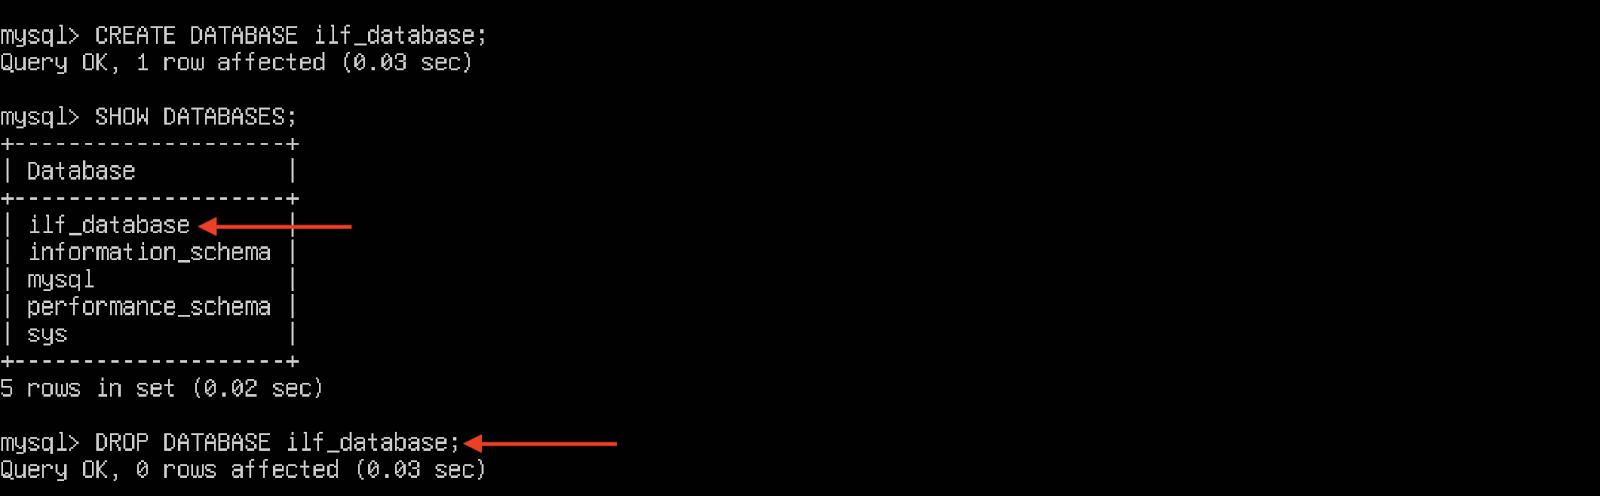
Delete Database
If you want to delete a database, simply use the DROP DATABASE query with the database name.
DROP DATABASE <database_name>;
Exit the MySQL Session
To end the MySQL session, use the EXIT query.
EXIT;
Allowing Remote Access to MySQL
Due to security reasons, MySQL only listens to the connection from the local host. To allow remote access to MySQL, the bind address needs to be changed in the mysqld.conf file.
Warning! It is always a good practice not to allow MySQL remote access and only enable it when necessary. Therefore, be careful while following the steps mentioned in this section to allow remote access to your MySQL database.
Steps by step instructions to allow remote access to MySQL are given below:
Step 1: Grant Privileges to Access MySQL from Remote
First of all, grant privileges to the user and the IP address from where MySQL will be accessed.
GRANT ALL PRIVILEGES TO ‘user’@’IP_ADDRESS’ IDENTIFIED BY ‘password’;
Refresh the MySQL privileges.
FLUSH PRIVILEGES;
Step 2: Open the mysqld.conf File
Use any terminal-based text editor to open the configuration file.
sudo nano /etc/mysql/mysql.conf.d/mysqld.conf
Step 3: Change the Bind Address
In the file, locate the bind-address and mysqlx-bind-address directives. And change their default values from 127.0.0.1 to 0.0.0.0 as shown in the image below.
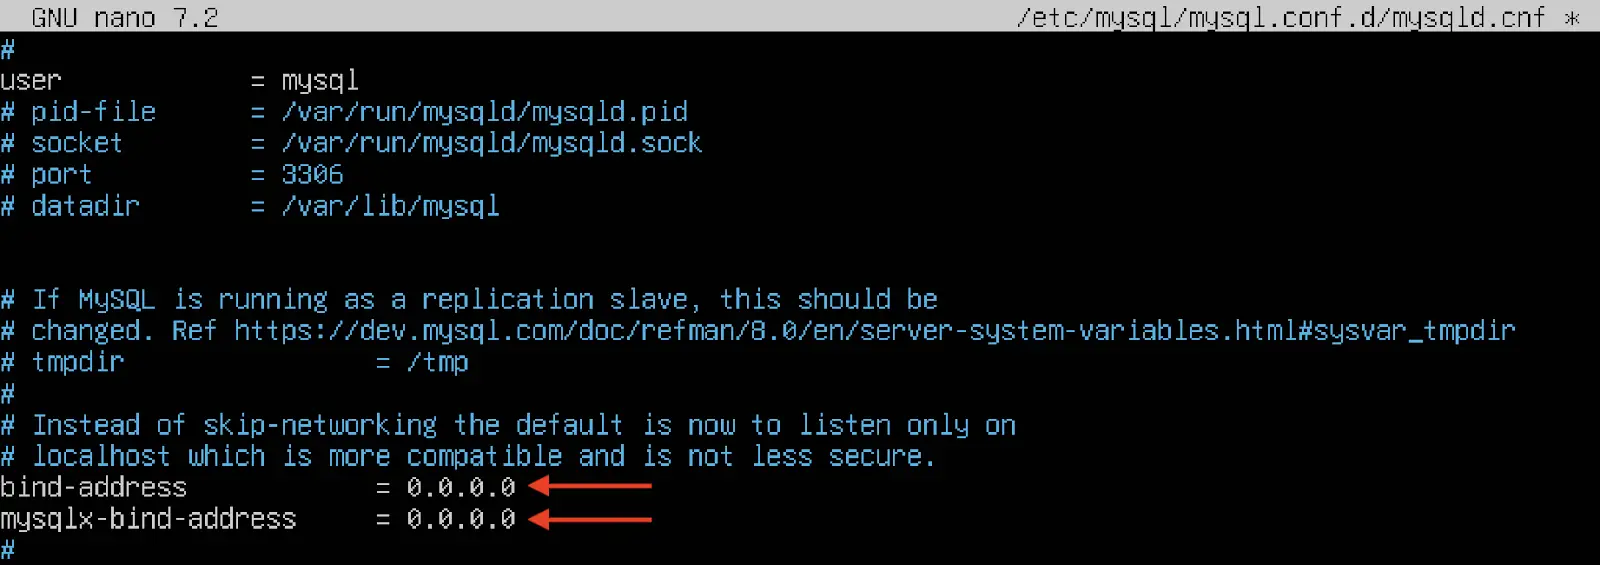
After making the changes save the file.
Step 4: Restart MySQL Service
After performing the modifications, the MySQL service file needs to be restarted using the service manager command.
sudo systemctl restart mysql.service
Step 5: Allow Port 3306 from Firewall
To accept the incoming traffic, allow port 3306 from the security system. The 3306 is the default port used by MySQL. To make it even more secure, only allow the specific server IP address that is going to access the MySQL database.
sudo ufw allow from <IP_ADDRESS> to any port 3306
That’s it, you can access MySQL from a remote machine.
Uninstall MySQL from Ubuntu 24.04
To completely remove MySQL from Ubuntu, use the apt remove command.
sudo apt remove --autoremove mysql-server
The –autoremove option deletes all the associated files.
Conclusion
The MySQL server is available to Ubuntu’s default repository and can easily be installed using the apt install mysql_server command. To make MySQL secure, execute the mysql_secure_installation script, it will ask you to remove anonymous users, test-database, and enhance password security. By default, MySQL is not accessible from a remote machine, however, by modifying the configuration file, it can be accessed remotely. After following the instructions given in this guide, you have gained knowledge of how to set up, configure, and delete MySQL on Ubuntu 24.04.
