One of the common requirements for professionals and enthusiasts alike is the ability to record their screen. Whether for tutorials, presentations, or personal use, having a credible screen recording tool is important. Additionally, it can be invaluable for educational purposes, allowing educators to create instructional content or for students to record lectures for later study.
Ubuntu 24.04, also known as Noble Numbat, is the latest LTS (Long Term Support) release, offering users a stable and secure operating system for various applications. Installing a screen recorder on Ubuntu 24.04 can serve multiple purposes, enhancing the user’s productivity and creative capabilities.
This guide will walk you through the process of installing SimpleScreenRecorder, a feature-rich screen recording tool for Ubuntu 24.04.
- How to Install and Use Screen Recorder on Ubuntu 24.04
- Method 1: Using Ubuntu Repository
- Method 2: Using Software Center
- Method 3: Using Flatpak
- How to Uninstall Screen Recorder on Ubuntu 24.04
- Conclusion
How to Install and Use Screen Recorder on Ubuntu 24.04
Screen recording on Ubuntu 24.04 can be accomplished with ease using the built-in screen recorder that’s part of the Gnome Shell.
By simply pressing “Ctrl + Alt + Shift + R”, a screen-recording pop-up window will appear, allowing you to select whether to record the full screen, a window, or a partial area:
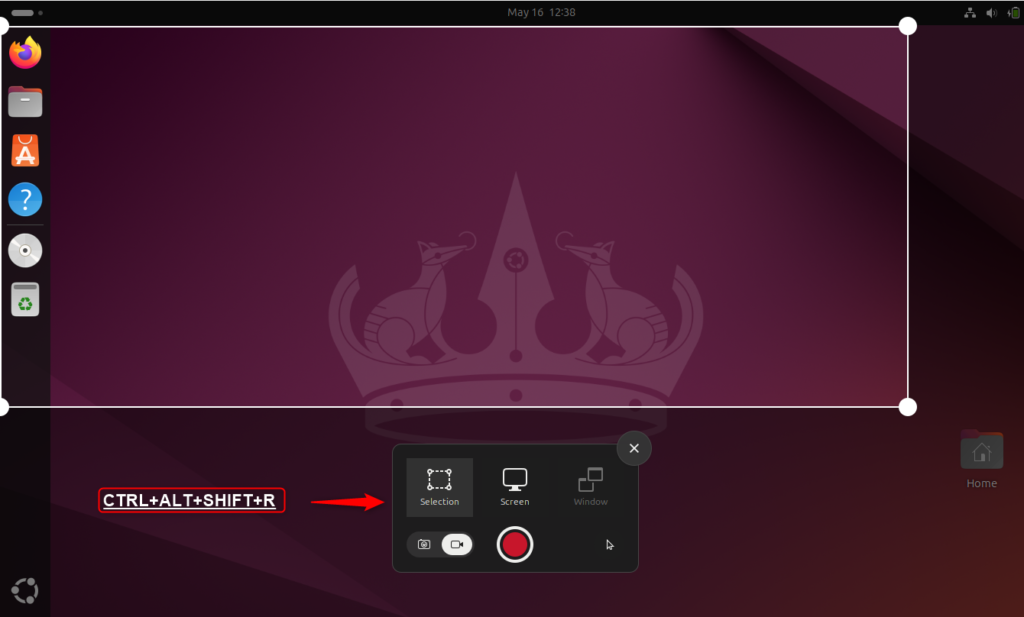
The recordings are saved in the Videos/Screencasts folder in your home directory.
Let’s install and use the easiest method.
Method 1: Using Ubuntu Repository
SimpleScreenRecorder is available in the official Ubuntu repository, making it straightforward to install. Users can create high-quality tutorials, and gameplay videos, or capture any screen activity for later review.
Let’s install Screen Recorder on Ubuntu 24.04 via CLI:
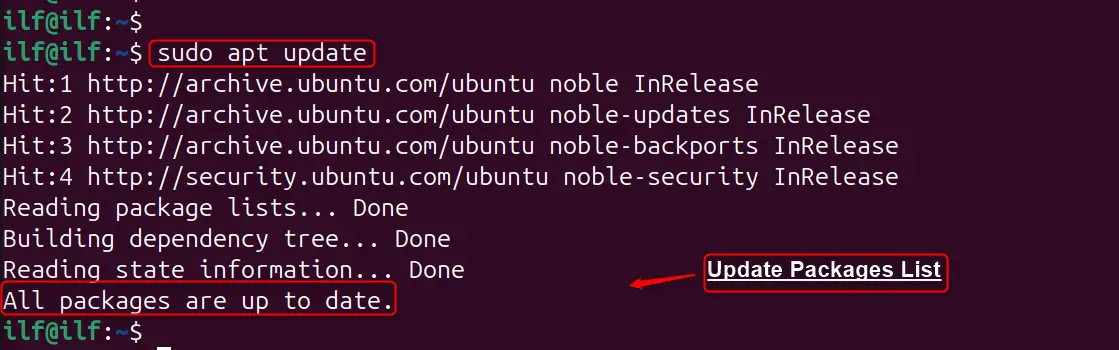
Step 1: System Update
Before installing any new package, it’s important to ensure that the Ubuntu system is up-to-date:
sudo apt update
sudo apt upgrade
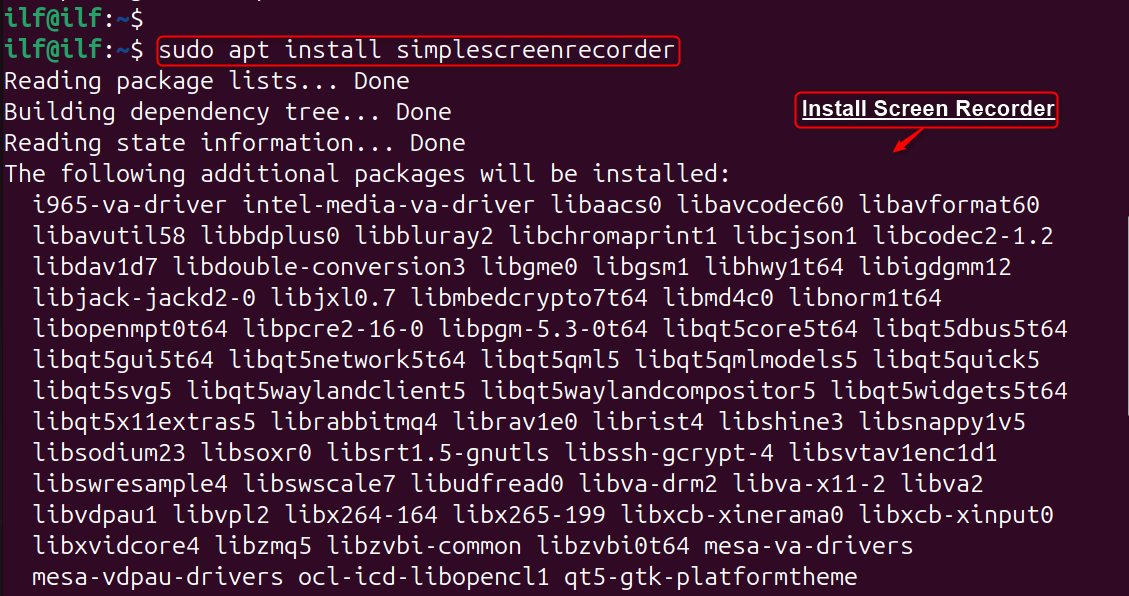
Step 2: Install SimpleScreenRecorder
Now, download and install the SimpleScreenRecorder package along with its dependencies via the below command:
sudo apt install simplescreenrecorder
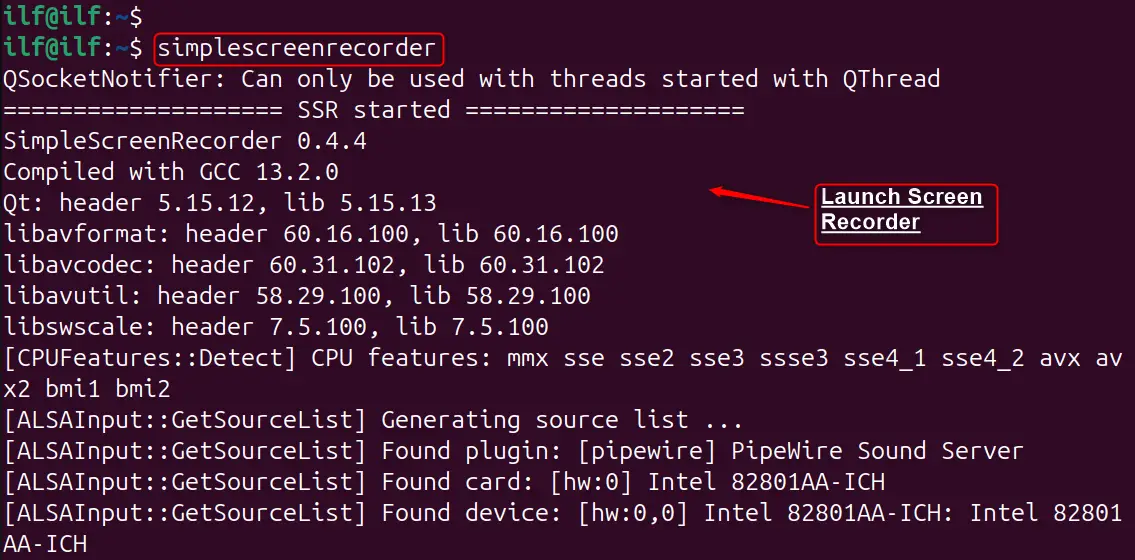
Step 3: Launching SimpleScreenRecorder
Once the installation is accomplished, users can launch SimpleScreenRecorder by writing “simplescreenrecorder” in the terminal interface:
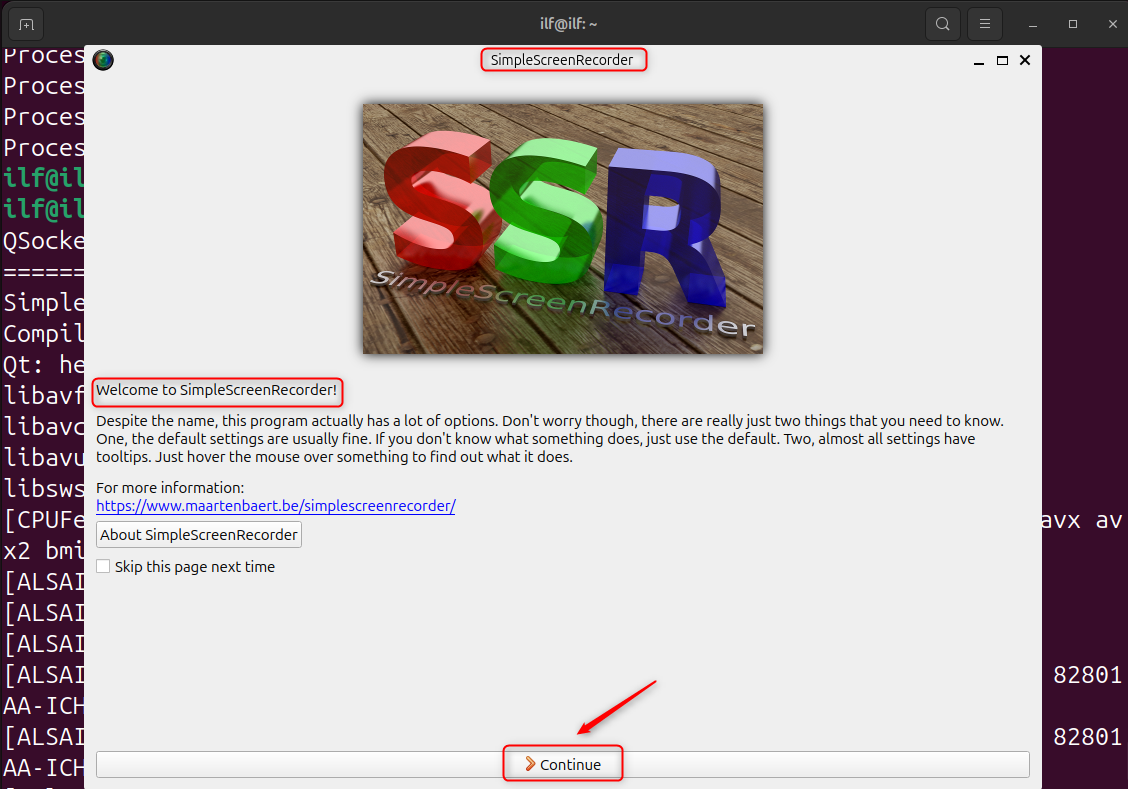
Upon launching, you’ll be greeted with a configuration window. At there, hit the “Continue” button:
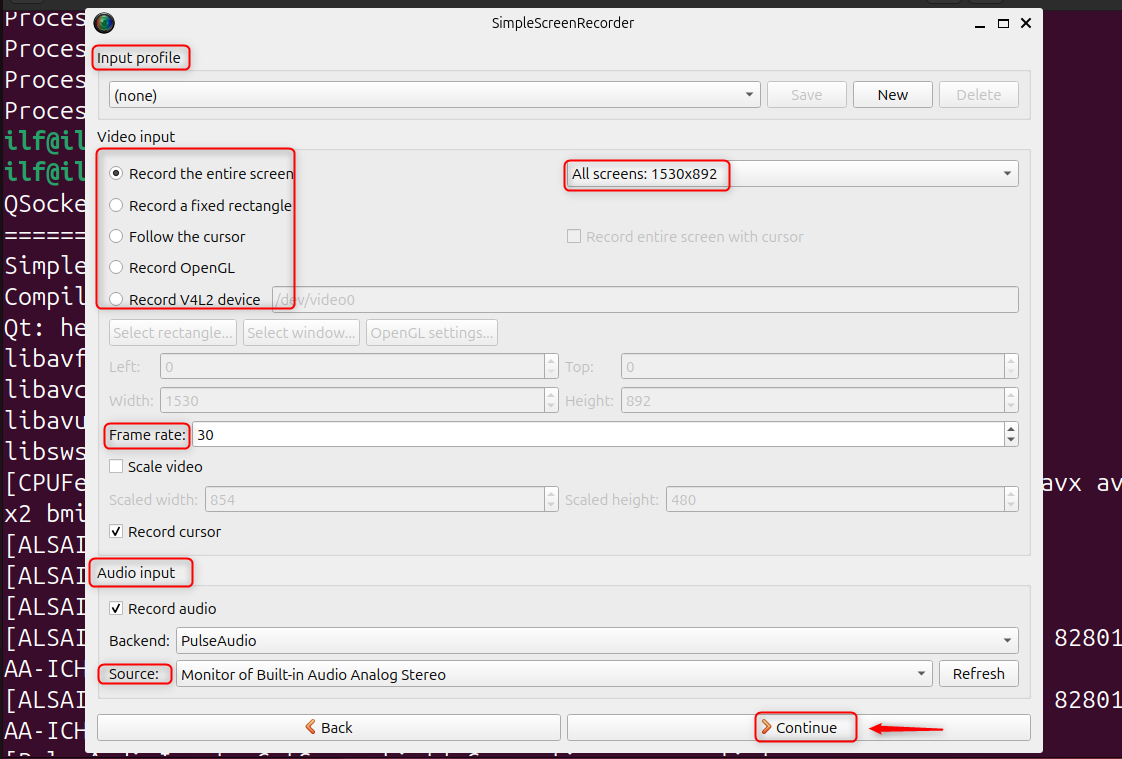
Step 4: Configuring SimpleScreenRecorder
Here, users can select the frame rate, input source, and other recording utilities. Also, pick to record the full screen, a fixed rectangle, or follow the cursor. Additionally, decide whether to include the system audio, microphone input, or both:
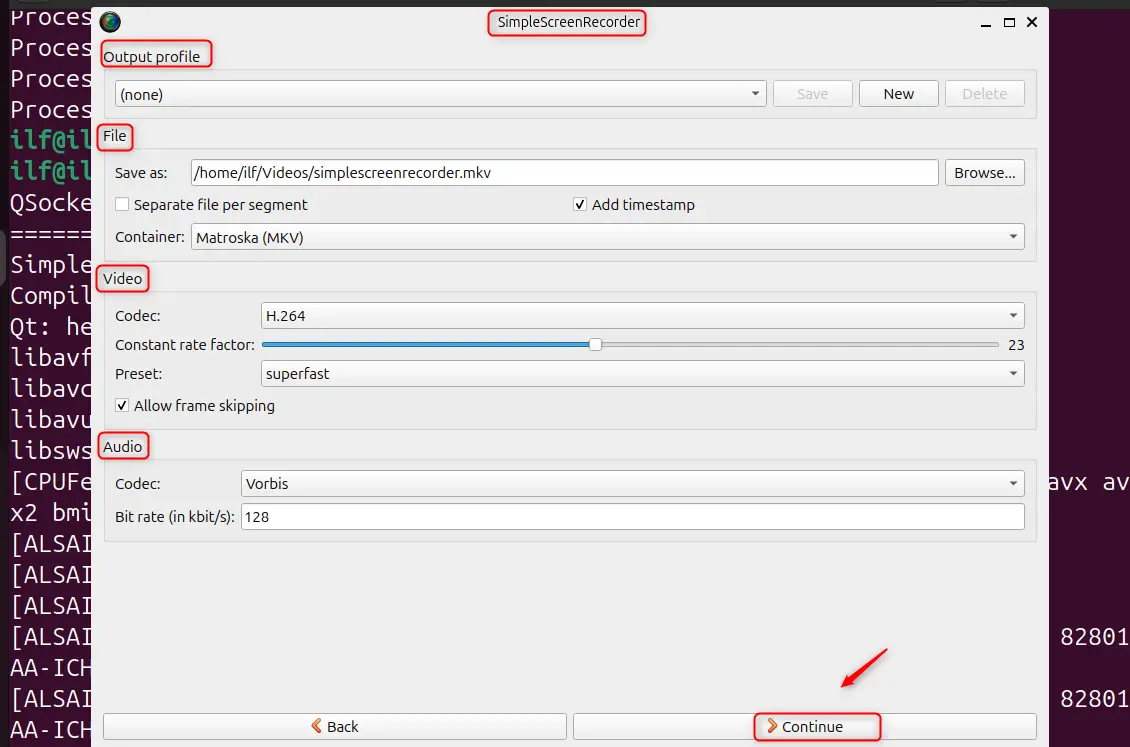
For users who need more control over their recordings, SimpleScreenRecorder provides advanced settings such as codec selection, bit rate, and custom scripts:
Step 5: Recording
After configuring the settings to your preference, proceed to the next step in the SimpleScreenRecorder interface to start recording. You’ll be able to specify the save location as well as the file name for the screen recording. Once everything is set, hit “Start Recording” to start capturing the screen.
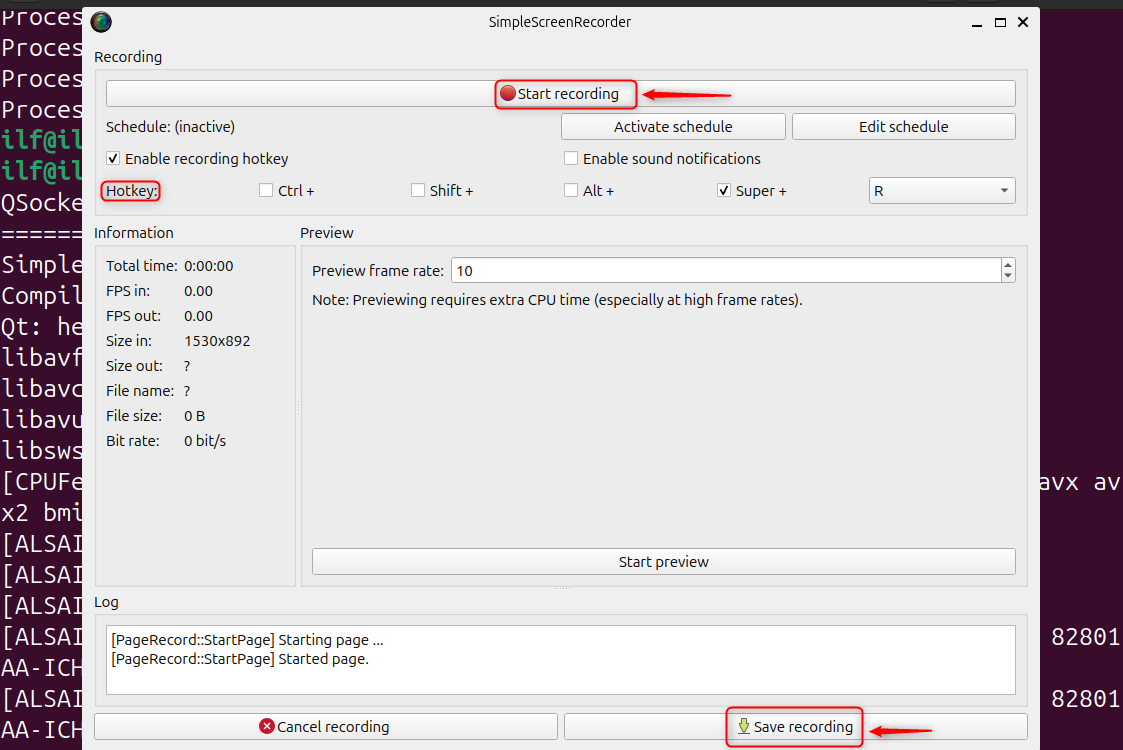
Keyboard Shortcuts: SimpleScreenRecorder offers keyboard shortcuts to start, pause, and stop recording, which can be configured in the settings.
Step 6: Stopping the Recording
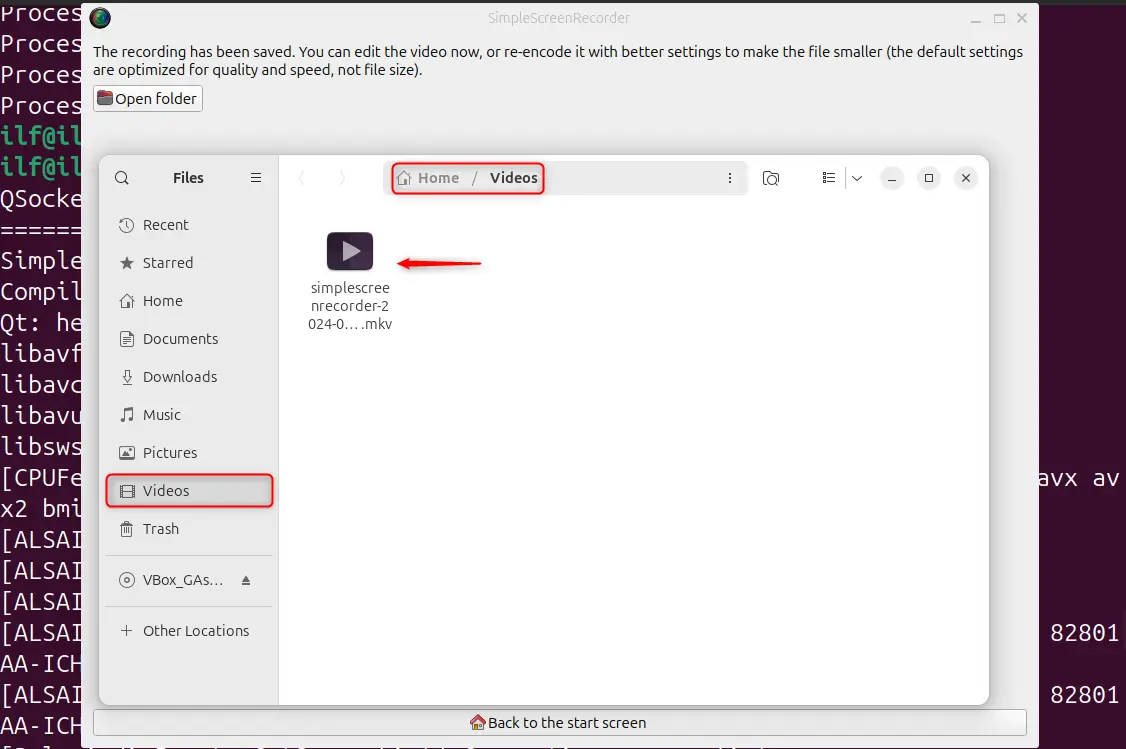
To stop recording, bring up the SimpleScreenRecorder window and click “Stop Recording”. The file is saved in the specified location in the format you chose:
Note: screen recording can be a resource-intensive task, so ensure your system meets the necessary hardware requirements for a smooth experience.
Method 2: Using Ubuntu Software Center
If you prefer a graphical interface for installing software, Ubuntu Software Center is a great option:
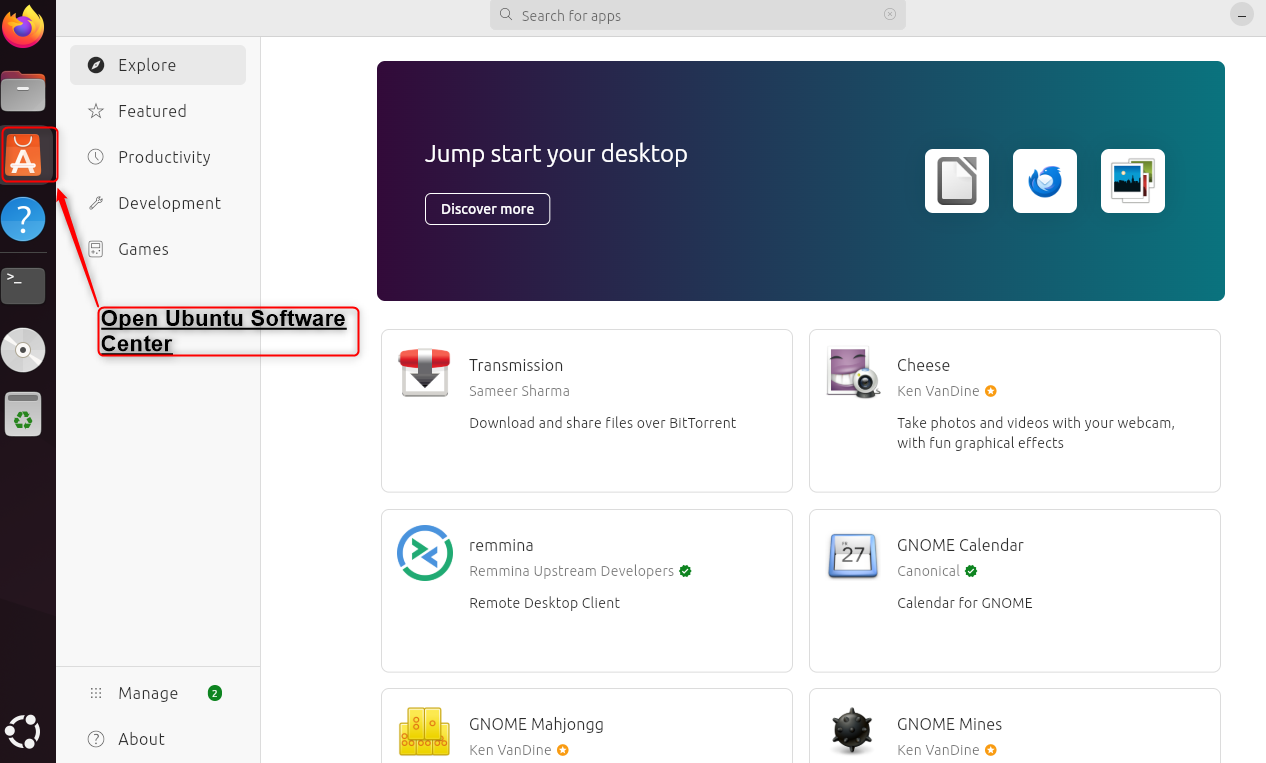
Step 1: Open Ubuntu Software Center
Hit the Ubuntu Software icon in your dock or application menu:
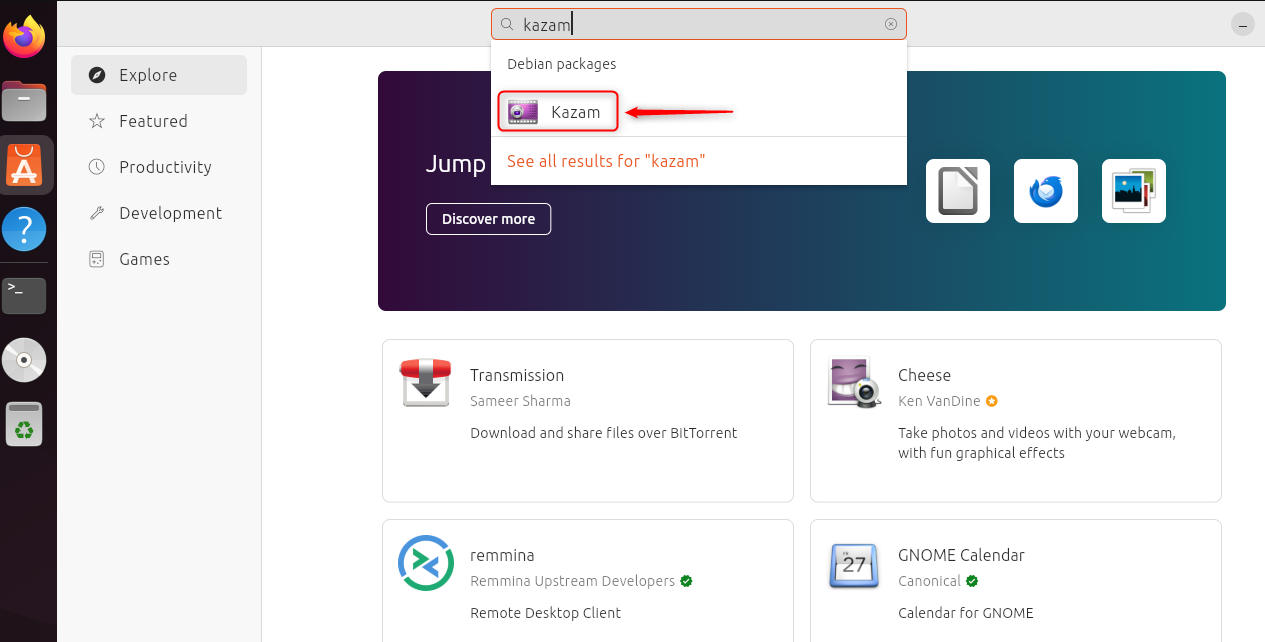
Step 2: Search for Screen Recorders:
Use the search function to find screen recording software. Kazam and VokoscreenNG are two examples that are well-regarded in the community:
Step 3: Install the Software
Click on the desired screen recorder and then click the “Install” button: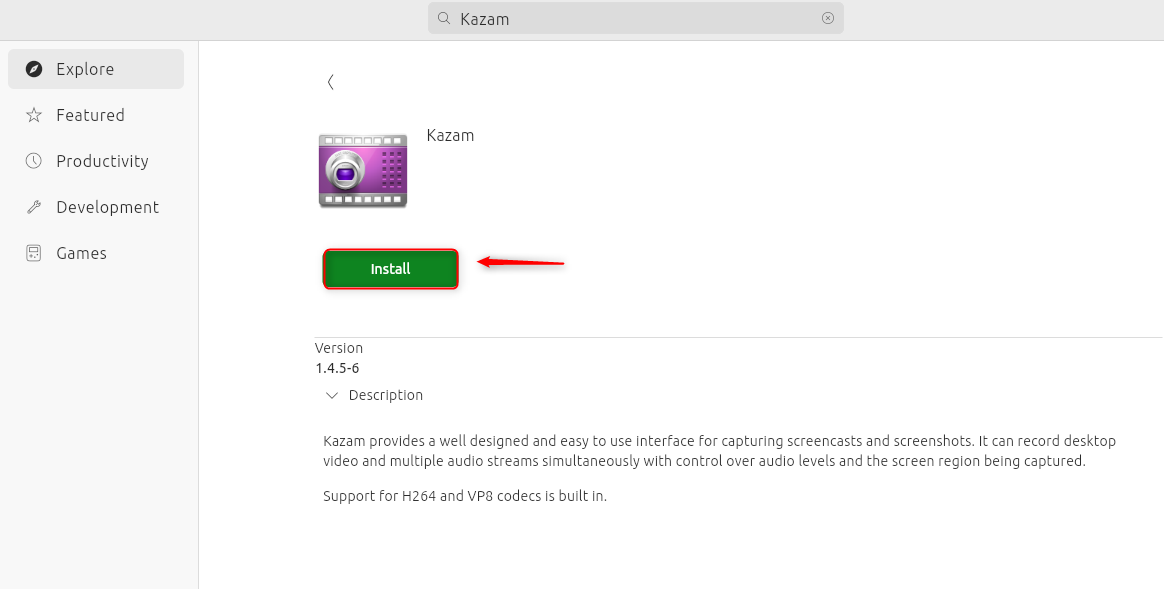
Step 4: Launch Screen Recorder
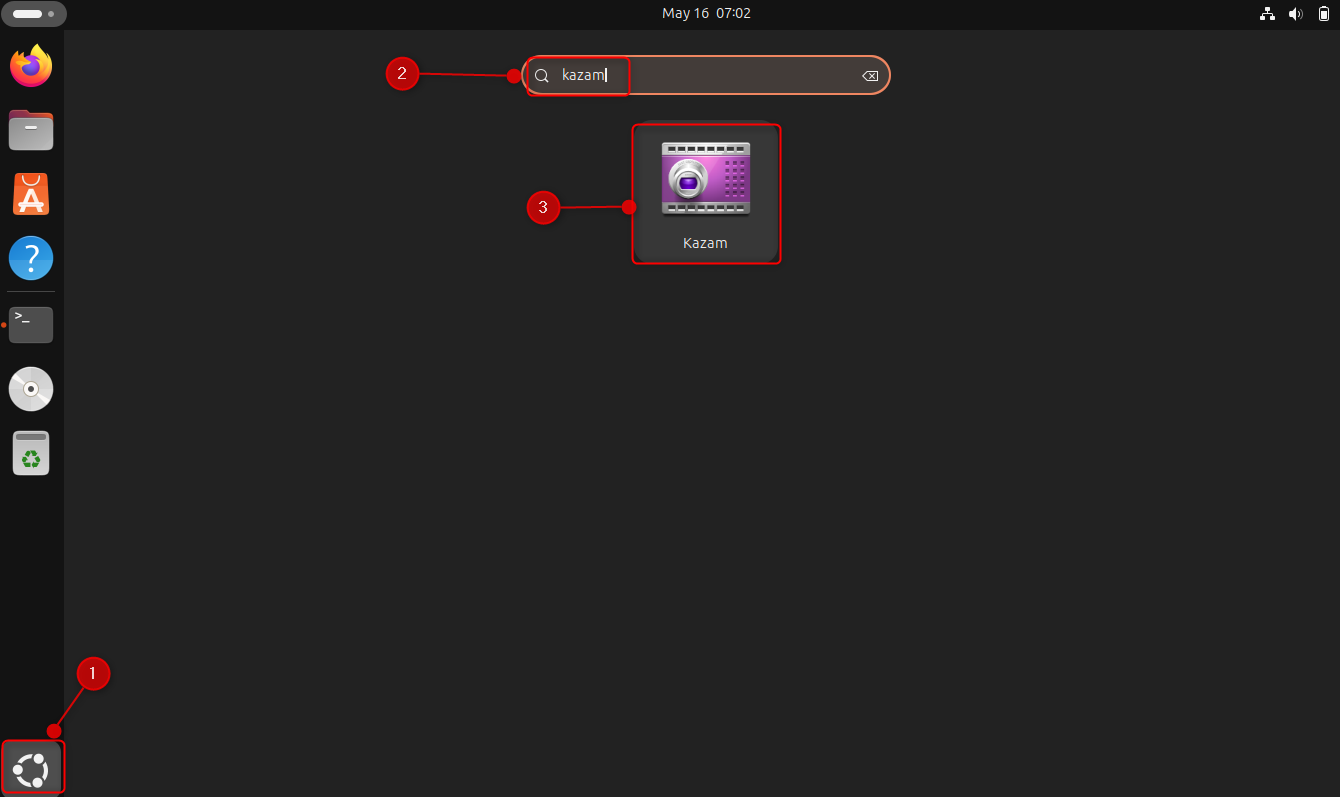
Once the installation is complete, you can start Kazam from your application menu or by searching for it in your activities overview:
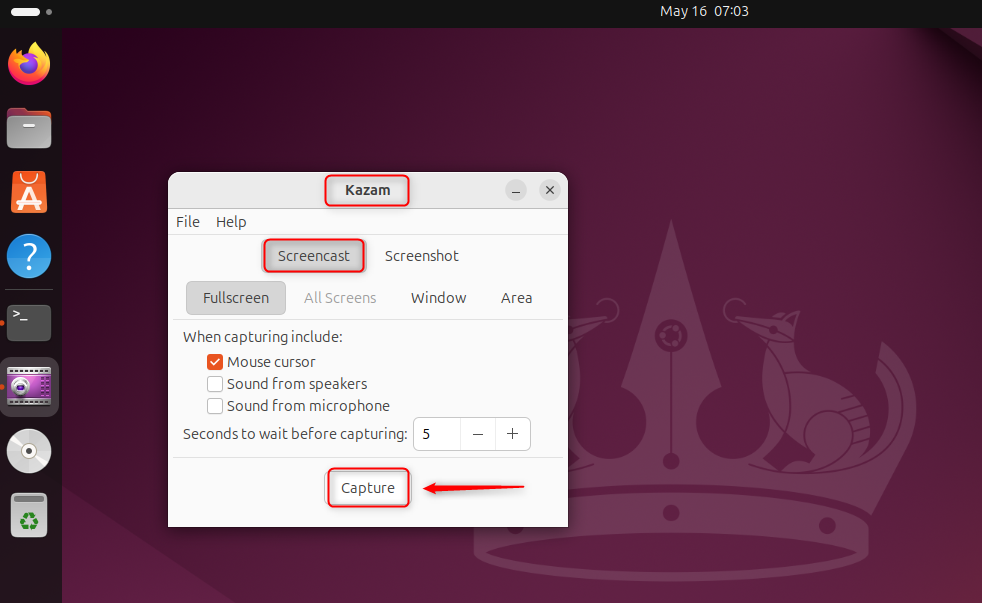
The application provides options to capture the full screen, a selected area, or input from your webcam:
That is all from this method.
Method 3: Using Flatpak
Flatpak offers the convenience of getting the latest versions of software, it’s always important to ensure that your system is compatible and that you’re comfortable using the command line for installation.
Let’s install a screen recorder on Ubuntu 24.04 using Flatpak:
Step 1: Installing Flatpak
Before you can install any applications with Flatpak, ensure that Flatpak installation on the system:
sudo apt install flatpak
Step 2: Add the Flathub Repository
After installing Flatpak, it’s recommended to add the Flathub repository, which hosts a multitude of Flatpak applications. You can add it by executing:
flatpak remote-add --if-not-exists flathub https://flathub.org/repo/flathub.flatpakrepo

Step 3: Installing the Screen Recorder
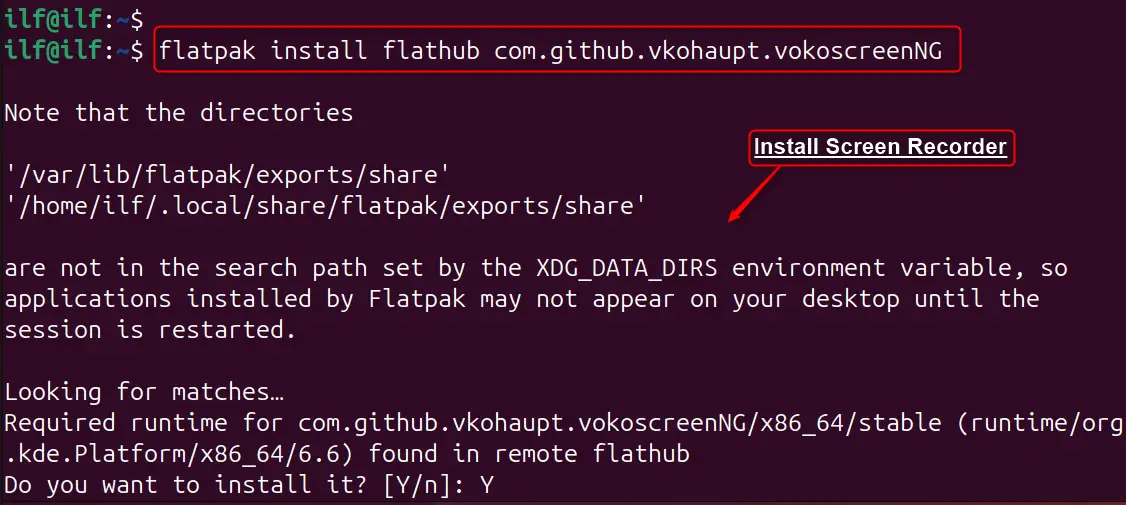
With Flatpak installed, you can now proceed to install a screen recorder. VokoscreenNG is a popular choice that’s available on Flathub. It’s an open-source tool that offers an intuitive interface for capturing video clips, the current screen, or for recording presentations.
To install VokoscreenNG using Flatpak, run the following command:
flatpak install flathub com.github.vkohaupt.vokoscreenNG
Step 4: Using the Screen Recorder
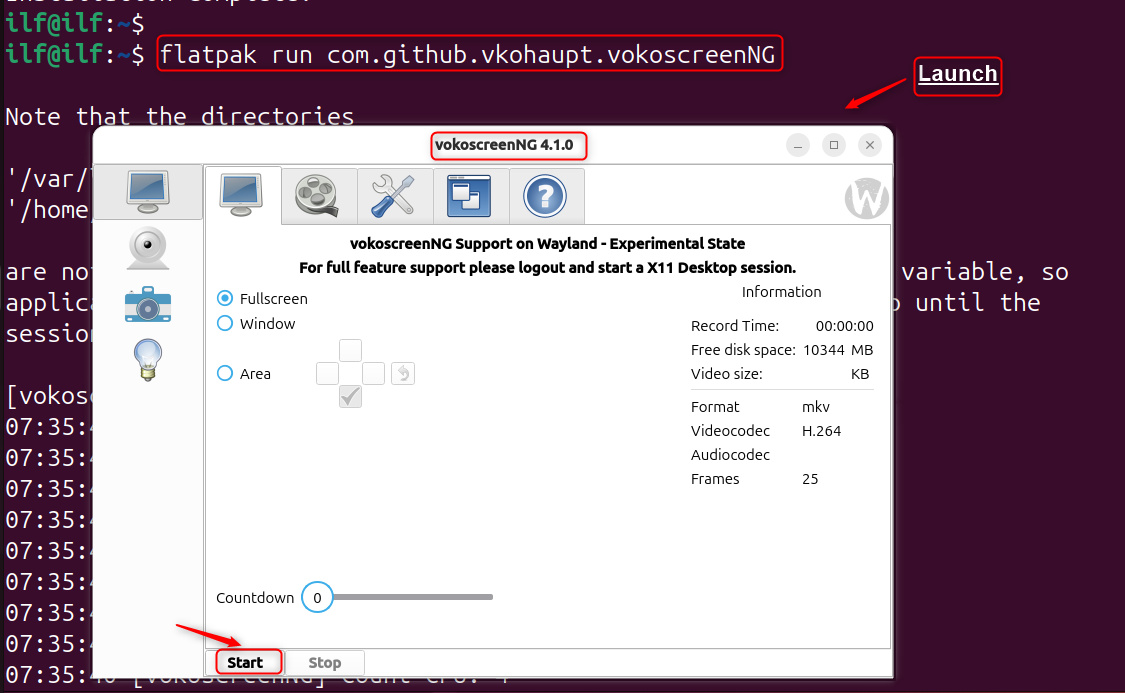
So, the installation is accomplished, now, users can launch VokoscreenNG from your application menu or by executing the below command. It provides options to capture the full screen, a selected area, or input from your webcam:
flatpak run com.github.vkohaupt.vokoscreenNG
Note: VokoscreenNG supports multiple video formats, including WebM, AVI, MP4, MKV, and MOV, and allows you to set custom frame rates for your recordings.
Now, users can install and start using a screen recorder on the Ubuntu 24.04 system.
How to Uninstall Screen Recorder on Ubuntu 24.04
Ubuntu provides a user-friendly interface and command-line options to help you achieve this.
Method 1: Using the Terminal
For those who prefer the command line or need to uninstall command-line utilities or libraries, the terminal is your go-to option. For this, open the Terminal, type “sudo apt remove [screen_recorder_package_name]” and press Enter:
sudo apt remove simplescreenrecorder
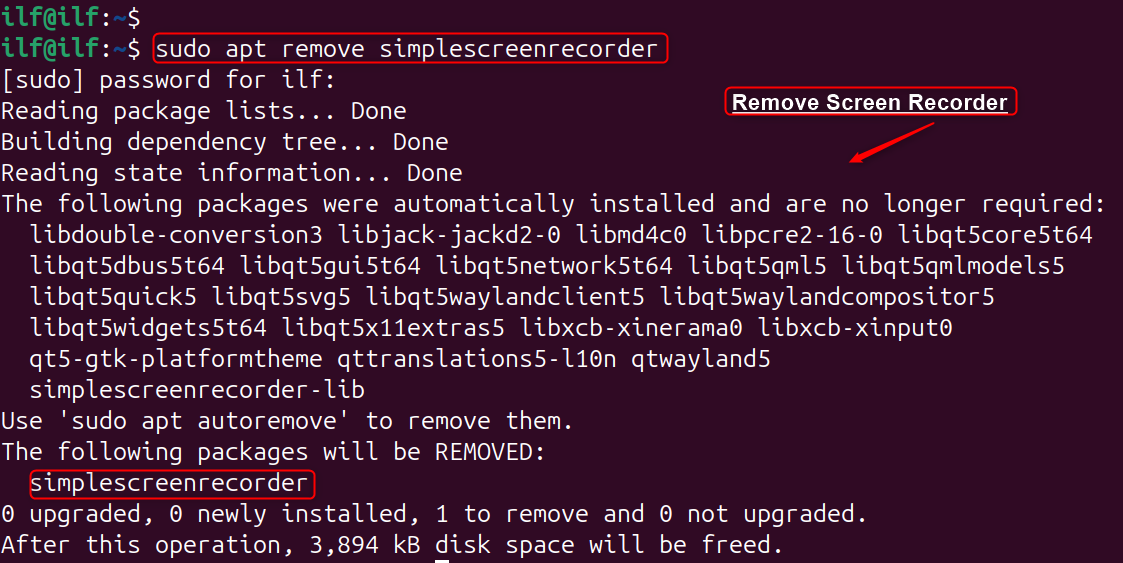
Remember to replace “[screen_recorder_package_name]” with the actual package name of the screen recorder you wish to uninstall.
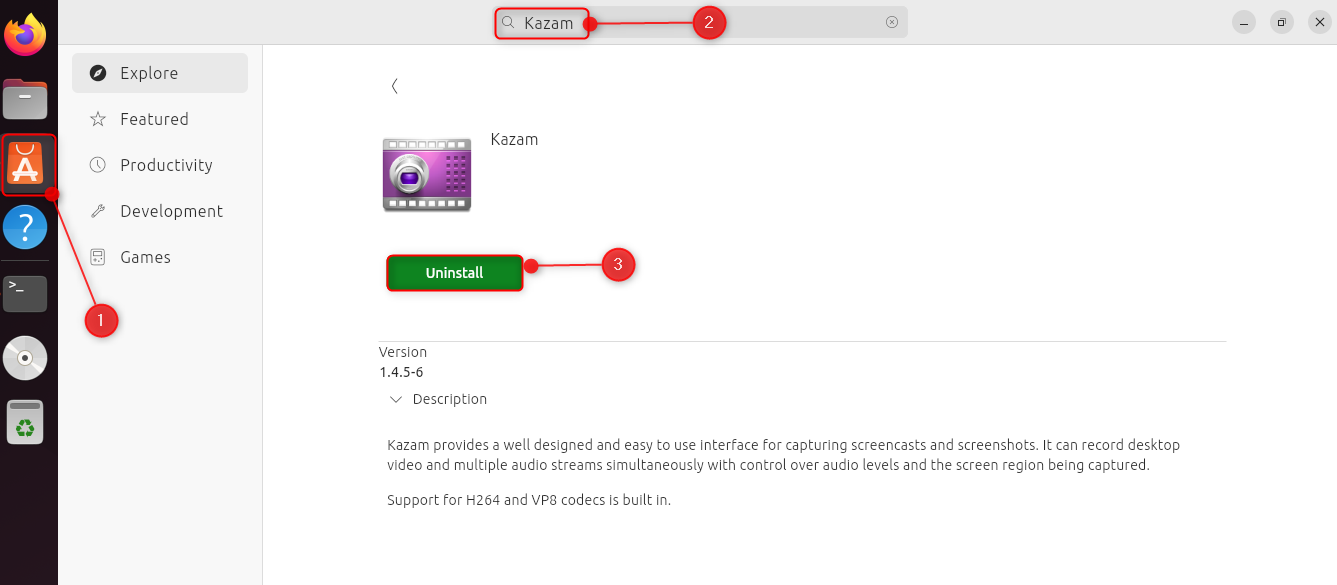
Method 2: Using Ubuntu Software Center
To uninstall a screen recorder, open the Ubuntu Software Center, and search the installed applications. Then, locate the screen recorder app and select it. Finally, hit the “Uninstall” button:
Method 3: Removing Flatpak Applications
If your screen recorder was installed as a Flatpak, you can remove it using the Flatpak command.
Once you have the ID, use the command “flatpak uninstall –delete-data [App-ID]” to remove the application along with its data:
flatpak uninstall --delete-data com.github.vkohaupt.vokoscreenNG

By following the steps outlined in this guide, you can easily install and configure SimpleScreenRecorder to fit your recording needs.
Conclusion
SimpleScreenRecorder is a powerful and user-friendly tool for screen recording on Ubuntu 24.04. To install and use a screen recorder on Ubuntu 24.04, you can choose from several options such as SimpleScreenRecorder, Kazam, or VokoscreenNG. SimpleScreenRecorder is a versatile tool that can be installed via a single APT command. Alternatively, users can utilize the Ubuntu Software Center, or Flatpak for the latest version.
