
Network Mapper is a popular tool for scanning the networks connected to the local server or machine. We scan the IP ranges to secure the computer and diagnose the network problems. The nmap makes it easy for us to scan the ranges of IPs, subnets, files, and protocols.
This post will help users scan the IP ranges using the nmap tool.
- How to Scan IP Ranges Using nmap?
- Scan IP Ranges of 24-bit Network Address
- Scan IP Ranges of Class B
- Scan IP Ranges of Complete Octet
- Scan the IP Ranges Excluding the Ports
- Scan the Range of IP Listed in a File
- Scan the Range of IP Addresses Excluding the Open Port
- Save the Result of IP Address Range Scan
How to Scan IP Ranges Using nmap?
The nmap can be used in Linux distributions by following the general syntax:
$ sudo nmap [options] [ip address]
The nmap is used to revoke the command, and the options can be used for different applications. Then specify the ip address which you want to scan.
Example 1: Scan IP Ranges of 24-bit Network Address
To scan the IP addresses of the 24-bit address size, use the hyphen – to define the range of IP addresses. For better understanding, we will scan the range of the 24-bit IP address using the command:
$ sudo nmap 192.168.0.190-240
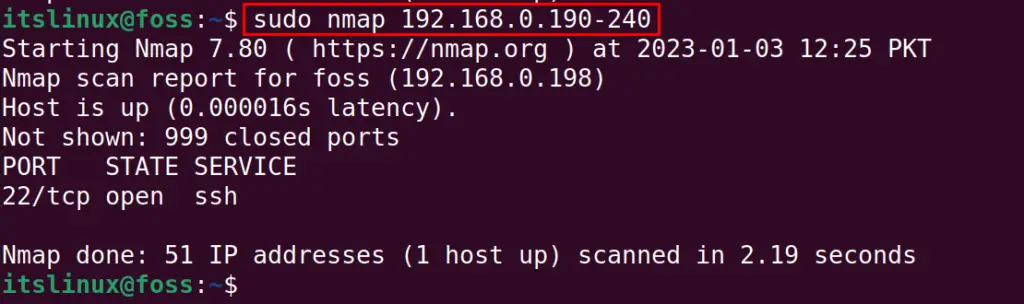
The output shows that the scan is completed in 2.22 seconds. Only one IP address is active by “foss”.
Moreover, the 999 ports of the “foss” are closed, and one port, port 22, is used by SSH.
Example 2: Scan IP Ranges of Class B
The Class B networks are scanned similarly to the above example, but a hyphen – is added in the last two octets. For example, we will scan the range of IP address:
$ sudo nmap 192.168.0-100.190-240

Example 3: Scan IP Ranges of Complete Octet
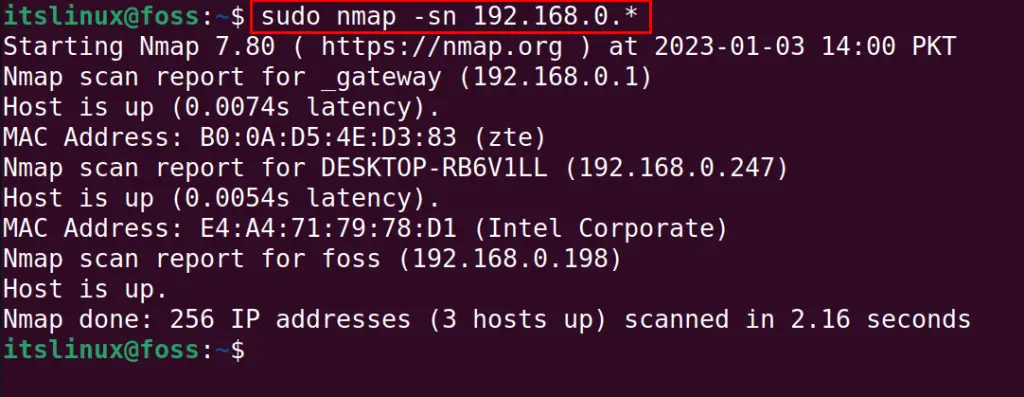
We can scan the range of IP addresses of the entire octet by replacing the octet with the star *. For example, we will scan the IP address by scanning the entire range of the last octet:
$ sudo nmap 192.168.0.*
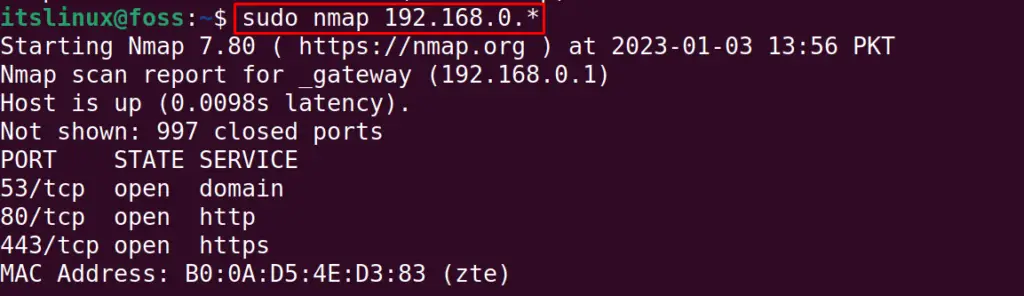
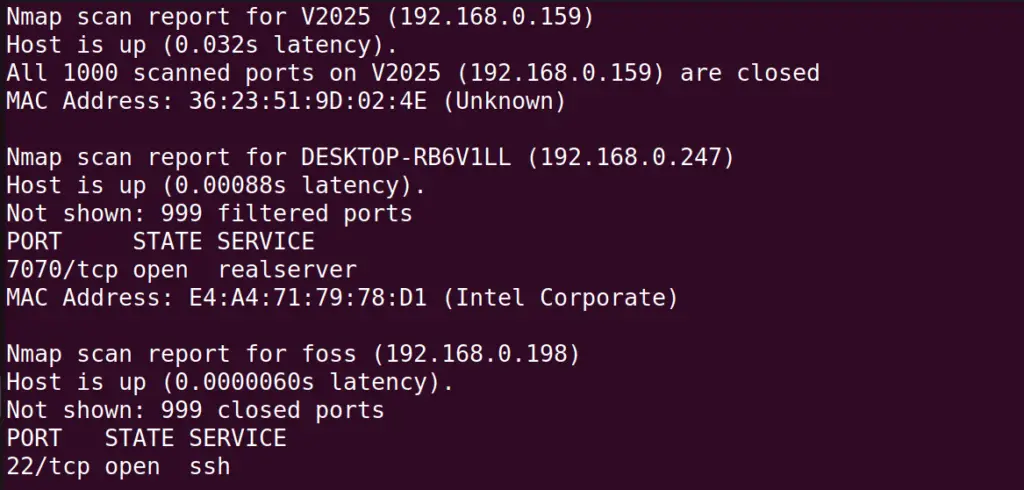

In the above output, we see that among the 256 IP addresses, only 4 hosts use the IP address whose information is displayed. This scan took 6.75 seconds.
Example 4: Scan the IP Ranges Excluding the Ports
When we scan the IP addresses with the nmap command, it will scan all the ports associated with the IP addresses, which will take time. To scan the IP addresses only, excluding the ports, use the “s” option to skip and “P” to specify the ports:
$ sudo nmap -sP 192.168.0.*
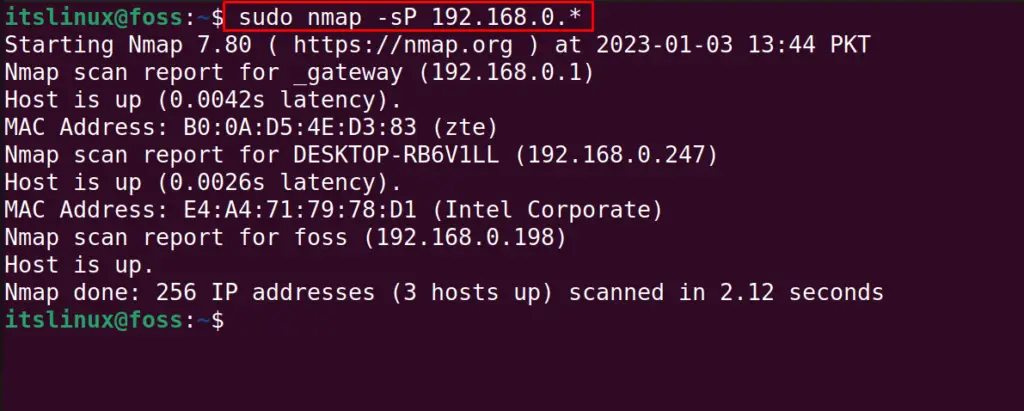
The IP addresses are scanned in 2.12 seconds only.
Example 5: Scan the Range of IP Listed in a File
The nmap command also can read the IP address ranges from the file. For example, we have a file containing the different IP ranges:
$ cat ip_file

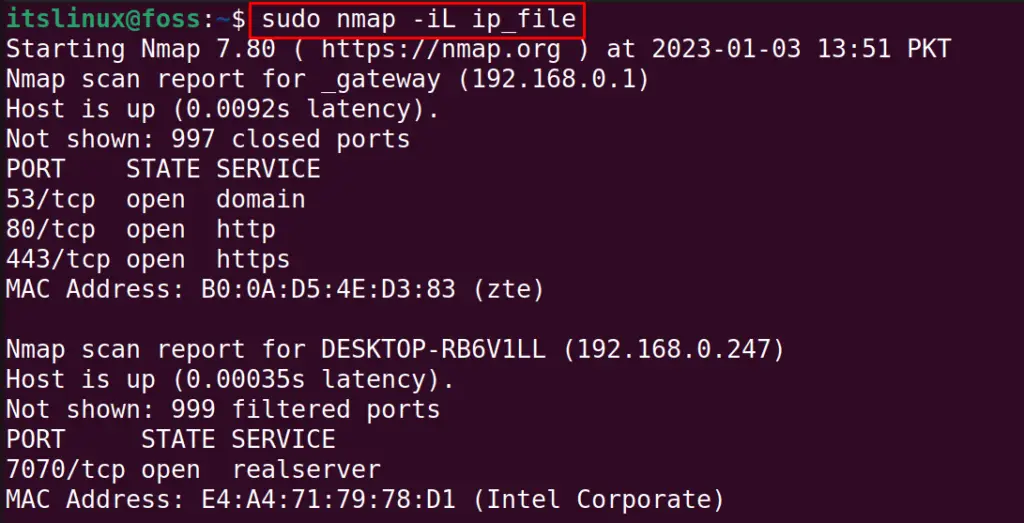
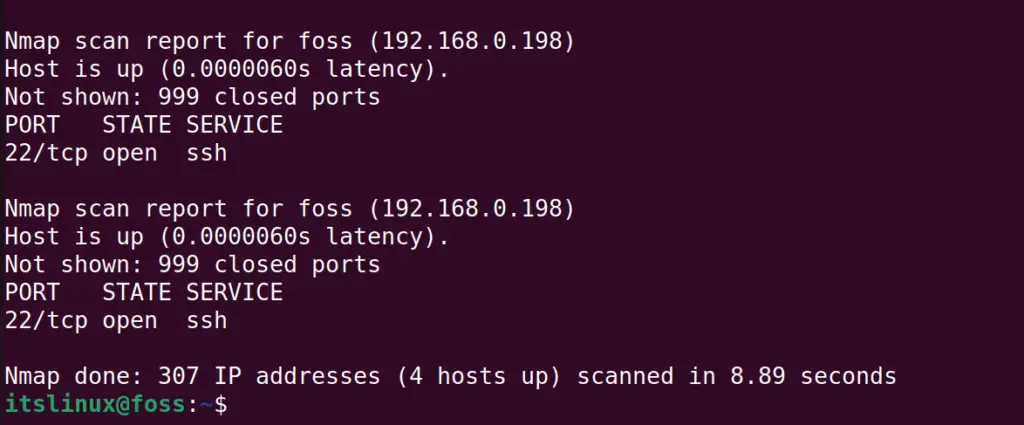
We can scan the IP Ranges from the file using the nmap command:
$ sudo nmap -iL ip_file
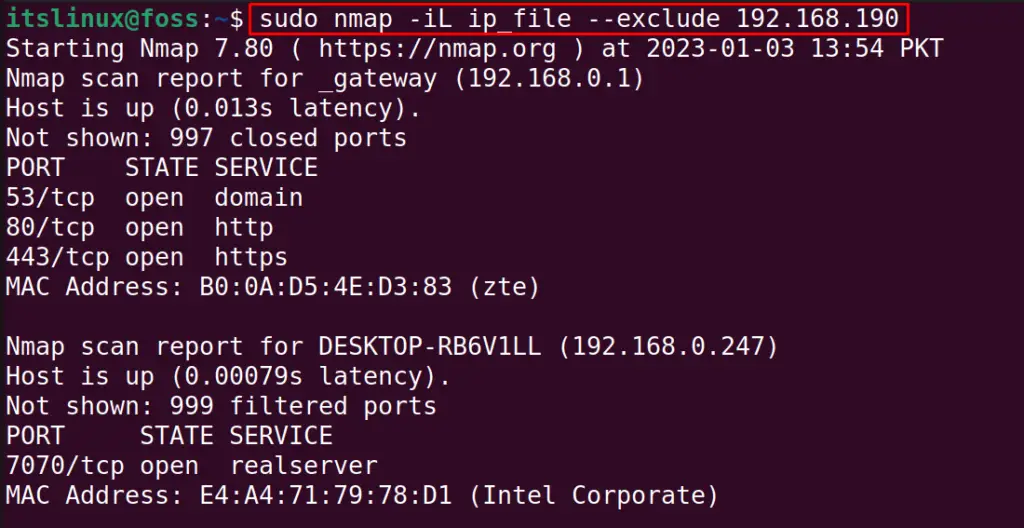
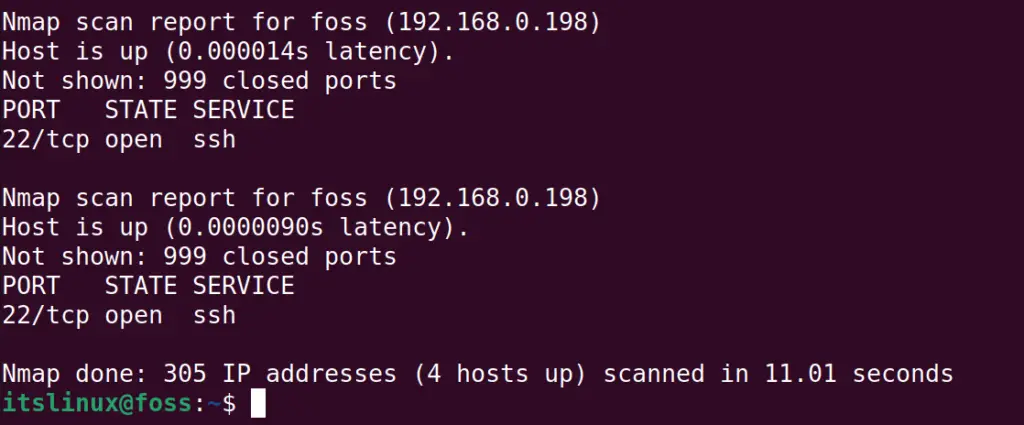
To exclude any specified IP range from the file, use the “exclude” option:
$ sudo nmap -iL ip_file --exclude 192.168.190
Example 6: Scan the Range of IP Addresses Excluding the Open Port
To scan the range of IP addresses excluding the open port; we will use the “n” option with the “s” in the command:
$ sudo nmap -sn 192.168.0.*
Example 7: Save the Result of IP Address Range Scan
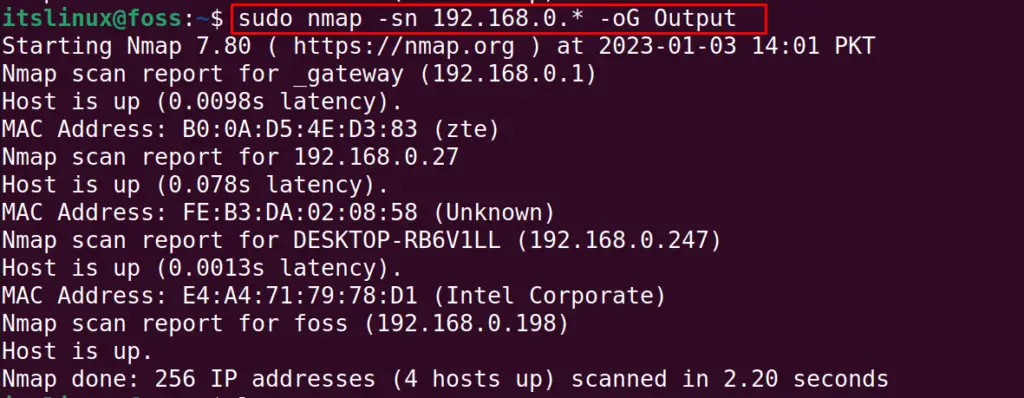
We can also save the output of the nmap command in the file with the “oG” option. For example, the result of the above file can be stored in the “Output” file using the command:
$ sudo nmap -sn 192.168.0.* -oG Output
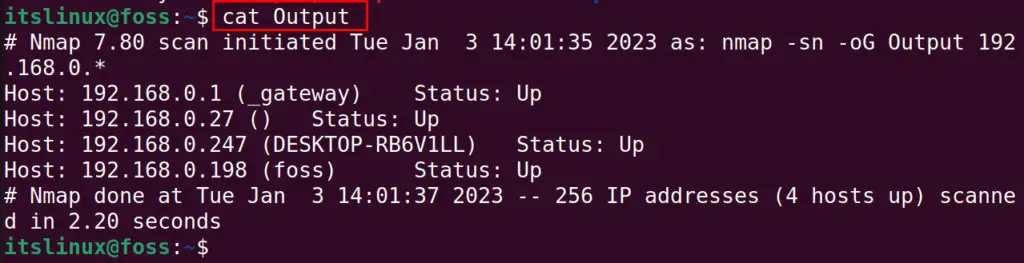
To list down the results of the “Output” file, use the command:
$ cat Output
To explore more usage of the nmap command in Linux, you can visit the link.
Conclusion
The nmap command scans the IP addresses on Linux to get their information related to the IP address ranges. We can scan the range of IP addresses with the nmap following the general syntax “sudo nmap [options] [ip address]”. In this write-up, different examples are used to explain the usage of the range of Ip addresses using a single command.
