Whether you’re a graphic designer and require a specific typeface or simply someone who appreciates a change of scenery in your document editor, Ubuntu 24.04 provides several straightforward methods to install new fonts.
One of the several customization features available to users is the ability to install new fonts. It optimizes the visual appeal of the desktop and applications, allowing for a more personalized computing experience.
This article will explain several methods for installing fonts on Ubuntu 24.04.
How to Install Fonts in Ubuntu 24.04
Several methods to install fonts on Ubuntu 22.04, catering to different preferences and requirements. Here’s a step-by-step guide to the various ways you can install fonts on your system.
- Method 1: Using Font Manager
- Method 2: Using the Ubuntu Software Center
- Method 3: Using Package Managers
- Method 4: Using the Google Fonts Website
- Bonus: Installing Multiple Fonts at Once
- Remove/Uninstall Fonts on Ubuntu 24.04
- Conclusion
Let’s start the installation of fonts with the easiest method.
Method 1: Using Font Manager
Font Manager is a straightforward application that simplifies the process of installing fonts. It offers a variety of methods for installing fonts, allowing users to personalize their computing experience. To use this method, follow these steps:
Step 1: Update Package List
First of all, update the package list before installing fonts on the Ubuntu system:
sudo apt update
Step 2: Install Font Manager
Now, install the font manager from the Ubuntu repository by using the command:
sudo apt install font-manager
Step 3: Launch Font Manager
Once installed, launch Font Manager from the “font-manager” command or Applications launcher:
font-manager
Step 4: Add a New Font
To add a new font in the Font Manager, click on the “+” sign that is highlighted below:

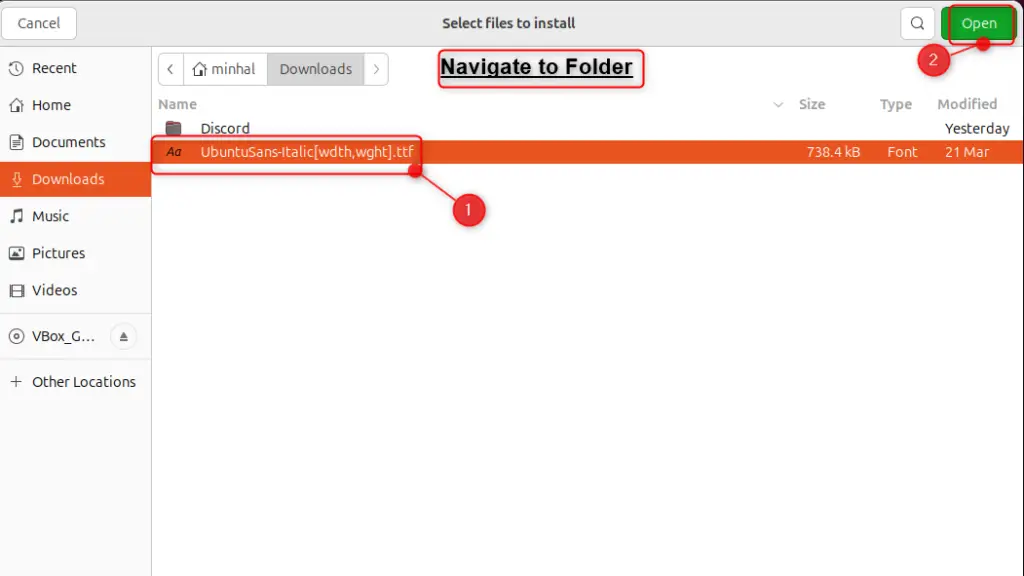
Now, users can navigate to the font file on the system where the downloaded font file is found. If not found, users can download from the Google Family:
Step 4: Verify the Added Font
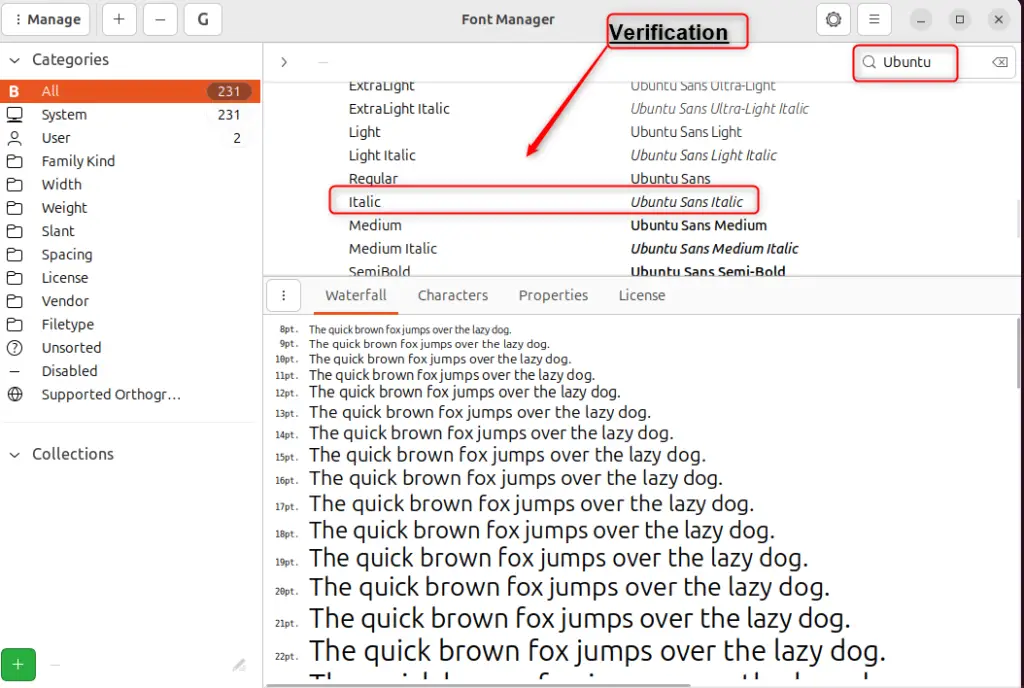
Now, users can authenticate whether the added font is installed or not. Search the added font and found in the below list:
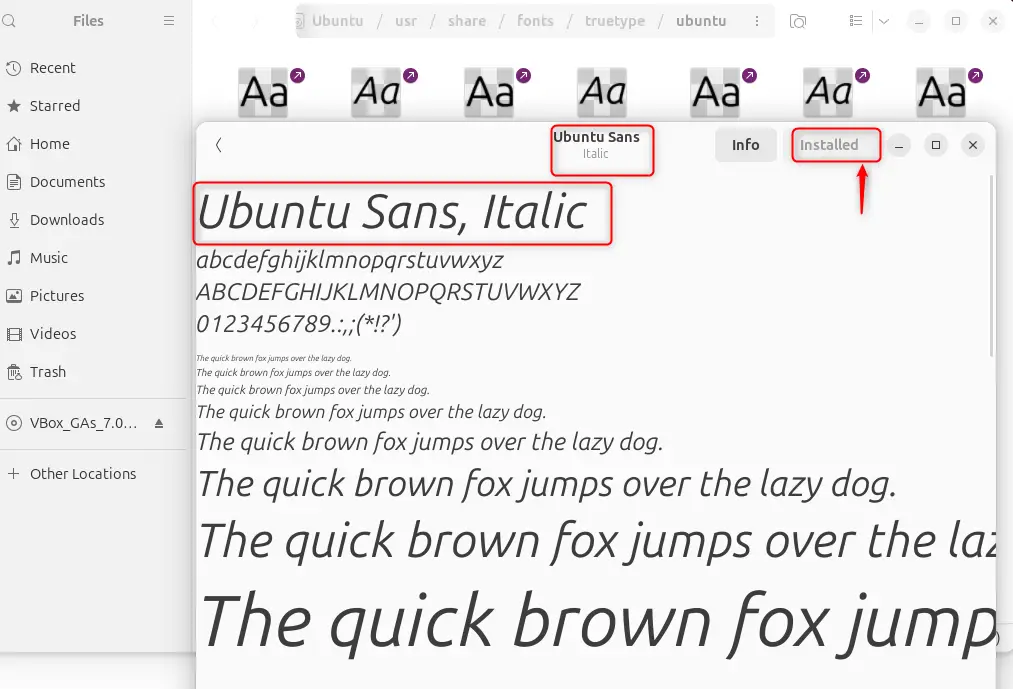
Alternatively, right-click on the installed font and navigate to the installed directory. Then, double-click on the added font and verify its successful installation:
This method is recommended for its ease of use and graphical interface, which is suitable for users of all skill levels.
Method 2: Install Fonts Using the Ubuntu Software Center
The Software Center assists with an interface for managing applications and extensions, including fonts. To install fonts through the Software Center:
Step 1: Search Font Package
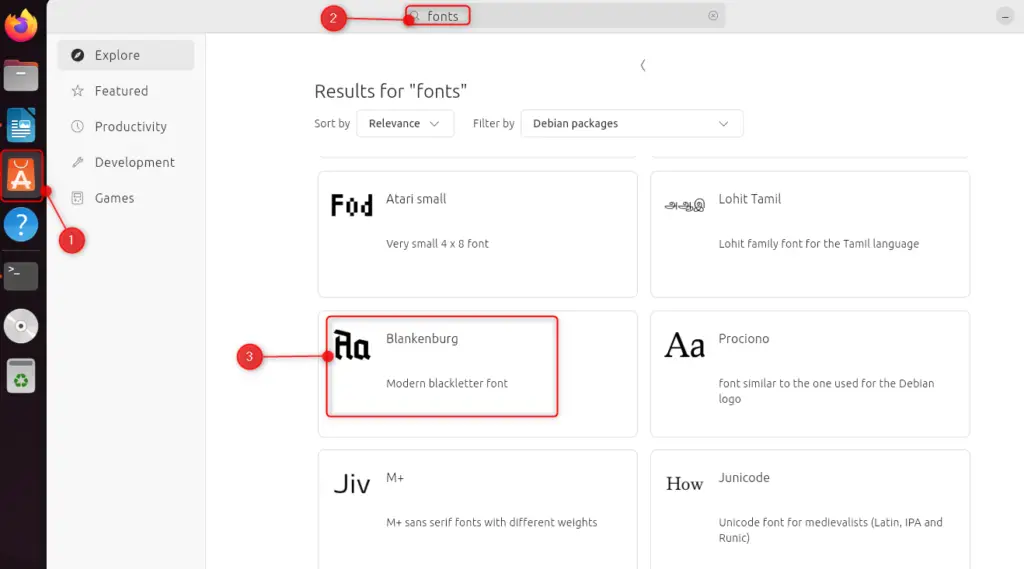
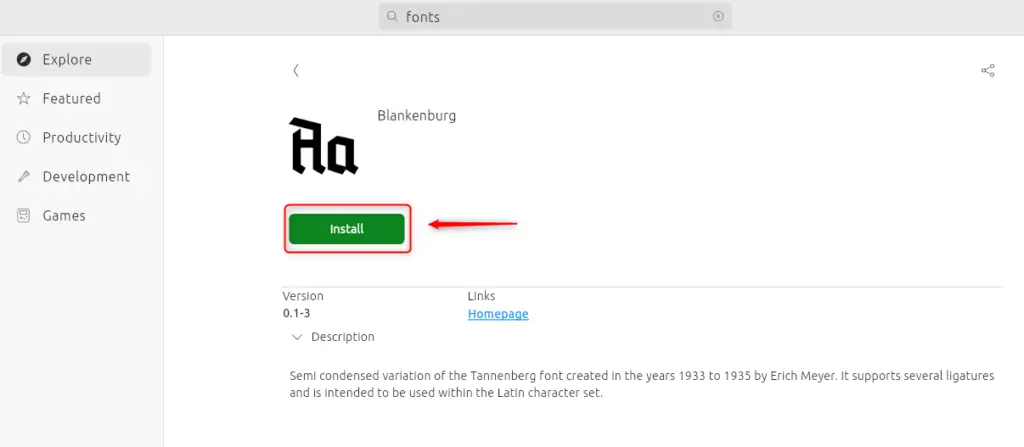
First, access the Ubuntu Software Center. After that, search the “fonts” and browse through the available font packages:
Step 2: Install Fonts
After browsing, select the desired font and click the “Install” button:
Step 3: Verify Installed Font
Fonts installed via the Software Center are typically available system-wide, making them accessible in all applications that support custom fonts:
That is all from the Ubuntu Software Center.
Method 3: Installing Fonts Using Package Managers
Ubuntu’s Software Center and package managers offer a selection of fonts that can be installed with a few clicks or commands. To install fonts on Ubuntu using the apt package manager, follow the below steps:
Step 1: Update Package List
First of all, update the package list before installing fonts on the Ubuntu system:
sudo apt update
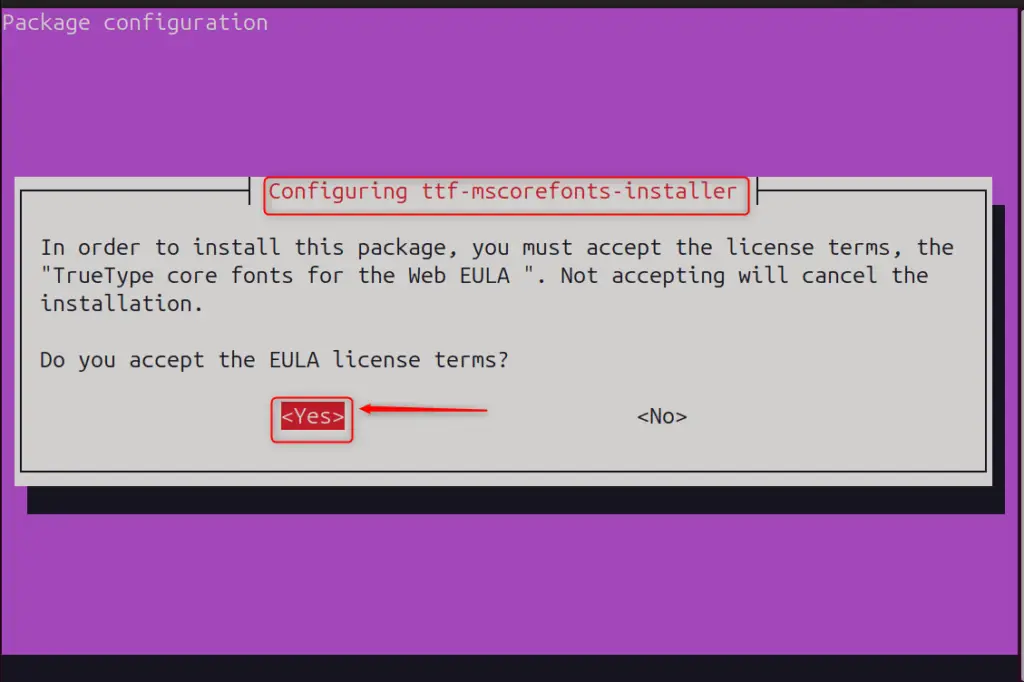
Step 2: Install Microsoft TrueType Fonts
To install Microsoft TrueType fonts, users can use the “ttf-mscorefonts-installer” package name:
sudo apt install ttf-mscorefonts-installer
During installation, you’ll need to accept the Microsoft Fonts’ EULA. For this, hit the <Yes> option to move further:
Step 3: Verify Installed Fonts
After installation, Microsoft fonts are accessible across the Ubuntu system:

For classic Ubuntu fonts, use “sudo apt install fonts-ubuntu-classic”. Remember to update the font cache with “fc-cache -f -v” to apply the changes.
Method 4: Installing Fonts Using the Google Fonts Website
The most user-friendly way to install fonts in Ubuntu is through the Google Fonts Website. For installing fonts on the Ubuntu system via the Font Viewer, follow the below steps:
Step 1: Visit the Google Fonts Website
Firstly, visit the Google Fonts website and browse through the extensive library of fonts by searching the font. This method combines the ease of Font Manager with the extensive library of Google Fonts, providing a wide range of options for users. In our case, search “Roboto” font in the search bar: 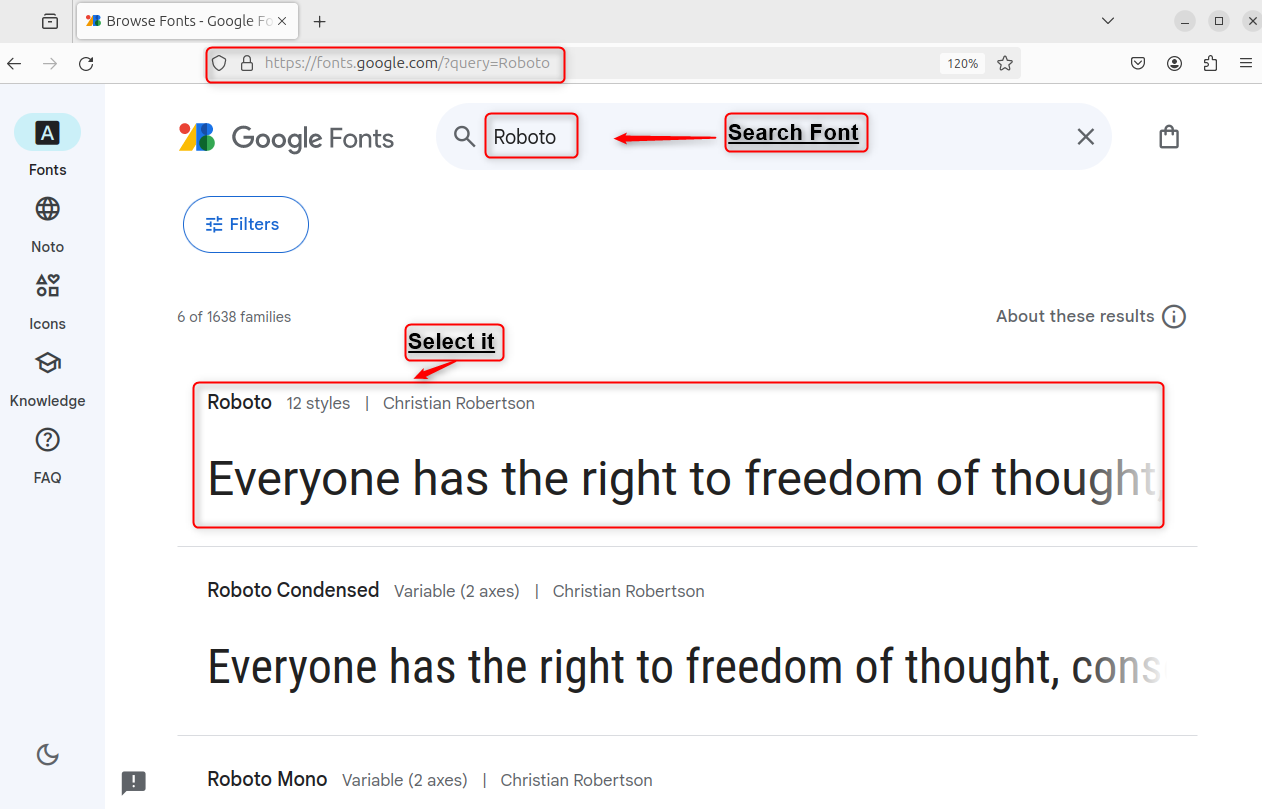
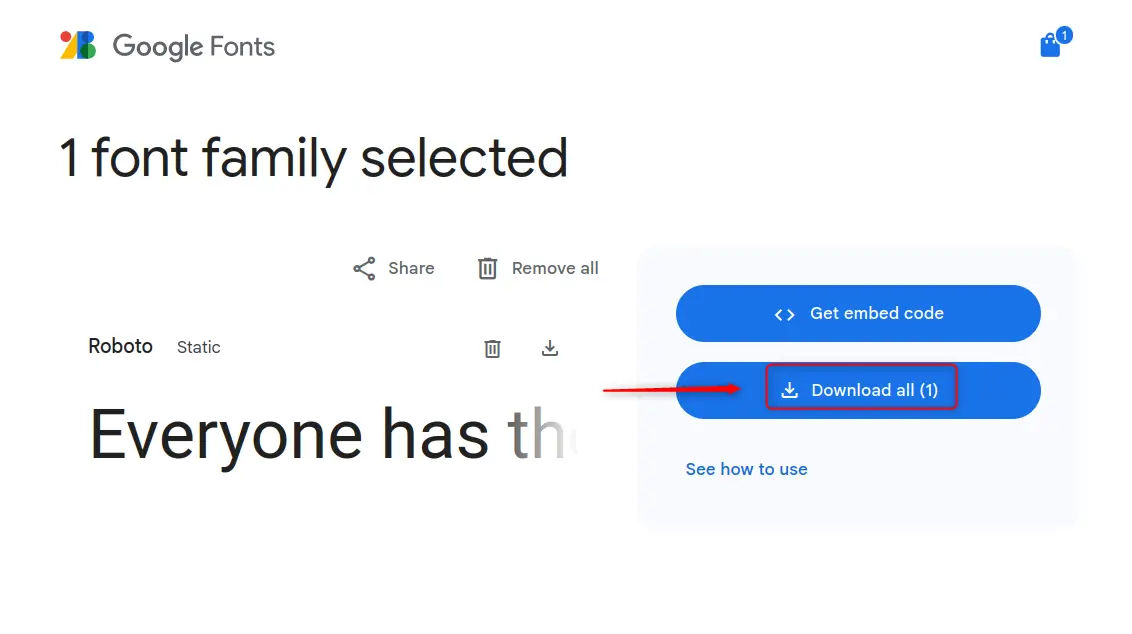
Step 2: Download Font
Once you’ve found a font that suits your needs, click on the “Get font” button to download the font to the system:

It navigates to the small pop-up window. At there, hit the “Download all” button for the download zip folder:
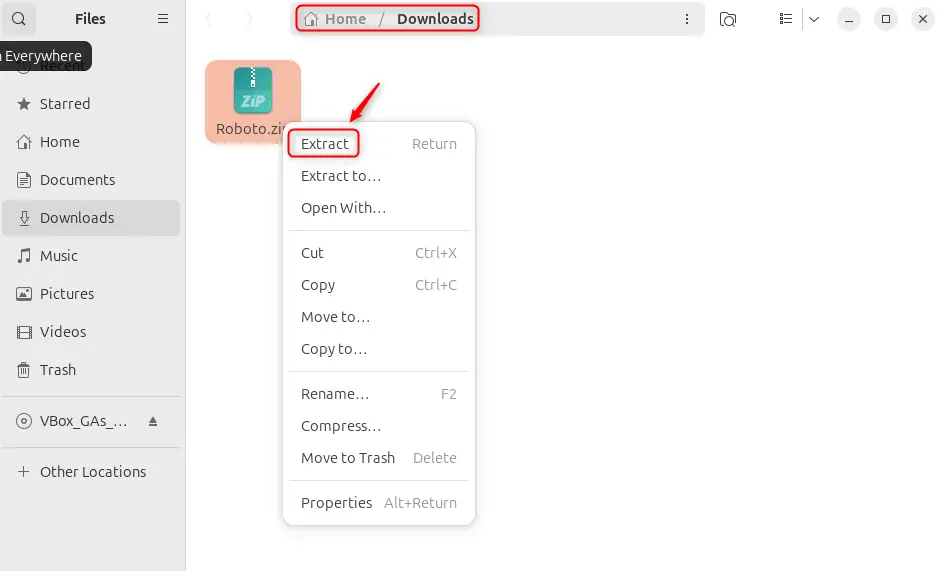
Step 3: Extract the Font
After downloading, find the zipped font file in the Downloads directory and extract it. It is possible by right-clicking on the file and selecting “Extract”:
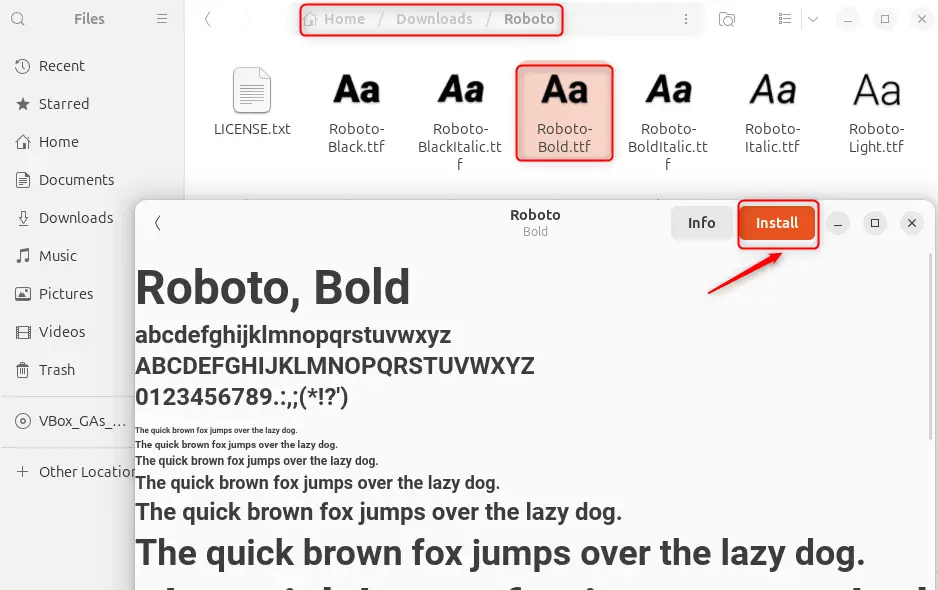
Step 4: Installing the Font
Navigate to the extracted folder and double-click on the font file (which will be in .ttf or .otf format). It launches the Font Viewer application. In the top-upper right corner of the Font Viewer, you’ll find an “Install” button. Clicking this will install the font onto your system:
Step 5: Verifying the Installation
To ensure that the font has been installed correctly, you can use the Font Viewer to check the status, which should now indicate that the font is “Installed”: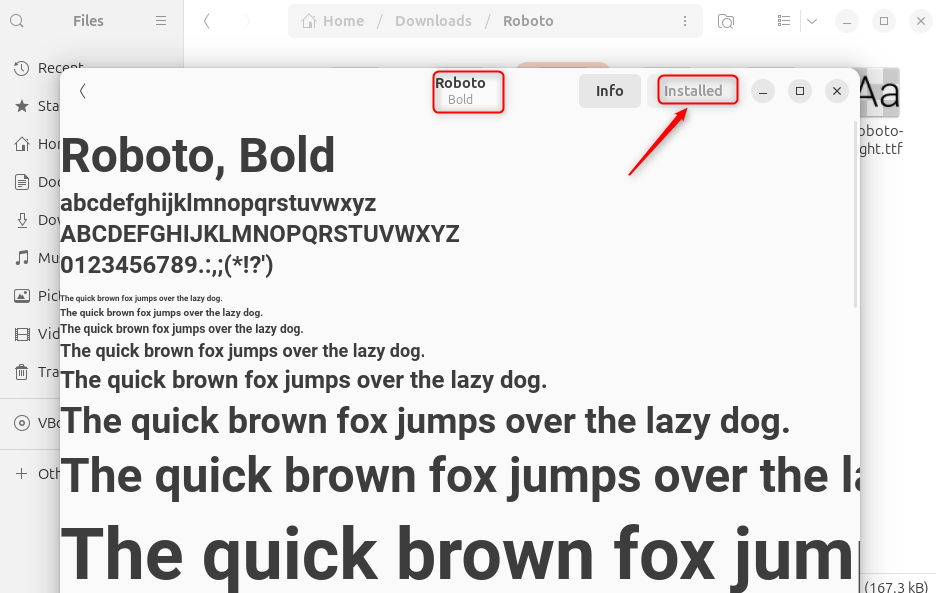
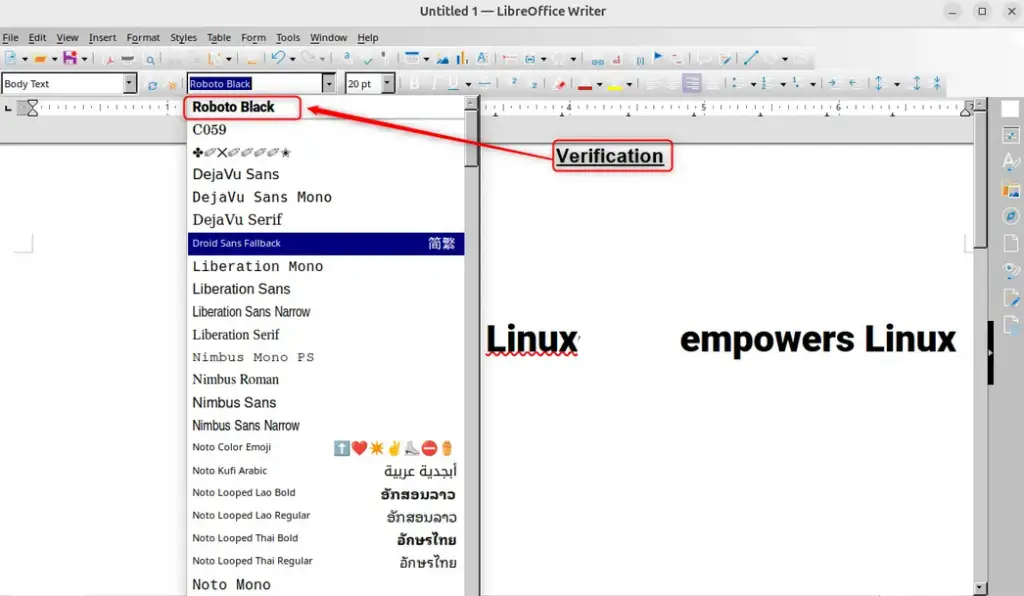
Once installed, the new fonts will be available in applications such as GIMP and LibreOffice.
Bonus: Installing Multiple Fonts at Once
If you have several fonts to install, it’s more efficient to batch-install them by following the below steps:
Step 1: Create a .fonts Directory
First of all, create a “.fonts” directory in the home folder if it doesn’t exist. Users can do this by running the “mkdir” command in the terminal:
mkdir ~/.fonts
Step 2: Copy all “.ttf” or “.otf” Font Files
After creating the directory, copy all “.ttf” or “.otf” font files into the “.fonts” (already) directory via the “cp” command:
cp ~/Downloads/Roboto/Roboto-Black.ttf ~/.fonts
Step 3: Update the Font Cache
After copying font files, it is necessary to update the font cache using the “fc-cache” command as below:
fc-cache -f -v
Step 4: Verify the Installed Font
Finally, users can verify the installation by checking the font’s availability in an application that utilizes fonts, such as GIMP or LibreOffice:
This method saves time and effort when dealing with multiple font files.
Optional: Install Font System-wide
For those who prefer using the terminal, fonts can be installed system-wide using the following steps:
1. Copy the font files to “/usr/local/share/fonts” or a subfolder within it.
2. Run “sudo fc-cache -fv” to rebuild the font cache.
This way ensures that fonts are available to all users and requires administrative privileges.
Remove/Uninstall Fonts on Ubuntu 24.04
Whether you’re a designer looking to declutter your workspace or a user who installed a font that’s causing issues, removing fonts in Ubuntu is a straightforward process. These are the methods to remove fonts on Ubuntu:
Using Font Manager
First, install Font Manager via the terminal with the command: “sudo apt install font-manager”. Then, open Font Manager, select the font to remove and hit the “Remove” button.
Using Terminal Commands
First, use the “fc-list” command to find the location of the font you want to delete. Then, remove the font files directly from their directory, typically found in “/usr/share/fonts”.
Using Manual Removal
First, navigate to the home directory, and hit “Ctrl+H” to show hidden files. Then, go to “.fonts” or “.local/share/fonts” and delete the unwanted font files. Finally, update the font cache with the “fc-cache -fv” command to apply changes.
To remove font on Ubuntu, use the “autoremove” option by specifying the name below:
sudo apt autoremove font-manager
That is all from the guide.
It’s important to note that removing system fonts can affect the functionality of your system, so proceed with caution. Always ensure that the fonts you’re deleting are not required by the system or any applications you use.
Conclusion
To install fonts in Ubuntu 24.04, use Font Manager, Ubuntu Software Center, and Package Managers.
Alternatively, users can install fonts in Ubuntu 24.04 using the Google Fonts Website or Installing Multiple Fonts at Once. Google Fonts offers a vast selection of fonts that can be easily installed on Ubuntu.
Installing fonts in Ubuntu 24.04 is recommended through the “ttf-mscorefonts-installer” package in the default repository. After installation, verify the fonts with the font manager application.
