Google Docs entertains their user by providing various features of text modification. At the same time, the “Drawing” tool in Google Docs enables the users to insert shapes into the existing document. These shapes include rectangles, circles, arrows, and many more. For this purpose, this post describes various methods for adding shapes on Google Docs. The step-by-step guidelines regarding these methods are as follow.
- Method 1: Using Drawing to Add a Shape in Google Docs
- Method 2: Using Image Option to Add a Shape on Google Docs
The content of this post is as:
Method 1: Using Drawing to Add a Shape in Google Docs
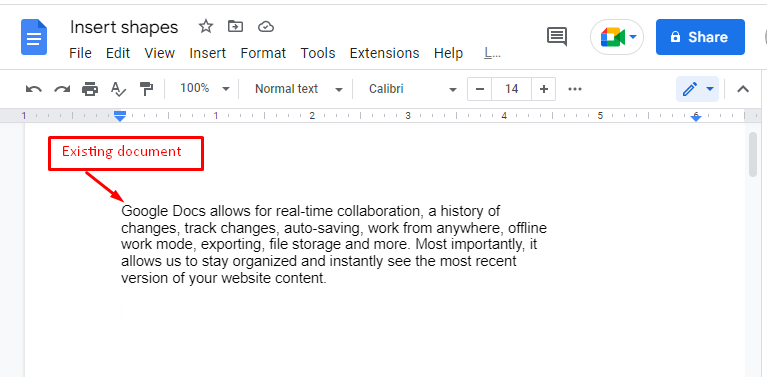
Google Docs offers a “Drawing” tool that provides exciting features to add different kinds of shapes. Considering it, an existing document is carried out, as seen in the below screenshot.
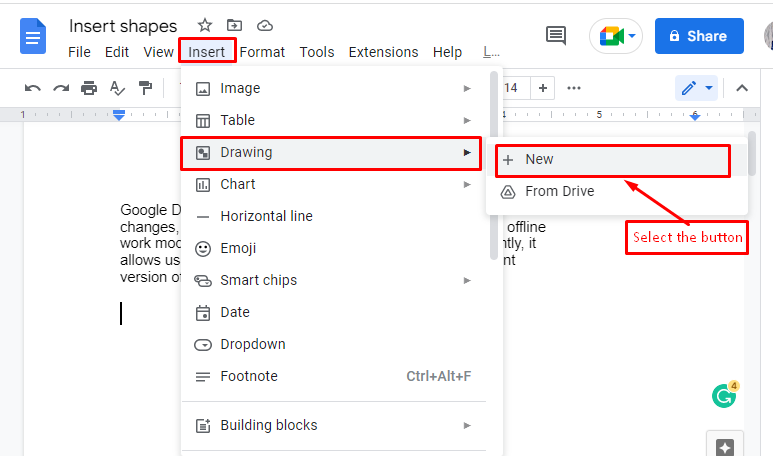
After that, select the “Drawing” tool that comes out from the “Insert” tab of the menubar and hit the “New” button.
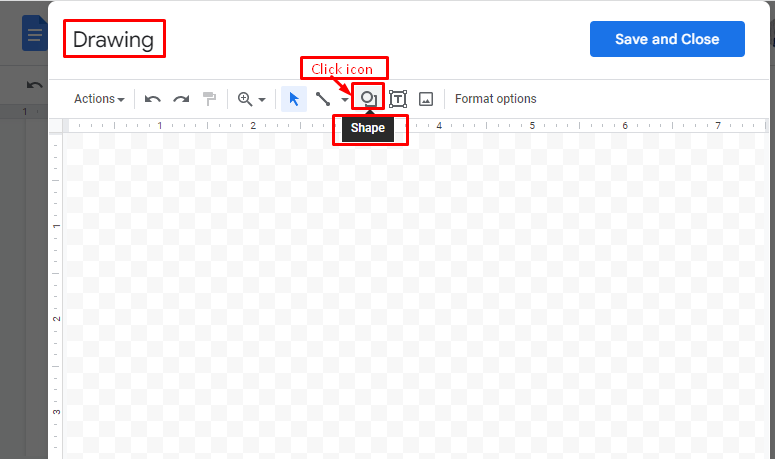
A new “Drawing” window pops up; select the “Shape” icon in the toolbar as shown in the below screenshot.
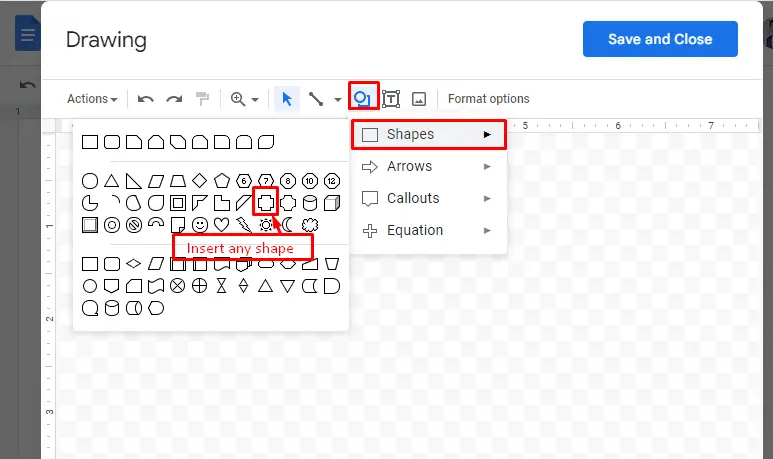
After pressing the icon, various options are shown. In this scenario, select the “Shapes” option that provides various shapes. As an example, we are adding the “addition” shape.
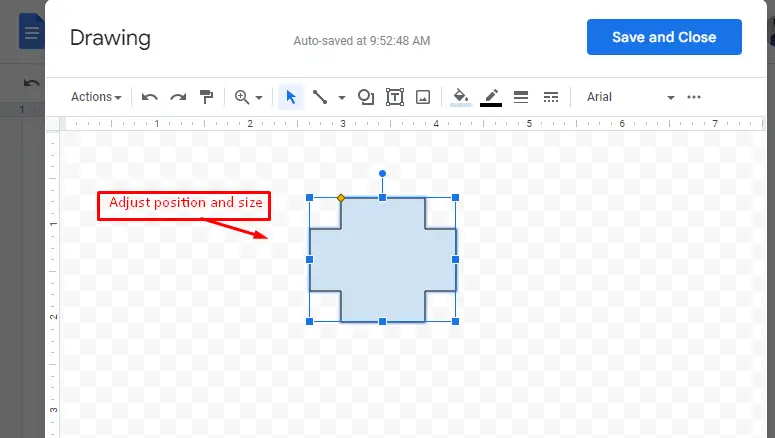
After clicking the shape, it is pasted into the “Drawing” window. Now, users have the facility to adjust the position as well as the size of the shape according to their needs.
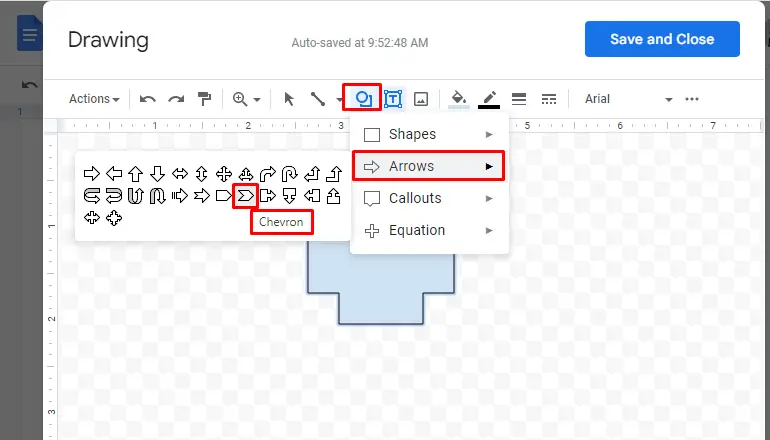
Similarly, hover over the “Arrows” option and choose the appropriate arrow for this shape. Here, the “Chevron” arrow is selected.
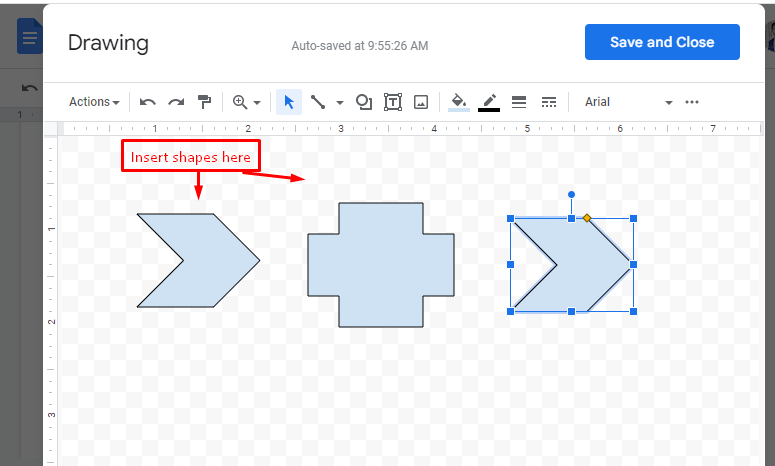
Hence, two “Chevron” shapes are pasted on the left and right side of the “Drawing” window, which can be observed in the below screenshot. Choose the “Save and Close” button.
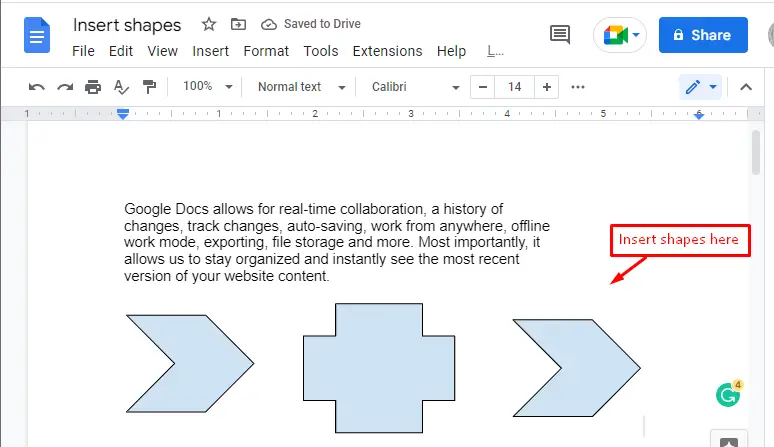
The selected shapes will be added to your Google Doc as shown in the image below.
Done it! You have learned to add a shape on Google Docs.
Method 2: Using Image Option to Add a Shape on Google Docs
An alternative method is considered for adding shapes from the webpage. It is an interesting feature of Google Docs that can be accessed through the “Insert” tab. Let’s see how it can be done:
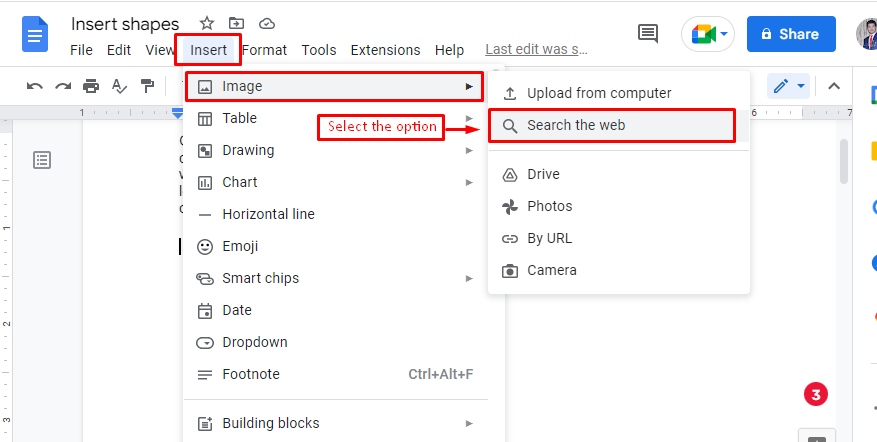
Navigate to the “Insert” tab from the menu bar and select the “Image” option in the dropdown list. A new dropdown will be created which shows that the users can choose images from the computer, from a web source, by URL, or by using the camera of the computing machine.
For example, we are going with the “Search the web” button.
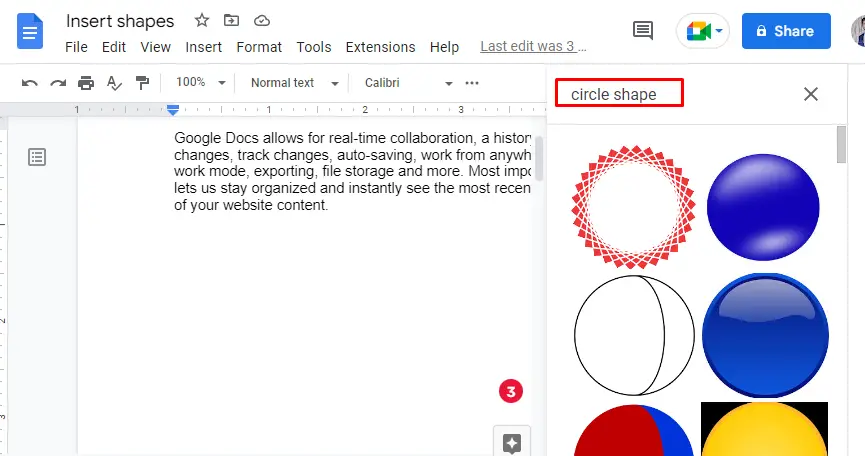
After that, type “circle shape” and choose a shape. Moreover, the users can write any shape that they want to insert in Google Docs.
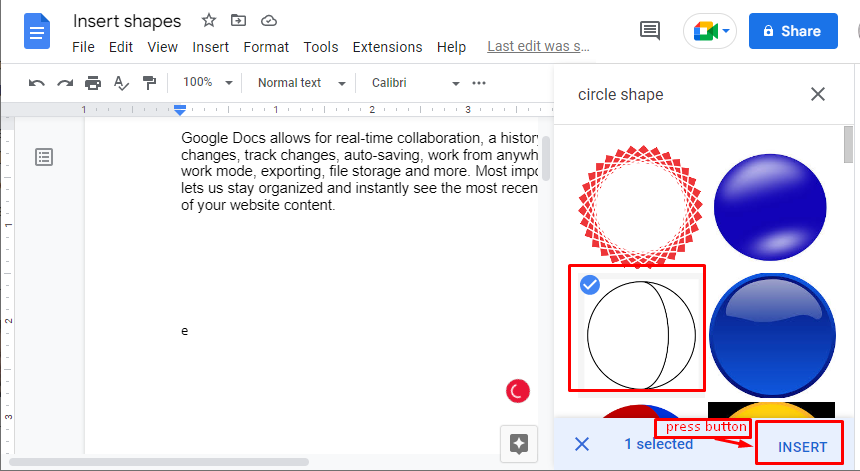
After that, choose the shape and hit the “INSERT” button that can be seen in the below figure.
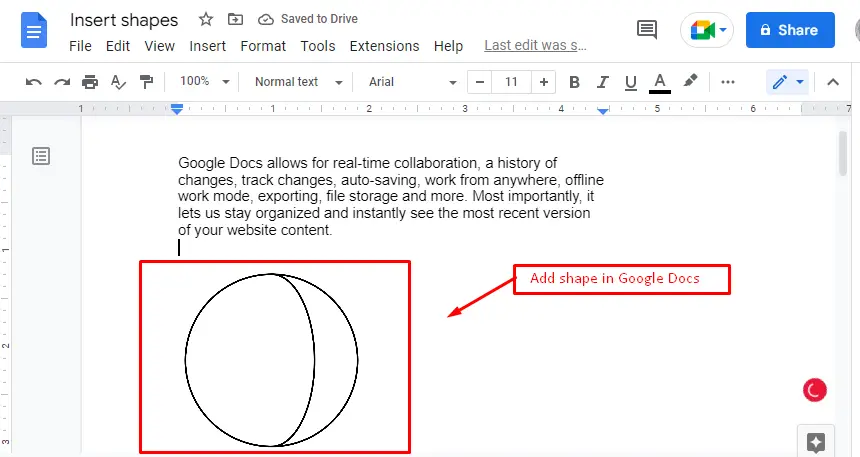
Finally, a selected shape is added in current Google Docs that can be verified below.
That it! Now you have experienced multiple methods to add a shape.
Conclusion
Google Docs offers the “Image” and “Drawing” options from the “Insert” tab for adding a shape on Google Docs. The “Drawing” window enables you to insert any shape as well as adjust the size and position of the shape based on user needs. To add user-defined or custom shapes from other sources, the “Image” gives the options, i.e., “Search for web”, “By URL”, “From Camera”, and “From Computer”.This post has explained possible methods for adding a shape in Google Docs.

TUTORIALS ON LINUX, PROGRAMMING & TECHNOLOGY