Like other operating systems Ubuntu is also a multi-user platform. Different levels of permissions can be set while adding new users. It is one of the basic skills every Linux user must know. This guide is about adding new users on Ubuntu and giving them some specific permissions and deleting them as well.
There are two main methods to add new users:
- Adding a new user using terminal
- Adding a new user using the GUI
1. Adding new user using terminal:
Users with “Sudo” privileges can add new users. Launch terminal and type the below-mentioned command to add the new user:
$sudo adduser < username > 
Use any name in the place of “< username >”. Firstly, you will be asked to set a password for the new user. So, type the password, confirm it by retyping.
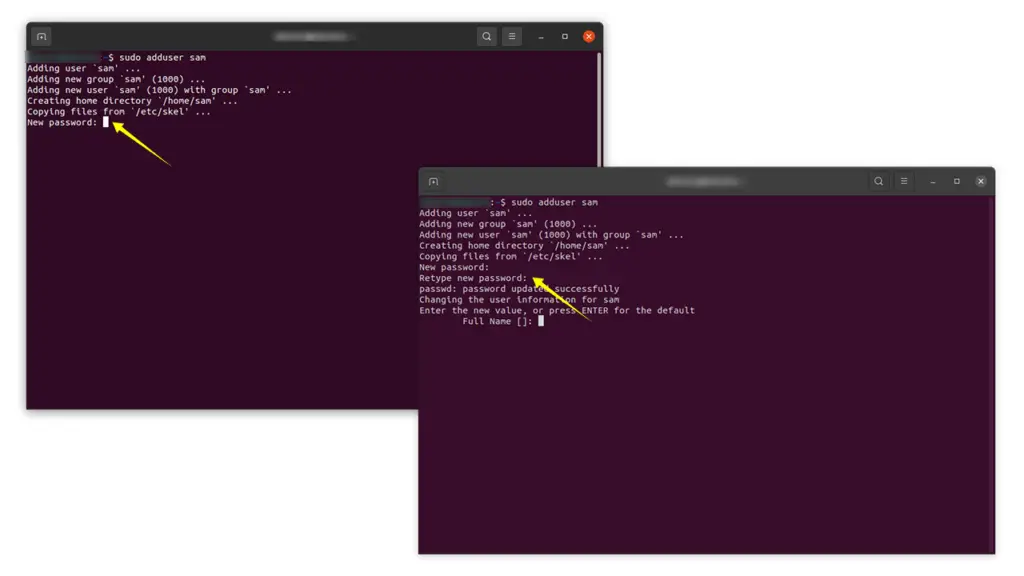
After setting up the password it will be asked to add user’s information such as “Full Name”, “Room Number”, And “Phone Number” etc, see the image below:

Verify the details and press “Y/y” to finish the process of adding a new user process.
Granting privileges to a new user:
Since the new user has been added time to grand root privileges, type the command shown below and press the “Return” key:
$sudo visudoIt will open a file in the terminal, that file would be “/etc/sudoers.tmp”. The file will open in a nano editor. Now, search “root ALL=(ALL:ALL) ALL”. and add the following line under this line as shown in the images below :
sam ALL=(ALL:ALL) ALL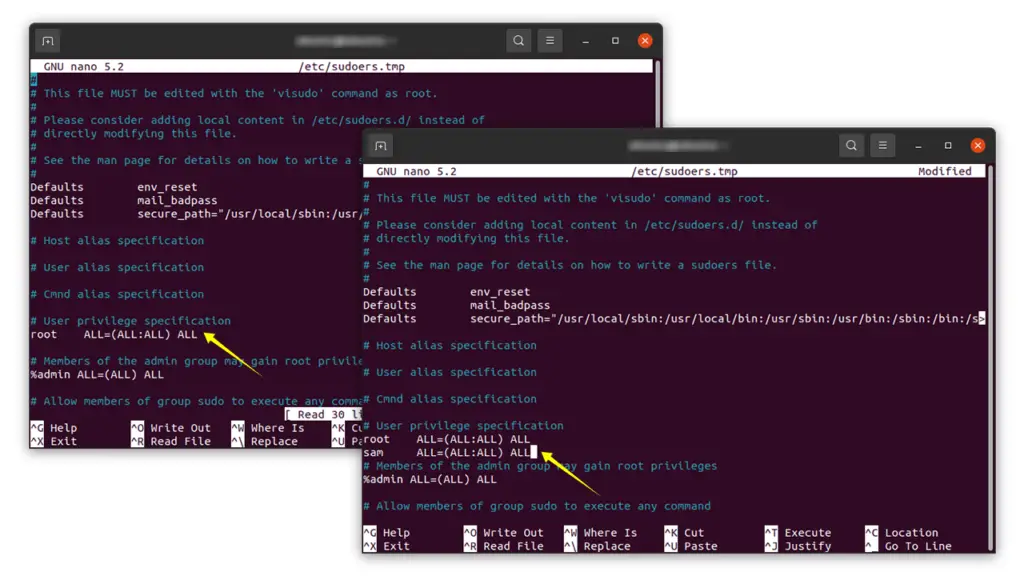
Press “ctrl X”, “Y” and then “Enter” to finish the process.
It can be verified by signing in with the new account and executing any command that requires “Sudo” permission.
Deleting the user:
To remove the user, type the following commands and press “Enter”:
$sudo deluser <username> Type the name of user in the place of “< username >” to remove it.

To remove the user’s home directory, run the command shown below:
$sudo deluser --remove-home <username>
2. Adding a new user using the GUI:
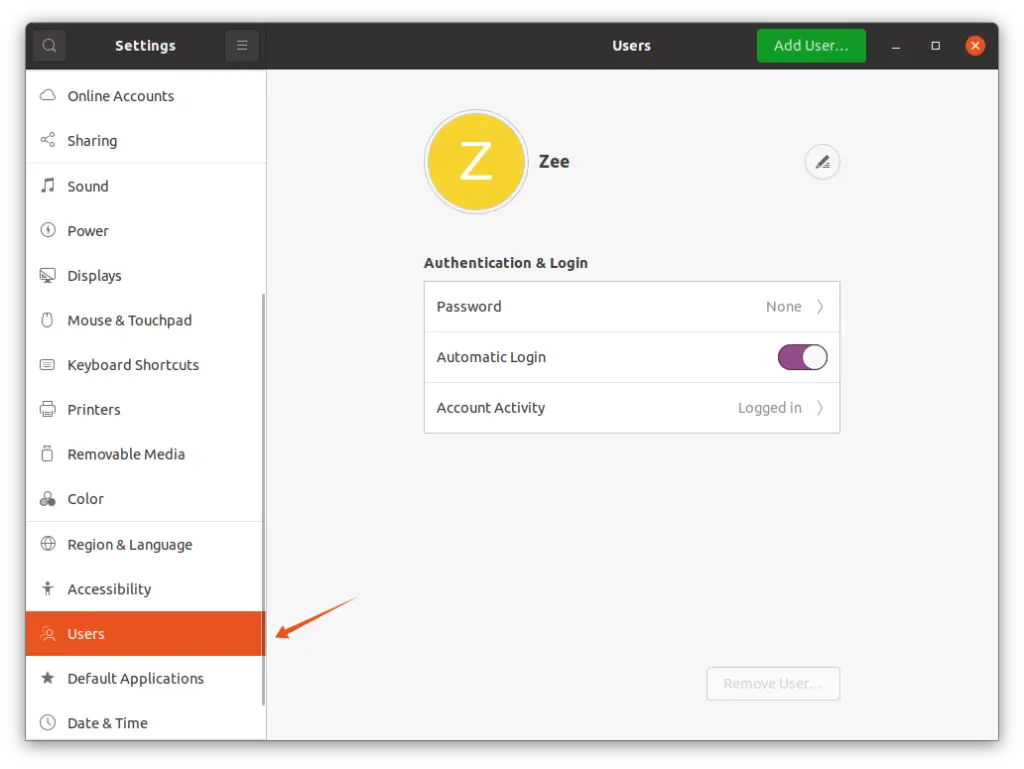
If you are not a command-line person then a new user can also be added using GUI in Ubuntu. Open settings and then go to the “Users” tab that can be seen in the following image:
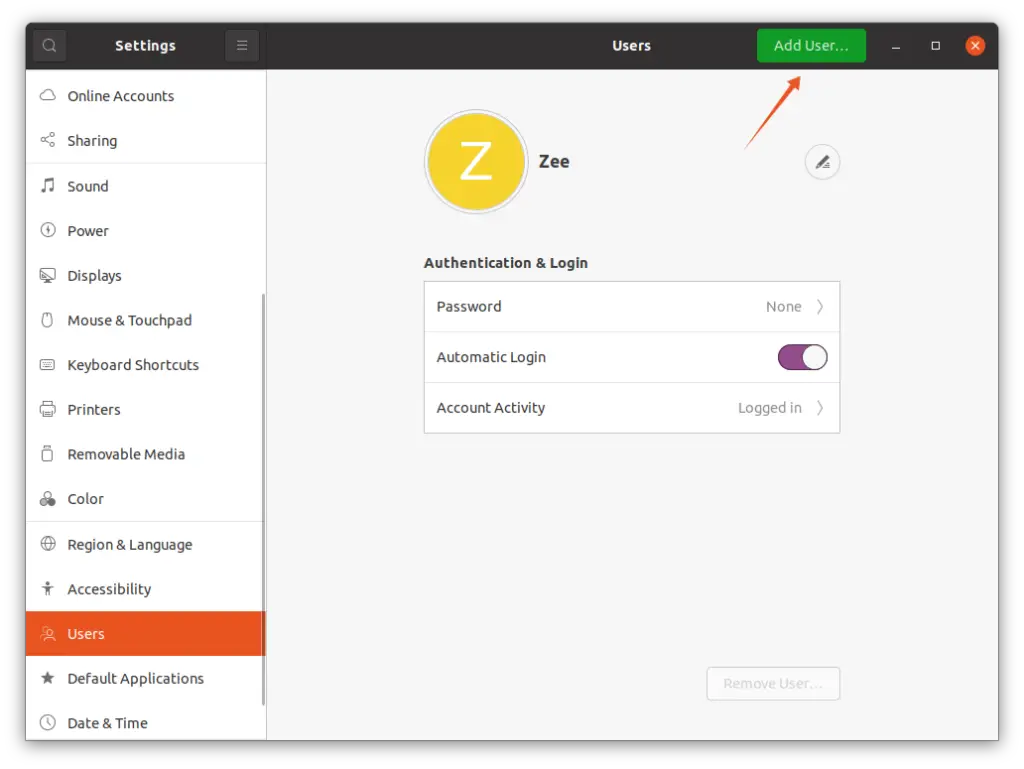
Click on the “Add User…” button at the top to add a new user as seen in the following image:
Two types of users can be added, standard and administrator, administrator user comes with additional permissions:
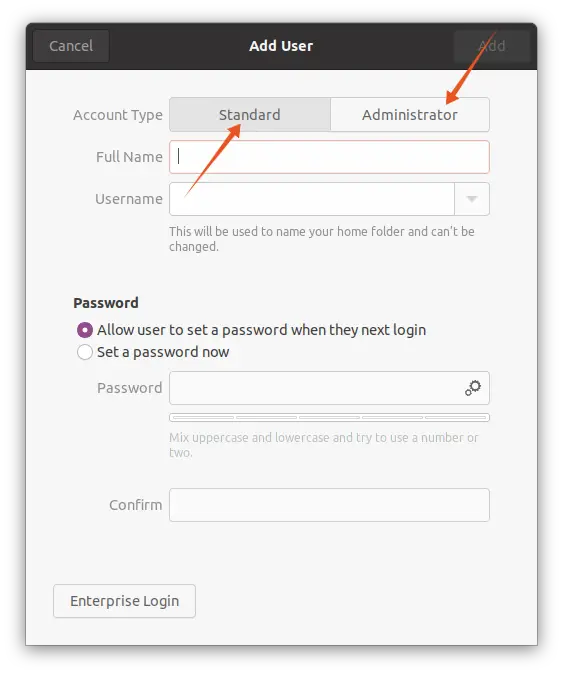
Type the name of the user:
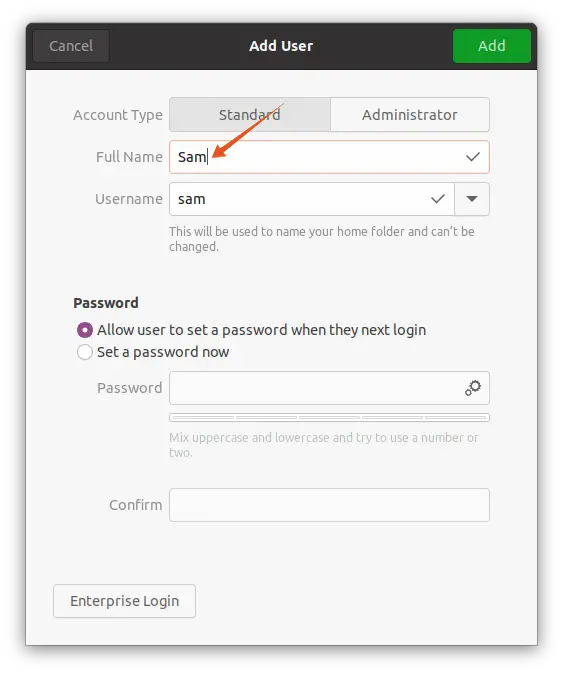
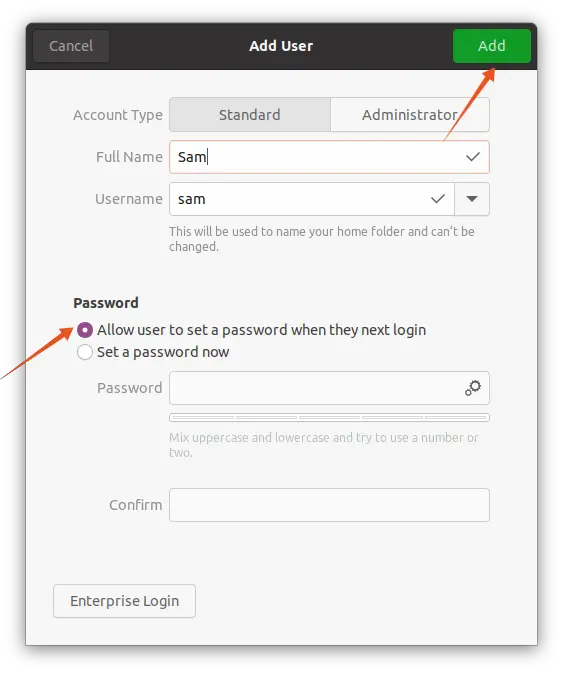
If you want to let the user set the password, then that is pretty much it, click on “Add”. Users will set their passwords when they first log in:
Or click on “Set a password now” option and type password:
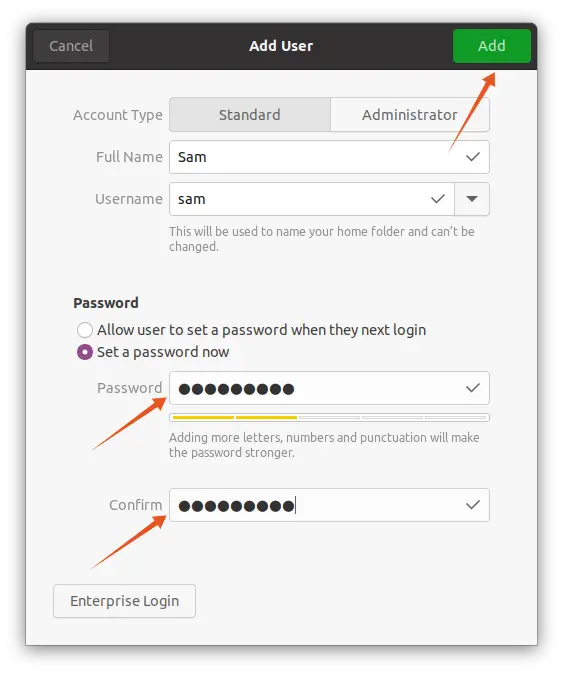
There is one more option at the bottom and that is “Enterprise Login”, see the following image for details:
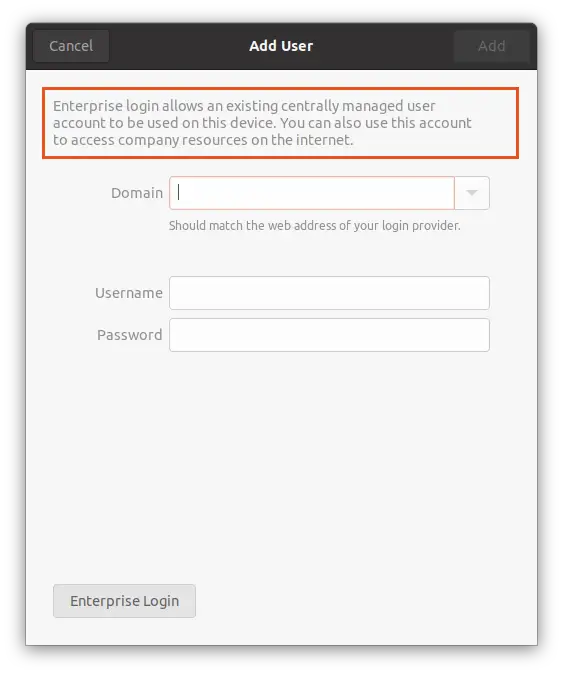
Deleting a user using the GUI:
To delete the existing users open the “Settings” and then “Users” tab, click on the user’s name, you will see a “Remove User” button at the bottom, click on it:
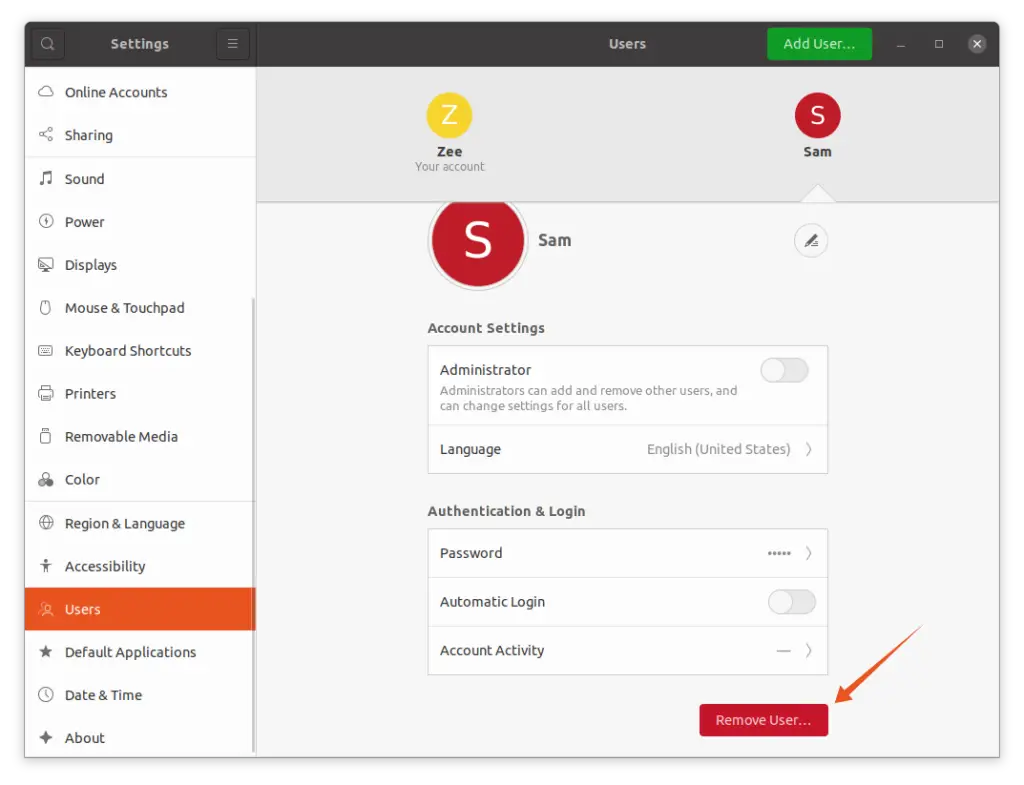
A prompt will open, you can either keep the user’s files or delete them, look at the image below:
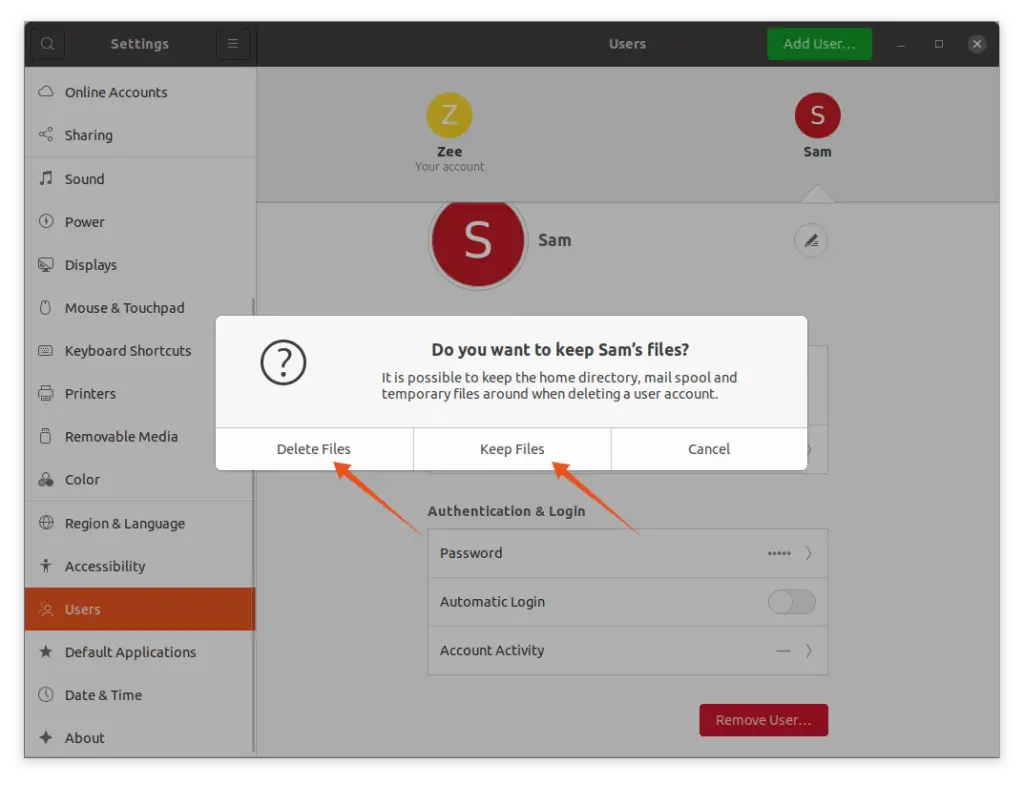
Chose either of the options and click, the user will be removed.
Conclusion
This article describes briefly that how we can add the new user on Ubuntu 20.04 and 20.10.

TUTORIALS ON LINUX, PROGRAMMING & TECHNOLOGY