
As a Linux administrator, on my previous job, I had to use bash for loop on multiple occasions almost every now and then. I am sick of seeing people teaching bash scripts by printing out “hello world” 4 times. That’s insane and not really useful, sure to teach the beginners you can do that but also teach some real world examples not just textbook stuff. I am going to share some practical examples that I have used in the real world as a linux system admin. These examples would be simple for better understanding yet practical.
1. How to Rename Files in Bulk Using Bash For Loop
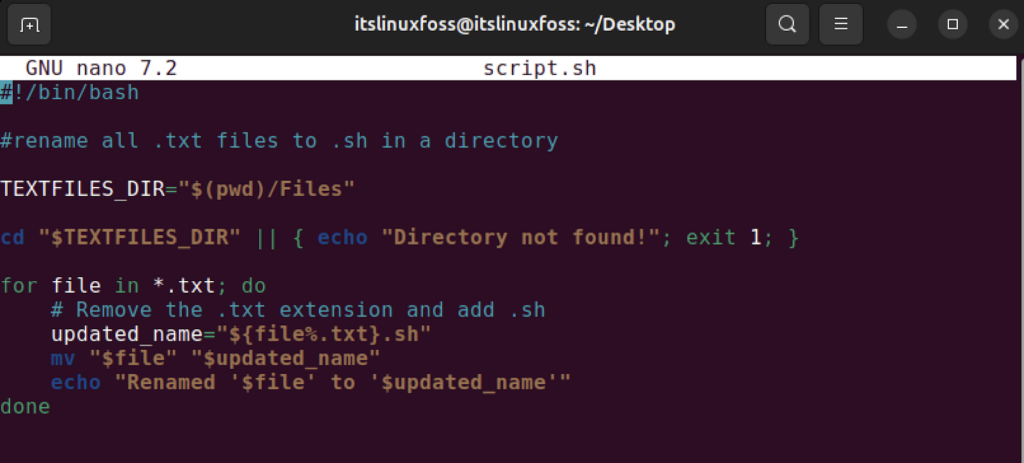
Once at my job, I had to solve a similar problem by writing a bash script using a for loop. Let’s do a similar example. So, let’s say that we have 7 .txt files in our directory named as ‘Files’. These are all text files with an extension .txt and we want to change their extension from ‘.txt’ to ‘.sh’. So to do this renaming in bulk, we would need to use bash for loop:
Step 1: First off, define the path to the directory where those 7 .txt files reside:
#!/bin/bash
"$TARGET_DIR"="$(pwd)/Files"

$(pwd) sets the path to the present working directory.
Step 2: To make sure that the directory exist, we will change the current directory to the variable ‘TARGET_DIR’ where we have stored the path to ‘Files’ directory:
cd "$TARGET_DIR" || { echo "Directory not found!"; exit 1; }
In case if the directory doesn’t exist then it prints the message of the directory not found and then terminates the script right away.
Step 3: Now, finally run a bash for loop through all those files in the directory and change their extensions from ‘.txt’ to ‘.sh’ one by one:
for file in *.txt; do
     updated_name="${file%.txt}.sh
     mv "$file" "$updated_name"
    echo "Renamed ‘$file’ to ‘$updated_name’"
done
Complete Script with Comments for Understanding
#!/bin/bash
"$TARGET_DIR"="$(pwd)/Files"   #path to the Files directory

cd "$TARGET_DIR" || { echo "Directory not found!"; exit 1; } #check if directory exists

for file in *.txt; do                             #bash for loop start
      #store the updated file name from .txt to .sh in variable
      updated_name="${file%.txt}.sh

     #actually rename the file the name you stored in the variable
     mv "$file" "$updated_name"

     #simply print each time a file is renamed
    echo "Renamed ‘$file’ to ‘$updated_name’"

done	#for loop ended
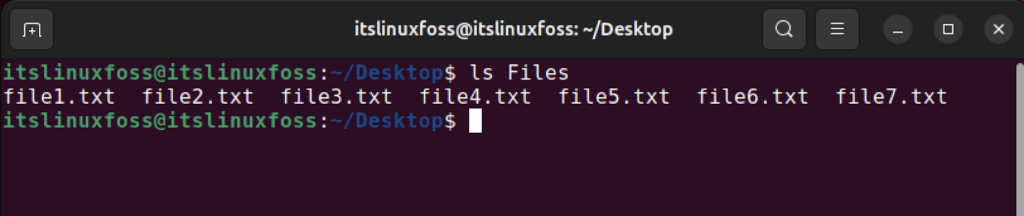
Step 4: Check the file names in the directory ‘Files’ before executing the script:
$ ls Files
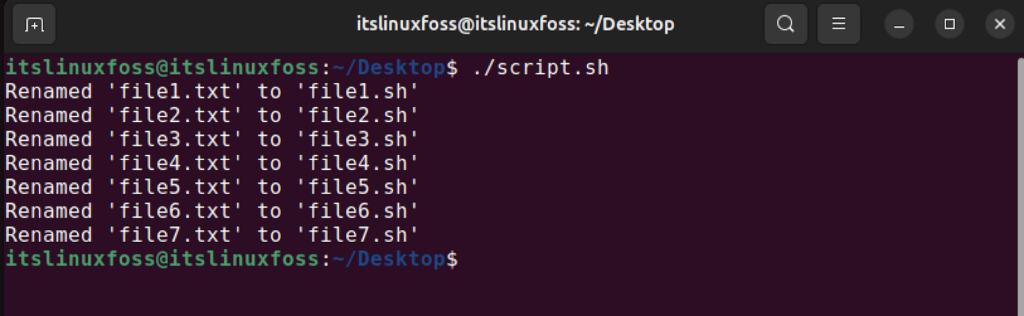
Step 5: Now, execute the script:
$ ./script.sh
Step 6: Now verify if the file extensions were actually changed, for that matter run ls command again:
$ ls Files

2. How to Compress Old Log Files using Bash For Loop
There were instances where I’d have to compress files older than 30 days in my previous job. Now, I am going to show you how to compress old files using bash for loop. In this example, I’d compress the log file older than 5 minutes. I’ll also show you the tweak that you could do to compress the log file older than 1 day.
I have created a directory on my desktop named ‘myapp’ and in this directory I have a file named ‘file.log’. You can learn how to create a directory in linux and how to create a file in linux.
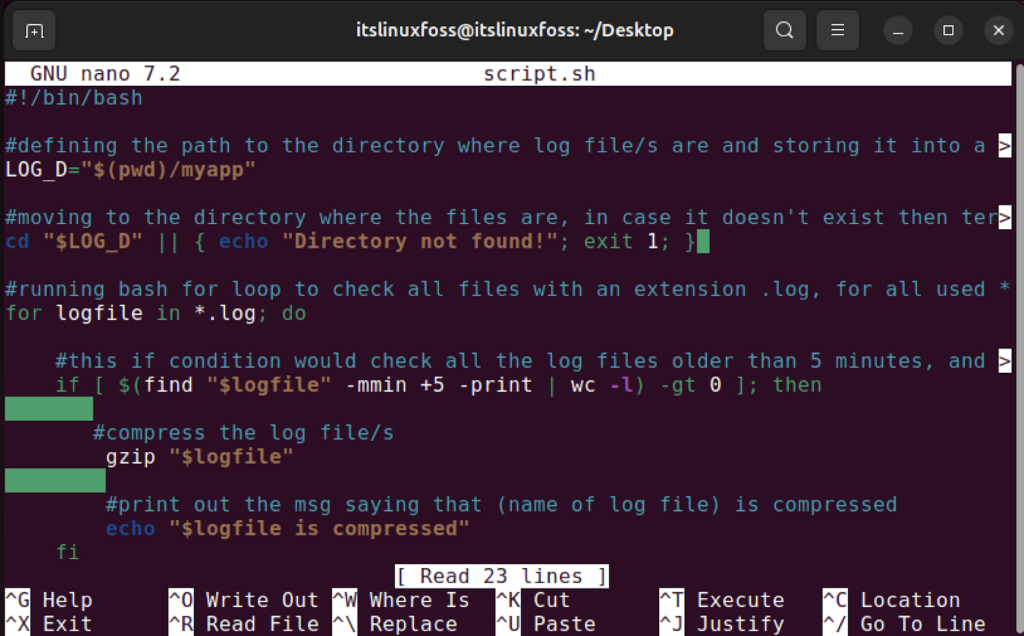
Step 1: First off, define the path to the directory where log file resides:
#!/bin/bash

LOG_D="$(pwd)/myapp"
Step 2: Second, change the directory to ‘myapp’ to check you apply the compression in the right directory, if the directory doesn’t exist, it will terminate the script:
cd "$LOG_D" || { echo "Directory not found!"; exit 1; }
Step 3: Third, I’ll run a bash for loop in which I’ll put a check to verify if the log file is older than 5 minutes, I just created the file so that’s why setting up this time:
for logfile in *.log; do
    if [ $(find "$logfile" -mmin +5 -print | wc -l) -gt 0 ]; then
        gzip "$logfile"
        echo "$logfile is compressed"
    fi
done
Important Note: if you want to compress log files older than 1 day then use ‘-mtime’ instead of ‘-mmin’. For example, If you would like to compress log files older than 30 days then the if statement would look like this:
  if [ $(find "$logfile" -mtime +30 -print | wc -l) -gt 0 ]; then
        gzip "$logfile"
        echo "$logfile is compressed"
   fi
In the if statement, ‘$logfile’ is the path, ‘find’ command finds all the log files at specified path older than 5 minutes for which we used ‘-mmin +5’ then ‘-print’ will sort of print the full path of the file that meets the condition and then we pipe the output to ‘wc -l’ which essentially helps us count the number of files that meet the condition and then ‘gt -0’ essentially makes sure that the output is greater than 0, meaning we do have some files matching the criteria so the log file/s can be compressed.
Complete Script with Comments for Understanding
#!/bin/bash

#defining the path to the directory where log file/s are and storing it into a variable LOG_D
LOG_D="$(pwd)/myapp"

#moving to the directory where the files are, in case it doesn't exist then terminate the script
cd "$LOG_D" || { echo "Directory not found!"; exit 1; }

#running bash for loop to check all files with an extension .log, for all used *
for logfile in *.log; do

    #this if condition would check all the log files older than 5 minutes, and find them
    if [ $(find "$logfile" -mmin +5 -print | wc -l) -gt 0 ]; then

       #compress the log file/s
        gzip "$logfile"

        #print out the msg saying that (name of log file) is compressed
        echo "$logfile is compressed"
    fi
done
Step 4: Check the file/s in the specified directory, I have 1 log file named as ‘file.log’:

Step 5: Run the script:
$ ./script.sh
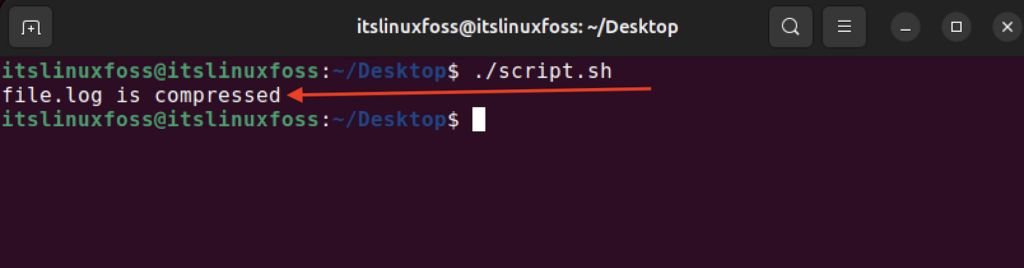
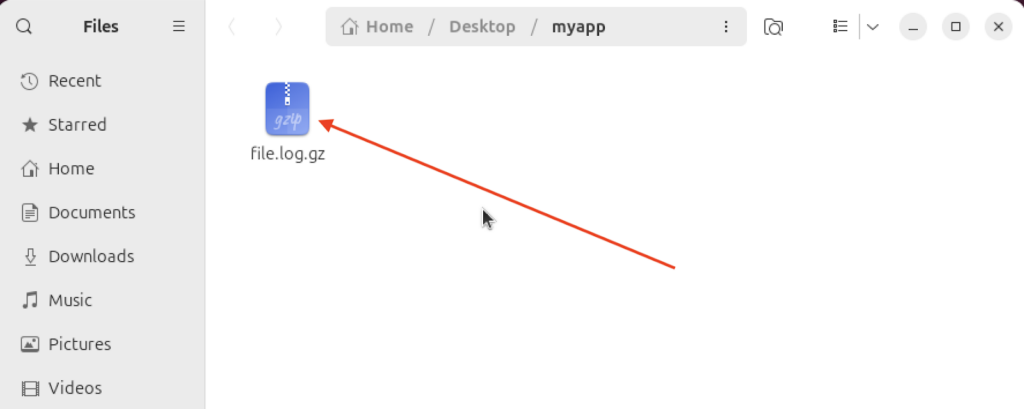
Step 6: Verify if the log file was compressed:
3. How to Check Connectivity to Multiple Servers Using Bash For Loop
As a linux administrator, one thing I distinctly remember doing was checking connectivity to a bunch of servers before running an automation script. I’d also do it while troubleshooting network issues. Of course, I’d have to use bash for loop in most cases. In this example, I’ll show you how to check your connectivity to a list of servers using bash for loop.
Step 1: First, define an array of servers with hostnames and ip address as its values:
#!/bin/bash

servers=("server1.example.com" "server2.example.com" "8.8.8.8")
First two values are random server hostnames which don’t even exist and third value is the ip address of Google’s DNS which means it’s going to be available.
Step 2: Second, Let’s run a bash for loop using which we are going to iterate over every member of the array. ${servers[@]} is going to cover all members of the array.
for server in "${servers[@]}"; do
   if ping -c 1 "$server" &> /dev/null; then
       echo "$server is reachable"
  else
    echo "$server is unreachable"
  fi
done
‘ping -c 1’ ensures that we send a single ping instead of continuous pings while ‘$server’ contains the hostname or ip address which is getting pinged. Also, we use ‘&> /dev/null’ to make sure that no output of error or any other kind is displayed in the terminal, we nullify that. If we don’t use /dev/null then it’s going to start to print ping success and failure messages on the terminal.
Finally, if ping was successful It’d let us know that the server is reachable and if it didn’t then it would let us know that it was unreachable.
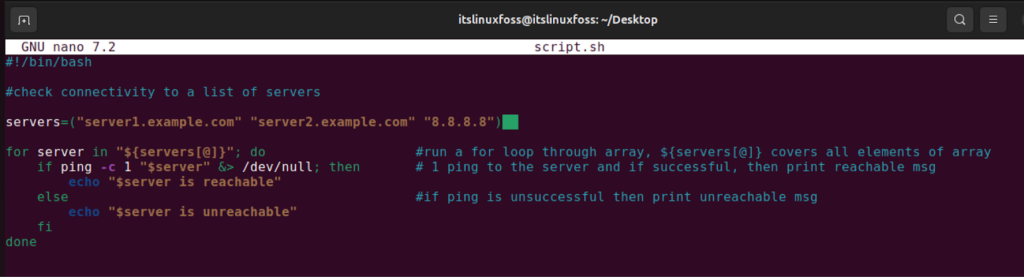
Complete Script with Comments for Understanding
#!/bin/bash
#check connectivity to a list of servers
servers=("server1.example.com" "server2.example.com" "8.8.8.8")
for server in "${servers[@]}"; do              #run a for loop through array, ${servers[@]} covers all elements of array
    if ping -c 1 "$server" &> /dev/null; then       #1 ping to the server and if successful, then print reachable msg
        echo "$server is reachable"
    else					   #if ping is unsuccessful then print unreachable msg
        echo "$server is unreachable"
    fi
done
Step 3: Let’s go ahead and run the script and see the result for ourselves.
$ ./script.sh
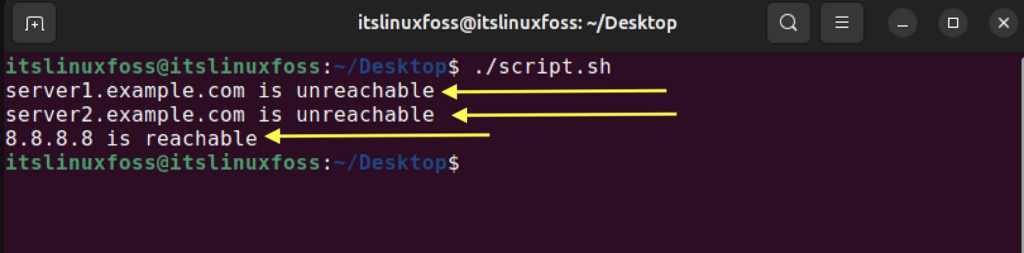
‘8.8.8.8’ is the primary DNS server of Google.
4. How to Create Backup for Multiple Directories Using Bash For Loop
If you are a linux administrator then backing up directories is your thing. You must know how to create backups of multiple directories. In this script, we are simply going to define an array of directories that we want to back up, and then we are going to specify a path where we are going to create the backup of these directories.
Step 1: Let’s say I want to create backups of three directories named Documents, Music and Pictures. So, first of all I need to define an array that contains paths to these three directories.
#!/bin/bash

directories=("$HOME/Documents" "$HOME/Pictures" "$HOME/Music")
We use $HOME so it works with any user like in my case the paths would be /home/itslinuxfoss/Documents, /home/itslinuxfoss/Pictures, /home/itslinuxfoss/Music.
Step 2: After that I need to define a path to the specific directory where I need to create the backup.
BACKUP_DIR="$HOME/Desktop/Backups"
Step 3: As my third step, I’ll see if the backup directory already exists, if it doesn’t then I want to create it.
mkdir -p "$BACKUP_DIR"
‘mkdir -p’ makes sure that the directory is created if it doesn’t already exist.
Step 4: To make sure that every backup is unique and recognizable, we generate timestamps and add them to every backup.
DATE=$(date +"%Y-%m-%d")
Step 5: Now, you have to loop through each directory from the array and for that matter you are going to use bash for loop.
for dir in "${directories[@]}"; do
Step 6: Let’s extract the directory name using basename:
base=$(basename "$dir")
Here ‘basename’ helps us extract the name of the directory instead of the full path. For example, out of ‘/home/itslinuxfoss/Documents’, it’d extract only ‘Documents’.
Step 7: Next we need to define the backup file name which is like defining a pattern, like how these backup files would be named.
backup_file="${base}_backup_${DATE}.tar.gz"
‘base’ gets the name and then adding ‘_backup_’ in the name of file, after that adding a timestamp which is ‘${DATE}’ to differentiate between multiple backups of the same directory overtime and then to archive and compress we are using ‘.tar.gz’.
Step 8: We have to create the backup archive now.
tar -czf "$BACKUP_DIR/$backup_file" -C "$(dirname "$dir")" "$base"
‘tar -czf’ creates a compressed archive, ‘$BACKUP_DIR/$backup_file’ is the backup file location, ‘-C “$(dirname “$dir”)”’ changes the directory to the parent folder of $dir and ‘“$base”’ is the actual directory that needs to be archived.
Step 9: Finally, print out the success message displaying that the backup has been created successfully.
echo "Backed up $dir to $BACKUP_DIR/$backup_file"
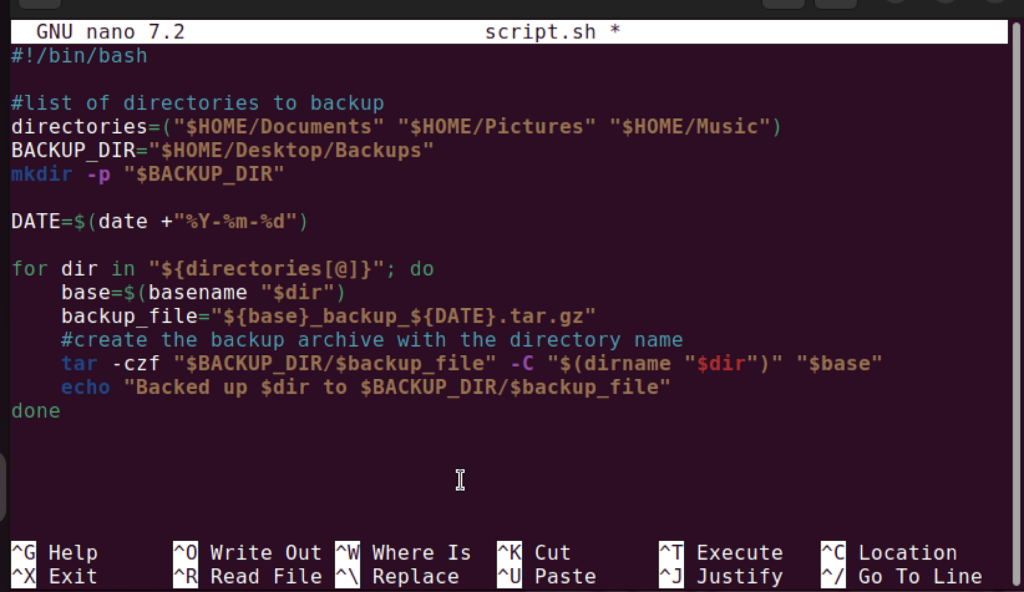
Complete Script with Comments for Understanding
#!/bin/bash

#list of directories to backup
directories=("$HOME/Documents" "$HOME/Pictures" "$HOME/Music")


BACKUP_DIR="$HOME/Desktop/Backups"
mkdir -p "$BACKUP_DIR"

DATE=$(date +"%Y-%m-%d")

for dir in "${directories[@]}"; do
    base=$(basename "$dir")
    backup_file="${base}_backup_${DATE}.tar.gz"
    #create the backup archive with the directory name
    tar -czf "$BACKUP_DIR/$backup_file" -C "$(dirname "$dir")" "$base"
    echo "Backed up $dir to $BACKUP_DIR/$backup_file"
done
Step 10: Run the script:
$ ./script.sh
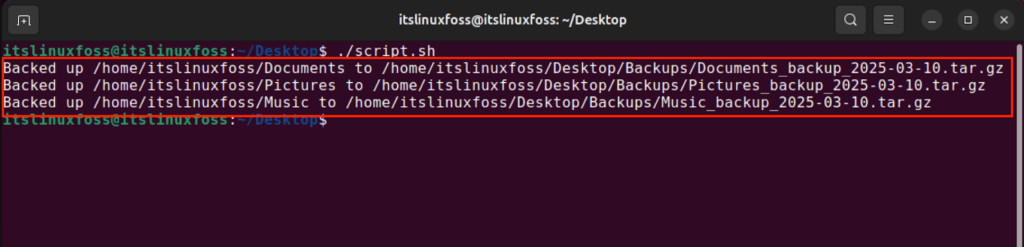
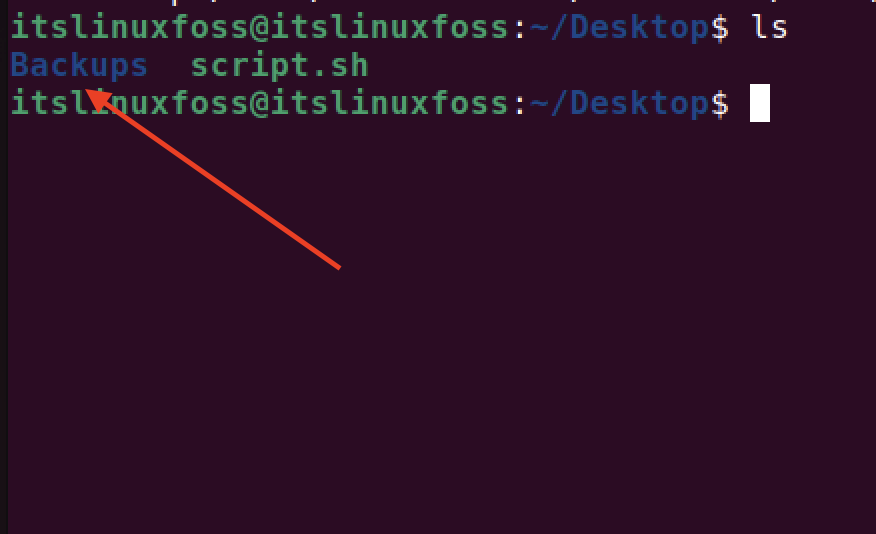
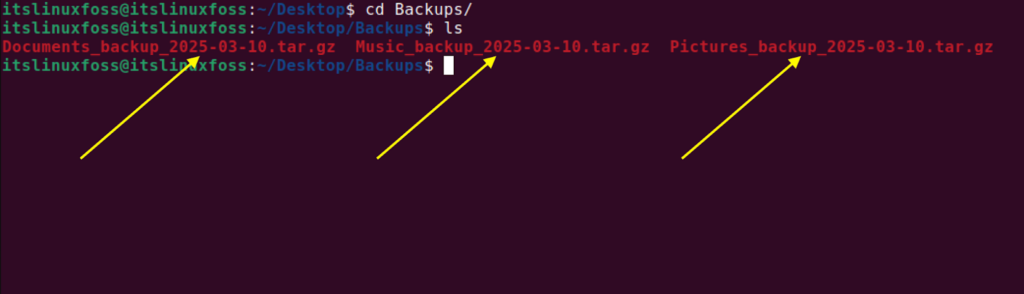
Step 11: Verify if the backup directory and backup files were created.
Conclusion
We have learned bash for loop with some practical examples that can be implemented in the real world. From naming the files in bulk to compressing the old log files to creating backups of multiple files, all those important key tasks that a Linux administrator would do, we have done in this article. Keep in mind that using bash for loop, we can automate the key repetitive tasks to improve performance and increase efficiency as Linux administrators. On top of that, you have the luxury to add if statements within bash for loop for more advanced logic like filtering and error handling.

Check our LinkedIn company page