
I still remember, at my previous job, one day I had to copy around 2500 word file names and paste them to a spreadsheet. This task was also urgent so I had to complete it by the end of day. That’s when I was first introduced with bash scripting and it was like 7 years ago. Since then I have been working on bash scripting and my favourite part is task automation using bash scripts. Now, this is not the only automation I have done since then, I have been all over it like creating automated backups, monitoring system resources and even sending email and text notifications using bash to name a few.
Some Instruction Before We Jump in:
I want you to know that in the 1st bash script example, I have even shown you how to create a script file, and how to make it executable. This is not shown in the rest of the examples.
I have provided a separate section named as ‘Complete Script with Comments for your Understanding’ from where you can copy the entire script with comments to run and understand. This section is available in all examples except Example#1, where you can copy the script with comments from Step 4.
You can schedule all these practical examples using crontab. I have shown how to practically just do that in Example#7.
1. How to Copy File Names to Spreadsheet with Bash
Let’s start from the example which got me started with bash scripting automations. To copy file names from a directory to a spreadsheet, you have to first go through all file names and then save them to a CSV file using bash. This CSV file then can be opened by using excel or google sheets.
So, I have 10 files in a directory and I will write a script now to copy the file names and save them to a CSV file. This same script can be used to copy 200 or 2000 file names and save them to a CSV, the number of files is not an issue. This script would work!
Step 1: First off, create a bash scripting file where you are going to write your bash script to automate copying all file names and then paste them to a CSV. To create a scripting file, do this:
$ touch script.sh

Step 2: Open this file in the nano editor:
$ sudo nano script.sh
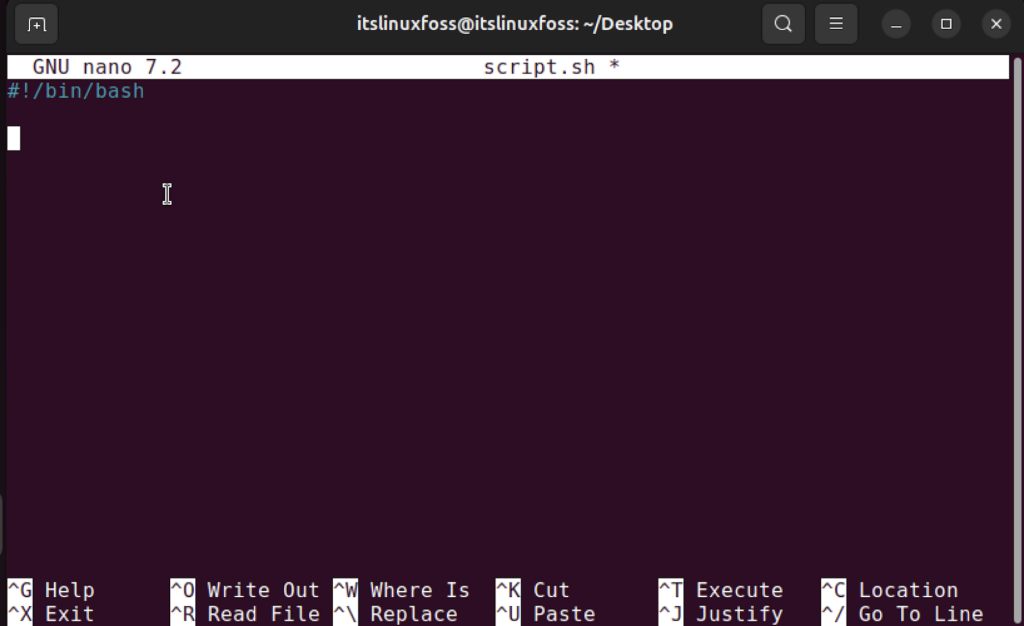
Step 3: Put this on top of the bash script:
#!/bin/bash
This helps the operating system know that the following script should be run by using bash shell.
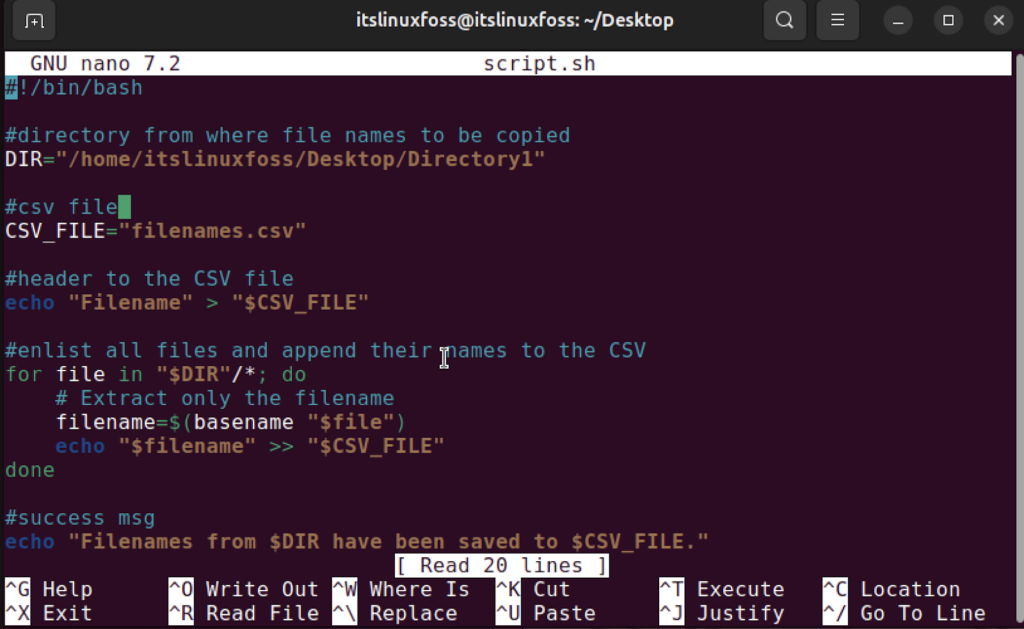
Step 4: Now, we are going to write the script using which we will copy the file names from a specific directory and paste them all into a CSV file:
#!/bin/bash
#directory from where file names to be copied
DIR="/home/itslinuxfoss/Desktop/Directory1"

#csv file where I’ll paste names
CSV_FILE="filenames.csv"

#header to the CSV file
echo "Filename" > "$CSV_FILE"

#enlist all files and append their names to the CSV
for file in "$DIR"/*; do
    #basename extracts only the filename
    filename=$(basename "$file")
    echo "$filename" >> "$CSV_FILE"
done

#success msg
echo "Filenames from $DIR have been saved to $CSV_FILE."
Step 5: Make the script executable:
$ chmod +x script.sh
Step 6: Run the script:
$ ./script.sh

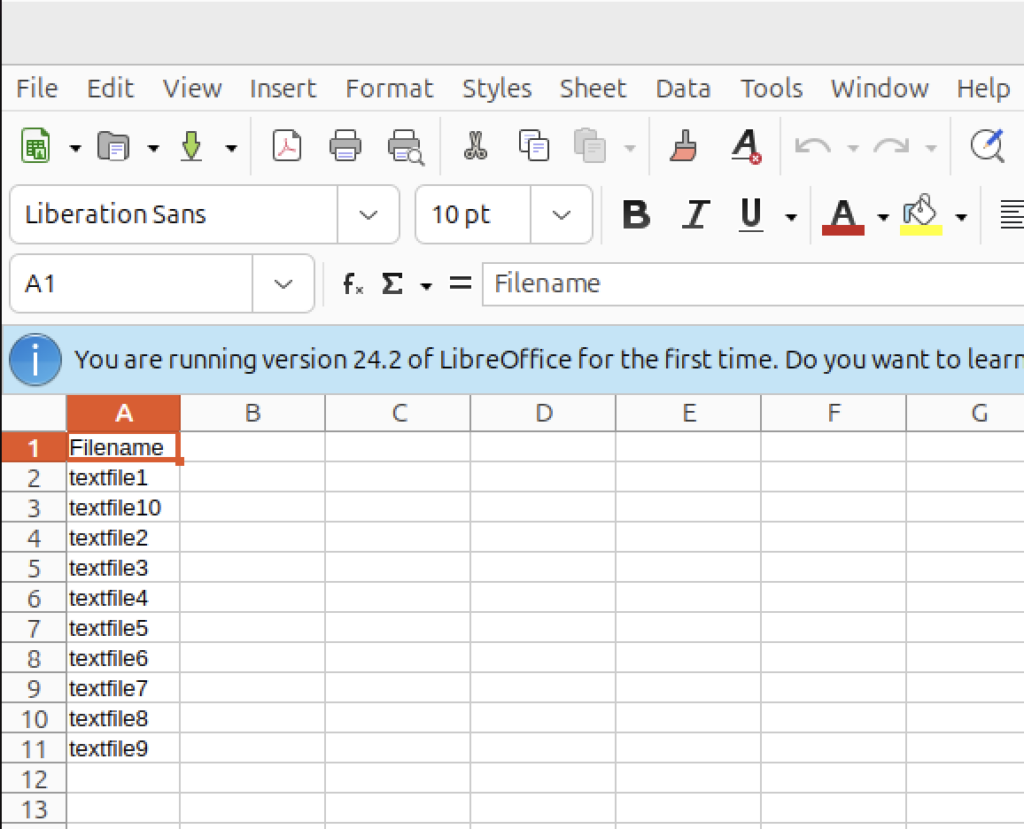
Step 7: Verify if everything has worked out okay, for that matter open the CSV file and see if all file names were copied:

2. How to Rename Multiple Files in a Directory with Bash
Renaming files is probably the most used task by me in my previous job, we dealt with lots of files and often needed to rename them all or some of them. Imagine renaming all files in a directory, that seems simple but how about renaming only a few files matching a certain type or name.
Step 1: First off, I’d define the path to the directory that I want to pick:
#!/bin/bash

DIR="/home/itslinuxfoss/Desktop/Directory1"
In your case, it might be different so pay attention.
Step 2: Now, I’ll change to the directory I picked earlier to ensure that we interact and make changes to the correct set of files.
cd "$DIR" || { echo "Directory not found!"; exit 1; }
In case, the directory doesn’t exist then it will echo the directory not found message and exit 1 just terminates the script.
Step 3: Go ahead and run a for loop in which you will first put a check so you only rename files and don’t encounter any directory. For that matter, ‘-f’ flag will be used so you only rename regular files. Then define the new name which in our case, I’d put “hello_” before every file name. Then will use mv to rename the file and then finally echo a message for verification.
for file in *; do
    if [[ -f "$file" ]]; then
        new_name="hello_$file"

        mv "$file" "$new_name"

        echo "Renamed: $file -> $new_name"
    fi
done
Step 4: I’d finally print out an okay message that should indicate that all files have been renamed.
echo "All files renamed successfully!"
Complete Script with Comments for your Understanding
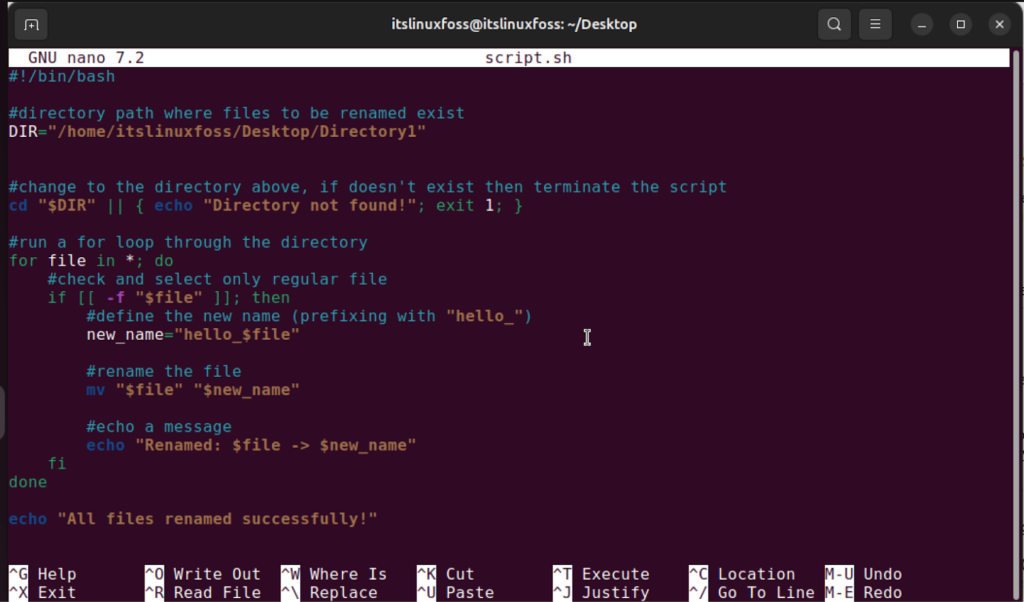
#!/bin/bash

#directory path where files to be renamed exist
DIR="/home/itslinuxfoss/Desktop/Directory1"

#change to the directory above, if doesn't exist then terminate the script
cd "$DIR" || { echo "Directory not found!"; exit 1; }

#run a for loop through the directory
for file in *; do
    #check and select only regular file
    if [[ -f "$file" ]]; then
        #define the new name (prefixing with "hello_")
        new_name="hello_$file"

        #rename the file
        mv "$file" "$new_name"

        #echo a message
        echo "Renamed: $file -> $new_name"
    fi
done

echo "All files renamed successfully!"
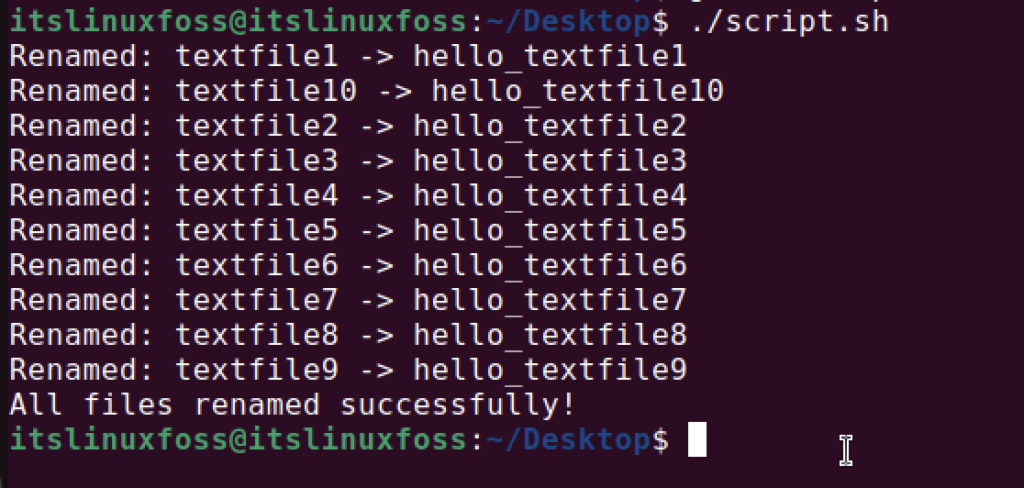
Step 5: Run the script and notice the results:
$ ./script.sh
3. How to Check Disk space and Send Alerts with Bash
It is possible to set a threshold for disk space usage and when it exceeds, it’s possible to send an email or text message to yourself informing about it using bash. This is very handy when it comes to keep an automatic check to monitor a certain threshold. You can learn how to setup email client on linux.
Step 1: Define the threshold first which would act as a trigger to send you email or text:
#!/bin/bash

THRESHOLD=20
Step 2: If you are sending an email alert then write the email address to which you want to send this alert to and then write email subject:
EMAIL=”[email protected]”

SUBJECT=”Disk Space Threshold Reached Alert on $(hostname)”
Step 3: You can directly write the code to check disk space or you can also write a function to do so and call it afterwards, I’ll create a function here:
check_disk_space() {

    df -h | awk 'NR>1 {print $5, $6}' | while read -r usage mountpoint; do
        usage=${usage%"%"}

        if (( usage > THRESHOLD )); then
            message="Warning: Disk usage on $mountpoint is ${usage}% (threshold: ${THRESHOLD}%)"
            echo "$message"

            if [[ -n "$EMAIL" ]]; then
                echo "$message" | mail -s "$SUBJECT" "$EMAIL"
            fi
        fi
    done
}
Step 4: Call the function:
check_disk_space
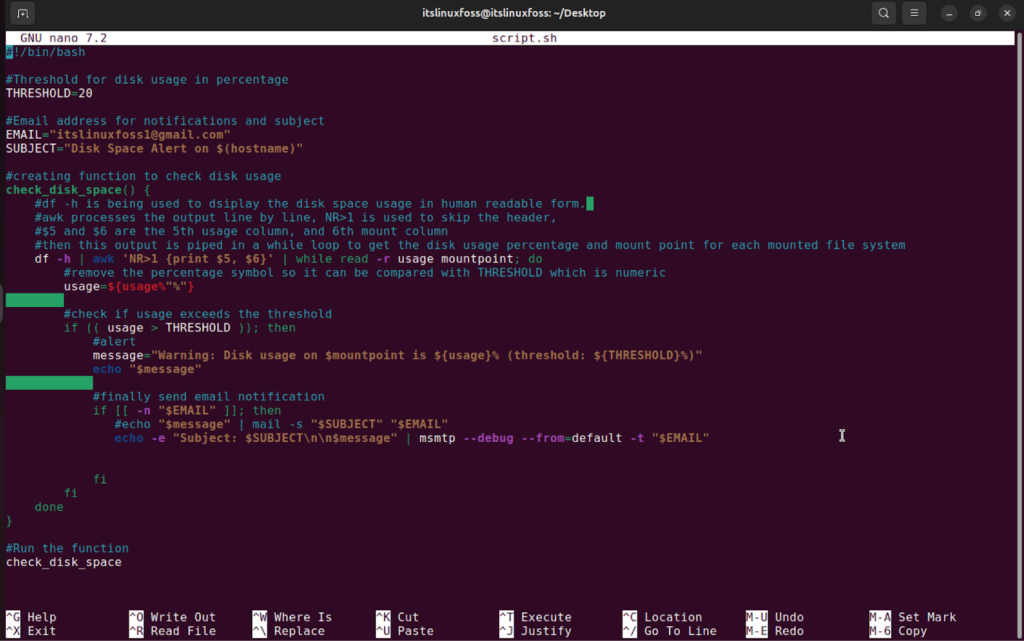
Complete Script with Comments for your Understanding
#!/bin/bash

#Threshold for disk usage in percentage
THRESHOLD=20

#Email address for notifications and subject
EMAIL="[email protected]"
SUBJECT="Disk Space Alert on $(hostname)"

#creating function to check disk usage
check_disk_space() {
    #df -h is being used to dsiplay the disk space usage in human readable form.
    #awk processes the output line by line, NR>1 is used to skip the header,
    #$5 and $6 are the 5th usage column, and 6th mount column
    #then this output is piped in a while loop to get the disk usage percentage and mount point for each mounted file system
    df -h | awk 'NR>1 {print $5, $6}' | while read -r usage mountpoint; do
        #remove the percentage symbol so it can be compared with THRESHOLD which is numeric
        usage=${usage%"%"}

        #check if usage exceeds the threshold
        if (( usage > THRESHOLD )); then
            #alert
            message="Warning: Disk usage on $mountpoint is ${usage}% (threshold: ${THRESHOLD}%)"
            echo "$message"

            #finally send email notification
            if [[ -n "$EMAIL" ]]; then
               #echo "$message" | mail -s "$SUBJECT" "$EMAIL"
               echo -e "Subject: $SUBJECT\n\n$message" | msmtp --debug --from=default -t "$EMAIL"


            fi
        fi
    done
}

#Run the function
check_disk_space
Step 5: Run the script:
./script.sh
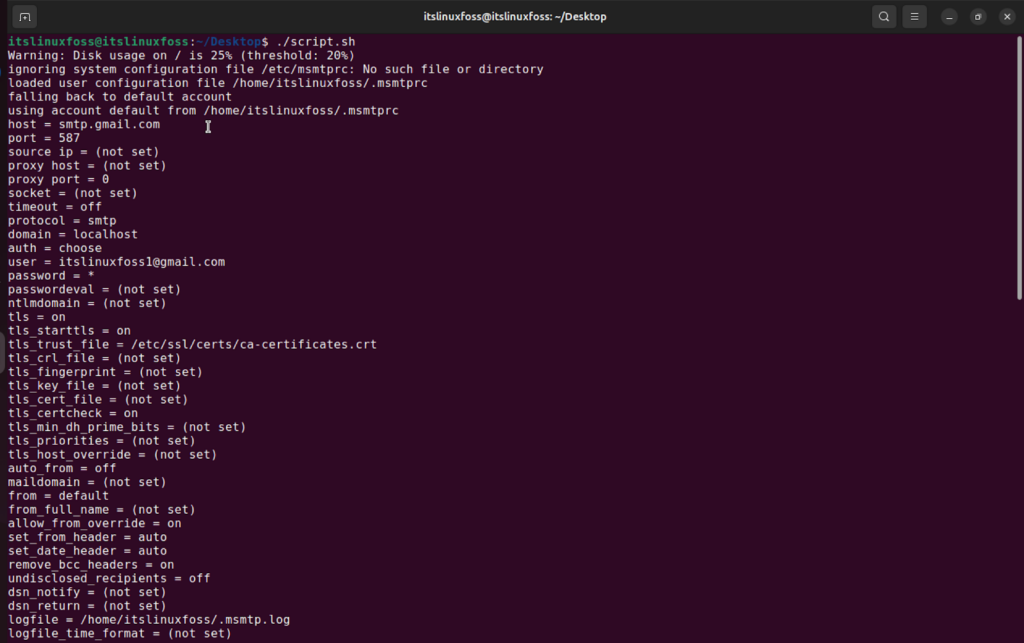
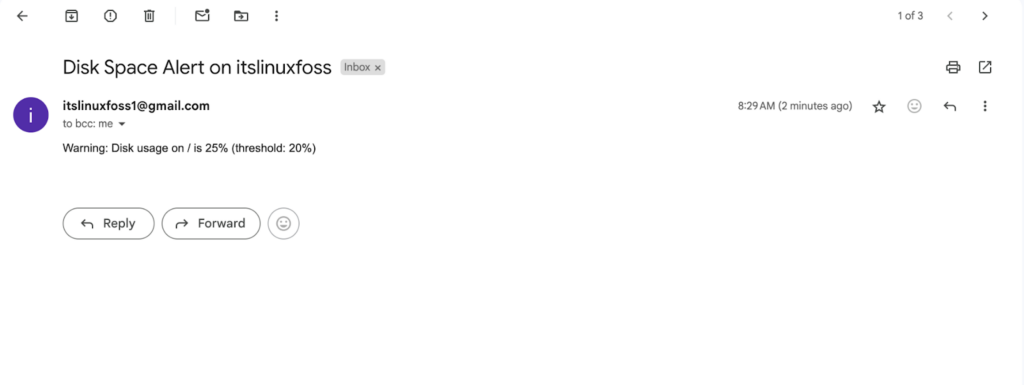
Step 6: go ahead and verify if you have received the email:
4. How to Monitor System Resources in Real Time using Bash
Let’s say I want to constantly monitor system resources such as CPU usage, Memory usage and Disk I/Oin real time. For that matter, I’d write a script that constantly refreshes the output so the usage can be observed.
Step 1: First off, I’ll set the interval in seconds after which the output will refresh:
#!/bin/bash

INTERVAL=10
Step 2: Start a ‘while true’ loop which is an infinite loop, in which you will first use ‘clear command’ which will clear the terminal on each refresh. Also, do echo to print something that makes it clear to everyone what’s happening on the screen:
while true
do
    clear
    echo "............................................................................................."
    echo " System Resource Monitoring (updated every $INTERVAL s) "
    echo ".............................................................................................."
Step 3: Remember that infinite loop is still on and now you are going to display the CPU usage:
echo ".......CPU Usage......."
top -b -n1 | grep "Cpu(s)"
echo "........................................................................."
Here in step 3, the command top is used which displays real-time information about processes and CPU usage etc. then we have used -b which forces top to run in batch mode means no interactive mode, -n1 ensures it runs just 1 time and then grep command after getting the output searches for all strings containing ‘Cpu(s)’.
Step 4: Inside infinite loop, now we would echo the Memory usage:
echo ".......Memory Usage......."
free -h
echo "..........................................................................."
Here ‘free -h’ is used to display memory usage and swap space. Swap space is an extension of RAM in linux, similar space with different names also exist in windows and mac OS.
Step 5: Next, we will go ahead and display Disk I/O:
echo ".......Disk I/O......."
iostat -x 1 1 | awk 'NR>6 { print }'
echo "..............................................."
Here ‘iostat’ is used to get I/O statistics of the disk in real time, ‘-x’ is extended mode and ‘1 1’ means display I/O stats every 1 second for 1 iteration. Then it pipes the output to awk, and ‘awk ‘NR>6 { print }’ essentially skips the first 6 lines which is usually header and summary which is non-essential. NR represents line number though!
Step 6: Now finally add the waiting interval before refresh and close the loop body:
 sleep $INTERVAL
done
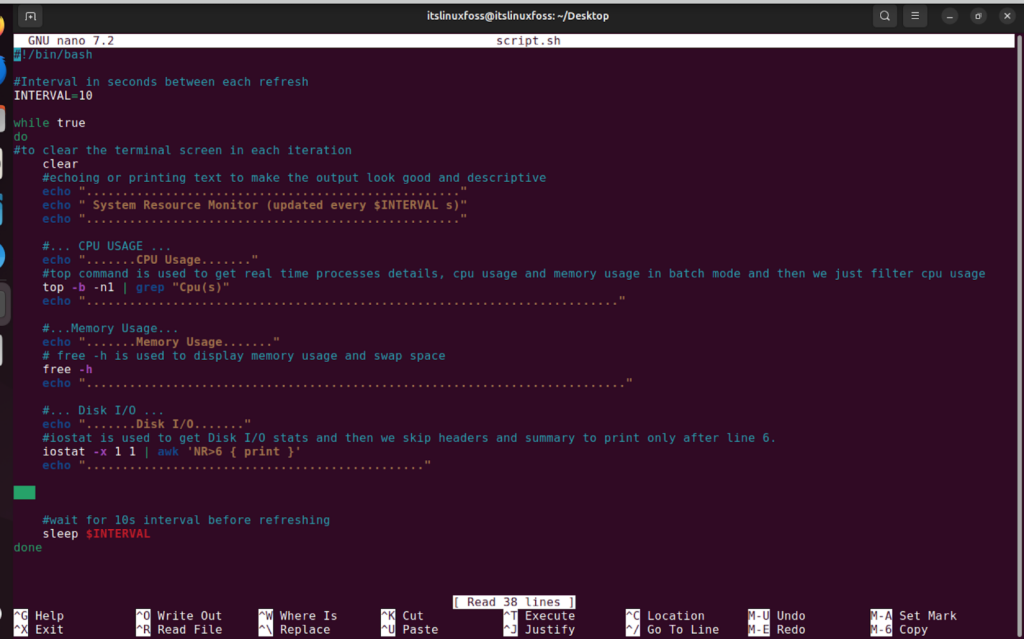
Complete Script with Comments for your Understanding
#!/bin/bash

#Interval in seconds between each refresh
INTERVAL=10

while true
do
#to clear the terminal screen in each iteration
    clear
    #echoing or printing text to make the output look good and descriptive
    echo "...................................................."
    echo " System Resource Monitor (updated every $INTERVAL s)"
    echo "...................................................."

    #... CPU USAGE ...
    echo ".......CPU Usage......."
    #top command is used to get real time processes details, cpu usage and memory usage in batch mode and then we just filter cpu usage
    top -b -n1 | grep "Cpu(s)"
    echo ".........................................................................."

    #...Memory Usage...
    echo ".......Memory Usage......."
    # free -h is used to display memory usage and swap space
    free -h
    echo "..........................................................................."

    #... Disk I/O ...
    echo ".......Disk I/O......."
    #iostat is used to get Disk I/O stats and then we skip headers and summary to print only after line 6.
    iostat -x 1 1 | awk 'NR>6 { print }'
    echo "..............................................."

      #wait for 10s interval before refreshing
    sleep $INTERVAL
done
Step 7: Now go ahead and run the script:
$ ./script.sh
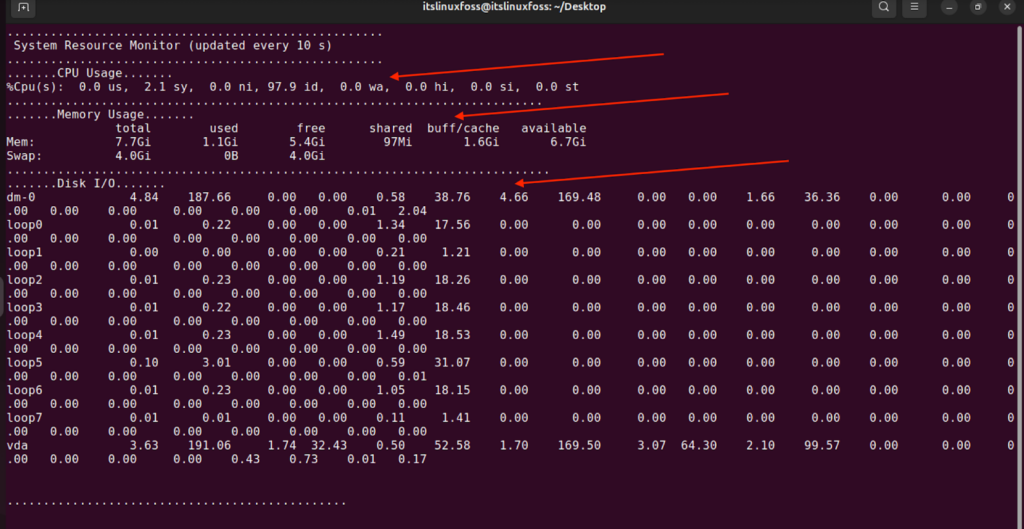
This script will keep running because of the infinite loop and output will keep refreshing until you terminate it by pressing CTRL+C.
5. How to Write a Menu Based Bash Script for Repeat Tasks
Menu based bash script involves displaying a menu in the terminal and taking input from the user and then executing the task against the input.
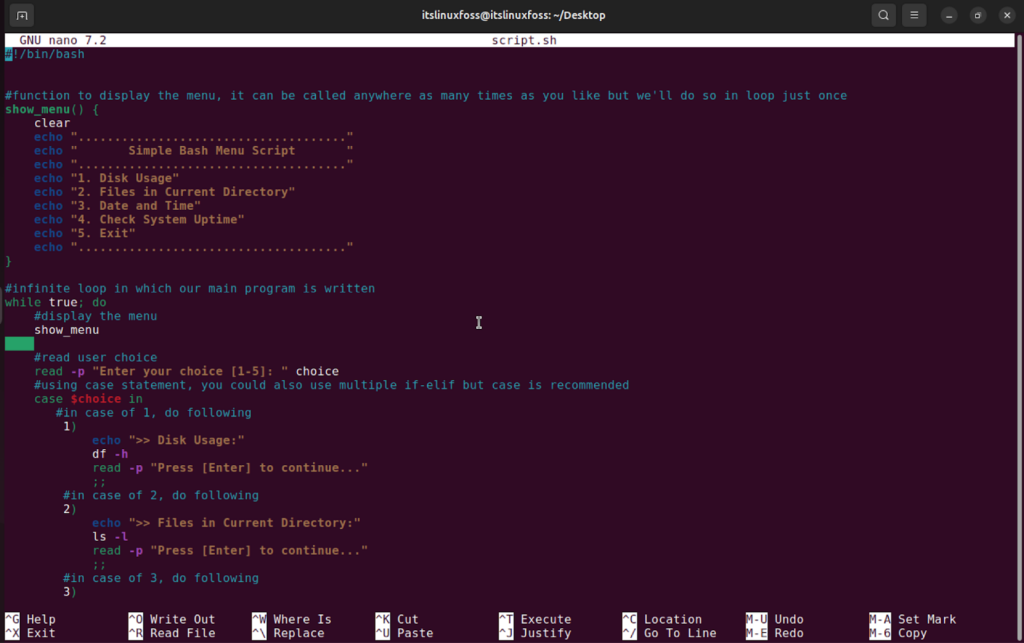
Step 1: Let’s create a function with menu in which we put menu items for the user to select, later we will call this function wherever we need in the script:
#!/bin/bash
show_menu() {
clear
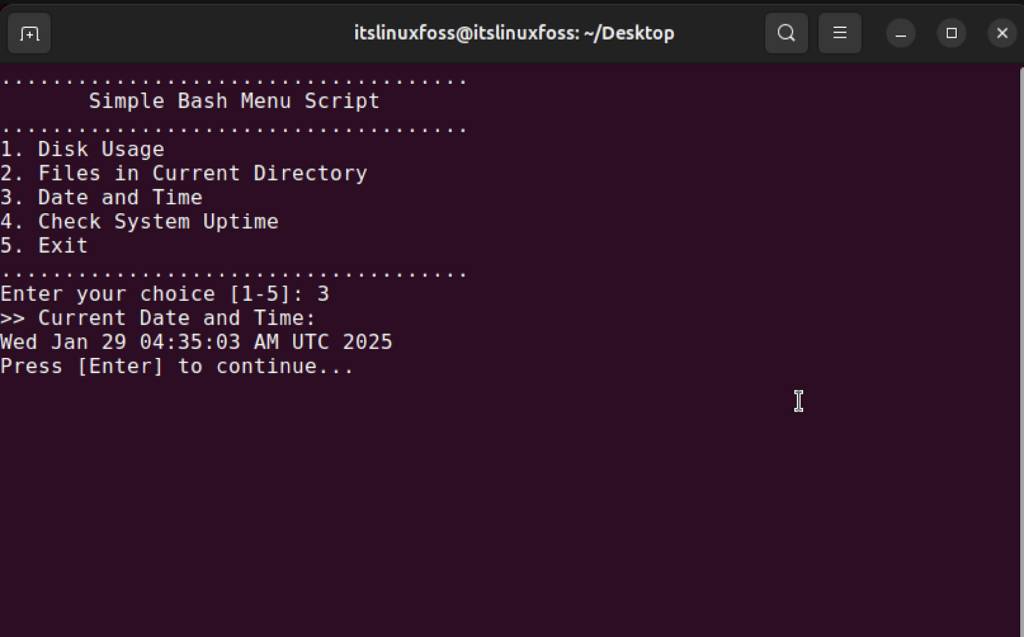
echo "........................................................."
echo " Simple Bash Menu Script "
echo "........................................................."
echo "1. Disk Usage"
echo "2. Files in Current Directory"
echo "3. Date and Time"
echo "4. Check System Uptime"
echo "5. Exit"
echo ".........................................................."
}
Step 2: I want this script to be interactive so it could take the input show results and then clear terminal for the next input upon hitting enter or return key. So for that matter, I’d need an infinite loop and I’d start it by displaying the menu:
while true; do
    show_menu
Step 3: After this, I’d take the input from the user and process its choice, ‘read -p’ basically show up a prompt for user to enter a choice:
read -p "Enter your choice [1-5]: " choice
Step 4: Now we are gonna use a case statement to process these 5 inputs and set options so what will happen if the user picks an option. The case statement is similar to switch statement in java, c etc. if you are familiar with programming you must be aware of it, case statement is used instead of multiple if-elif statements, in this case we will use it like this:
case $choice in
        1)
            echo ">> Disk Usage:"
            df -h
            read -p "Press [Enter] to continue..."
            ;;
        2)
            echo ">> Files in Current Directory:"
            ls -l
            read -p "Press [Enter] to continue..."
            ;;
        3)
            echo ">> Current Date and Time:"
            date
            read -p "Press [Enter] to continue..."
            ;;
        4)
            echo ">> System Uptime:"
            uptime
            read -p "Press [Enter] to continue..."
            ;;
        5)
            echo "Exiting the script. Goodbye!"
            exit 0
            ;;
        *)
            echo "Invalid option! Please try again."
            read -p "Press [Enter] to continue..."
            ;;
    esac
done
‘esac’ was used to close the case statement, and done is used to close the while loop.
Complete Script with Comments for your Understanding
#!/bin/bash

#function to display the menu, it can be called anywhere as many times as you like but we'll do so in loop just once
show_menu() {
    clear
    echo "....................................."
    echo "       Simple Bash Menu Script       "
    echo "....................................."
    echo "1. Disk Usage"
    echo "2. Files in Current Directory"
    echo "3. Date and Time"
    echo "4. Check System Uptime"
    echo "5. Exit"
    echo "....................................."
}

#infinite loop in which our main program is written
while true; do
    #display the menu
    show_menu

    #read user choice
    read -p "Enter your choice [1-5]: " choice
    #using case statement, you could also use multiple if-elif but case is recommended
    case $choice in
       #in case of 1, do following
        1)
            echo ">> Disk Usage:"
            df -h
            read -p "Press [Enter] to continue..."
            ;;
        #in case of 2, do following
        2)
            echo ">> Files in Current Directory:"
            ls -l
            read -p "Press [Enter] to continue..."
            ;;
        #in case of 3, do following
        3)
            echo ">> Current Date and Time:"
            date
            read -p "Press [Enter] to continue..."
            ;;
        #in case of 4, do following
        4)
            echo ">> System Uptime:"
            uptime
            read -p "Press [Enter] to continue..."
            ;;
        #in case of 5, do following
        5)
            echo "Exiting the script. Goodbye!"
            exit 0
            ;;
        *)
            echo "Invalid option! Please try again."
            read -p "Press [Enter] to continue..."
            ;;
    esac
done
Step 5: Let’s go ahead and run the script to see what happens:
$ ./script.sh
6. How to Automate Log File Creation and Management Using Bash
We are going to write a script that will actually demonstrate to you how a nerd system admin would take care of logs for his analysis and it’s not that difficult. This is how exactly we troubleshoot issues and optimize storage. First, we are going to create a log directory if it doesn’t exist already then we write logs with timestamps then we rotate them if they exceed a specific size, rotating means archiving them and renaming them to optimize disk space. Finally, we delete logs after a certain number of days, it could be 7,15 or 30 days or even 90. We’d delete them after 7 days.
Step 1: I’d first define the log directory name and the file name, these are not going to be system wide logs so I’ll create the directory in my present working directory:
#!/bin/bash

LOG_DIR="./var/log/myapp"
LOG_FILE="$LOG_DIR/app_$(date +'%Y-%m-%d').log"
MAX_LOG_SIZE=10
Step 2: Now, I’ll create a function that explicitly checks if the directory exists or not, if it exists then it does nothing but if it does not exist then it creates the directory and prints the message confirming directory creation:
setup_log_directory() {
    if [ ! -d "$LOG_DIR" ]; then
        mkdir -p "$LOG_DIR"
        echo "Log directory created: $LOG_DIR"
    fi
}
Step 3: We are going to write log messages now in the file, this function will take the message as an argument and essentially append it with timestamp in the log file:
write_log() {
    local message="$1"
    echo "$(date +'%Y-%m-%d %H:%M:%S') - $message" >> "$LOG_FILE"
}
Step 4: Next, we are writing a function for log rotation, if the log file gets bigger than 10MB, we are going to put a check for that, and then if its bigger it simply renames the file and compress it and prints the message about this rotation:
rotate_logs() {
    if [ -f "$LOG_FILE" ]; then
        local log_size
        log_size=$(du -m "$LOG_FILE" | cut -f1)

        if [ "$log_size" -ge "$MAX_LOG_SIZE" ]; then
            mv "$LOG_FILE" "$LOG_FILE.old"
            gzip "$LOG_FILE.old"
            echo "Log file rotated: $LOG_FILE.old.gz"
        fi
    fi
}
Step 5: Let’s move now towards cleaning logs after 7 days, for that we are going to create a function that will find compressed files with ‘.gz’ older than 7 days and then delete them using ‘rm -f’. After that, it’d print the message that logs were cleaned up:
cleanup_old_logs() {
    find "$LOG_DIR" -type f -name "*.gz" -mtime +7 -exec rm -f {} \;
    echo "Old logs cleaned up."
}
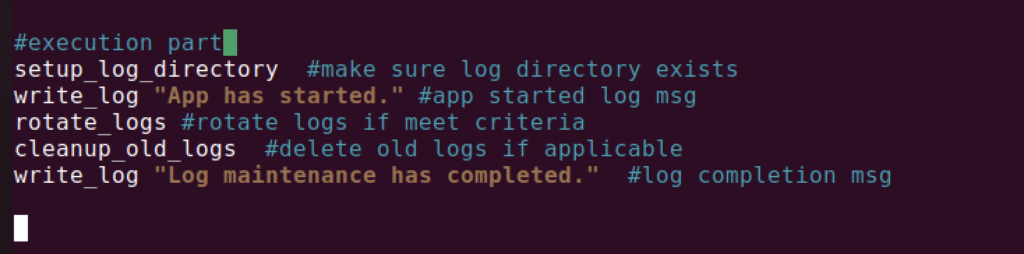
Step 6: Finally, we call these functions into the main part where execution happens:
setup_log_directory
write_log "App has started."
rotate_logs
cleanup_old_logs
write_log "Log maintenance has completed."
‘setup_log_directory’ is a function that will create the directory if it doesn’t exist, then ‘write_log “App has started.”’ will write the log in the file, ‘rotate_logs’ will rotate the logs and ‘cleanup_old_logs’ will clean up the logs older than 7 days.
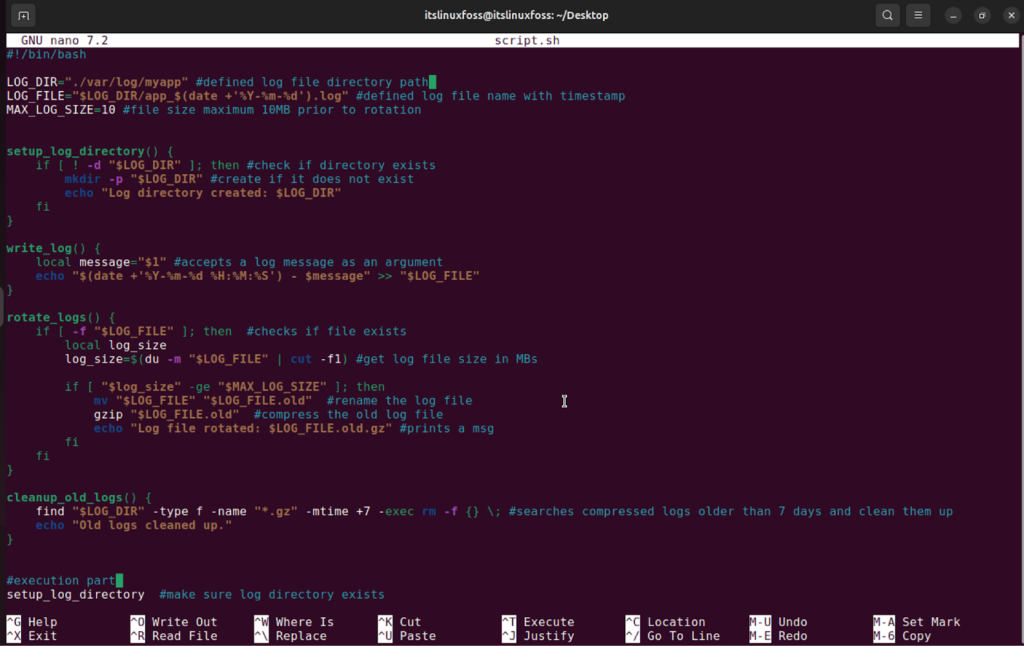
Complete Script with Comments for your Understanding
#!/bin/bash

LOG_DIR="./var/log/myapp" #defined log file directory path
LOG_FILE="$LOG_DIR/app_$(date +'%Y-%m-%d').log" #defined log file name with timestamp
MAX_LOG_SIZE=10 #file size maximum 10MB prior to rotation


setup_log_directory() {
    if [ ! -d "$LOG_DIR" ]; then #check if directory exists
        mkdir -p "$LOG_DIR" #create if it does not exist
        echo "Log directory created: $LOG_DIR"
    fi
}

write_log() {
    local message="$1" #accepts a log message as an argument
    echo "$(date +'%Y-%m-%d %H:%M:%S') - $message" >> "$LOG_FILE"
}

rotate_logs() {
    if [ -f "$LOG_FILE" ]; then  #checks if file exists
        local log_size
        log_size=$(du -m "$LOG_FILE" | cut -f1) #get log file size in MBs

        if [ "$log_size" -ge "$MAX_LOG_SIZE" ]; then
            mv "$LOG_FILE" "$LOG_FILE.old"  #rename the log file
            gzip "$LOG_FILE.old"  #compress the old log file
            echo "Log file rotated: $LOG_FILE.old.gz" #prints a msg
        fi
    fi
}

cleanup_old_logs() {
    find "$LOG_DIR" -type f -name "*.gz" -mtime +7 -exec rm -f {} \; #searches compressed logs older than 7 days and clean them up
    echo "Old logs cleaned up."
}


#execution part
setup_log_directory  #make sure log directory exists
write_log "App has started." #app started log msg
rotate_logs #rotate logs if meet criteria
cleanup_old_logs  #delete old logs if applicable
write_log "Log maintenance has completed."  #log completion msg
Step 7: Lets run the script and see results:
$ ./script.sh
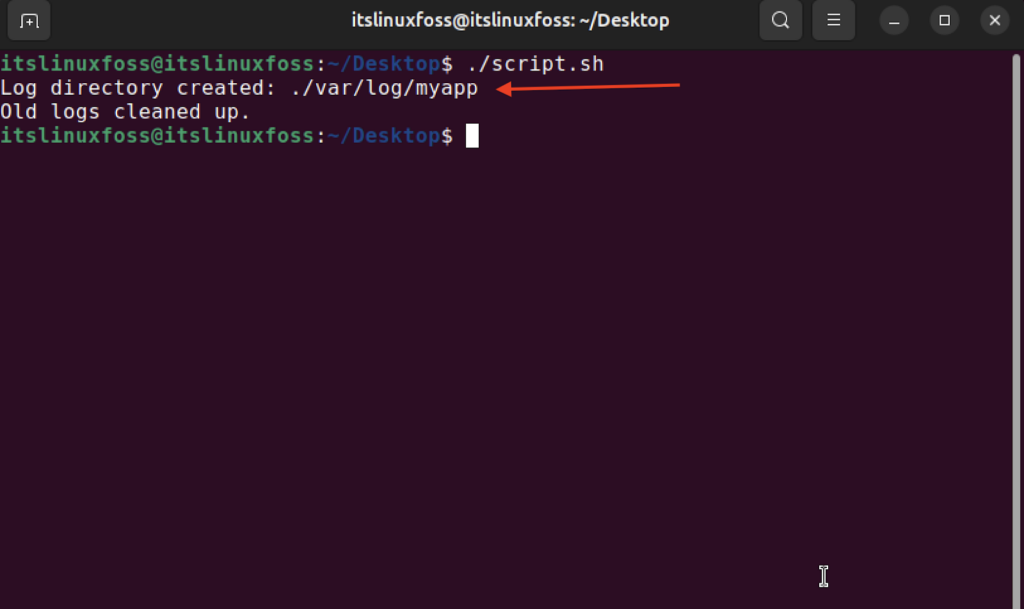
You can see the directory ‘var’ has been created in my present working directory.

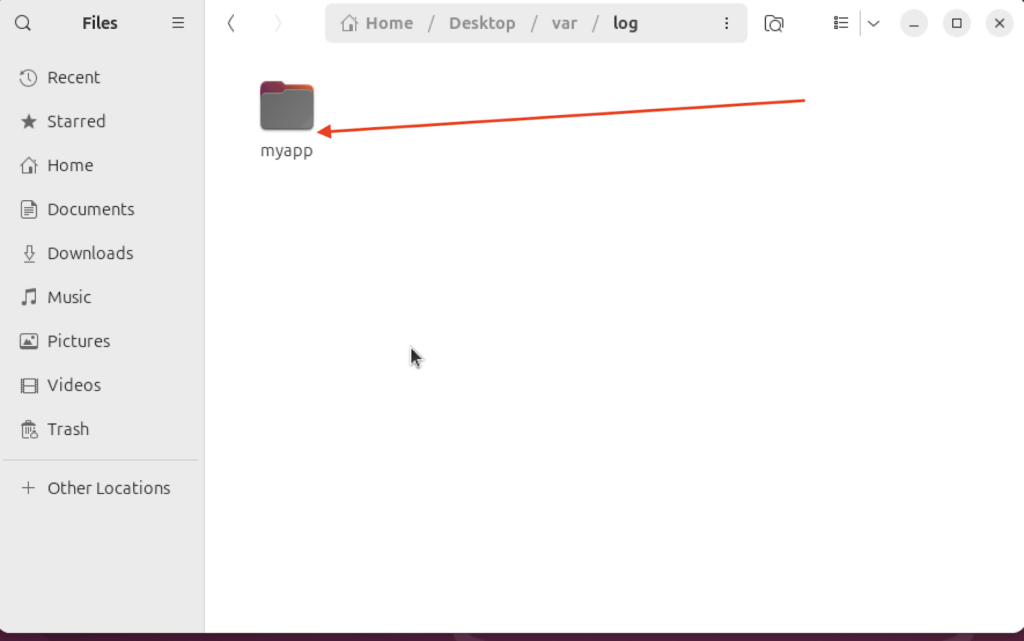
Now, lets go inside ‘var’ directory and then you would see:
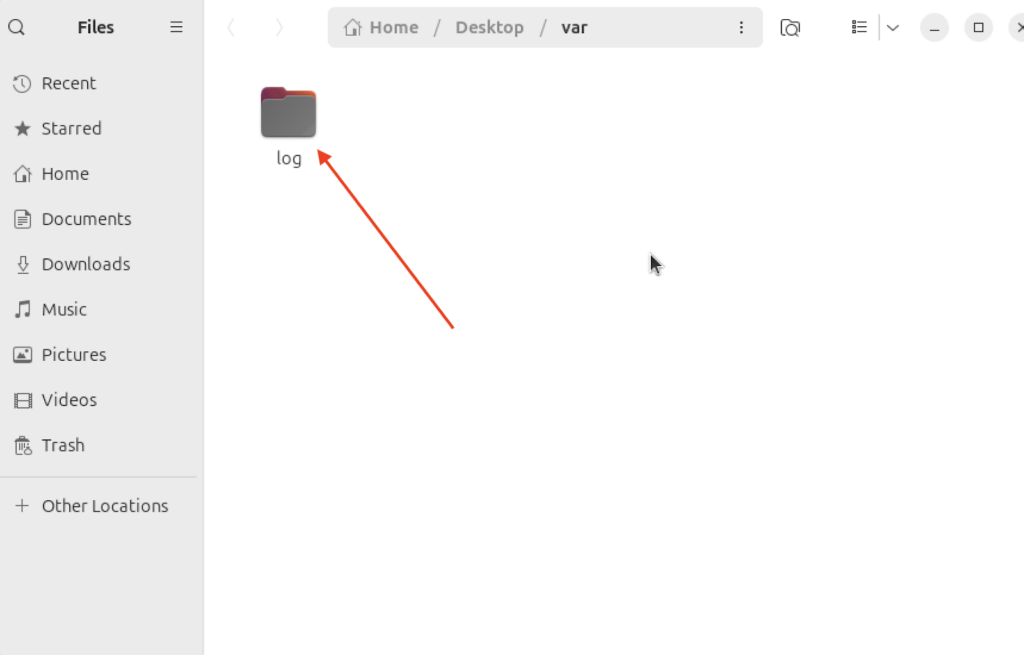
If you go further in:
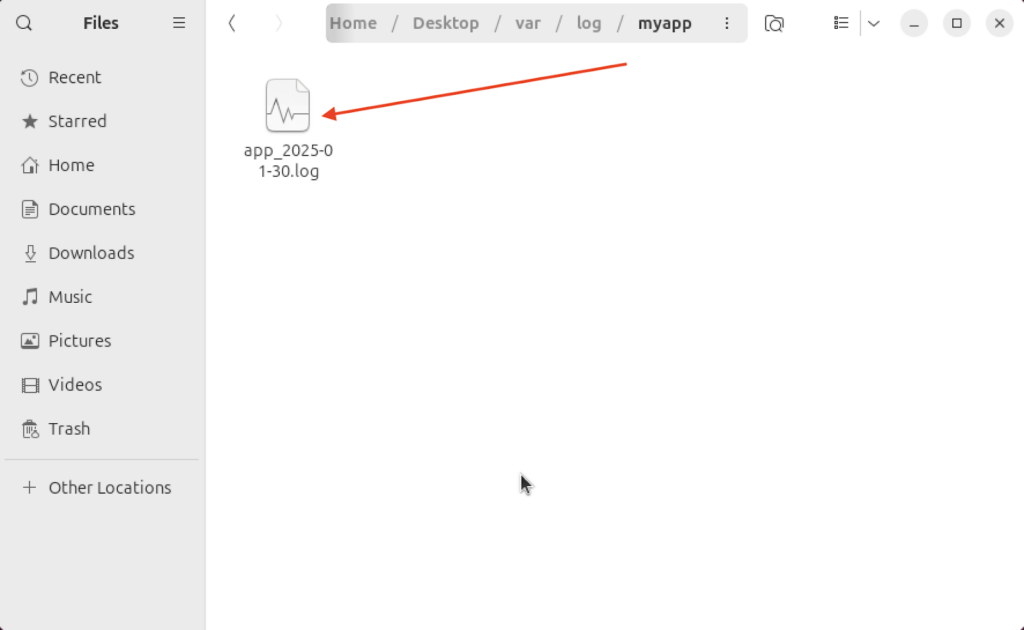
See the structure/path is the same as we defined, inside it you’d see our log file with timestamp:
Inside the log file, there are logs:
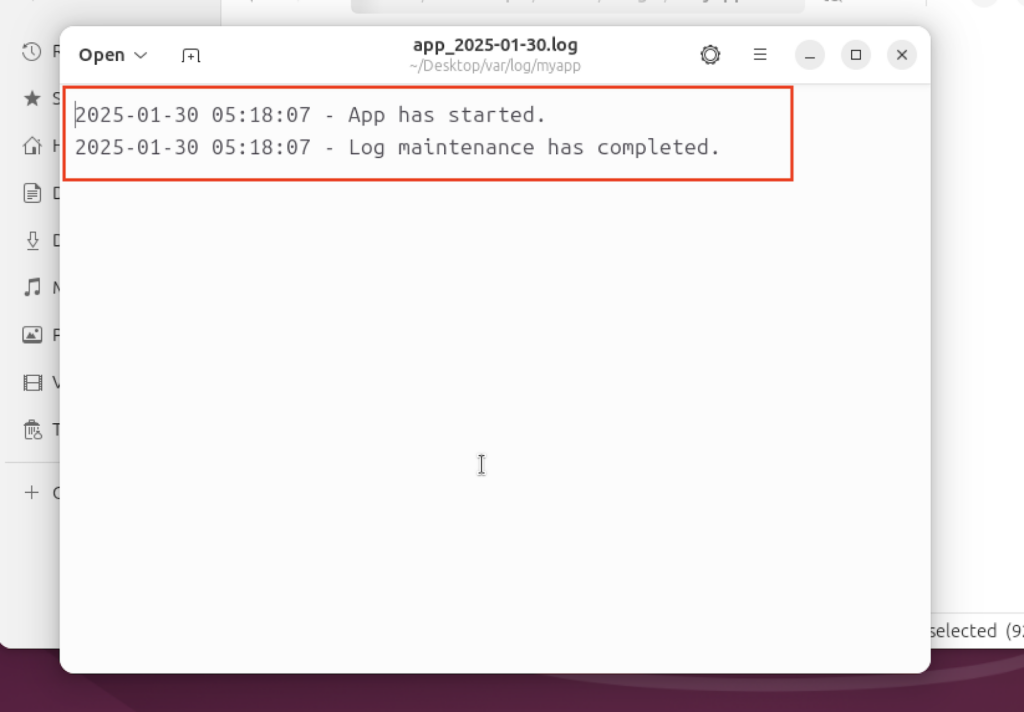
This is how simple it is to automate your log management. From creation to rotation to deletion of logs older than 7 days.
7. How to Schedule Repeat Tasks with Cron Using Bash
If you have repeat tasks that you need to automate and you want to be totally relieved of the duties to fulfill those tasks then you can do so with cron jobs. It will require no manual input from your side and it’d run the tasks automatically on the time specified by you, saving you effort, time and resources.
So, I am creating a scenario where lets say I have something important added in my ‘Documents’ directory every now and then and I want to back it up everyday.
Step 1: First off, I am going to define my source directory for which I need to create a backup, for that matter I need to put the path to the ‘Documents’ directory:
#!/bin/bash

SRC_DIR="$HOME/Documents"
So I have defined a variable ‘SRC_DIR’ which contains the path to the ‘Document’ directory.
Step 2: Next, I need to define the path where backup directory would be created, in my case, I want to create it in my ‘Desktop’ directory:
BKUP_DIR="$HOME/Desktop/Backup"
Step 3: Now, I am just going to create ‘Backup’ directory if its already not created:
mkdir -p "$BKUP_DIR"
‘mkdir’ is used to create a directory and ‘-p’ is used to check if the directory already doesn’t exist in the ‘Desktop’ directory.
Step 4: We need to get the current date and time for backup file timestamp:
DATE=$(date +"%Y-%m-%d_%H-%M-%S")
Step 5: Now, we need to name the backup file:
BKUP_FILE="backup_$DATE.tar.gz"
Step 6: ok, so now we need to change to the source directory so we perform the backup of the directory we want:
cd "$(dirname "$SRC_DIR")" || { echo "Failed to change directory to $(dirname "$SRC_DIR")"; exit 1; }
If some error occurs in changing the directory, we terminate the script because we don’t want to create the backup of a wrong directory.
Step 7: so now, we simply create a compressed tar file of the source directory:
tar -czf "$BKUP_DIR/$BKUP_FILE" "$(basename "$SRC_DIR")"
Step 8: Finally, I want to check if the backup was created successfully, if not I want to print the result:
if [ $? -eq 0 ]; then
    echo "Backup of '$SRC_DIR' completed successfully at $DATE."
    echo "Backup file saved as: $BKUP_DIR/$BKUP_FILE"
else
    echo "Backup failed."
fi
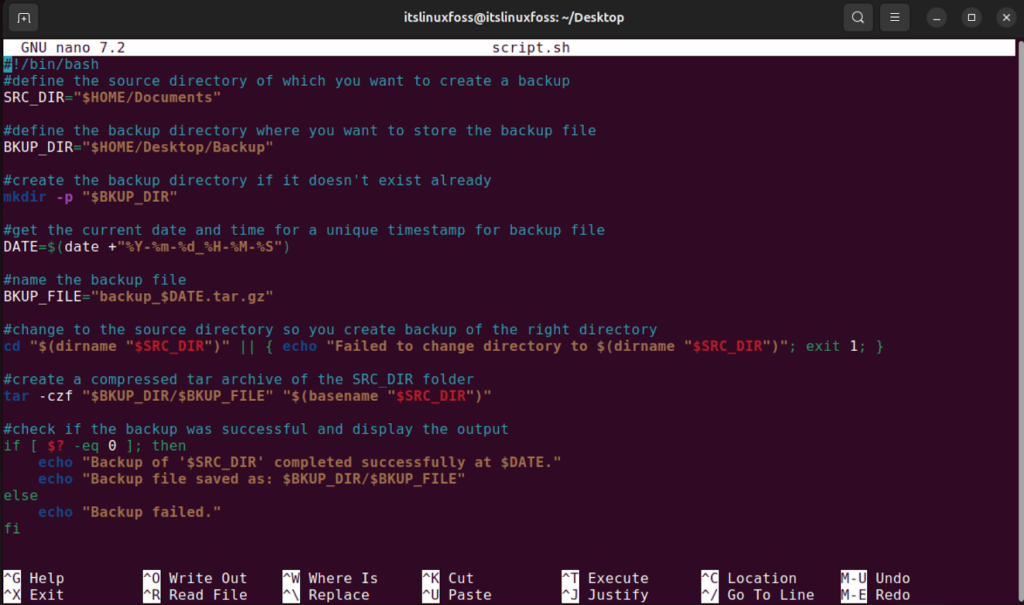
Complete Script with Comments for your Understanding
#!/bin/bash
#define the source directory of which you want to create a backup
SRC_DIR="$HOME/Documents"

#define the backup directory where you want to store the backup file
BKUP_DIR="$HOME/Desktop/Backup"

#create the backup directory if it doesn't exist already
mkdir -p "$BKUP_DIR"

#get the current date and time for a unique timestamp for backup file
DATE=$(date +"%Y-%m-%d_%H-%M-%S")

#name the backup file
BKUP_FILE="backup_$DATE.tar.gz"

#change to the source directory so you create backup of the right directory
cd "$(dirname "$SRC_DIR")" || { echo "Failed to change directory to $(dirname "$SRC_DIR")"; exit 1; }

#create a compressed tar archive of the SRC_DIR folder
tar -czf "$BKUP_DIR/$BKUP_FILE" "$(basename "$SRC_DIR")"

#check if the backup was successful and display the output
if [ $? -eq 0 ]; then
    echo "Backup of '$SRC_DIR' completed successfully at $DATE."
    echo "Backup file saved as: $BKUP_DIR/$BKUP_FILE"
else
    echo "Backup failed."
fi
Step 9: Let’s run the script and see if it works:
$ ./script.sh
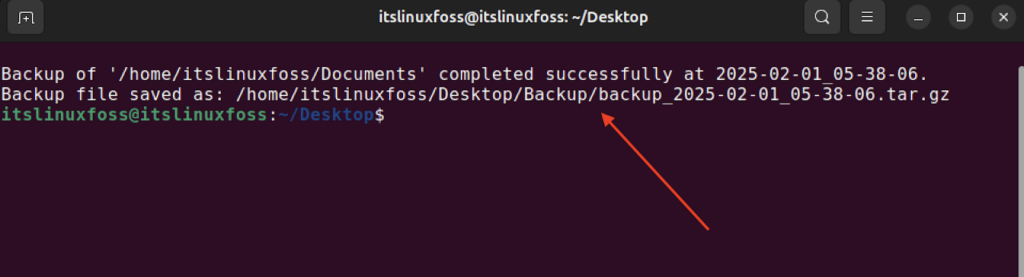
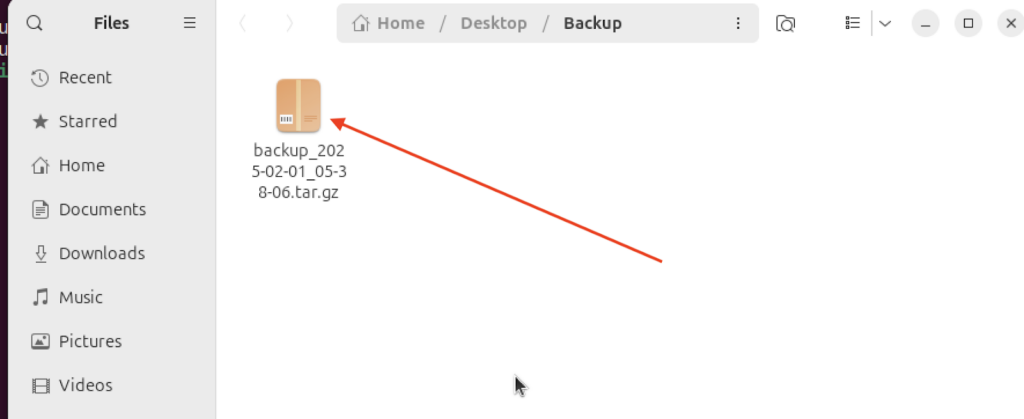
A directory named as ‘Backup’ created on my desktop:

Backup tar file was also created with the timestamp:
Step 10: We are not just done yet, we need to schedule this backup task with cron so it runs automatically everyday, for that matter, open Crontab:
$ crontab -e
Select nano editor if it prompts, otherwise it will open the editor directly.
Step 11: Add the following line or cron entry in the editor:
0 4 * * * /bin/bash ~/Desktop/script.sh
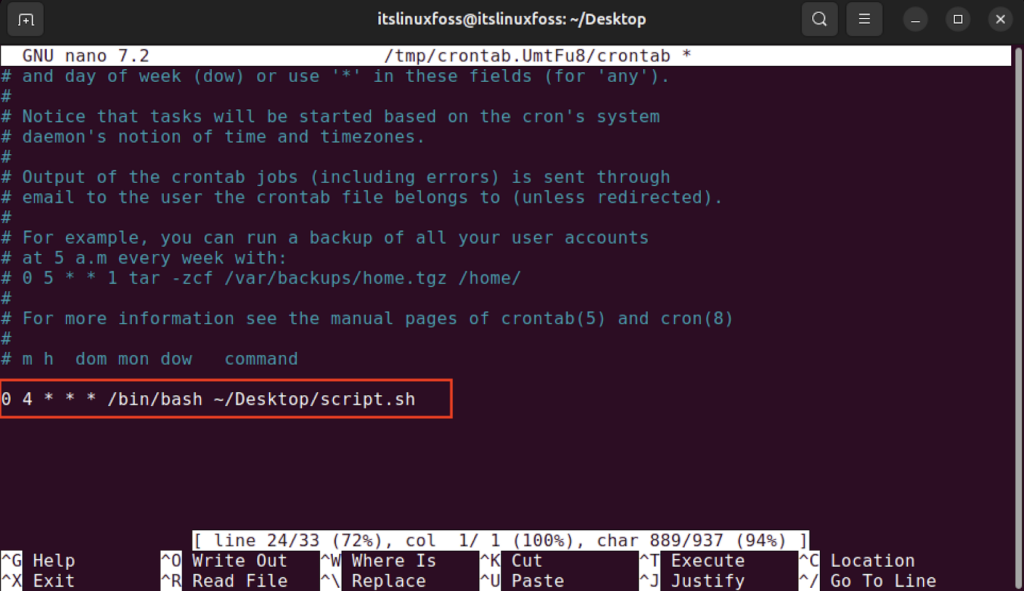
‘0’ means zero minutes past the hour, ‘4’ means 4am, 1st ‘*’ means every day of the month, 2nd ‘*’ means every month, 3rd ‘*’ means every day of the week. ‘/bin/bash’ specifies the bash interpreter to be used for the execution of the script and ‘~/Desktop/script.sh’ is the path of the script that needs to be executed at the specified time i.e. 4am.
Save and exit the editor afterwards by pressing ‘CTRL+O’ (then hit enter) and ‘CTRL+X’ respectively.
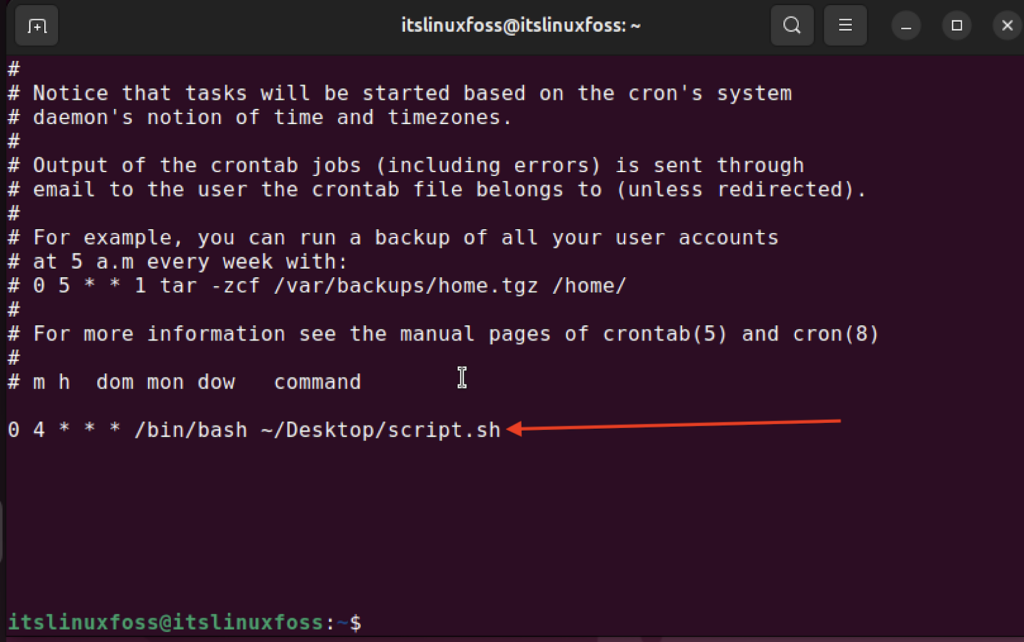
Step 12: To confirm if your cron job was added successfully, simply run this command in your terminal:
$ crontab -l
Conclusion
We have not done simple bash scripts which students do in school, we have done some real sh*t together where we have learned by doing some practical bash scripting examples which have been used by me in my real job. I have intentionally not over-complicated these examples and have kept them simple yet practical. Now, go ahead and use your creativity to write bash scripts that automate your workflow and make your life easy. Peace!

Check our LinkedIn company page