
Ubuntu is a powerful Linux-based operating system that is designed for network servers, PCs, mobile phones, etc. It supports the terminal and a graphical interface like the Windows operating system. Suppose you installed Ubuntu in the operating system and want to connect to the Internet.
This guide will demonstrate the various methods to connect the wireless via WIFI. The content carried out in this guide is:
Let’s start with the first method.
Method 1: Using CLI to Connect Wifi Ubuntu Server
In Linux systems, establishing a connection is the first requirement to access the Internet. Using the terminal, the “nmtui” command makes it easy, and you just require the SSID and password to connect to the Wifi network. To do so, execute the below script:
$ nmtui

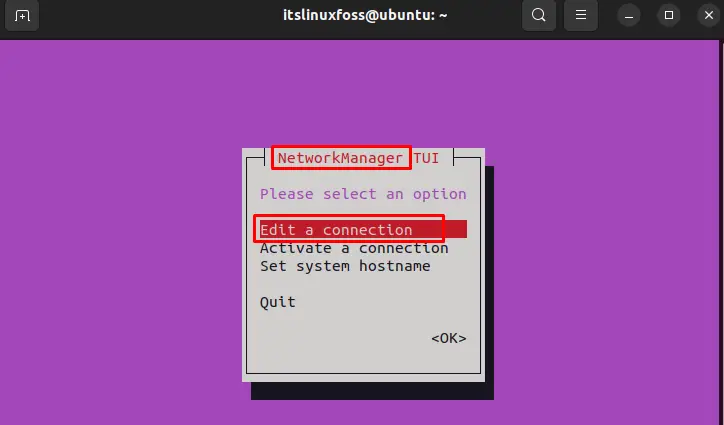
Select Edit a Connection Option
It navigates to the Network Manager window having several options. Choose the “Edit a connection” option and hit the “Enter” button:
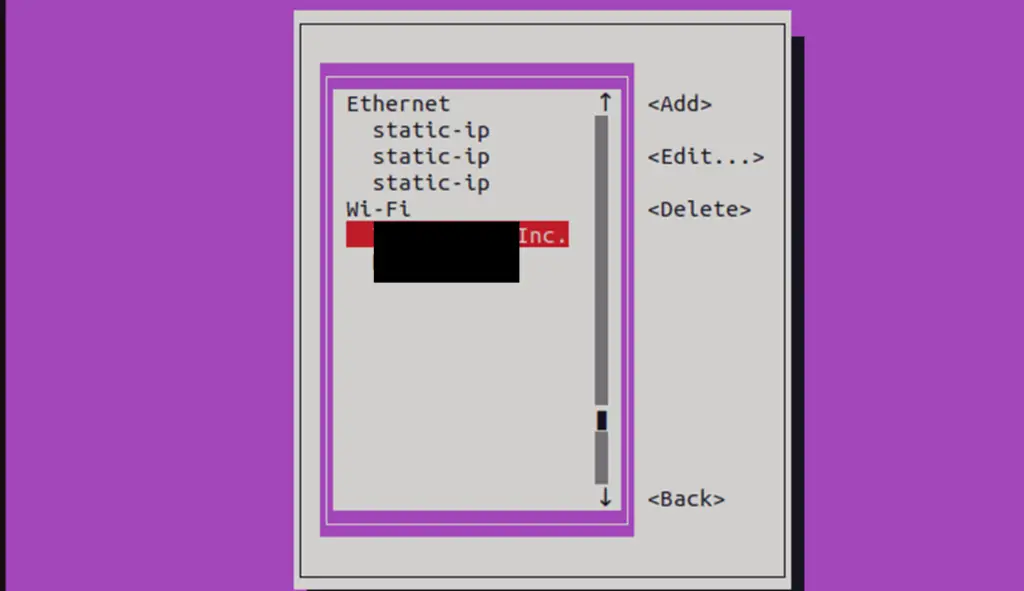
Choose Wifi Network
It goes to the new window where the available networks are presented in the “Ethernet” and “Wi-Fi” sections. Hit the particular network whose SSID and password are known:
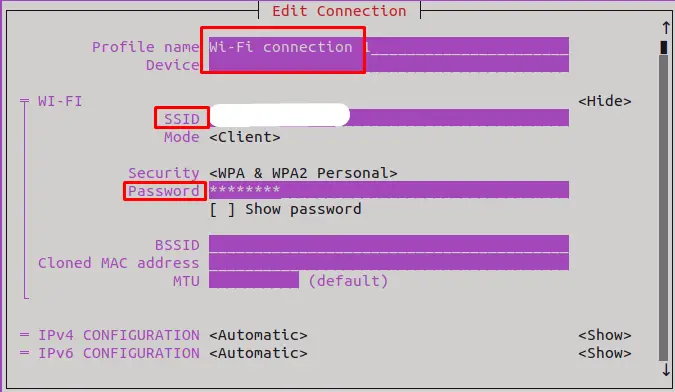
Enter Password
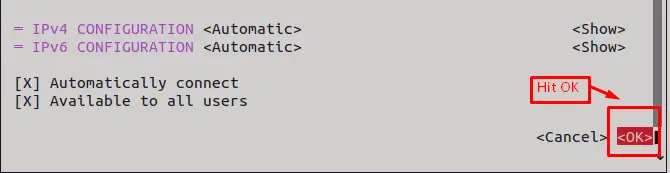
It navigates to the “Edit Connection” window where the SSID of a given network is provided here. Move to the Password section and enter the credentials. After that, hit the “OK” button at the left bottom of the window:
Verify the Connected Wifi Network
The network manager command line interface (NMCLI) manages the network interface and specifies the possible internet connection. The “d” option is used to display the devices that are managed by the network manager. To verify the connected Wifi network, execute the below script:
$ nmcli d
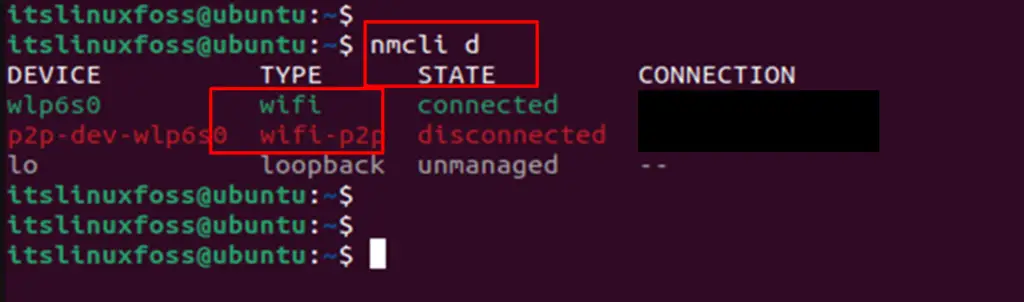
The output shows that the “wlp6s0” device (wireless interface) has successfully connected to the Wifi network.
Method 2: Using GUI to Connect WiFi Ubuntu Server
The most common method is considered to connect the Wifi Ubuntu server via graphical representation. You should be familiar with the SSID and password to create a connection. For this, the step-by-step procedure is given below:
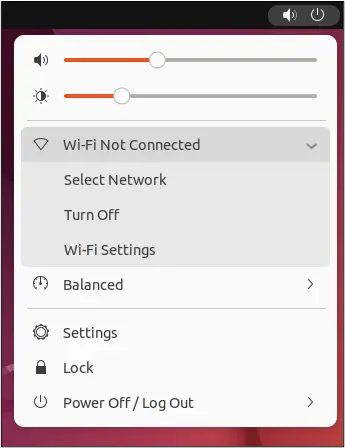
Hit the Select Network Option
From the desktop window of Ubuntu, hit the top right corner icons that drop down a list of options. Hit the “Select Network” icon to choose the given networks:
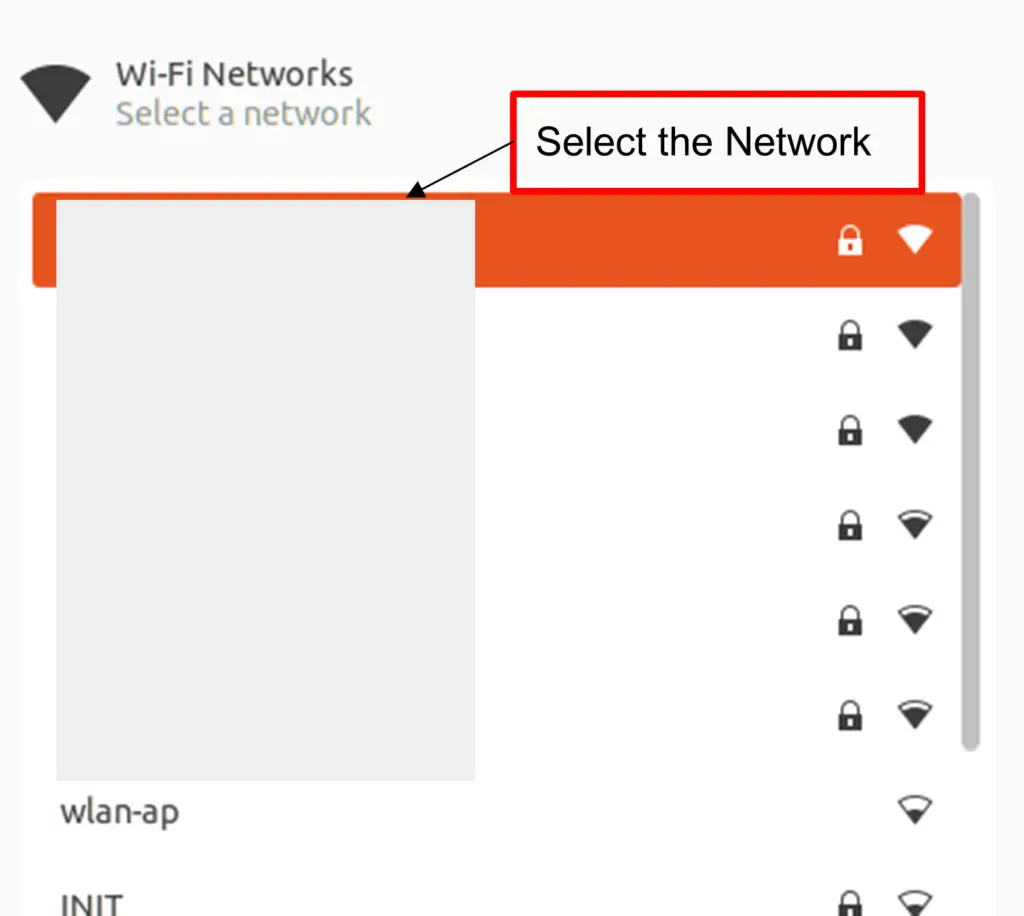
Select a Network
It displays the list of available networks, choosing the particular network whose password you already know. In our case, select the first network in the list of Wifi Networks as below:
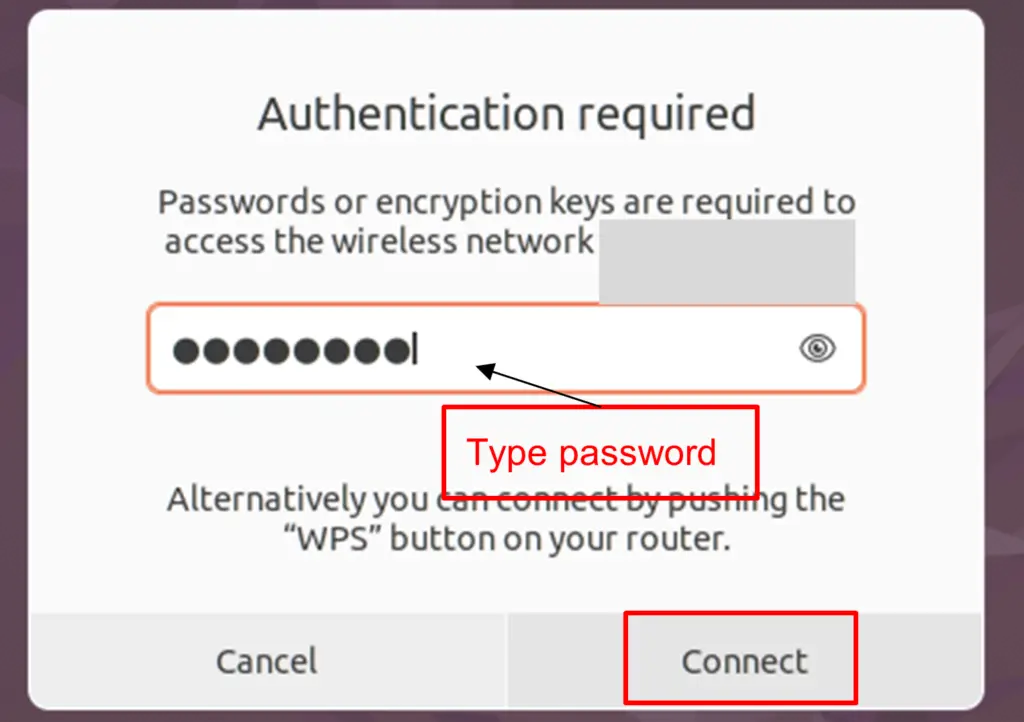
Type Password
After pressing the specific network, it will open a new window for authentication. In this window, type the password and hit the “Connect” button as below:
In this way, the wireless connection has been successfully accessed in Ubuntu.
Conclusion
In the Ubuntu operating system, you can connect to the WiFi network through the “CLI” and “GUI” methods. In “CLI”, the “nmtui” command pops up a Network manager window where you pick the specific network and enable the WiFi network after inserting “<password>”. The “GUI” provides easy access to the Wi-Fi connection by knowing the SSID and Passwords of a particular internet connection. This article has explained different methods to connect to the WiFi Ubuntu server.
