Debian is an open-source free operating system that uses the Linux kernel that is very popular among advanced users because of its commitment to the needs and expectations of the Linux community and Debian’s technical excellence. An operating system is just a set of programs, software, and utilities that make your computer run.
Debian is called the universal operating system and the first stable version was released in 1993. The latest version that took two years of development was released on 14 Aug 2021 called Debian 11 Bullseye and Debian 11 is an update to Debian 10 Buster. Debian 11 is sup[orted for the next 5 years and offers over 11 thousand new packages and a total of approx 60 thousand packages. Apart from that Debian has this new eye-catching theme, new desktop environments, printer, and scanner improvement, and much much more.
In this article, we will teach you how to install Debian 11 Bullseye along with screenshots, so, before wasting any more time let’s get into it.
Debian 11 ISO File
Before installing the Debian 11 Bullseye, first, we have to download the iso file that contains all the installation files and can be downloaded from the below link:
https://www.debian.org/CD/http-ftp/
When you visit the above link, scroll down and depending on your system architecture choose an option. We will go with amd64.
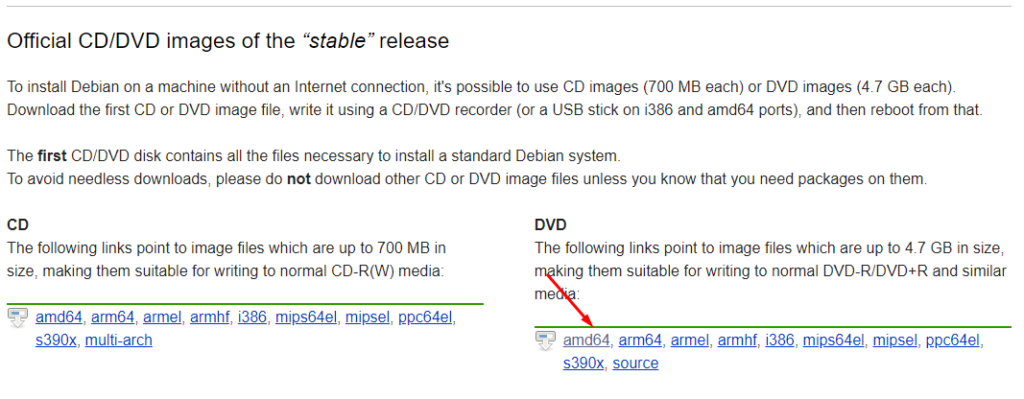
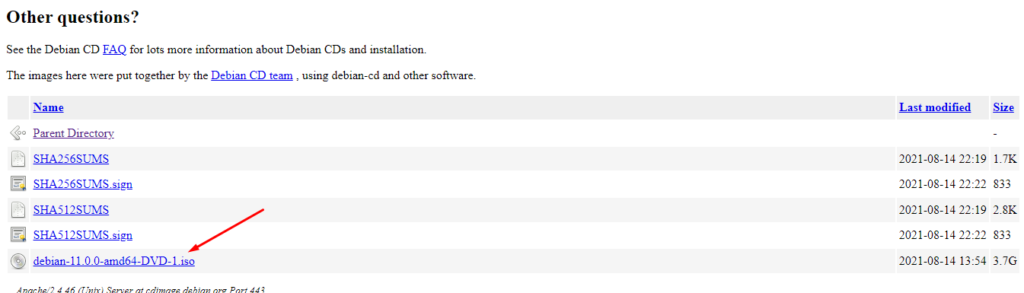
Once we click on the preferred architecture, we will be redirected to another page where we have to scroll down and click on the Debian ISo file as shown below:
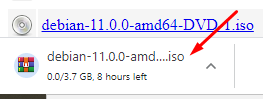
When we click on the ISO file, the download will start:
Bootable USB Creation
Once we are finished with downloading, the next step is to make a bootable USB that will have Debian 11 ISO file. To make a bootable USB a third-party utility is required for which there are some options and you can download these utilities from the links given below:
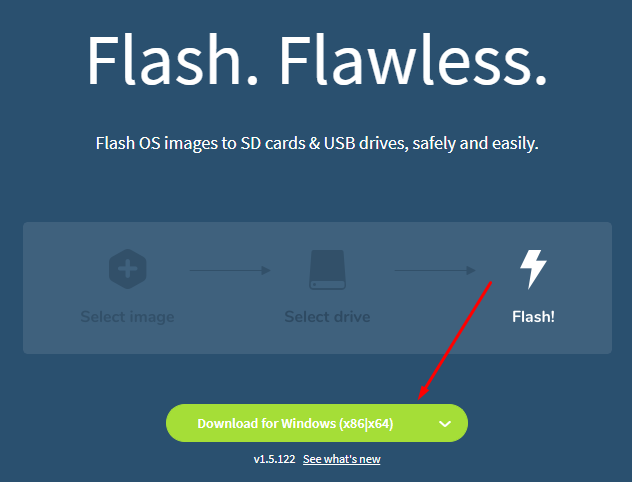
Download a utility based on your preference, we will go with the balenaEtcher and when we visit the balenaEtcher website we see the download option where we will click on then install balenaEtcher:
Once installed, open balenaEtcher and you will see a screen like below:
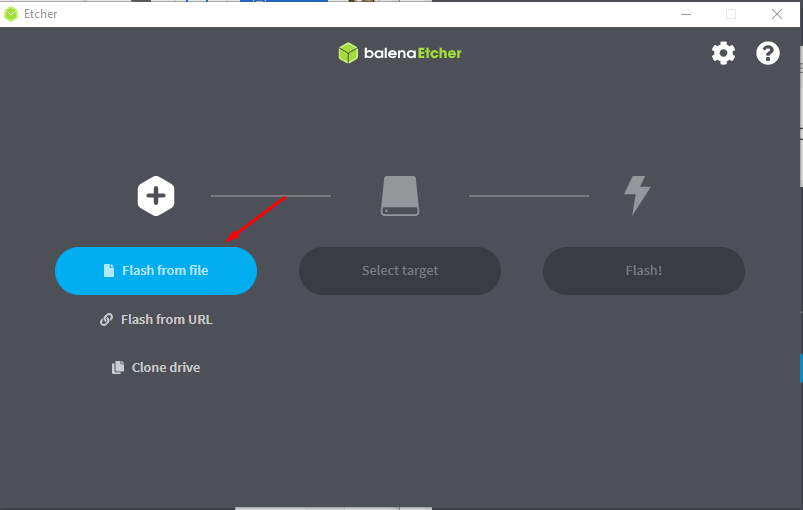
Click on the Flash from file as shown in the screenshot above, and then go to the directory where you downloaded the Debian 11 ISO file and select it.
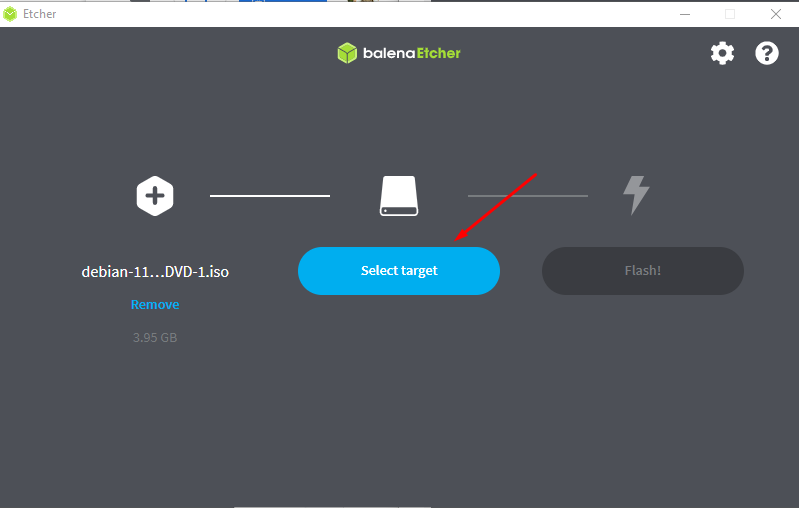
After selecting Debian 11 ISO file, next click on Select target where you have to select a USB drive that you want to make bootable:
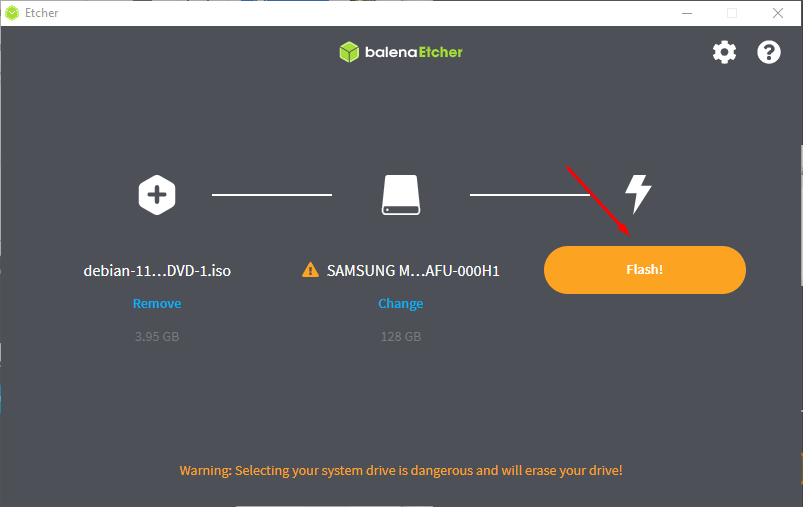
Next click on flash and the bootable process will start which will take some minutes.
Boot Settings
Now that our bootable USB is ready, the next step is to insert the bootable USB in the target system where we want to install Debian 11 and then reboot that system. Once rebooted enter the boot menu which can be achieved by pressing keys on your keyboard. The boot menu keys depend on a system e.g in some systems it is F1, F2, F10, or ESC so figure out your system boot menu key and press it one=ce your system is rebooted. Once you enter the boot menu, click on bootable USB and then press Enter to boot.
Debian 11 Bullseye Installation
When the boot starts you will see the below screen:
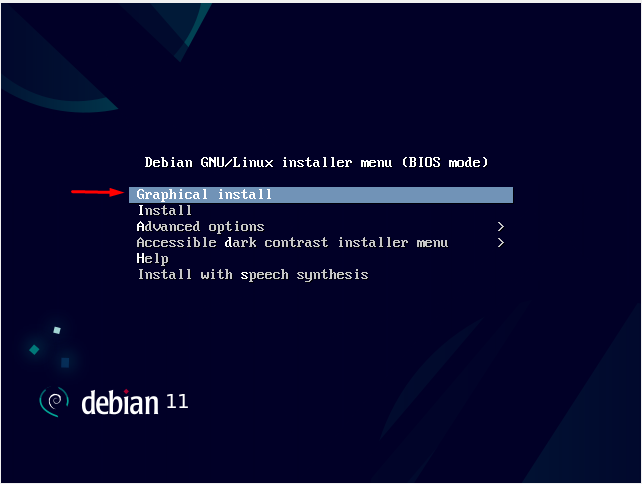
This is an installer menu where different installation options are available and you can choose any one of them depending on your requirements and preference. We will however go with the Graphical Install as shown above. To select press Enter on your keyboard.
The next screen that will show up will be the language selection screen. Select your preferred language and click on Continue:

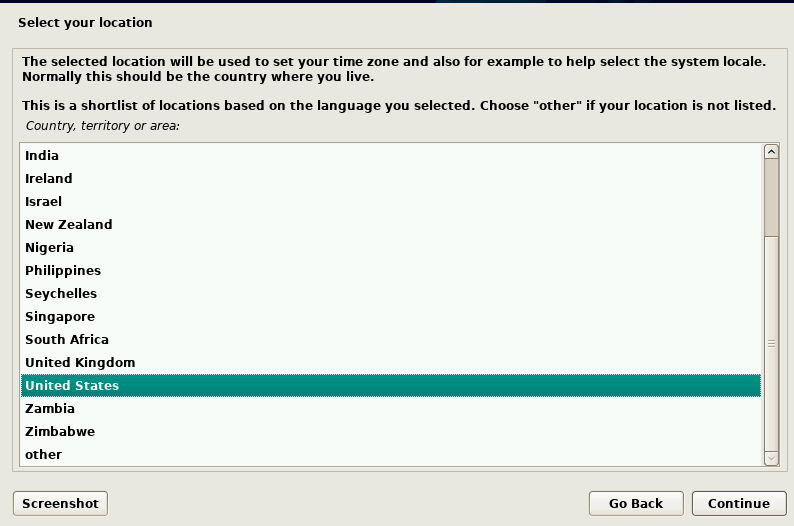
After selecting language, select your language and Debian 11 will set the system time accordingly:
Now configure the keyboard by selecting keyboard language and then and press Enter:

When you select the keyboard, configuring network settings will start and after a while, you will see the below screen where you have to set a hostname that identifies your system to the network:
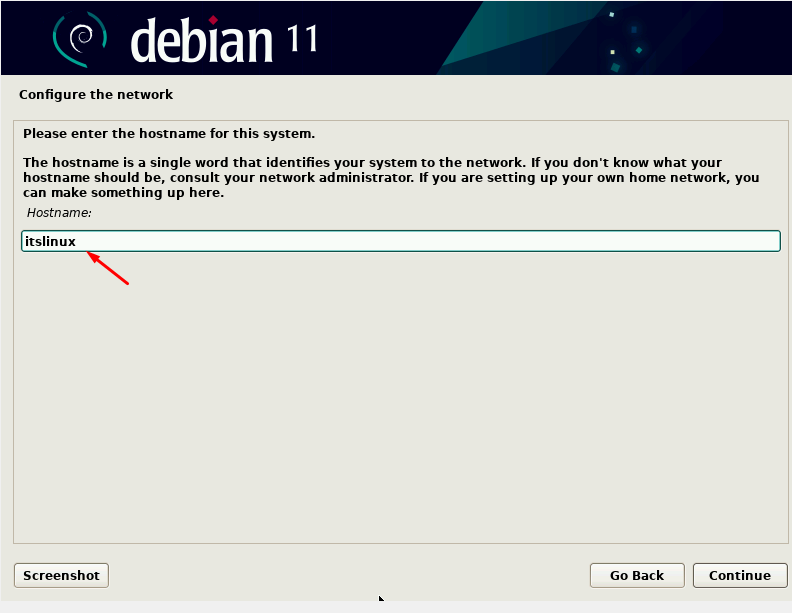
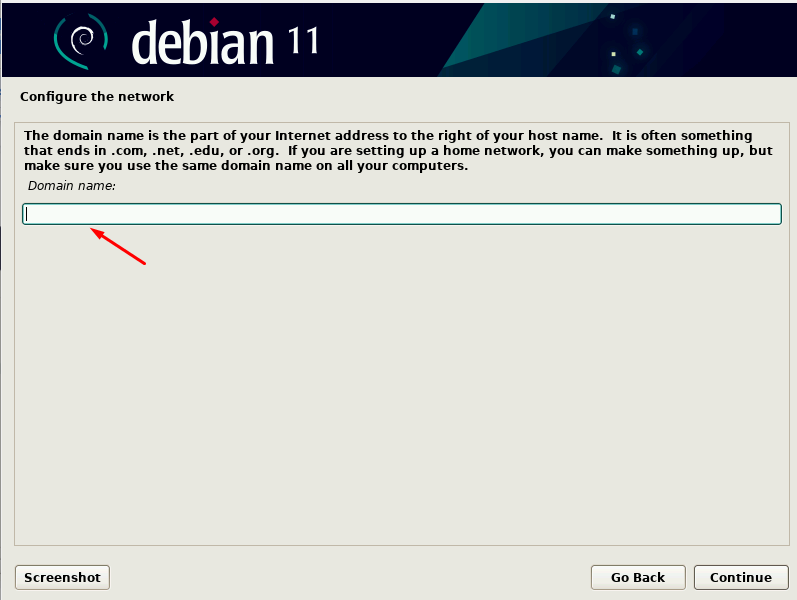
After the domain name, the installer will ask you to set the domain name and you can leave it blank if you don’t have a domain name by pressing enter or clicking on the Continue button:

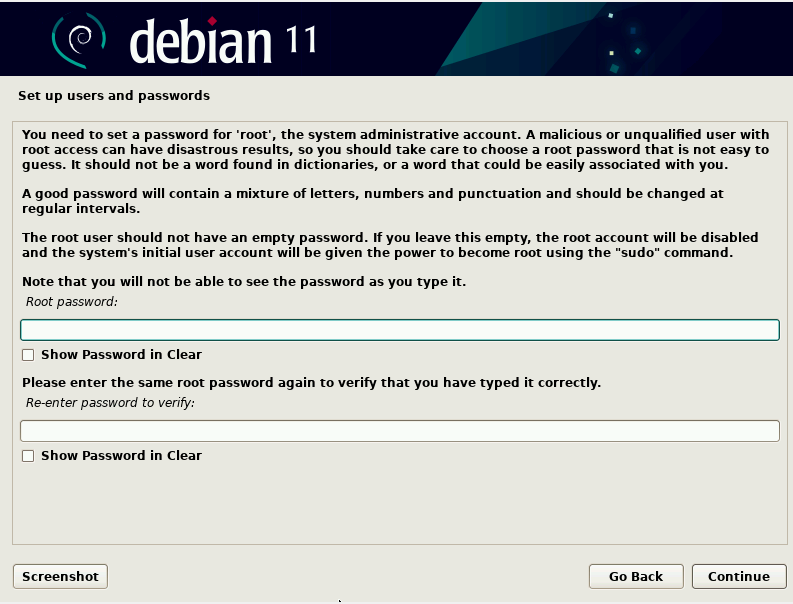
The next step is to set a password for the administrator or root user and this user will have unlimited privileges so, keep the password secure and strong.
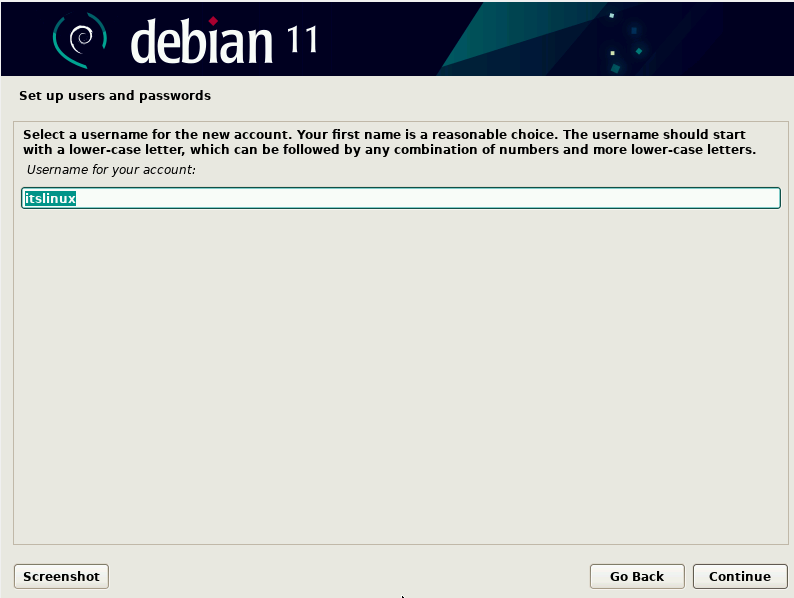
This step involves setting up your user name by typing the name in the input box and then pressing enter:
You have successfully created a user. We can also create other users once we install Debian 11.
Now that you have set the name, the next step is to set the username which will be a sudo privileged account:
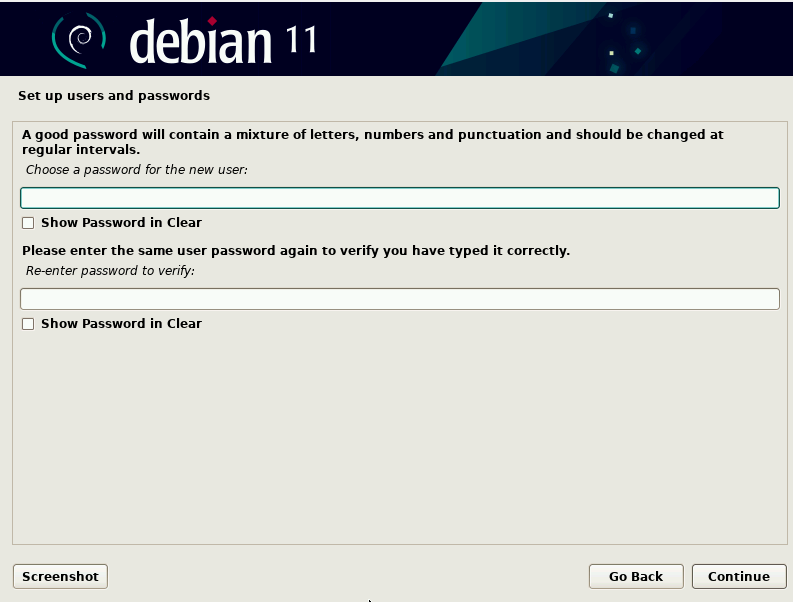
Now we have to set a password for the new user which will be used to login into Debian 11 operating system:
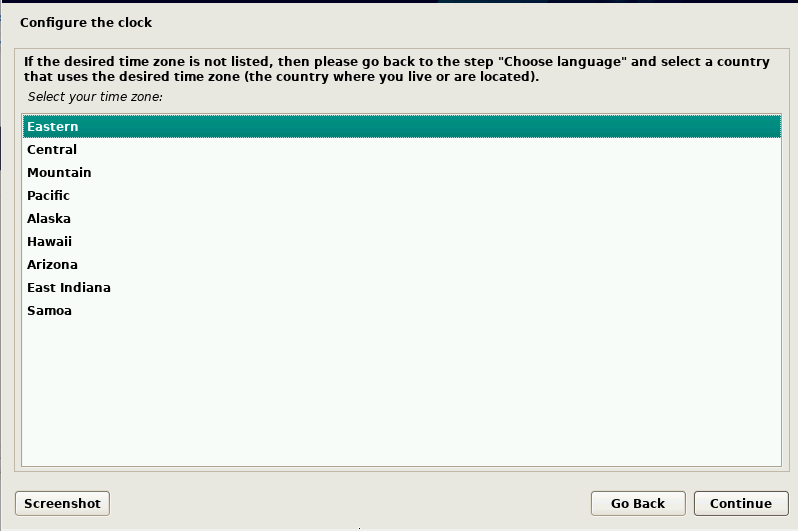
The next step is to configure the clock by choosing your preferred timezone:
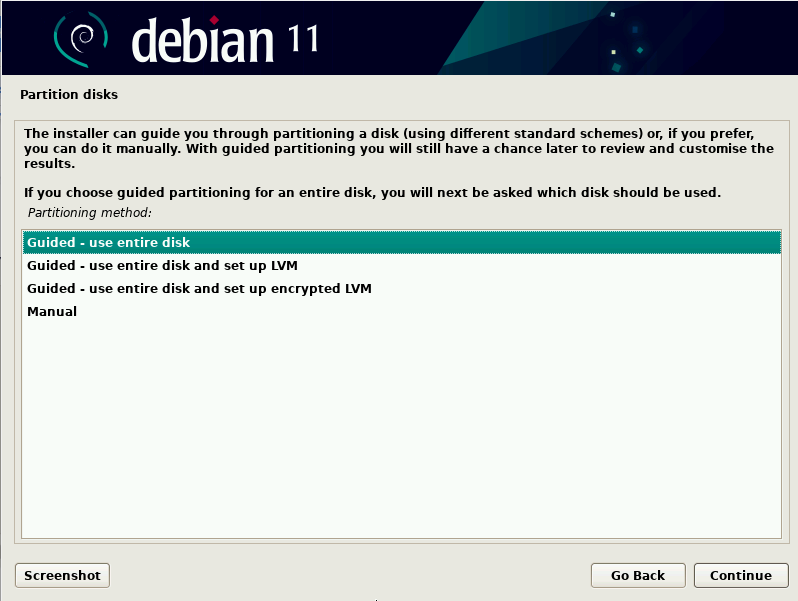
Now the partition disks installation menu will be shown like below where we have to choose a partition method. The partition method depends on a user preference or requirement however the default Guided- use entire disk is recommended and we will also go with it by pressing enter:
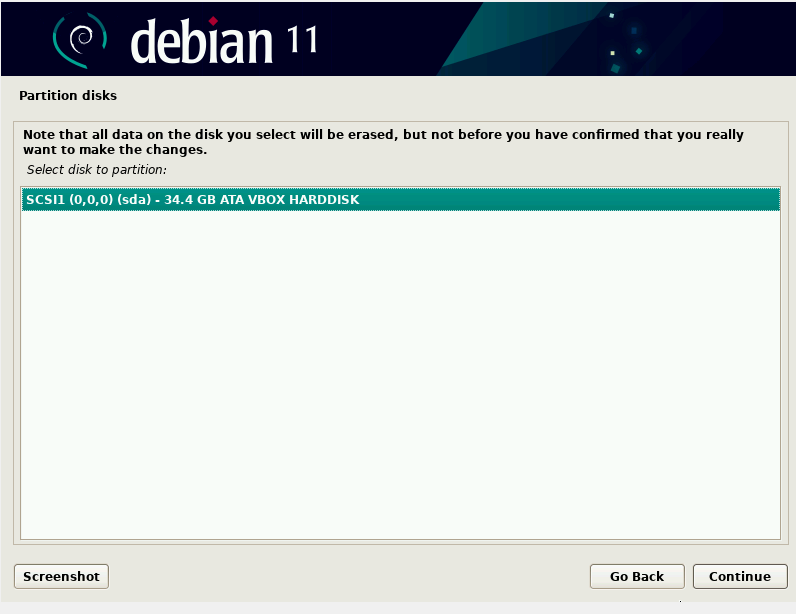
When you press enter or clock on the continue button, you will be redirected to another installer menu where you will see all the attached hard disks to your system. Select your disk and click on continue:
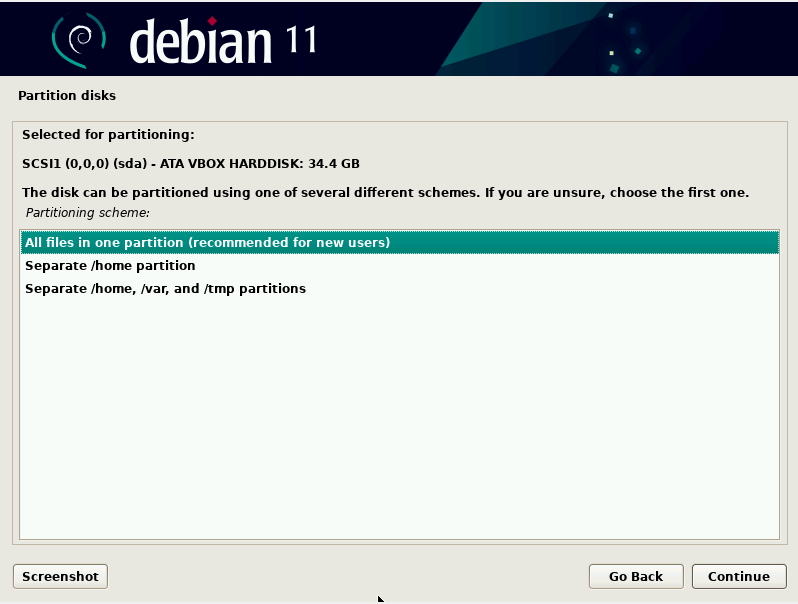
This step is for choosing a partition scheme and we will go with the default option however you can choose any option based on your preference:
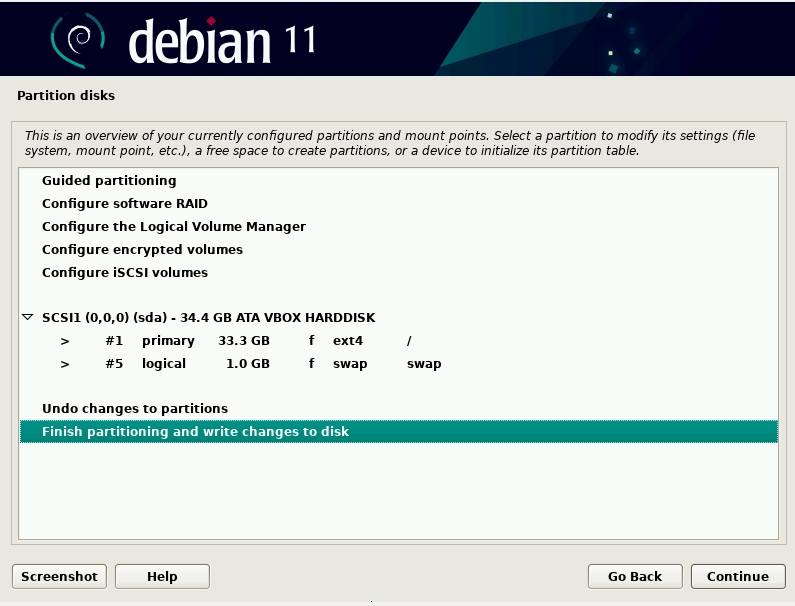
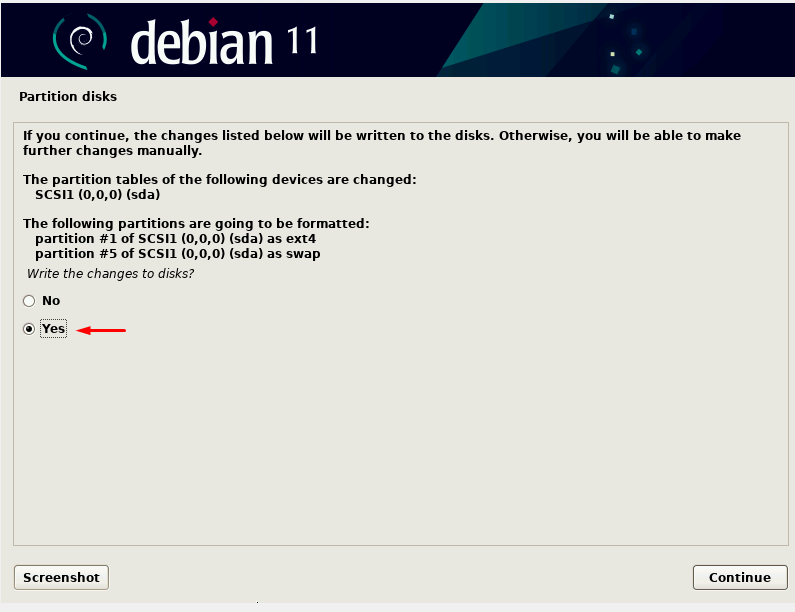
In this prompt, you will see the partition settings, review them and then press enter or click on continue:
The next prompt is to confirm the configuration settings where we will chose yes option and click on continue:
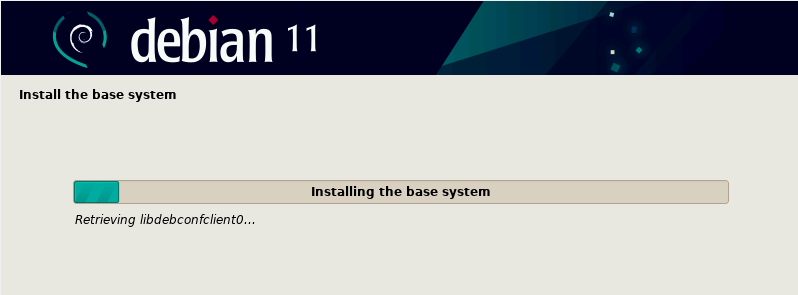
When you click on continue, the installing base system screen will be seen:
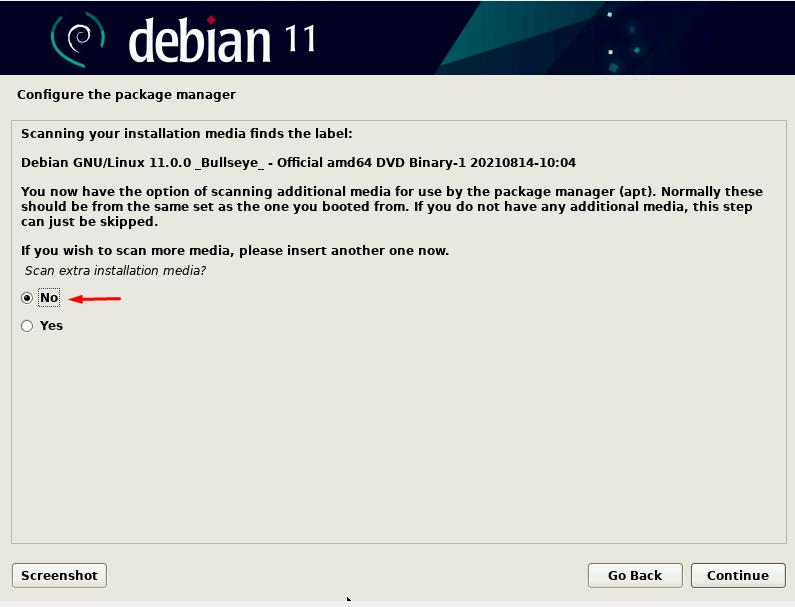
Now it’s the turn of conjuring package manager where we will select no for the scanning storage media:
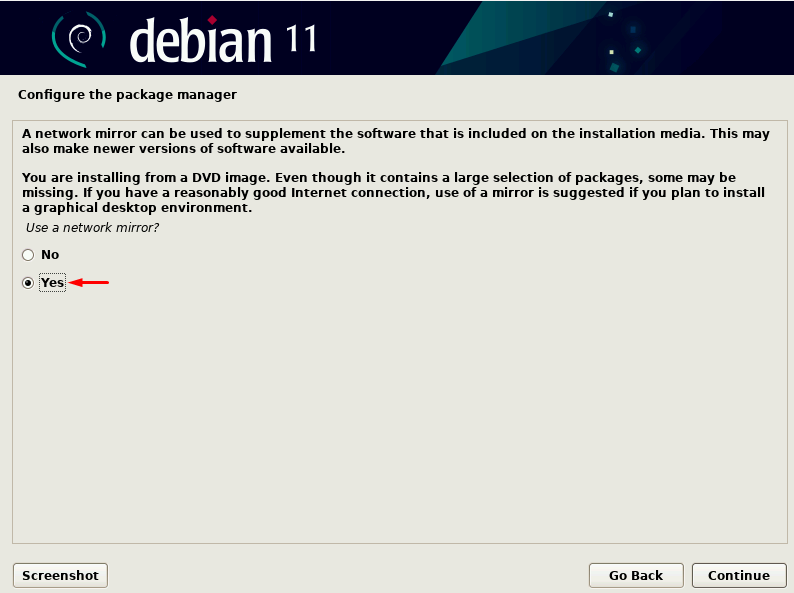
Now the installer will ask you whether you want a network mirror or not for which we will select the yes option:
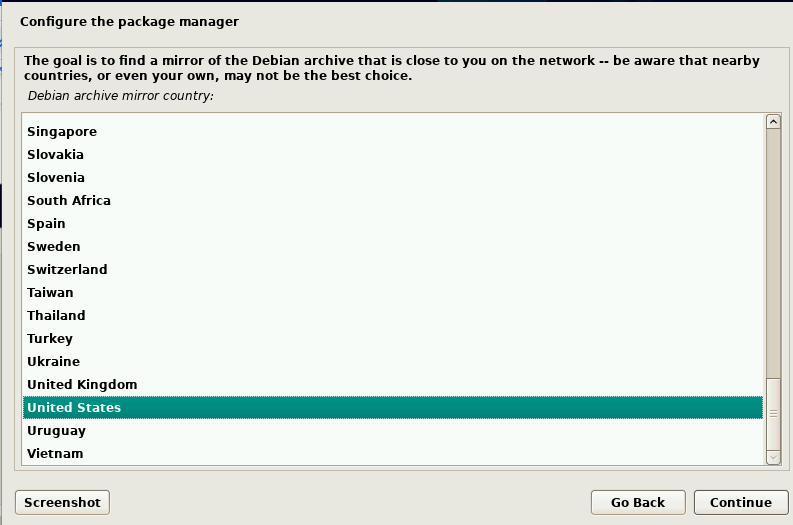
Next, we have to select the archive mirror country:
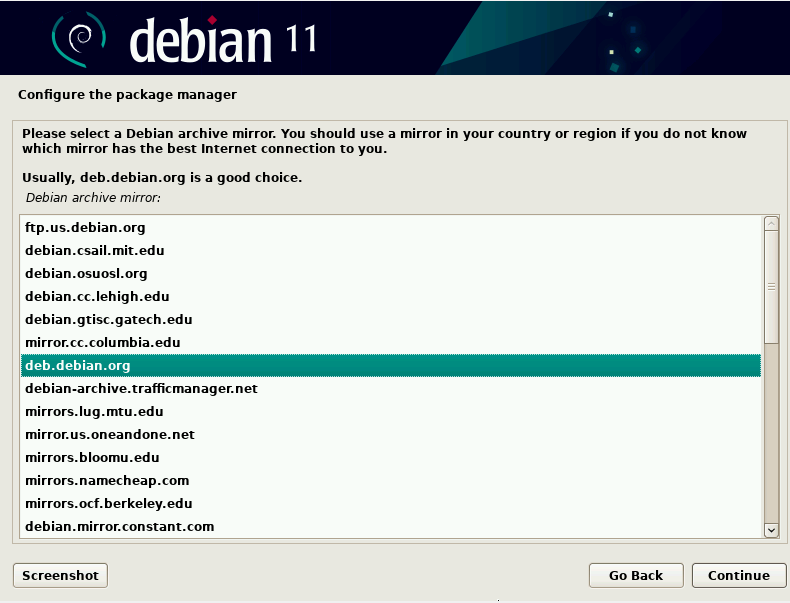
Once we are done with selecting an archive mirror country, we then select an archive mirror:
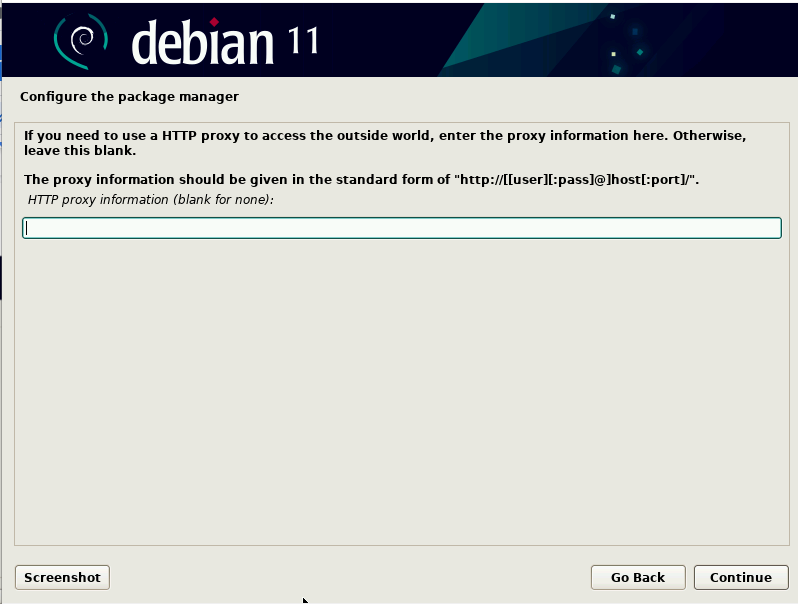
In the configuring package manager, the next prompt shown to us will be the HTTP proxy which we will leave blank and click on continue:
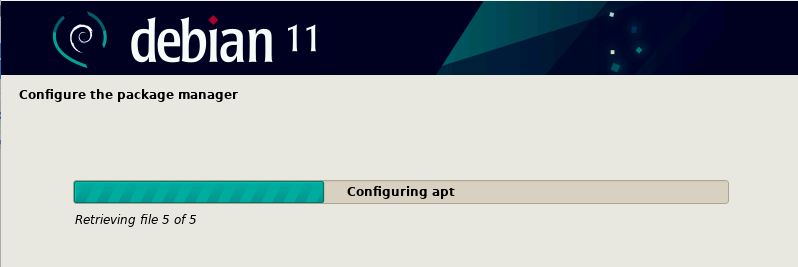
The package manager configuration will start and you will see the following screen:
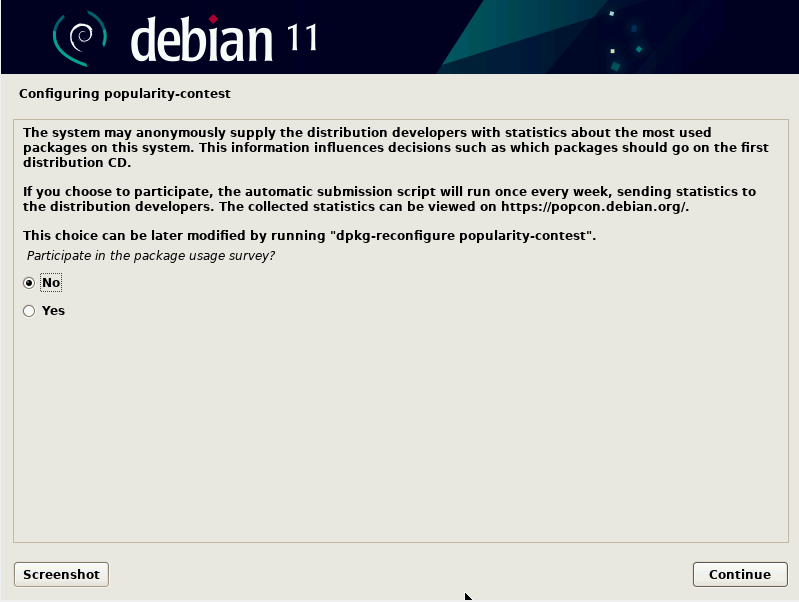
Next, you will be asked whether you want to participate in the package usage survey or not, for which we will select no option and click on continue:
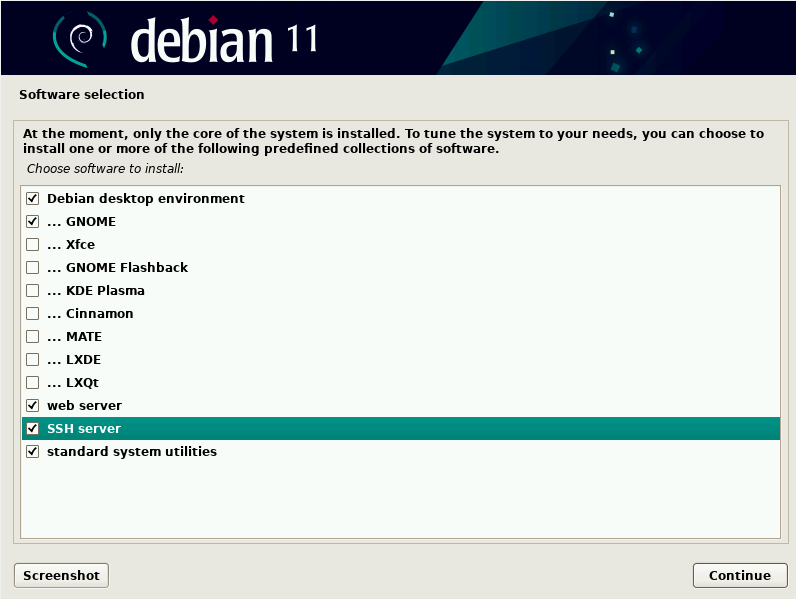
The next step is to install some predefined collections of software along with the core of the system for which we are given some options and we can choose either of them. We chose SSH server, web server and GNOMe environment.
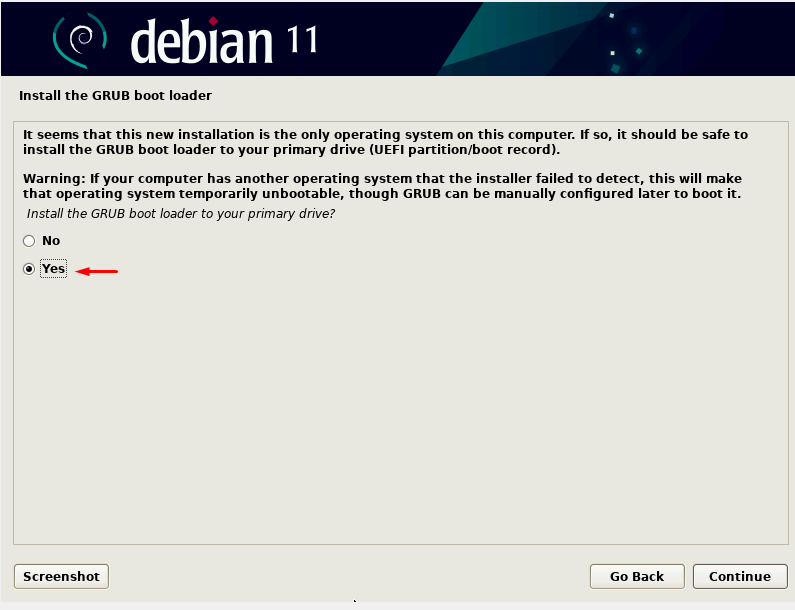
The installation process will start after which you will be asked to install GRUB boot-loader or not for which we will select yes option as GRUB boot loader is required to load Debina hence click on continue:
Once we click on continue we will see the following screen:
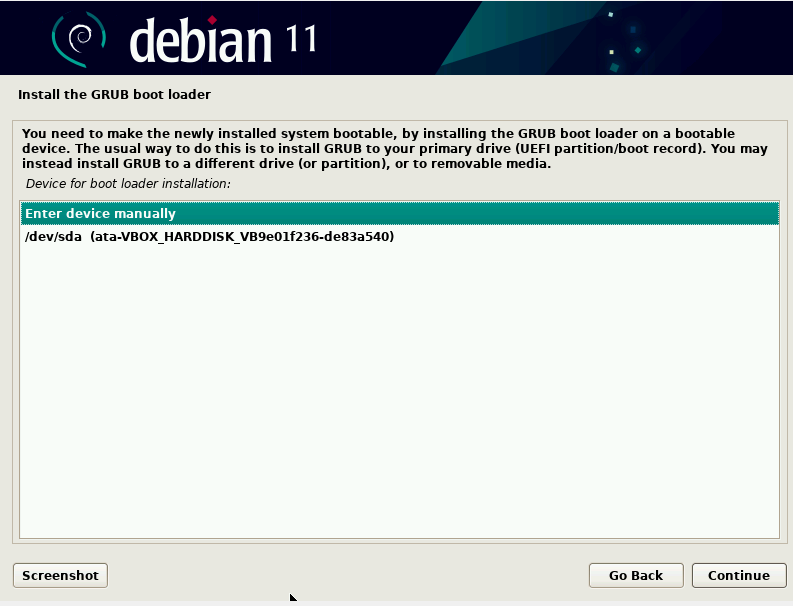
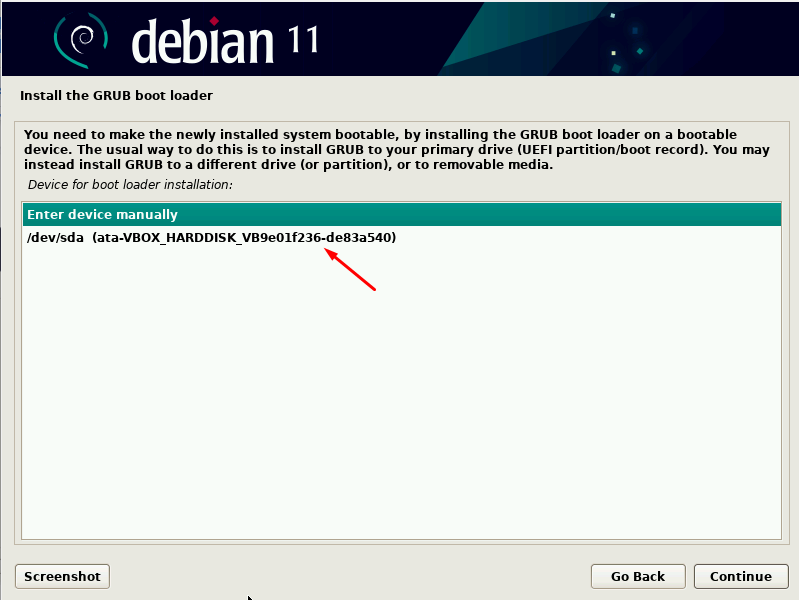
Choose the storage media on which we want Debian to be installed which is usually the /dev/sda. Once selected, click on continue:
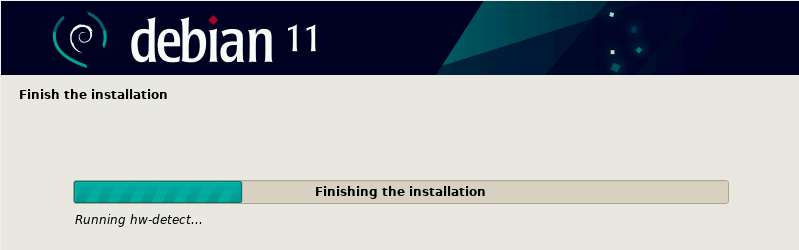
The installation will start and wait until it finishes:
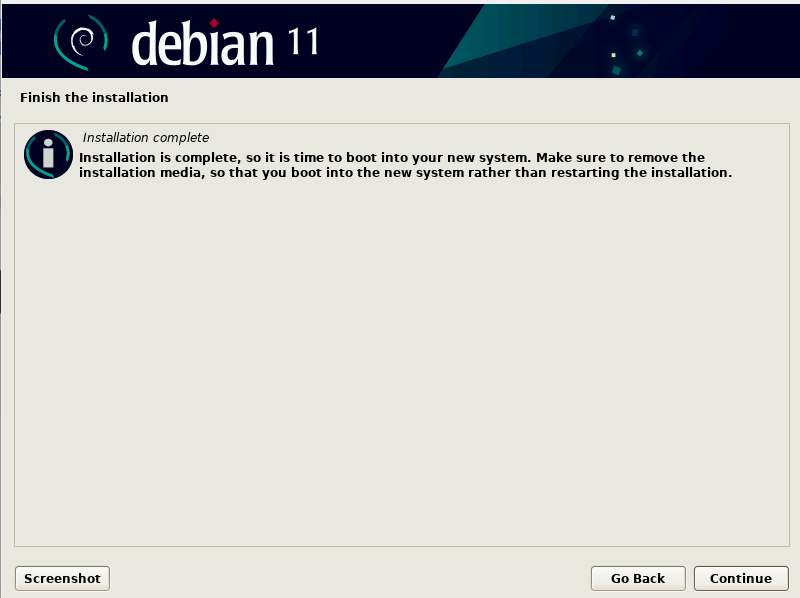
You will see the installation finished screen. Click on continue:
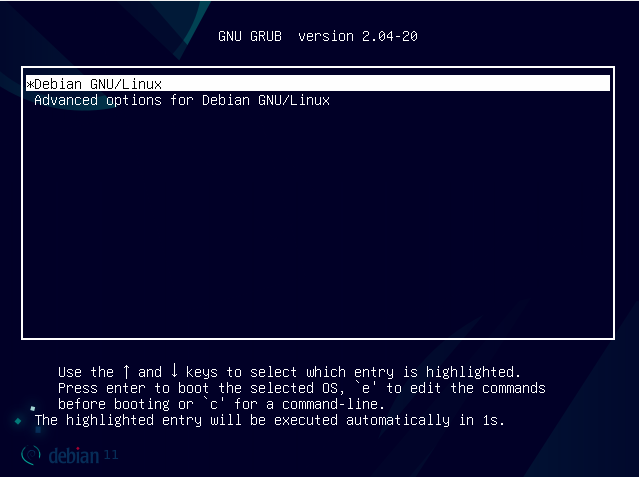
Your Debian 11 operating system will start and you will see the following screen where you have to select the option shown below:
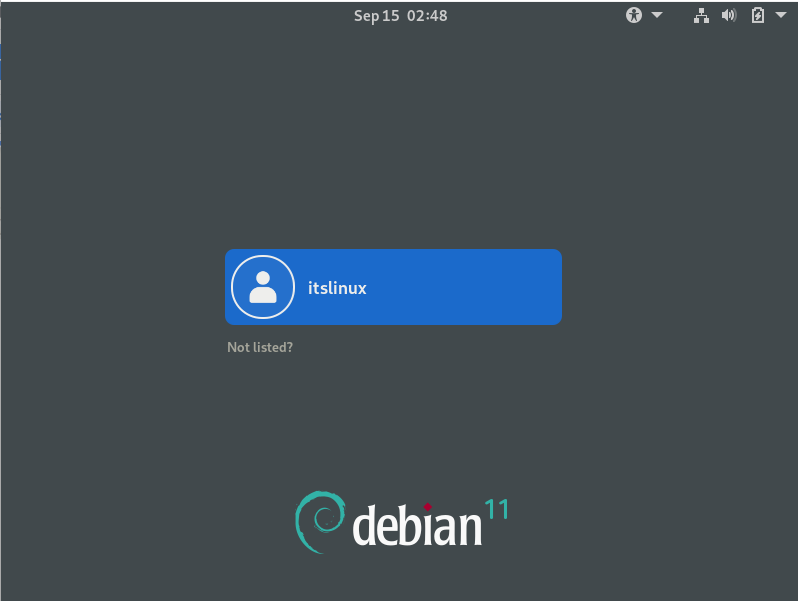
Now, the login screen will be visible and the user-created during the installation of Debian 11 will be seen. Click on the user:
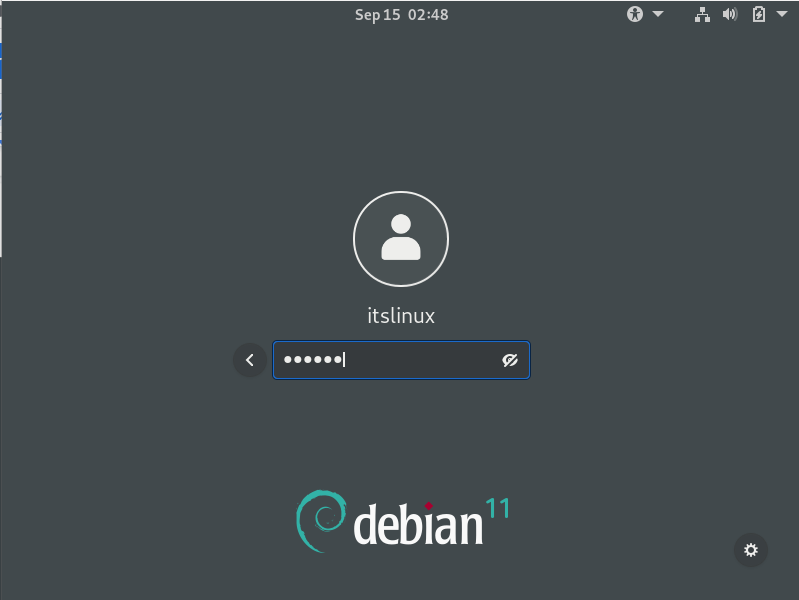
Type your password set for the user:
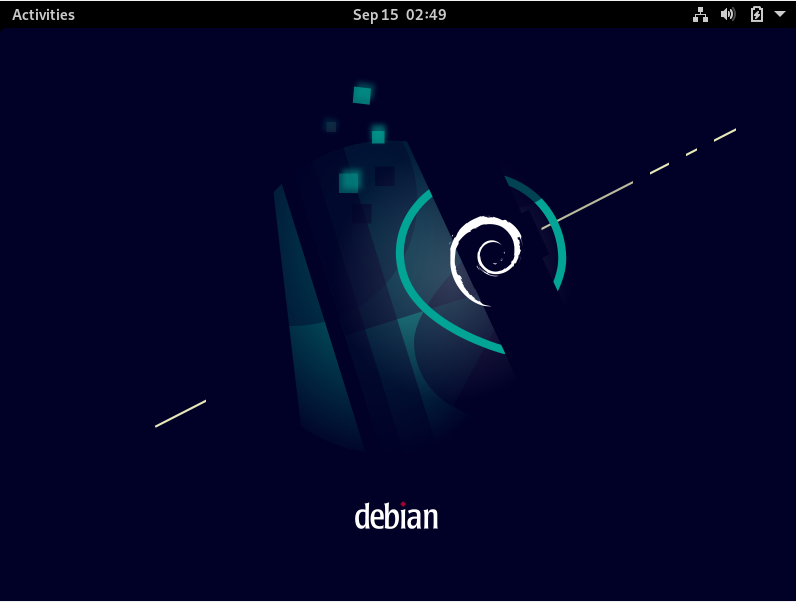
Now you will see the below screen. Congratulations! You have successfully installed Debian 11 on your system.
Conclusion
Debian 11 is a free operating system that offers enhanced features, driverless printing and scanning and exFAT file system support, and much more. Debian 11 is used by a large community, especially by tech advanced users.
In this article, we gave you all the necessary tools on how to install Debian 11 Bullseye along with screenshots. We hope that this article was informative to you and by following this article, you must have now a Debian 11 operating system installed on your system.

Saryia is a technology entrepreneur and digital publisher specializing in Linux, open-source technologies, and developer education.