When a segmentation fault happens, the system ends the program and generates a core dump file. This file is a snapshot of the memory state of the particular program at the crash time. In Linux, the error “segmentation fault (core dumped)” comes across during the execution of the script file (C, C++, Python, Java) from the terminal. The core dump is when a code performs read and write operations on a free memory location.
This article will provide multiple solutions to the above-stated “segmentation fault (core dumped)” error in Linux. The supported content of this guideline is as follows:
- What is the “segmentation fault (core dumped)” Error in Linux?
- What are the Possible Reasons to Fix the “segmentation fault (core dumped)” Error in Linux?
- How to Fix the “segmentation fault (core dumped)” Error in Linux?
- Reason: Attempting the Non-Existing Memory
- Solution 1: Remove the Lock File
- Solution 2: Kill the Specific Process
- Solution 3: Remove Cache Repository
- Solution 4: Identify the Source of the Error
- Solution 5: Fix the Code
- Solution 6: Repair the Broken Packages
What is the “segmentation fault (core dumped)” Error in Linux?
In Linux, a segmentation fault (core dumped) error is a type of error that arises when any specific program attempts to acquire the memory location that is not allowed to acquire/access. Furthermore, tries to write to a read-only memory segment. The core dump file can be utilized for debugging the program and finding the cause of the error.
What are the Possible Reasons to Fix the “segmentation fault (core dumped)” Error in Linux?
This error can happen due to various reasons, such as invalid pointer dereference, buffer overflow, stack overflow, or memory corruption. Some possible cases are given below:
- The program has a bug that causes it to write or read beyond the boundaries of an array, a pointer, or a buffer.
- The program tries to dereference a null pointer, a dangling pointer, or an uninitialized pointer.
- The program tries to modify a memory location that is marked as read-only, such as a string literal or a constant variable.
- The program tries to execute a memory location that is not executable, such as data or stack segments.
- The program runs out of memory and fails to allocate more.
How to Fix the “segmentation fault (core dumped)” Error in Linux?
When the error occurs, the system terminates the program and dumps its core, which is a snapshot of the memory and registers at the time of the crash. This core dump can be used for debugging purposes with tools like “gdb” or “valgrind”. To fix the segmentation fault error, one needs to identify the cause of the error and correct it in the source code of the program. Also, it can be resolved by removing the “lock” files through the “rm” command, clearing the cache repository, or killing the process via “process id”.
Reason: Attempting the Non-Existing Memory
The main cause of this error is that you are trying to access a specific portion of memory that does not exist. For instance, when users try to read or write the elements of a non-existent array, do not define the pointer before using it or use a memory address with the same variable value. Therefore, the particular program will crash and display the “segmentation fault” error when executing the file.
The screenshot of the causing error is given below:

The next sections contain several solutions to encounter the above error.
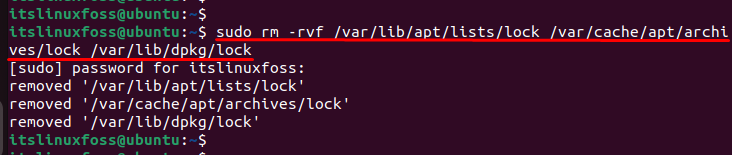
Solution 1: Remove the Lock File
During the execution of a program, locked files are created to make the script files executable. To resolve the error, one of the solutions is to remove the lock file that attempts the non-existent memory. For removing these files, the “rm” command is used to delete the lock files:
sudo rm -rvf /var/lib/apt/lists/lock /var/cache/apt/archives/lock /var/lib/dpkg/lock
Let’s head over to another solution.
Solution 2: Kill the Specific Process
Users can consider another solution to resolve errors by killing the specific process. First, locate the process ID stored in the “/var/lib/dpkg/lock” directory. The “lsof” flag is utilized to list all open files as below:
sudo lsof /var/lib/dpkg/lock
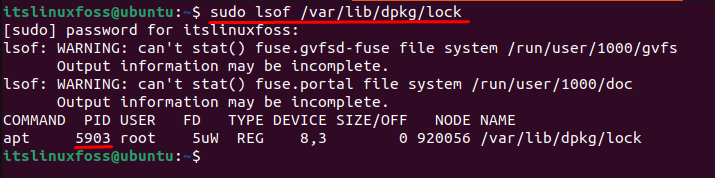
After identifying the specific process ID, you can go to terminate the process. For this, the “kill” command is utilized with a “-9” signal that forcefully terminates the running process “5903”:
sudo kill -9 5903

You can verify that the “kill” command terminates the specific process via the “5903” id.
Solution 3: Remove Cache Repository
One possible cause of this error is a corrupted cache repository that prevents the program from loading the required libraries or modules. To fix this, you can try to remove and rebuild the cache repository. Here are the steps to do so:
Step 1: Locate and Remove Cache Repository Directory
Locate the cache repository directory. It is usually under “/var/cache/ldconfig” or “/etc/ld.so.cache.d”. Let’s remove the cache files via the “rm” command with the sudo privileges:
sudo rm /etc/ld.so.cache

Users can also remove the cache repository by using the “clean all” command in the terminal with the sudo privileges:
sudo apt clean all

It deletes the cache repository file or directory. You may need root privileges to do this.
Step 2: Rebuild the Cache Repository
Now, run the “ldconfig” command to rebuild the cache repository. This will scan the system for available libraries and modules and create a new cache file.
sudo Idconfig

Step 3: Restart the System
Finally, users can restart the system via the “reboot” command and see if the error is resolved.

This is all about fixing the above-mentioned error by removing the cache repository.
Solution 4: Identify the Source of the Error
Users can use a debugger tool such as “gdb” or “valgrind” to run the program and find out which line of code causes the segmentation fault. You can also use the core dump file that is generated by the system when the error occurs. This file contains information about the program state at the crash time.
Load the Core Dump File
You can use the gdb command with the “c” option to load the core dump file into gdb and inspect it:
gdb -c core
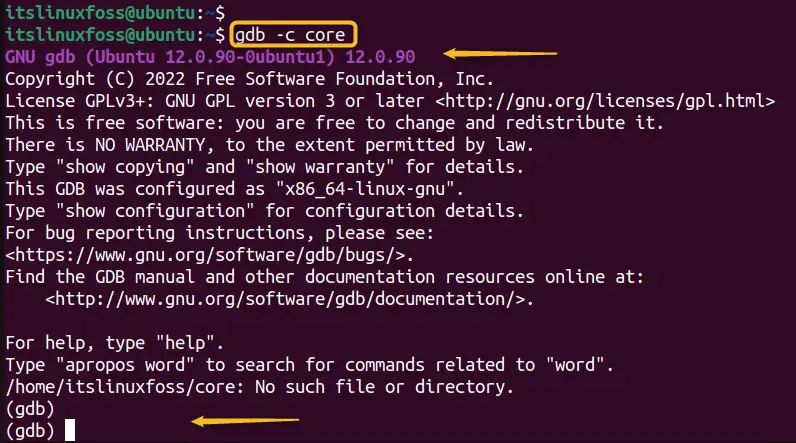
In this way, users can specify the particular file, start inspection, and resolve the relevant issue.
Solution 5: Fix the Code
Once users know where the error is, they can try fixing it by modifying the code. For example, if you have a pointer that points to an invalid memory location, you can check if it is null before dereferencing it, or allocate memory for it properly.
If you have a buffer overflow, you can limit the amount of data that you write or read from the buffer, or use a safer function. If you have a stack overflow, you can reduce the size of your local variables or use dynamic memory allocation instead. To read more about this error during code, follow our guide.
Solution 6: Repair the Broken Packages
This can happen due to various reasons, such as a bug in the program, a corrupted file, or a hardware problem. One possible way to fix this error is to repair the broken packages that may be causing it. To do this, you can follow these steps:
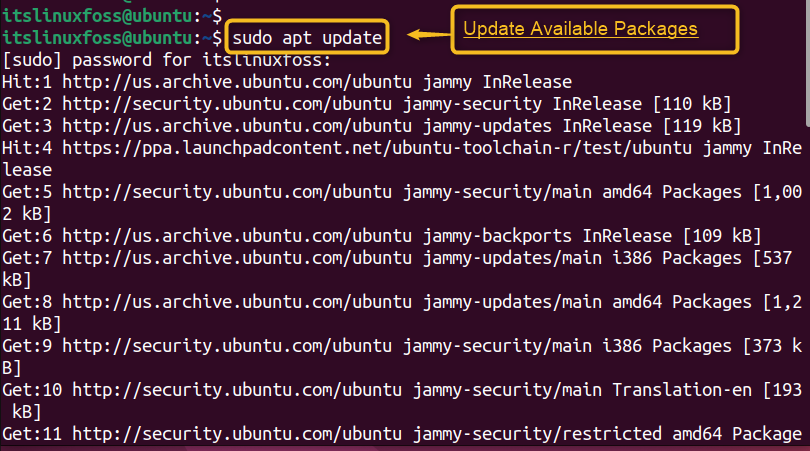
Step 1: Update Available Packages
Open a terminal and run the below command to update the list of available packages:
sudo apt update
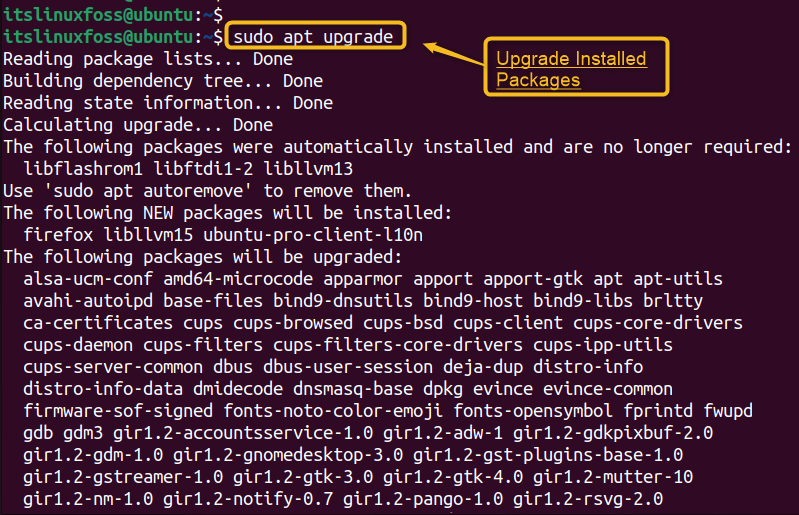
Step 2: Upgrade the Installed Packages
Run the below command to upgrade the installed packages to their latest versions:
sudo apt upgrade
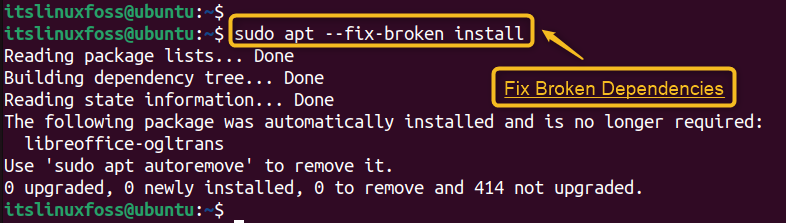
Step 3: Fix Broken Dependencies
Run the command to fix any broken dependencies or missing files.
sudo apt --fix-broken install
Step 4: Remove Unnecessary Packages
Run the command to remove any unnecessary packages that may be taking up space or causing conflicts.
sudo apt autoremove

If the error persists, you may need to reinstall the program or check your hardware for any issues.
This is all about tackling the above-mentioned error in Linux.
Conclusion
In Linux, the error “segmentation fault (core dumped)” occurs when the process requires additional memory that the operating system does not permit access. This can occur due to several reasons, such as invalid pointer dereference, buffer overflow, stack overflow, or memory corruption. It can be resolved by removing the “lock” files through the “rm” command, clearing the cache repository, or killing the process via “process id”. This article has explained all possible solutions to encounter the error mentioned above.
