
Utilizing the state-of-the-art cryptography is a modern VPN called WireGuard. It’s easy to configure and provide a cross-platform as compared to other popular VPNs available.
It uses a peer-to-peer medium in which any of the systems can act as a server or a client. It’s much faster than remaining VPNs with a smaller codebase that can be easily maintained and inspected. Due to it being cross-platform, it can run on any system. But, in this article, we’ll learn the installation of WireGuard VPN on Ubuntu 20.04.
WireGuard Installation
For the installation follow the following steps:
Step 1. Update Your System
Run the following command to update the system:
$ sudo apt update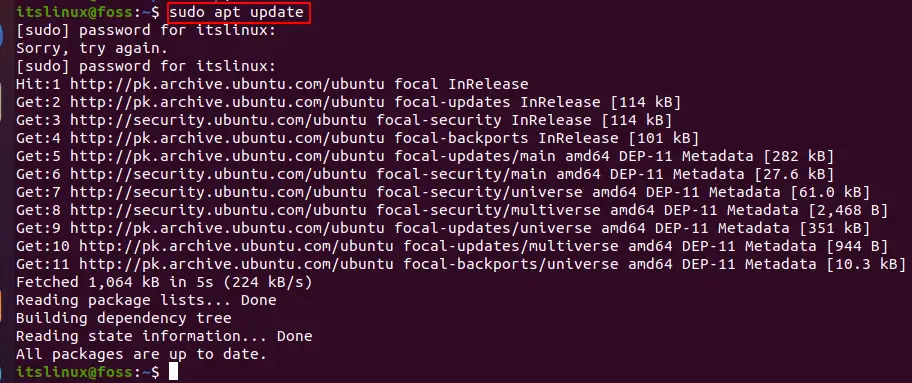
Step 2. Install WireGuard
Run the following command for the installation of WireGuard:
$ sudo apt install wireguard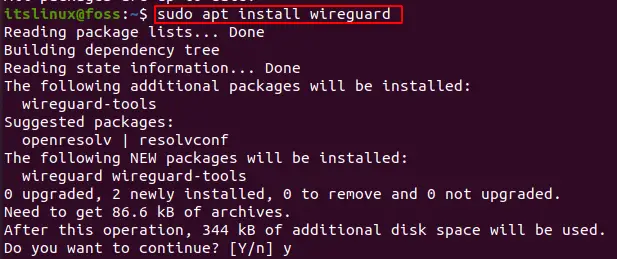
It’ll show the following output:
Step 3. Configuring The System
Firstly, UDP traffic needs to be allowed for the VPN connection. For this run the following command:
$ sudo ufw allow 61951/udp
Now, after this for allowing the kernel-level network packet redirection run the following command:
$ sudo nano /etc/sysctl.conf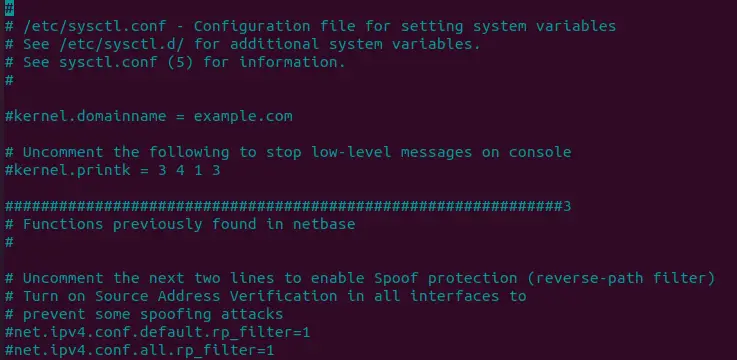
This will open a file which you need to edit. In the file go down and uncomment the following line:
net.ipv4.ip_forward=1Before:

After:
Now, save the changes and close the file. Run the following command to order for the changes to be applied to your system

$ sudo sysctl -pThis will show the following output:

Step 4. Key Pair Creation (Public & Private Keys)
Now, we need to configure and manage the WireGuard Interface. For this purpose two commands “wg” and “wg-quick” will be used. We need to provide public and private keys to each device in WireGuard. For generating the keys, run the following command:
$ wg genkey | sudo tee /etc/wireguard/server_private.key | wg pubkey | sudo tee /etc/wireguard/server_public.key
Root should have the access to the private key. For this purpose, run the following command:
$ sudo chmod 600 /etc/wireguard/server_private.key
File is created in the directory: /etc/wireguard. In order to view the content, either use “cat” or “less”. Run the following command:
$ sudo cat /etc/wireguard/server_private.key
This key will be generated which you need to copy and paste later.
Step 5. Configuration of WireGuard Server
Now, a tunnel device is needed to route the VPN traffic. For this purpose a file is created for configuration with name “wg0.conf” and the following content is added to it.
$ sudo nano /etc/wireguard/wg0.confThis will open an empty file. Fill the file with the content given below:
[Interface]
Address = 10.0.0.1/24
SaveConfig = true
ListenPort = 51820
PrivateKey = 2Jks4wWj0TUsfpRneQhLMLpBpN7PWaZG9Ap8rDgGI2g=
PostUp = iptables -A FORWARD -i %i -j ACCEPT; iptables -t nat -A POSTROUTING ->
PostDown = iptables -D FORWARD -i %i -j ACCEPT; iptables -t nat -D POSTROUTING>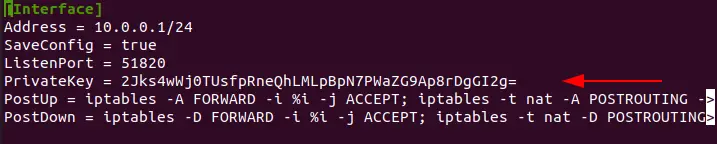
Paste the pr. Now save the changes and close the file. In order for WireGuard VPN autorun after a system reboot, run the given command:
$ sudo systemctl enable wg-quick@wg0
Step 6: Configuration of WireGuard Client
In this step we’ll set the client with Windows. First download Wireguard on your window and launch it. Once it’s open it’ll pop up a window.
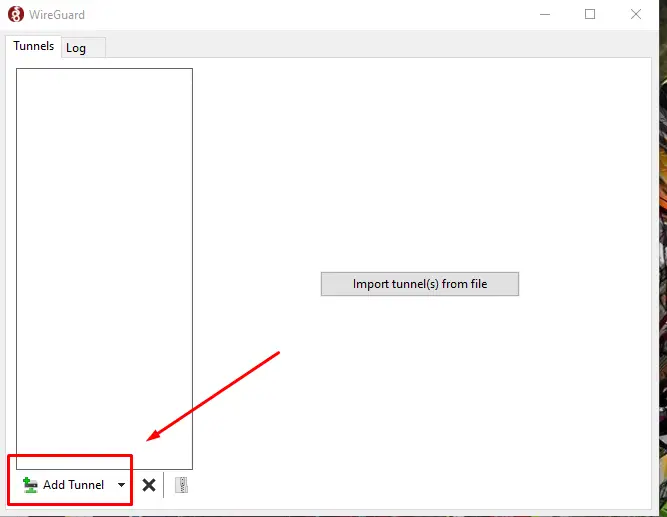
In this window click the add tunnel and select “Add empty Tunnel”. A window will open up.
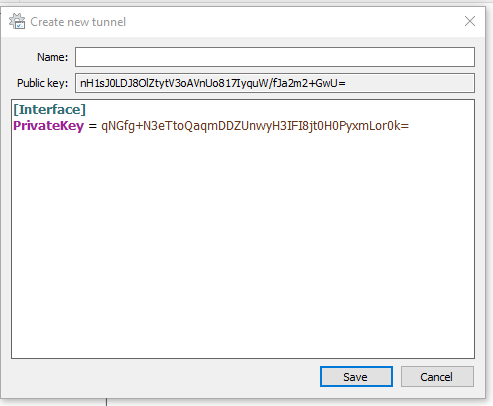
Now you need to edit this and add the following lines of code:
[Interface]
PrivateKey = mGkntpbFJcbnz9Ls82XWknoFSVIlpbVWjuTZPnvOeFo=
Address = 10.0.0.2/24

[Peer]
PublicKey = SERVER_PUBLIC_KEY
AllowedIPs = 0.0.0.0/0
Endpoint = IP_OF_SERVER_:51820
Here in the peer section:
PublicKey: Add the public key of your ubuntu server.
EndPoint: Ip address of your ubuntu server will go here and after color it’s the port of Wireguard 51820.
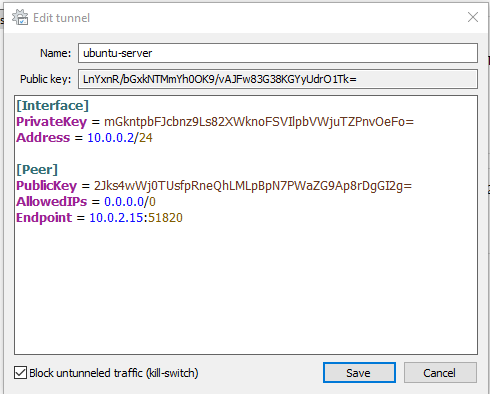
Here I added the information according to my server. Once completed select save and select Active.
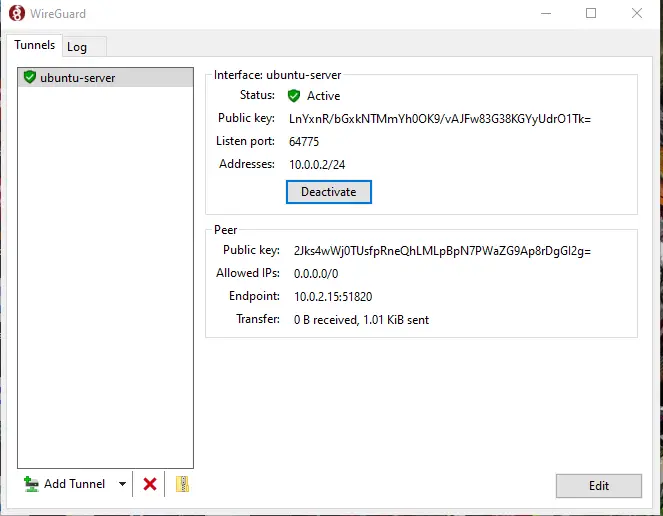
Here it shows active status which means our system is successfully connected.
Conclusion
WireGuard provides a free and fast VPN service on various platforms. In today’s how-to guide we learned how to set up the WireGuard system on Ubuntu. We configured the setting of both the server and client and established a connection between both the devices. Now it should be up and running on your systems without any errors.

Check our LinkedIn company page