What is Apache Cassandra?
Apache Cassandra is an open-source DMS(database management system), it manages the data of NoSQL databases in the form of a cluster model. This project of Cassandra, was launched in July of 2008 by Google, in March 2009 it became the part of Apache Incubator project and later on, in February 2010 it was known as the top-level project.
How does Apache Cassandra work?
Apache Cassandra can manage huge data by following the cluster model. In the cluster mode, the data is distributed among a number of nodes, each node is having different data but it is interlinked with other nodes so can retrieve the data from any other node as well.
What are the features of Apache Cassandra?
Apache Cassandra is being used by well-known companies like Netflix, Github, Airship, and Blackrock because of its popular features. The features of Cassandra are:
- Fault-tolerant: It provides the feature of replicating with multiple data centers ensuring the users that if any node is failed, it can be replaced with new nodes in no downtime without the loss of data.
- Excellent Quality: It is being undergone through a lot of testings such as fault-injection tests, performance tests, and property-based tests to ensure stability and reliability.
- Security: The data is distributed among different nodes so if the main data center goes down, the data cannot be lost.
- Scalable: The databases can edit or read at any time without interruption to the applications.
Cassandra is supported by different distributions of Linux such as Ubuntu, Redhat, Centos, and Debian. In this write-up, we will learn the installation procedure of Apache Cassandra on Debian 11.
How to install Apache Cassandra on Debian 11
To install apache Cassandra on Debian 11, we have to follow the following steps.
Step 1: Installation of Java
First, we have to install Java on Debian 11 which is the prerequisite of Apache Cassandra. We can install Apache Cassandra on Debian 11 using the command:
$ sudo apt install default-jdk -y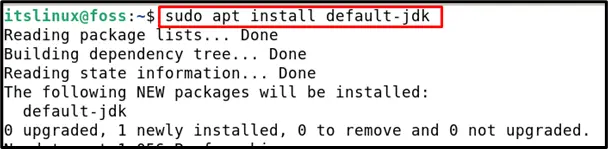
Java has been installed successfully.
Step 2: Importing of the key of Cassandra
After the installation of the prerequisite, we will import the key of Cassandra from the official site of Apache by using the wget command:
$ wget -q -O - https://www.apache.org/dist/cassandra/KEYS | sudo apt-key add -
The output should display “OK”, which means the key has been imported successfully to the repository of Debian 11.
Step 3: Addition of Cassandra repository
The next step will be to add the Cassandra repository in the file of sources.list in our Debian 11, we can do this by using the command:
$ sudo sh -c 'echo "deb https://www.apache.org/dist/cassandra/debian 40x main" > /etc/apt/sources.list.d/cassandra.list'
No error after executing the command showing the repository of Cassandra has been added in the sources.list file of Debian 11.
Step 4: Updating Debian 11 repository
After the key is being imported and the Cassandra Repository has been added, we will update the repository of Debian 11.
$ sudo apt update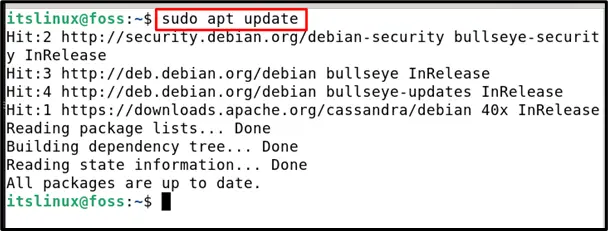
The repository is updated and we can see from the output, apache key has also been updated in the repository.
Step 5: Installation of Apache Cassandra
To install Cassandra, we will run the following command in the terminal:
$ sudo apt install cassandra 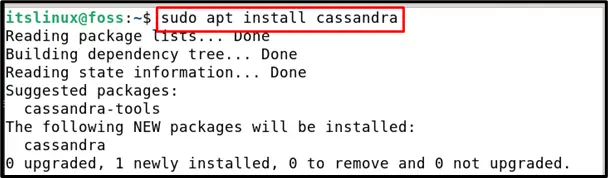
It has been successfully installed.
Step 6: Verification of installation
We will verify the installation by checking its status using the systemctl command:
$ sudo systemctl status cassandra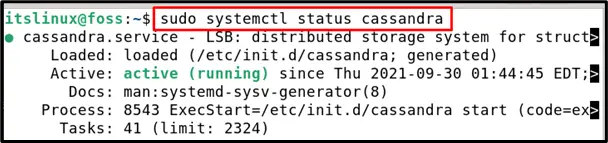
The output is showing that the cassandra is installed as well as it is in running state. By default, when the cassandra is installed it start running automatically.
Step 7: Configuration of Apache Cassandra
Apache Cassandra configuration files are available in the directory of Cassandra located in /etc/cassandra and data of Cassandra is stored in /var/lib/cassandra.
By default, Cassandra works only for the local host, so we can connect to any database running on the same machine without using the binding interface. We can access the Cassandra from the terminal using the cqlsh command:
$ cqlsh 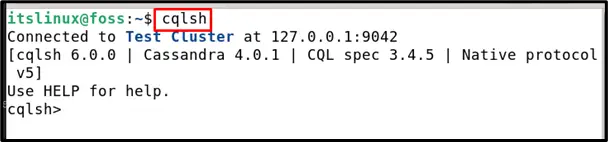
In the output, we can see “Test Cluster” which is the name of cluster cloud and can be renamed as well.
Renaming of Cluster Cloud
To rename the name of the cluster, we will run the following command in the Cassandra to rename the cluster cloud from “Test Cluster” to “LinuxFoss Cluster”‘:
UPDATE system.local SET cluster_name = 'LinuxFoss Cluster' WHERE KEY = 'local';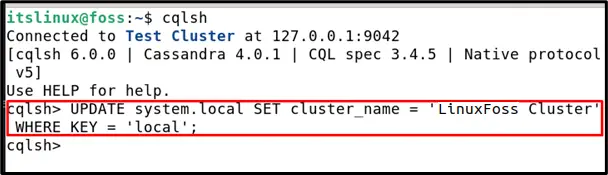
Close the Cassandra by typing “exit”.
exit
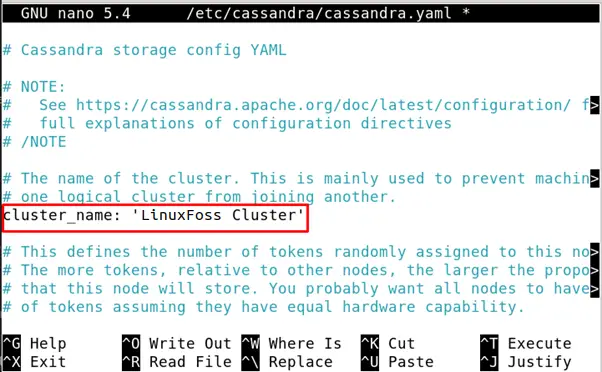
Now, edit the new name, “LinuxFoss” in the configuration file of Cassandra, cassandra.yaml, by opening the file with nano editor.
$ sudo nano /etc/cassandra/cassandra.yaml
Replace the name “Test Cluster” with the “LinuxFoss Cluster”.
Restart the Cassandra using the systemctl command:
$ sudo systemctl restart cassandra
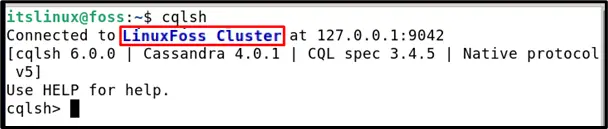
To verify changes, again run the command to enter the Apache Cassandra.
$ cqlsh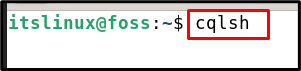
The output shows the name of the cluster cloud as “LinuxFoss Cluster”.
Uninstallation of Apache Cassandra
We can uninstall the Apache Cassandra by the following command:
$ sudo apt purge cassandra -y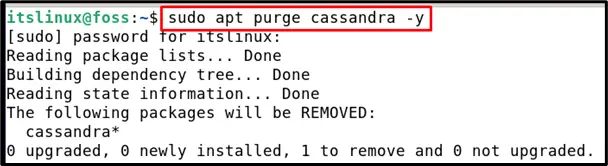
The Apache Cassandra has been removed successfully.
Conclusion
The features of scalability, cluster cloud, and reliability increased the popularity of Apache Cassandra. In this write-up, we have discussed the installation of Apache Cassandra using the command-line mode. We have installed its prerequisite that is Java and then import the key of Cassandra and added its latest repository to the repository of Debian 11. After installation, we verified the installation and also discussed the uninstallation of Apache Cassandra in Debian 11.

Saryia is a technology entrepreneur and digital publisher specializing in Linux, open-source technologies, and developer education.