VirtualBox is open-source software that allows the user to operate different operating systems on a single machine, either at the same time or one by one. It saves not only a lot of time but also saves the cost of buying different machines to operate different operating systems.
Debian 11 is also known as Debian bullseye. When it is installed on the VirtualBox with the help of ISO, some of its functionalities are restricted like one cannot access its full screen and similarly, one cannot share files between the host and guest.
What are Guest Additions?
The VirtualBox guest additions are the set of drivers and tools which improve the handling of the operating system for better performance. The guest additions include features like:
- Allows the fullscreen mode
- It synchronizes the time between the host and guest operating system
- It also improves video performance
- Allows smooth integration of mouse pointer
- Allows the automated logins
- Generic additional tools which help to control and manage the guest operating system
This write-up will guide you in detail how to install the VirtualBox Additions on Debian 11.
How to install VirtualBox additions on Debian 11 automatically
There is a file named, “VBoxGuestAdditions.iso” in the host operating system when the virtual machine is installed. To enable the VirtualBox guest additions, we have to just mount that file from the host operating system to Debian 11 using the VirtualBox GUI manager. We can complete this process by following the simple procedure explained.
Step 1: Update the package repository of Debian 11
Open the VirtualBox GUI manager and start Debian 11, once Debian 11 is started open the terminal and run the following command to update the repository of Debian 11,
$ sudo apt update
Step 2: Install prerequisite packages
Next, we need to install the build-essential package, DKMS, and Linux-headers packages.
- Build-essential package is needed to build Debian 11 packages and it also contains the informational list of all packages which are supposed to be important in building Debian 11.
- The DKMS (Dynamic Kernel Module System) will enable the installation of further packages of kernel modules.
- Lastly, the Linux-headers package behaves like an interface between the kernel components.
These packages can be installed by executing the command:
$ sudo apt install build-essential dkms linux-headers-$(uname -r)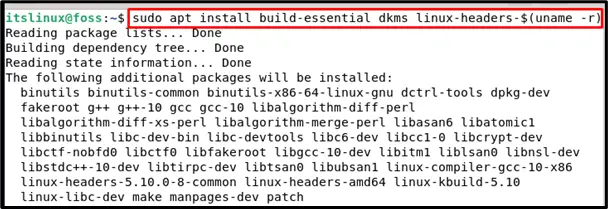
It will inform you about the space required for the installation of these packages and ask your permission to continue with this so press “y” to allow the installations:

It will take a few moments to download and install the prerequisite packages:
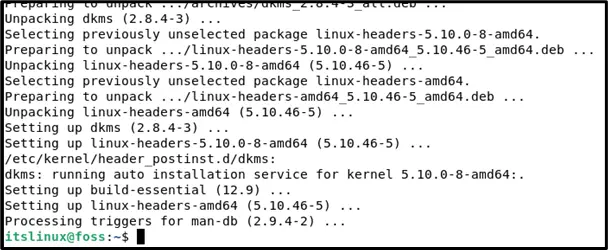
Once the prerequisite packages are successfully installed, the next step is to insert the guest Addition CD image.
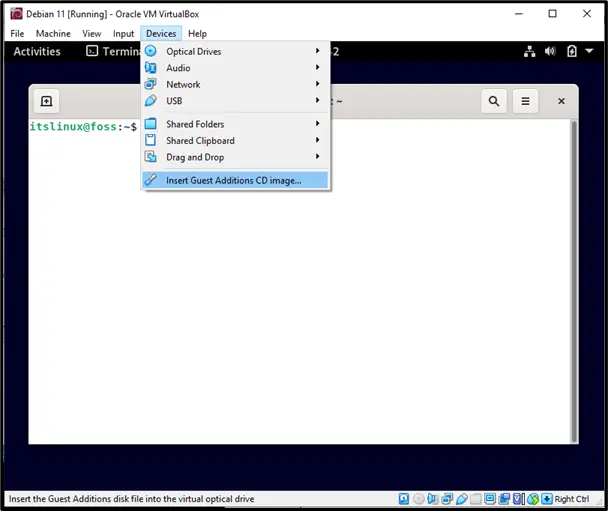
Step 3: Insert Guest Addition CD Image
To insert the Guest Addition CD Image, click on the “Devices” in the menu bar present at the top of the GUI of the virtual manager and choose “Insert Guest Additions CD image… ” as shown in the screenshot attached below:
After this step the VirtualBox guest additions CD Image will mount automatically, the guest additions will start to install, and be completed in a while. Just restart the system and enjoy the installed guest additions.
“Unable to insert the Virtual Optical Disk into the machine Debian 11” Error
However, if an error occurs like “Could not mount the media/drive ‘C:\Program Files\Oracle\VirtualBox\VBoxGuestAdditions.iso’”, it means that the Guest Addition Image is not mounted automatically.
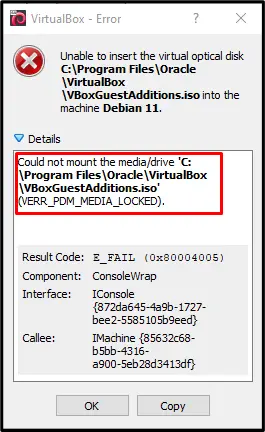
Then we will have to mount the Guest Addition ISO image manually.
Mount the Guest Addition ISO image Manually
For mounting the Guest Addition ISO image manually, simply follow the procedure provided below.
Step 1: make a “cdrom” directory in the “/mnt” directory
For making a directory with the name of “cdrom” in the “/mnt/” directory, use the command:
$ sudo mkdir -p /mnt/cdrom
Step 2: Mount the Optical Disk from “/dev/” to “/mnt/” directory
For mounting the ISO image of VirtualBox guest addition from “/dev/cdrom” to “/mnt/cdrom” directory, execute the command:
$ sudo mount /dev/cdrom /mnt/cdrom
Step 3: Go to the /mnt/cdrom directory
Now open the directory of the mounted file using the “cd” command:
$ cd /mnt/cdrom
Step 4: Execute the “VBoxLinuxAdditions.run” Script
To install the VirtualBox guest additions on Debian 11, execute the “VBoxLinuxAdditions.run” script file using the “sh” command:
$ sudo sh ./VBoxLinuxAdditions.run --nox11
The script will take a few seconds to run and on successful execution, the output will show the progress of building packages.
Step 5: Reboot the system
Once it is completed, restart the Debian 11 Operating system using the “shutdown -r now” command:
$ sudo shutdown -r now
Step 6: Verify the installation of VirtualBox Guest Additions
Once Debian 11 is rebooted, go to the “View” in the menu bar and click on “Full-screen Mode”:
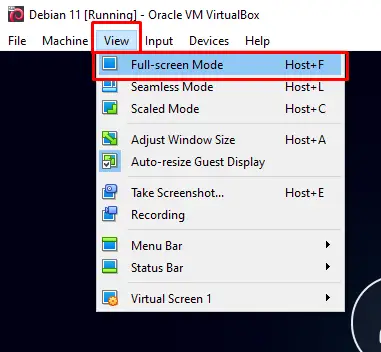
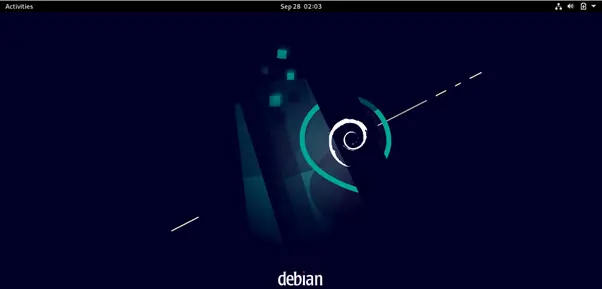
Now you can enjoy the fullscreen of Debian 11 along with other helpful features which means it has been are installed successfully.
Another method to verify the installation is by “lsmod” command:
$ lsmod | grep vboxguest
The output displays the details of the installed vboxguest package.
Conclusion
VirtualBox guest addition installs the tools which enhance the functionality of Debian 11, it has a lot of features discussed in this write-up. This write-up describes the simple procedure of installing the VirtualBox guest additions on Debian 11 by mounting the ISO image of guest addition automatically as well as manually. If an error is occurred in mounting the ISO automatically, then will proceed towards the manual procedure of mounting ISO. Hope this write-up will resolve all the queries regarding the installation of VirtualBox guest additions on Debian 11.

Saryia is a technology entrepreneur and digital publisher specializing in Linux, open-source technologies, and developer education.