Adobe Acrobat Reader stands as a popular tool for opening, printing, and adding comments to PDF files. While it’s a popular tool on Windows and macOS, Linux users, particularly those using Ubuntu.
Although Adobe no longer supports a native Linux version of Acrobat Reader. For users who are comfortable with using older software, the last native Linux version of Adobe Acrobat Reader (9.5.5) can still be installed. By considering its significance, this article will explain different ways of installing Adobe Reader on Ubuntu 24.04.
- How to Install Adobe Acrobat Reader on Ubuntu 24.04?
- Method 1: Using Adobe’s FTP Source
- Method 2: Using Flatpak
- Method 3: Using the Ubuntu Software Center
- How to Uninstall Adobe Acrobat Reader on Ubuntu 24.04?
- Method 1: Using Adobe’s FTP Source
- Method 2: Using Flatpak
- Method 3: Using the Ubuntu Software Center
- Conclusion
How to Install Adobe Acrobat Reader on Ubuntu 24.04?
While Adobe Acrobat Reader is not natively supported on Ubuntu 24.04, installing and using it through Adobe’s Official FTP source, flatpak, and Software Center is still possible.
Method 1: Using Adobe’s FTP Source
Here’s a step-by-step guide to installing Adobe Acrobat Reader on Ubuntu:
Step 1: Update Your System
Before starting, it’s always a good practice to update your system’s package list:
sudo apt update
sudo apt upgrade
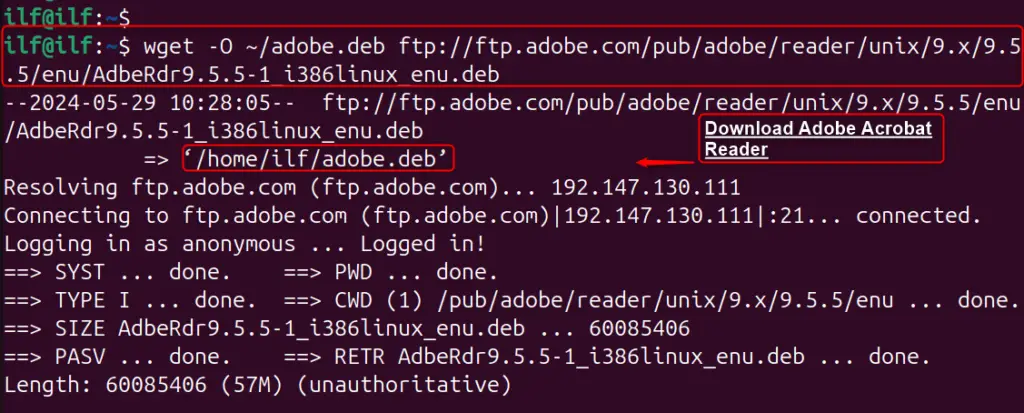
Step 2: Download Adobe Acrobat Reader
You can download the last supported Linux version of Adobe Acrobat Reader (9.5.5) from Adobe’s official FTP using the wget command:
wget -O ~/adobe.deb ftp://ftp.adobe.com/pub/adobe/reader/unix/9.x/9.5.5/enu/AdbeRdr9.5.5-1_i386linux_enu.deb
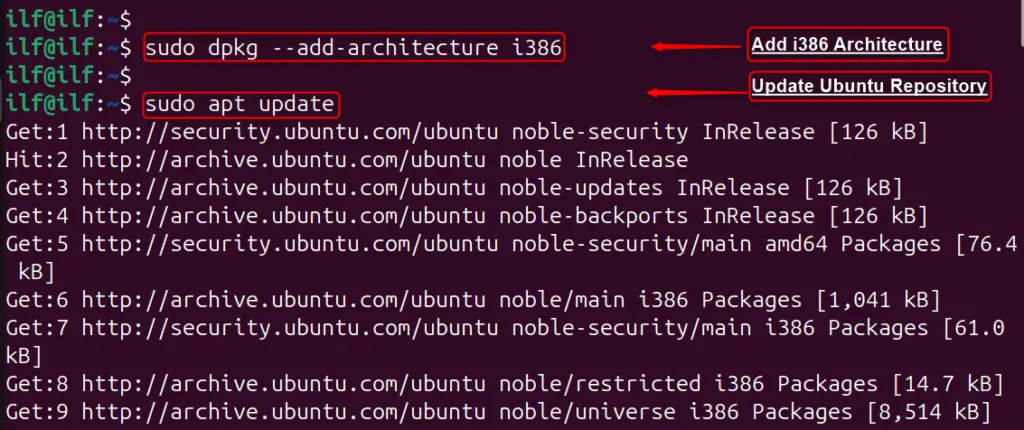
Step 3: Add the i386 Architecture
Since the available Adobe Reader version is for 32-bit systems, you need to add the i386 architecture to your 64-bit system:
sudo dpkg --add-architecture i386
sudo apt update
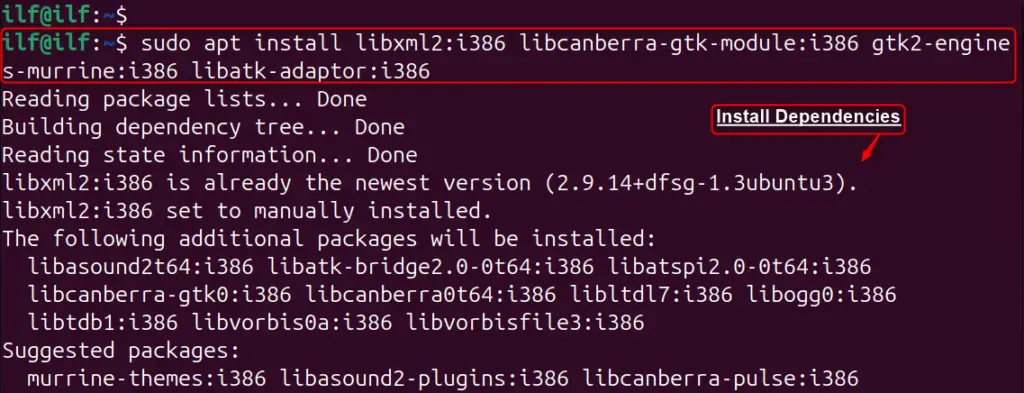
Step 4: Install Dependencies
There are some dependencies required for Adobe Reader to run smoothly on your system. Install them using the command:
sudo apt install libxml2:i386 libcanberra-gtk-module:i386 gtk2-engines-murrine:i386 libatk-adaptor:i386
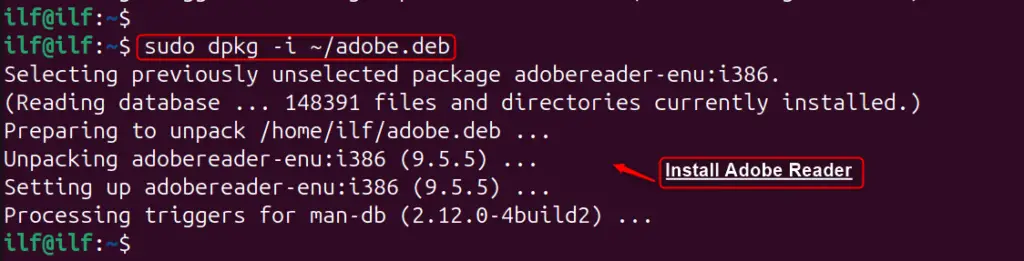
Step 5: Install Adobe Acrobat Reader
Now, you can install Adobe Acrobat Reader using the dpkg command:
sudo dpkg -i ~/adobe.deb
Step 6: Launch Adobe Acrobat Reader
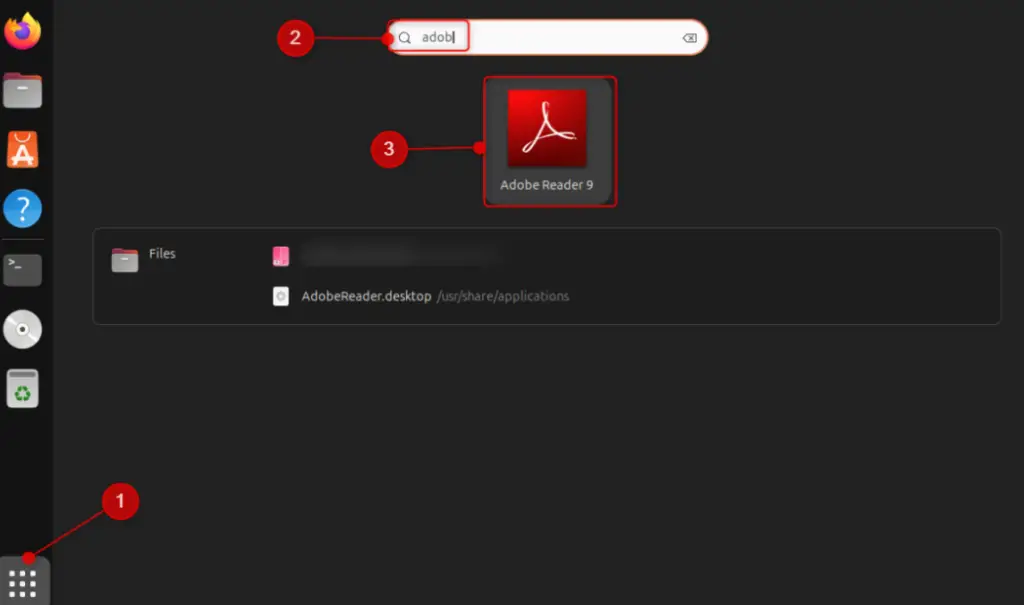
After installation, start Adobe Acrobat Reader from the terminal with the “acroread” command. Alternatively, launch Adobe Acrobat Reader from the Activities Panel by searching for it:
Note: If the Adobe Reader application is missing a required library, specifically “libgdk_pixbuf_xlib-2.0.so.0”. This is a common issue when running a 32-bit application on a 64-bit system. To resolve this, you can try installing the 32-bit version of the library:
sudo apt install libgdk-pixbuf2.0-0:i386
Method 2: Using Flatpak
Here’s a step-by-step guide to installing Adobe Acrobat Reader on Ubuntu using Flatpak:
Step 1: Install Flatpak
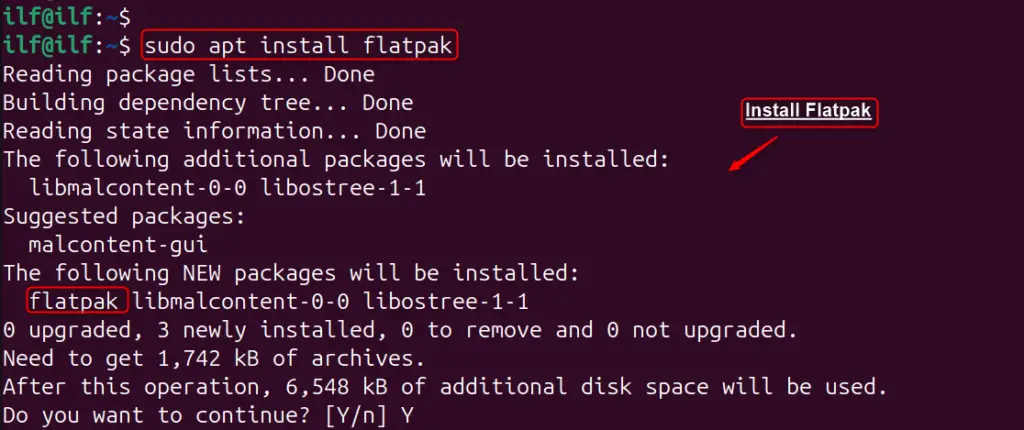
If Flatpak is not already installed on your system, you can install it by opening a terminal and running the command:
sudo apt install flatpak
Step 2: Add Flathub Repository
Now, add the Flathub Repository for installing the Adobe reader using the flatpak command:
flatpak remote-add --if-not-exists flathub https://dl.flathub.org/repo/flathub.flatpakrepo

Step 3: Install Adobe Acrobat Reader
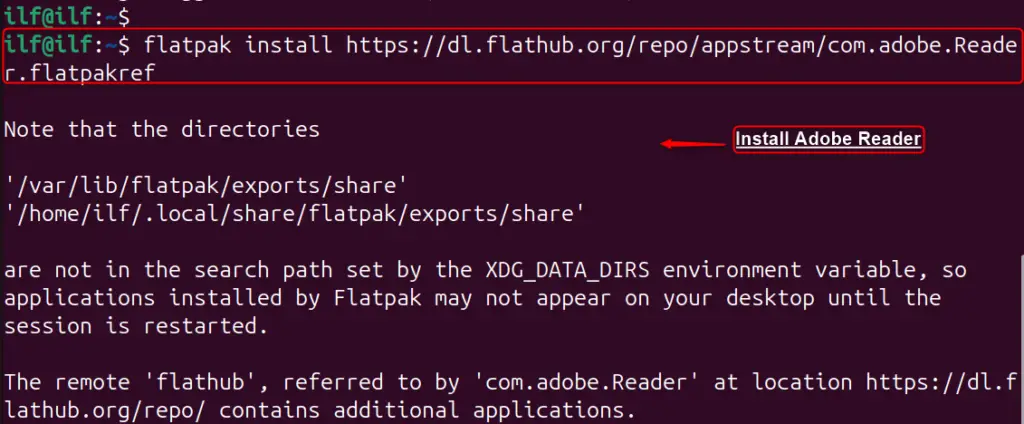
Now, you can install Adobe Acrobat Reader as a Flatpak package by executing the following command:
flatpak install https://dl.flathub.org/repo/appstream/com.adobe.Reader.flatpakref
Step 4: Launch Adobe Acrobat Reader
After installation, start Adobe Acrobat Reader from the terminal with the below command:
flatpak run com.adobe.Reader
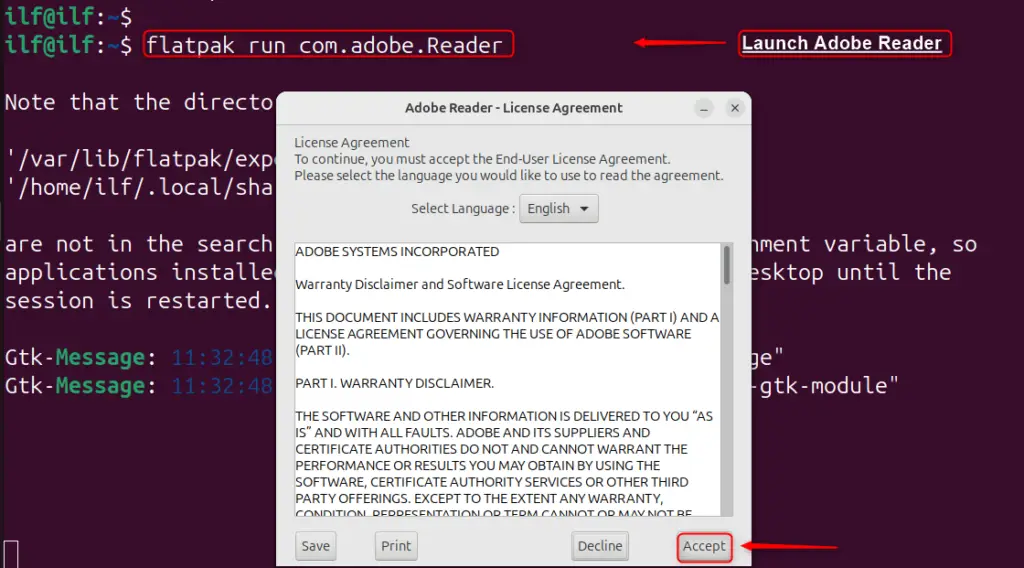
Finally, users can verify the Adobe Reader 9 interface in the below figure:

That is all from the installation from the Flatpak.
Method 3: Using the Ubuntu Software Center
Unfortunately, Adobe Acrobat Reader is not directly available through the Ubuntu Software Center, and Adobe no longer provides support for the Linux version of Acrobat Reader.
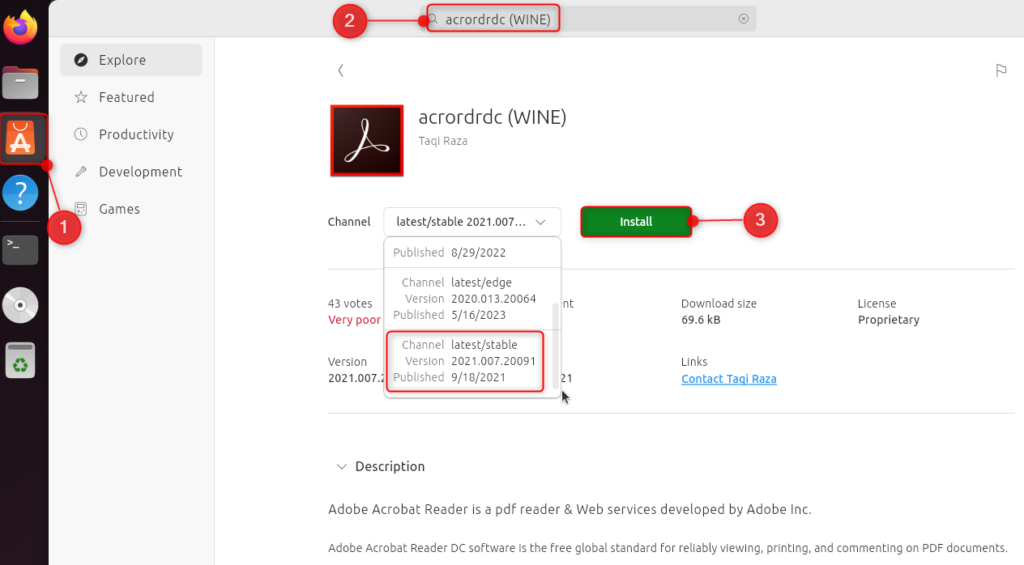
To install Adobe Acrobat Reader on Ubuntu 24.04 using the Ubuntu Software Center, begin by opening the Software Center from the Activities menu or hitting the App icon. In the search bar, type “acrordrdc (WINE)” and select the application from the search results. Click the “Install” button and authenticate with your password to initiate the installation process:
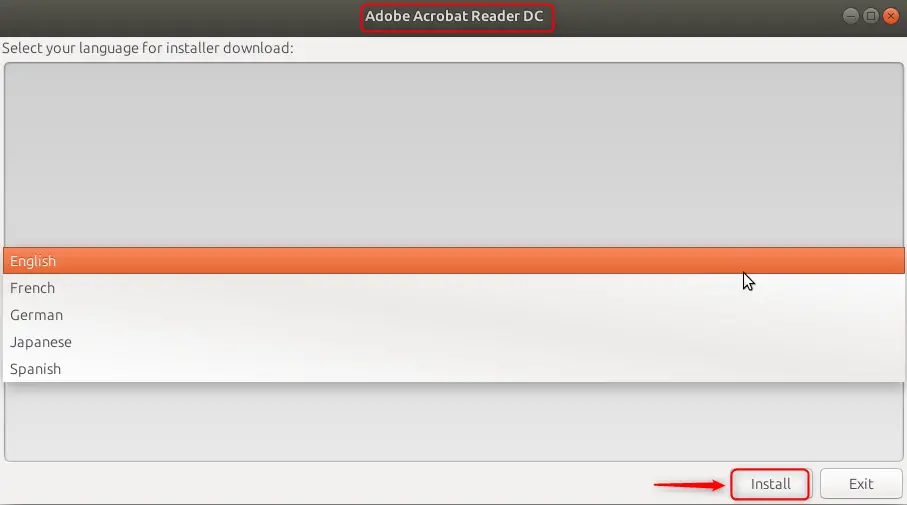
This method provides a user-friendly way to install Adobe Acrobat Reader. Here, select the language and hit the “Install” button:
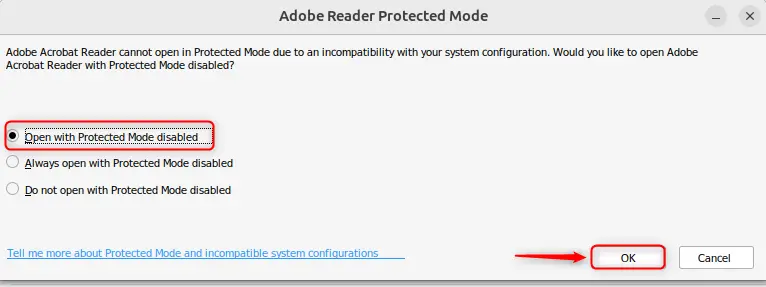
Users can also disable the protected mode based on requirements:
Finally, users can verify the Adobe Reader interface and perform relevant tasks according to their needs:

That is all from the GUI method.
How to Uninstall Adobe Acrobat Reader on Ubuntu 24.04?
If users need to remove Adobe Acrobat Reader and its dependencies, they can follow the below methods
Method 1: Using Adobe’s FTP Source
The most straightforward method to remove Adobe Acrobat Reader is by using terminal commands. Open your terminal and execute the following commands:
To remove the Adobe Acrobat Reader package, use the apt command:
sudo apt autoremove adobe reader-enu
Method 2: Using Flatpak
To uninstall Adobe Reader using Flatpak, execute the below command by specifying the server ID:
flatpak uninstall --delete-data com.adobe.Reader
To delete unused runtime libraries to free up disk space, utilize the below command
flatpak uninstall --unused
Method 3: Using the Ubuntu Software Center
Adobe Acrobat Reader can also be uninstalled through the Ubuntu Software Center:
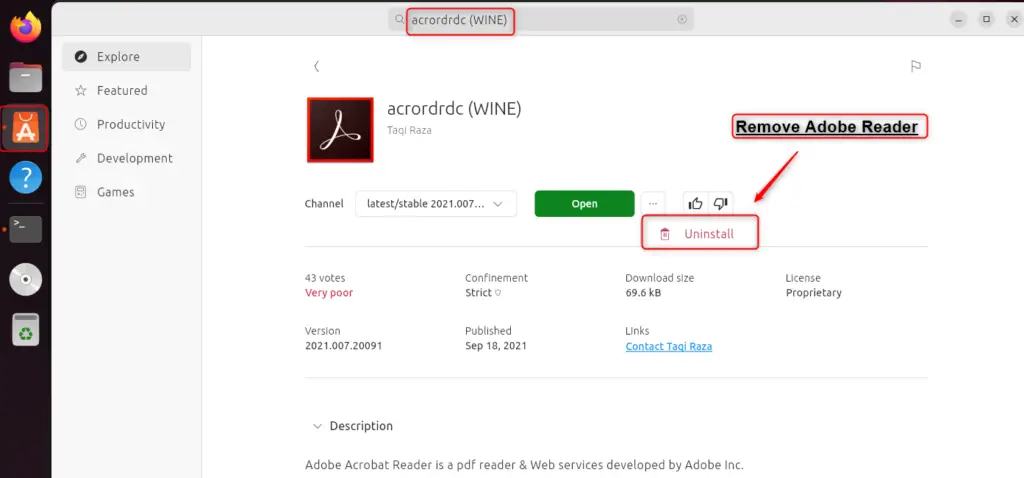
First, open the Ubuntu Software Center. Then, search for Adobe Acrobat Reader. Finally, hit the “Remove” button to uninstall the Adobe Reader application:
Remember, Adobe no longer provides updates for the Linux version of Acrobat Reader, so using Wine with the Windows version is recommended for the latest features and security updates.
Alternative PDF Readers
If you prefer not to use Wine or want a native Linux application, there are several alternative PDF readers available for Ubuntu, such as Evince, Okular, and Foxit Reader. These can be installed directly from the Ubuntu Software Center or via terminal commands.
Conclusion
Installing Adobe Acrobat Reader on Ubuntu involves a few steps since the software is not included by default. First, you need to enable the i386 architecture because Adobe Acrobat Reader is available only in a 32-bit format. Then, you can download the Adobe Acrobat Reader .deb package using the wget command. After downloading, you must install the necessary dependencies before installing the Acrobat Reader package itself.
It is important to note that Adobe no longer supports Acrobat Reader for Linux, and the latest native Linux version is 9.5.5 dated from 2013. Therefore, it is recommended to consider other PDF readers or use Adobe Acrobat Reader on Wine from the Software Center for better security.
