Installing CUDA on Ubuntu serves the purpose of leveraging the parallel computing capabilities of NVIDIA GPUs. It significantly accelerates computationally intensive tasks. By installing CUDA, developers can optimize their applications to run on the powerful architecture of NVIDIA GPUs, thus enhancing performance and efficiency.
The installation of CUDA on Ubuntu 24.04 is an interesting process that can significantly enhance the performance of computationally. It is particularly beneficial for applications in scientific simulations, data analysis, and machine learning.
This guide will provide a detailed overview of the different ways to install CUDA on Ubuntu, ensuring you can select the method that best fits your needs.
How to Install CUDA on Ubuntu 24.04
If you’re looking to install CUDA on an Ubuntu system, there are several methods you can follow, each with its own set of steps and requirements. Let’s follow methods:
- Method 1: Using Ubuntu’s Standard Repositories
- Method 2: Using Nvidia Official Website
- Method 3: Using CUDA Toolkit Runfile
Method 1: Using Ubuntu’s Standard Repositories
For Ubuntu 24.04, the simplest method to install CUDA is to use the standard repositories provided by Ubuntu. This method may not provide the latest version of CUDA, but it offers a straightforward installation process:
Step 1: Update Package List
In Linux systems to refresh the local package index with the latest information from the repositories, ensuring that subsequent installations or upgrades are made with the most current package versions
sudo apt update
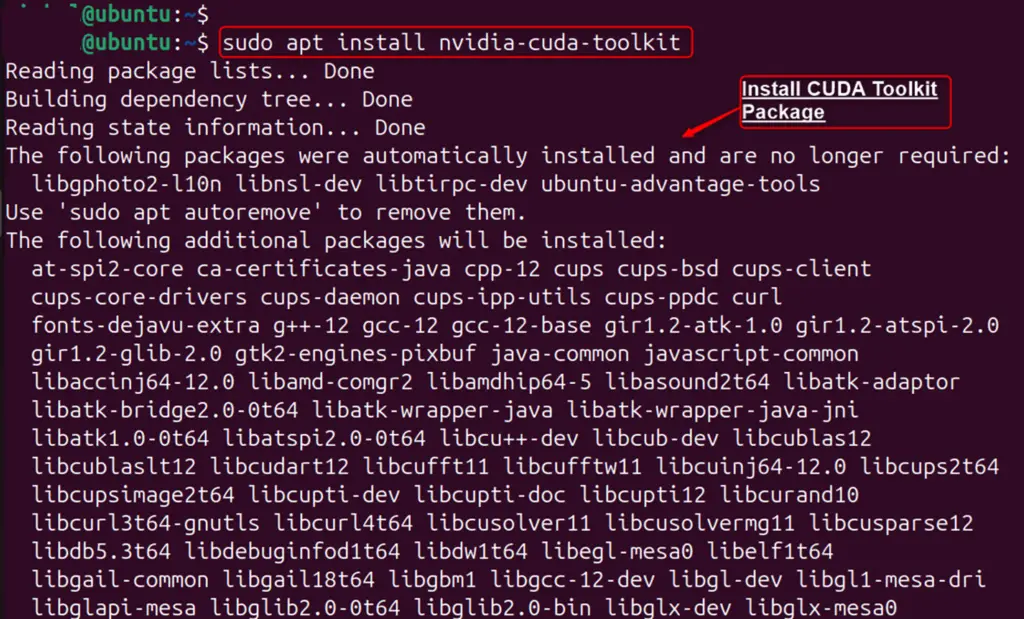
Step 2: Install the CUDA toolkit Package
Let’s install the NVIDIA CUDA Toolkit that facilitates the development of parallel multiple applications.
sudo apt install nvidia-cuda-toolkit
Step 3: Verify CUDA Version
Verify the installation by checking the CUDA version. It displays the version of the NVIDIA CUDA Compiler Driver (NVCC) which is used to compile CUDA programs for NVIDIA GPUs, providing details about the version and build of the compiler:
nvcc --version

Method 2: Install CUDA on Ubuntu 24.04 Using Nvidia’s Official Website
Another method is to install CUDA directly from the NVIDIA CUDA repository. This approach is suitable for Ubuntu 24.04 and 24.04 LTS releases:
This setup allows you to leverage the power of your Nvidia GPU for various computing tasks, from deep learning to scientific simulations. To install CUDA on Ubuntu 24.04 via Nvidia’s official website, follow the below steps:
Step 1: Remove Any Previous CUDA Versions
If you have an older version of CUDA installed on your system, it’s essential to remove it to prevent any conflicts:
sudo apt --purge remove "*cud*" "*nvidia*"
Step 2: Update the System
Update the package repository to make sure you have access to the most recent packages:
sudo apt update
sudo apt upgrade
Step 3: Verify CUDA Version
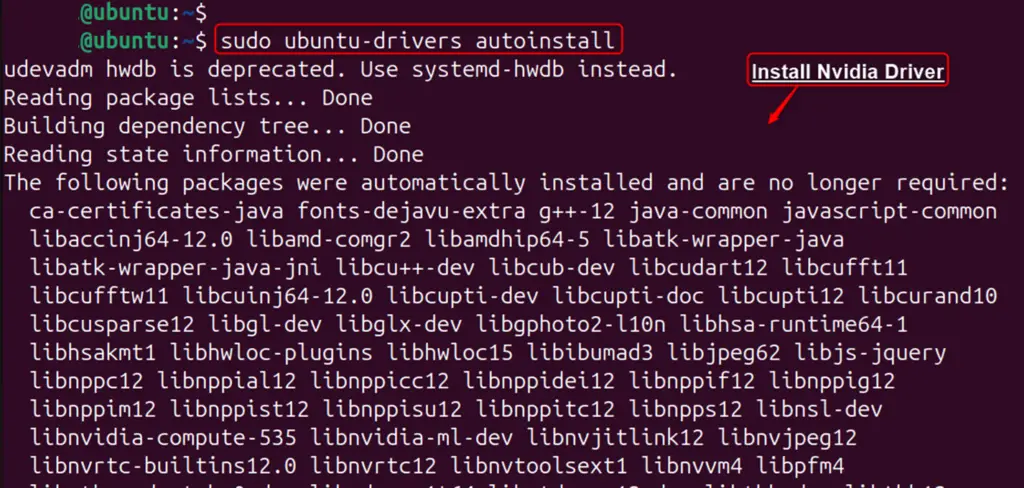
Ubuntu 24.04 should come with the open-source Nouveau driver pre-installed, which needs to be replaced with the official Nvidia driver. Users can install the recommended driver via the following command:
sudo ubuntu-drivers autoinstall
Reboot your system after the installation to apply changes.
Step 4: Disable the Nouveau Driver
The Nouveau driver can interfere with the Nvidia driver, so it’s recommended to disable it. You can do this by creating a blacklist file for Nouveau:
echo "blacklist nouveau" | sudo tee /etc/modprobe.d/blacklist-nouveau.conf

Then, update the kernel initramfs and reboot:
sudo update-initramfs -u
sudo reboot

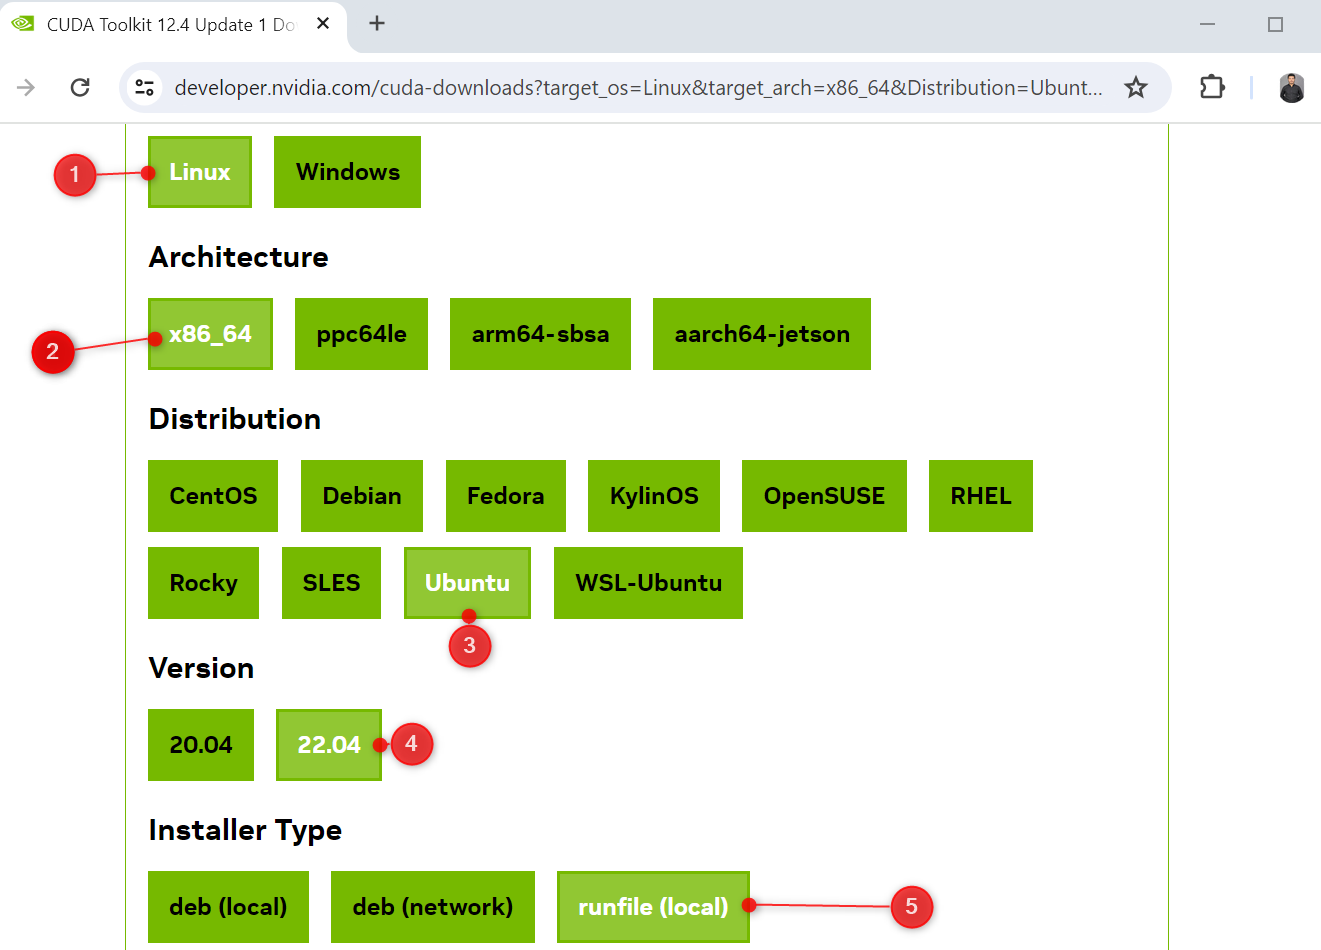
Step 5: Download and Install the CUDA Toolkit
Visit the Nvidia CUDA Downloads page to download the CUDA Toolkit for Ubuntu 24.04. Choose the deb (local) package which matches your system architecture:
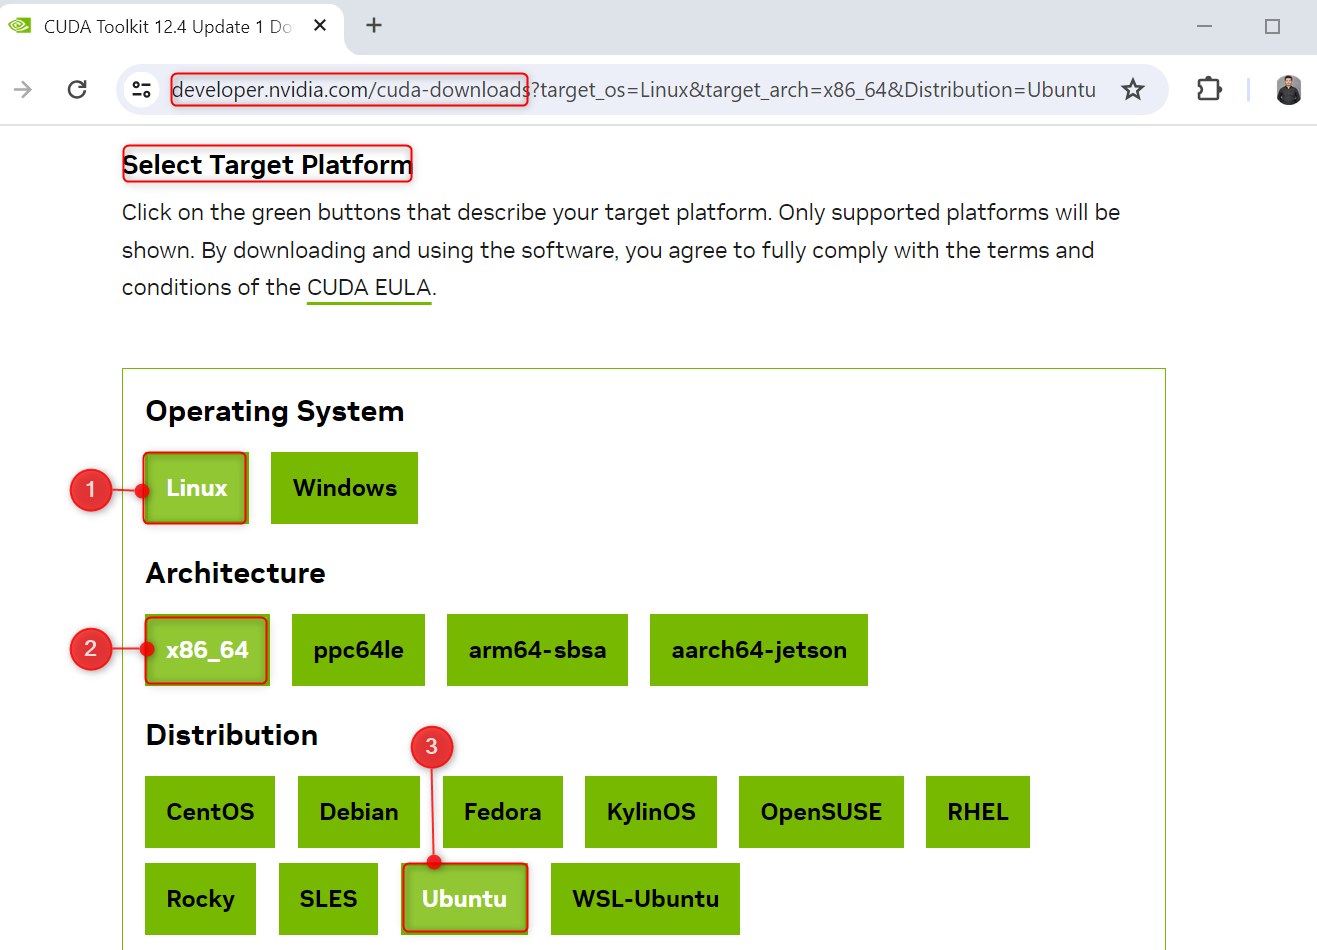
Important: After selecting the tabs, follow the pop-up interface at the bottom of the page and execute commands based on the most recent release.
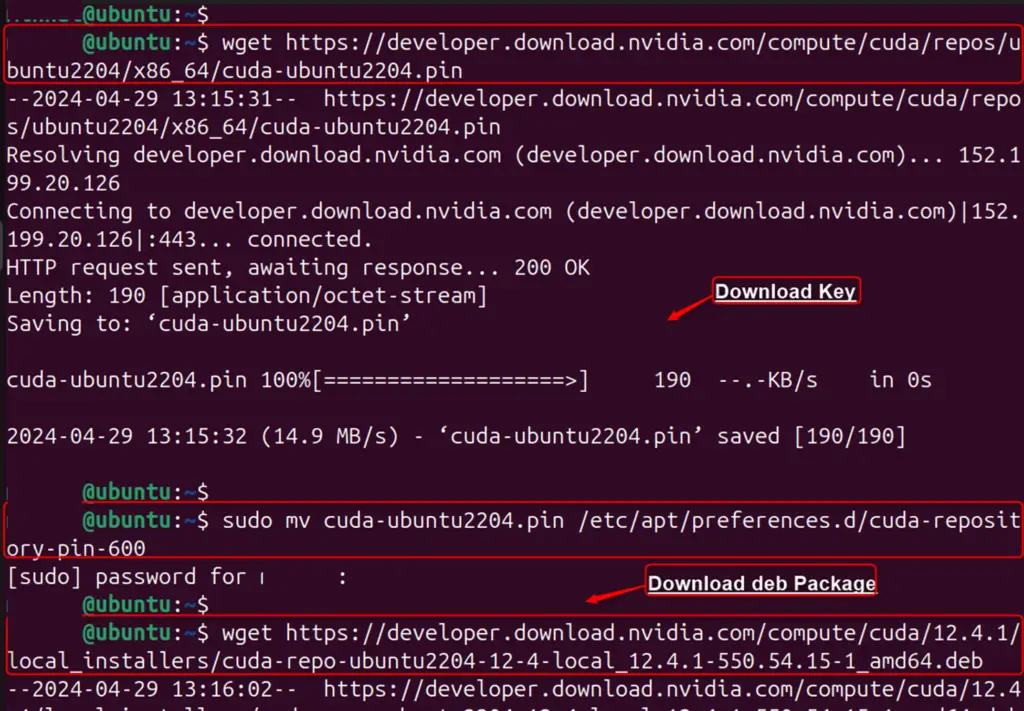
After downloading, install the CUDA Toolkit with the following commands:
wget https://developer.download.nvidia.com/compute/cuda/repos/ubuntu2204/x86_64/cuda-ubuntu2204.pinsudo mv cuda-ubuntu2204.pin /etc/apt/preferences.d/cuda-repository-pin-600wget https://developer.download.nvidia.com/compute/cuda/12.4.1/local_installers/cuda-repo-ubuntu2204-12-4-local_12.4.1-550.54.15-1_amd64.deb
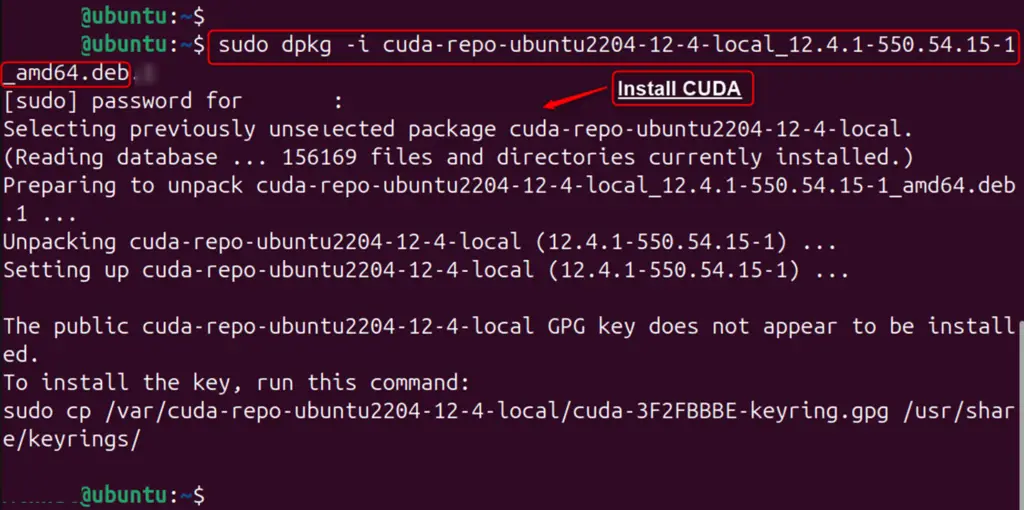
Now, install the CUDA Toolkit via the below commands:
sudo dpkg -i cuda-repo-ubuntu2204-12-4-local_12.4.1-550.54.15-1_amd64.deb
sudo cp /var/cuda-repo-ubuntu 2204-12-4-local/cuda-*-keyring.gpg /usr/share/keyrings/
sudo apt update
sudo apt install cuda-toolkit-12-4
If users find any error, install the CUDA driver by executing the below command:
sudo nano /etc/apt/sources.list
deb http://archive.ubuntu.com/ubuntu/ lunar universe
sudo apt update
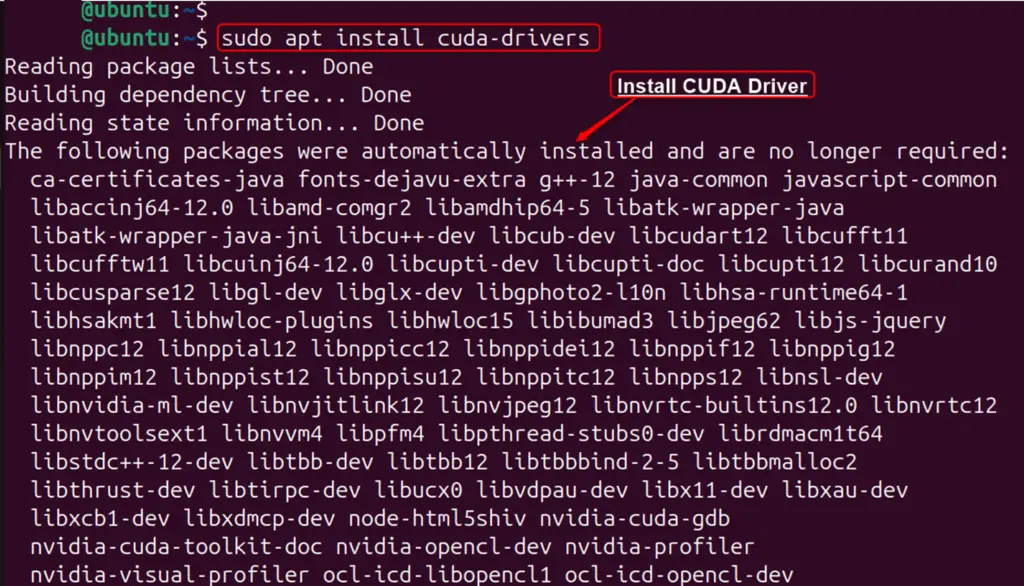
To install the CUDA driver, use the below command:
sudo apt install cuda-drivers
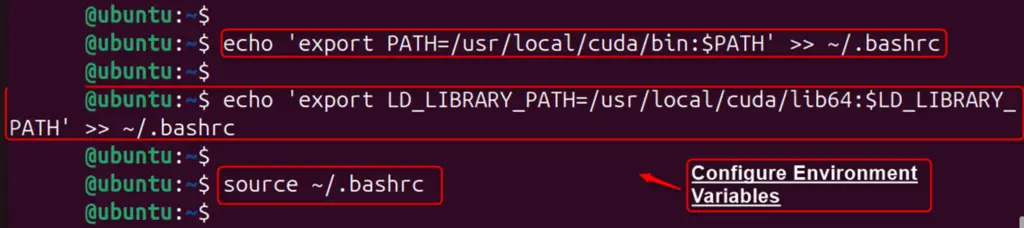
Step 6: Configure PATH
To use the CUDA compiler and tools, add them to your PATH with the following commands:
echo 'export PATH=/usr/local/cuda/bin:$PATH' >>~/.bashrc
echo 'export LD_LIBRARY_PATH=/usr/local/cuda/lib64:$LD_LIBRARY_PATH' >> ~/.bashrc
source ~/.bashrc
You have now successfully installed CUDA on Ubuntu 24.04.
Method 3: Install CUDA on Ubuntu 24.04 Using CUDA Toolkit Runfile
For those who need the absolute latest version of CUDA or have specific requirements, manual installation might be the way to go:
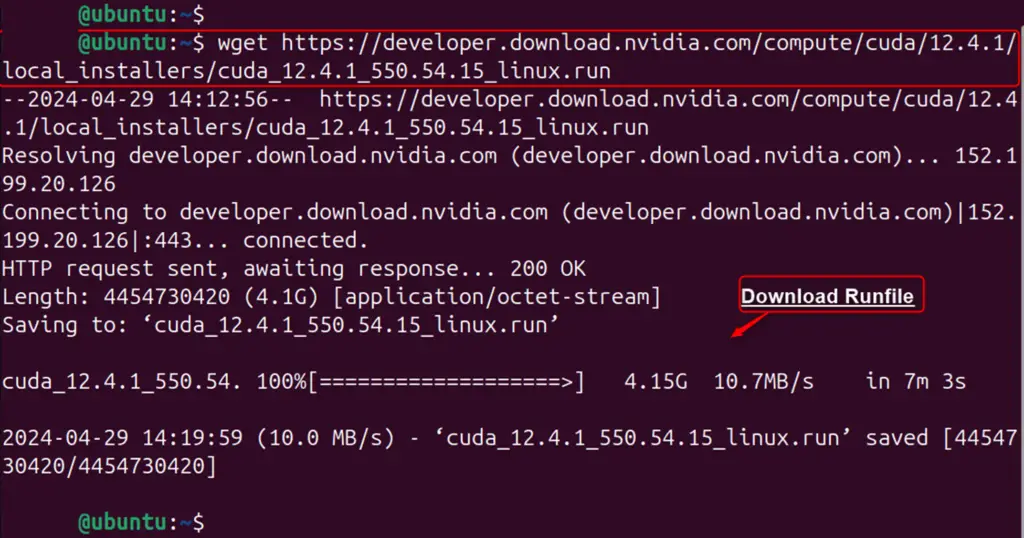
Step 1: Download CUDA Toolkit Runfile
Download the appropriate CUDA Toolkit runfile from NVIDIA’s website.
Or utilize the below command:
wget https://developer.download.nvidia.com/compute/cuda/12.4.1/local_installers/cuda_12.4.1_550.54.15_linux.run
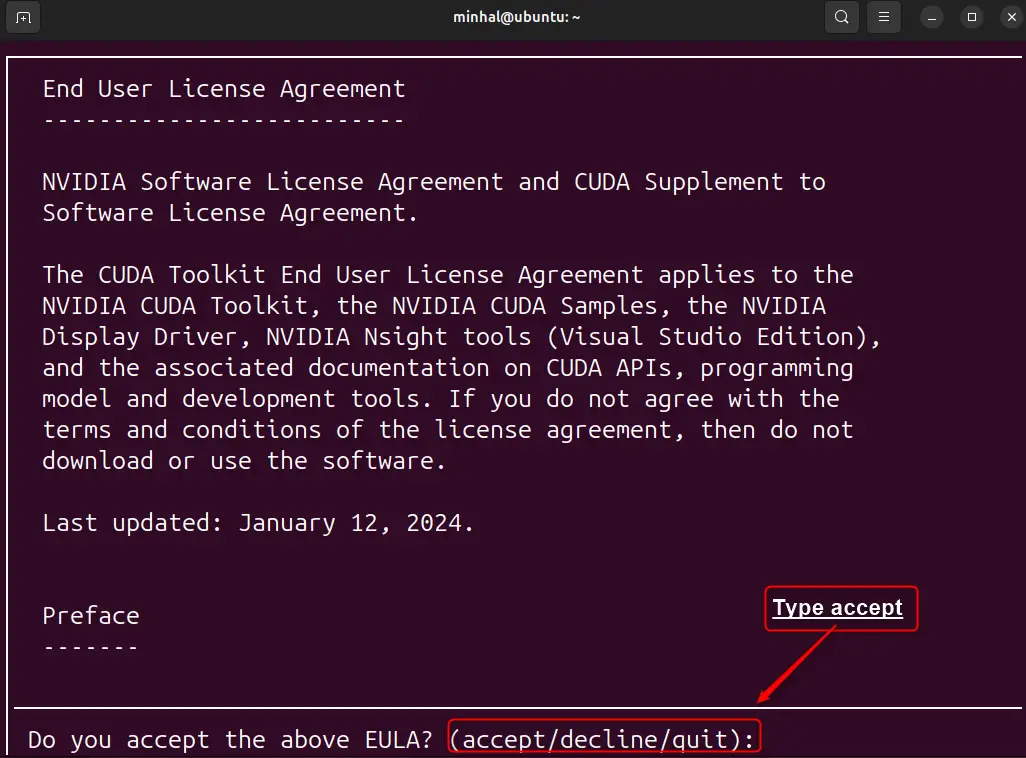
Step 2: Run Downloaded File
Run the downloaded file and follow the guides for completing the installation:
sudo sh cuda_12.4.1_550.54.15_linux.run

Set the necessary environment variables for your system.
Step 3: Verify the Installation
To verify that CUDA is installed, reboot the system and run the “nvidia-smi” or “nvcc” command to check the status of the GPU and the installed CUDA version:
nvidia-smi
nvcc --version

By following these steps, a successful installation of CUDA has been done on your Ubuntu 24.04 system.
Remove/Uninstall CUDA on Ubuntu 24.04
To remove CUDA from Ubuntu, you can follow these steps:
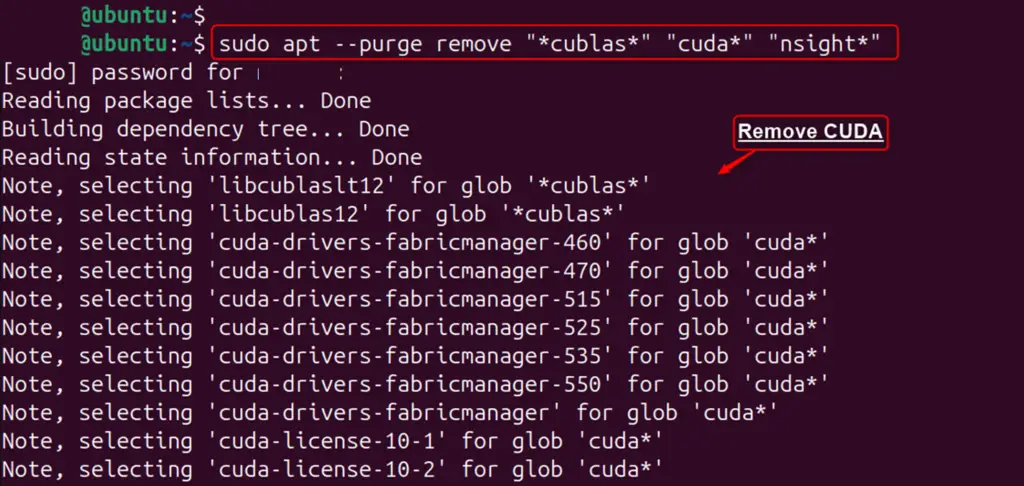
Uninstall CUDA Toolkit
First, uninstall the CUDA Toolkit by using the “remove” command. It removes the toolkit and associated packages:
sudo apt --purge remove "*cublas*" "cuda*" "nsight*"
Remove NVIDIA Drivers
If you have NVIDIA drivers installed, you can remove them with the “–purge” utility. After purging the packages, it’s a good practice to run the “autoremove” utility. To remove any unused packages and to clear the local repository of retrieved package files, use the “autoclean” utility:
sudo apt --purge remove "nvidia*"
sudo apt autoremove
sudo apt autoclean
Remove NUDA Directory
If users have installed CUDA by running the run file, remove the installation directory, typically located in “/usr/local/”, with the below command:
sudo rm -rf /usr/local/cuda-<version>
Note: Always ensure to replace “<version>” with the specific version number of CUDA you have installed.
Conclusion
To install CUDA on Ubuntu 24.04, make the system have a CUDA-capable GPU and meet the necessary system requirements. Begin by removing any existing NVIDIA or CUDA installations to avoid conflicts. Then, you can install the NVIDIA CUDA Toolkit by integrating Nvidia’s official APT repository, which provides the latest drivers and tools for your system.
This guide has explained all possible methods for installing the CUDA on Ubuntu 24.04.
