
“Ifconfig” the short form of “interface configuration” is the basic command being used for a long time for finding IP addresses. In Linux, it’s used to view and modify the configuration of network interfaces of our systems.
Through it, users can configure their systems, enable or disable the network interface, assign an IP address or netmask to the network interface, switch various modes, add aliases to your network interface and many more.
Despite being replaced by the “ip” command, which comes with more functionalities and a different syntax, “ifconfig” is still being used widely. It’s due to its simpler syntax and how users are used to using the command. In this article, we’ll learn various uses of the ifconfig command, starting from it’s installation.
How to install ifconfig?
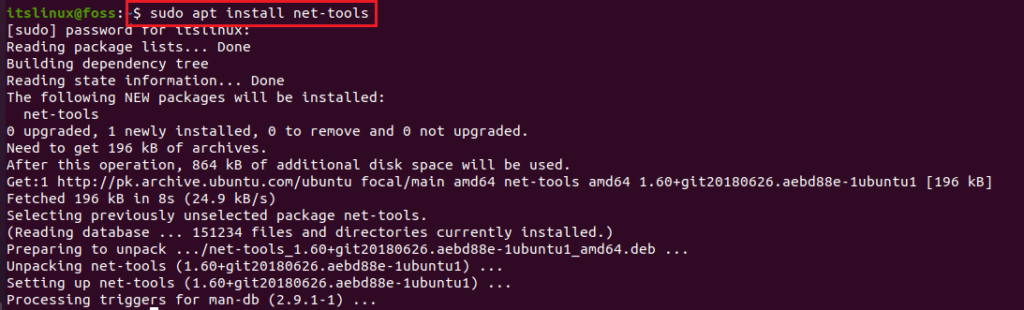
In newer versions of some Linux distributions, the “ifconfig” command isn’t pre-installed. If you enter “inconfig” on your terminal, it might through this error:

So, to resolve this and install the command, type the following:
$ sudo apt install net-toolsThis will install the ifconfig on your system.
How to use ifconfig?
There are various ways you can use the “ifconfig” command. Using it without any parameters will return you all the network interfaces connected to your system along with their ip address, gateway address etc.
Command:
$ ifconfigOutput:
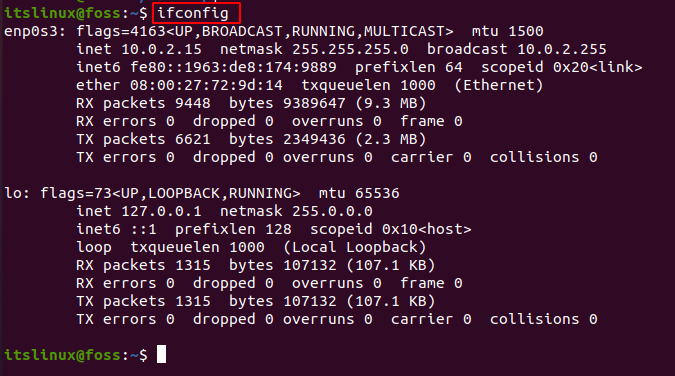
Here, the first “enp0s3” interface is an eternal interface.
Furthermore, if the interface is specified along with various commands then the user can change the setting of the interface. Here’s the syntax:
$ ifconfig [..options] [interface] [commands] [parameters] [address]Here, interface refers to network interfaces which you want to view and make changes through the use of specific commands. Some of them are as follows:
- up (enable the interface)
- netmask (to set network mask)
- add (add an ip address)
- del (remove an ip address)
- mtu (to change the packet maximum size)
Now, parameters and address are optional. They’ve a global effect, and depend on the command that is being used.
- -a : used when we need to apply the command for all the interfaces.
- -s : Display a short list of the interfaces.
Now let’s see how these work:
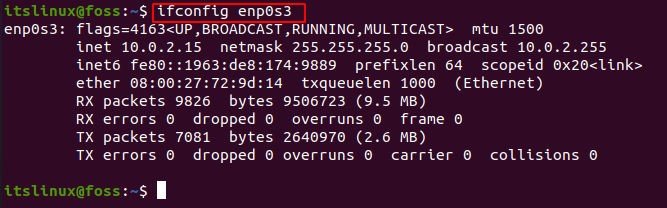
View Specific Interface’s Network Settings:
To view a specific network such as to view “enp0s3” Type the following command:
$ ifconfig <interface>Output:
To disable a Network Interface:
In case of disabling a network interface, we’ve to use “down” along with the name of that specific interface.
Following is the command used to disabled the interface “enp0s3”
$ sudo ifconfig <interface> down
Display information of all Enabled and Disabled interfaces:
To display all the information of interfaces even those which are disabled then run the following command:
$ ifconfig -a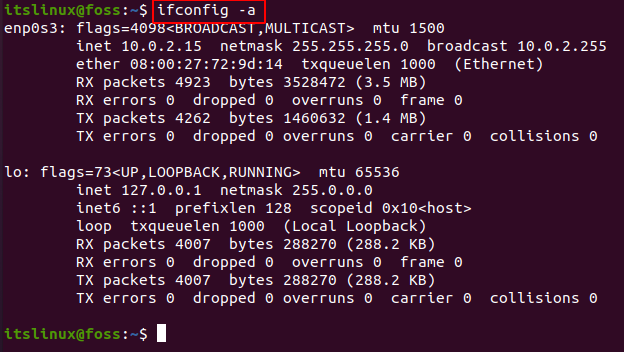
Now, if you see the network “enp0s3” is disabled but the list still shows all the networks present.
To Enable the Network interface and assign Netmask:
Now to enable the interface and assign a netmask following commands are used:
To enable:
$ sudo ifconfig <interface> upTo assign netmask:
$ sudo ifconfig <interface> netmask [netmask]
Here, a netmask “255.255.255.254” is assigned to network “enp0s3”
To change the packet size:
Here, packet size is changed of network “enp0s3” using following command:
$ sudo ifconfig <interface> mtu 1000
Conclusion
In this article we learned about the “ifconfig” command in Linux along with how to install and use it. Users can view and modify various network interfaces using it. Although it’s replaced by the “ip” command still, it’s useful due to various reasons, one of them being it’s simpler syntax. Personally, I also prefer using “ifconfig” because like other users I’m also used to it.

Saryia is a technology entrepreneur and digital publisher specializing in Linux, open-source technologies, and developer education.