In the Linux OS, a hostname is the name given to a computer network so that other computers on the network can interact with it. It plays a crucial role in the functioning of the Linux operating system and is used in various system processes and services.
When you install the Linux operating system, you need to set your hostname at that time. But after that as well you can set it and change it.
You can change the hostname using the “hostnamectl” command we will teach you in this article.
How to Set Hostname Using the hostnamectl Command?
Here we will be guiding you in different steps on how you can set your hostname.
Step 1: Verify Current Hostname
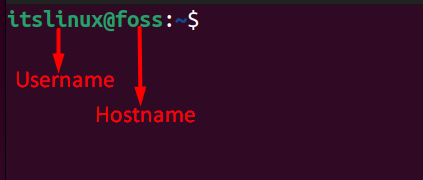
When you open a terminal then, you will be able to see your username and hostname separated by the ‘@’ sign, as shown below.
Your hostname can also be verified by using the below command:
$ hostnamectl
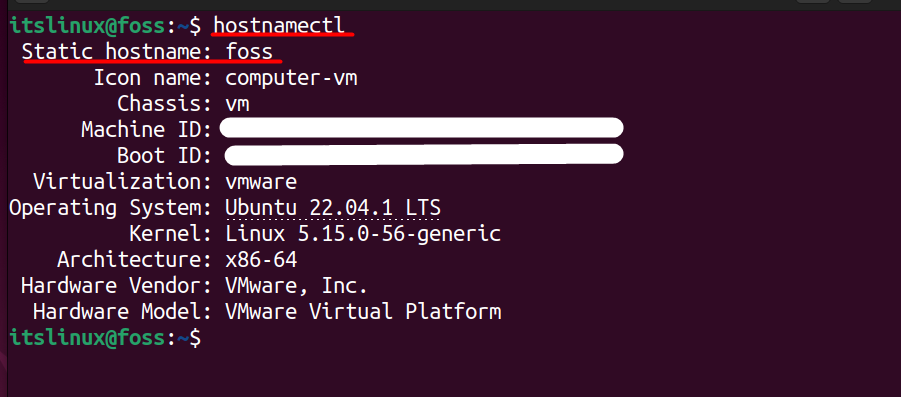
As mentioned earlier that the hostname is stored in a file which is available in
Step 2: Change the Hostname Using hostnamectl
After verifying your hostname, you can change it by typing the below command in the terminal:
$ hostnamectl set-hostname ubuntu
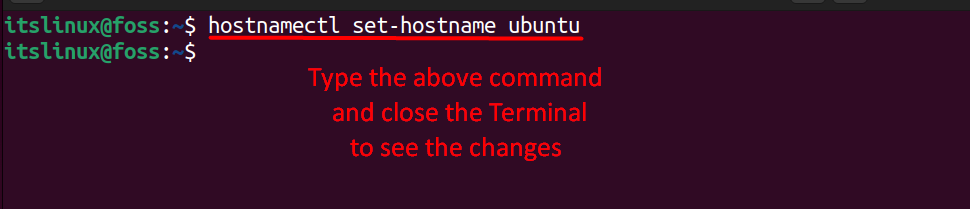
In the above command, “ubuntu” will be our new hostname, so you need to set your own hostname as per your choice.
Step 3: Exit and Open the Terminal Again
As you can see that after typing the above command, no new changes can be seen on the hostname. The reason is that you need to close the terminal and re-open it to see your new hostname, as shown below:
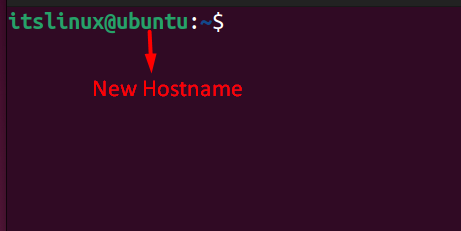
You can see that the new changes have been applied, and the hostname has now been changed.
Alternate Methods
Apart from the “hostnamectl” command, other command line methods can be used to set the hostname. Let’s
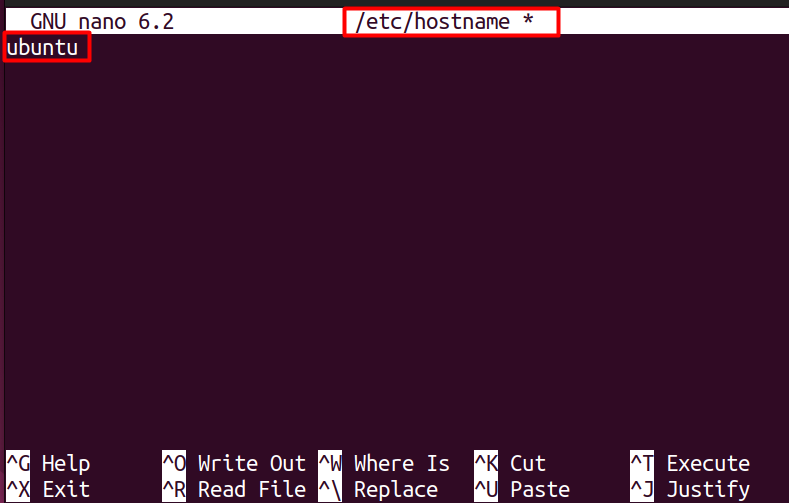
Method 1: Using e/etc/hostname
The hostname is stored in the file “/etc/hostname” on a Linux system and can be set manually. It is important to choose a unique and meaningful hostname for a device to avoid confusion on the network and to make it easier to identify and manage the device
So, follow the below command to change your hostname as shown below manually:
$ nano /etc/hostname

In the above command, ‘nano’ is the default manager that we have used to open the hostname file, and after that, you should be able to see your current hostname. So to change the hostname, you need to replace it with your desired one, and then you need to save the file by pressing “CTRL +S” and then exit it using “CTRL +X”.
Method 2: Using hostname Command
Using a simple “hostname” command can also be used to change the hostname by typing:
$ sudo hostname ubuntu

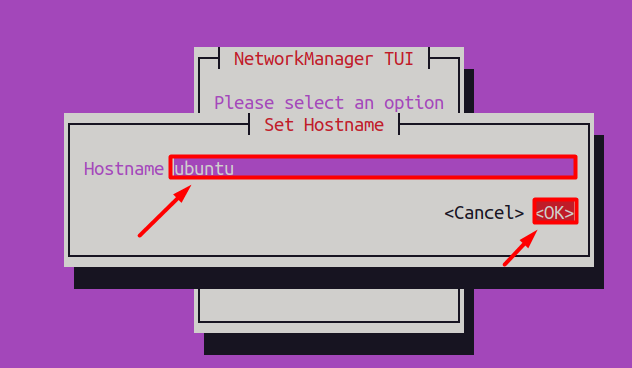
Method 3: Using nmtui Tool
The “nmtui (Network Manager Text User Interface)” is a text-based user interface for configuring and managing network connections on a Linux system. It is a part of the Network Manager package, a system service that manages network connections on a Linux system.
You can also change your hostname by using this command, which will include multiple steps which are explained below:
Step 1: Run nmtui
Open your terminal and execute the following command:
$ nmtui

A new window will open where you need to select the “set system hostname” option.

Step 2: Set the Hostname
Now, you need to write your desired hostname, and after that, click on the ‘OK’ button as shown below, which will change your hostname.
For more information regarding the hostname and how to change it, you can read this article.
That’s all from this article.
Conclusion
A hostname is a unique identifier assigned to a device connected to a Linux operating system network. It allows other devices to communicate with it and is used in various system processes and services. While the hostname is usually set during the installation of the operating system, it can be changed at any time using the “hostnamectl” command we have explained in this article.