
Nmap is the Network Mapper, also known as the free computer scanner. This will scan all the network connections with the computer’s ports, whether outgoing or incoming. While scanning the networks, it will gather the information list of the computer ports being used, connected device names, and operating system information. To explore more about the usage of the Nmap command utility in Linux, you can visit the link mentioned.
In this blog, you will learn how the Nmap command scans all the computer ports using the Nmap utility. The post’s content is:
- What are the Ports in Linux?
- How to Use Nmap to Scan All Ports?
- Scan All the Ports
- Scan All the UDP Ports
- Scan All the TCP Ports
- Scan IP Addresses
- Scan All Ports in Safe Mode
- Scan All Ports in Aggressive Mode
Let’s get started with the basics of ports in Linux.
What are the Ports in Linux?
There are 65535 ports in the computer, which start from port 0. These ports can be assigned to different processes, though by default, different processes are assigned to specific ports. For example, some ports are associated with different processes:
| Port 22 | For SSH processes |
| Port 80 | For HTTP processes |
| Port 443 | For HTTPS processes |
| Port 20 | For FTP procceses |
To understand the usage of the ports, we should be known to a basic knowledge of some networking terms described below.
| Port | Ports are the locations of the computer that are designed to access different processes and receive information about the specified services or processes |
| Sockets | The internet sockets are used to specify the IP address, the port associated with the IP address, and the information is transferred through the port |
| Binding | It is the process by which data is transferred to and from the sockets |
| Listening | It the process in which binding process is in execution to gather information from the client machine at the specific port |
Now, we will learn the method of scanning ports using the Nmap.
How to Use Nmap to Scan All Ports?
Different types of scans can be done for different applications. Different categories of scans are made depending on their application, like auth, external, and version.
Scan All the Ports
We will scan all the ports ranging from 0 to 65535 while connecting with the “itslinuxfoss.com” domain using the Nmap:
$ sudo nmap -p0-65535 itslinuxfoss.com
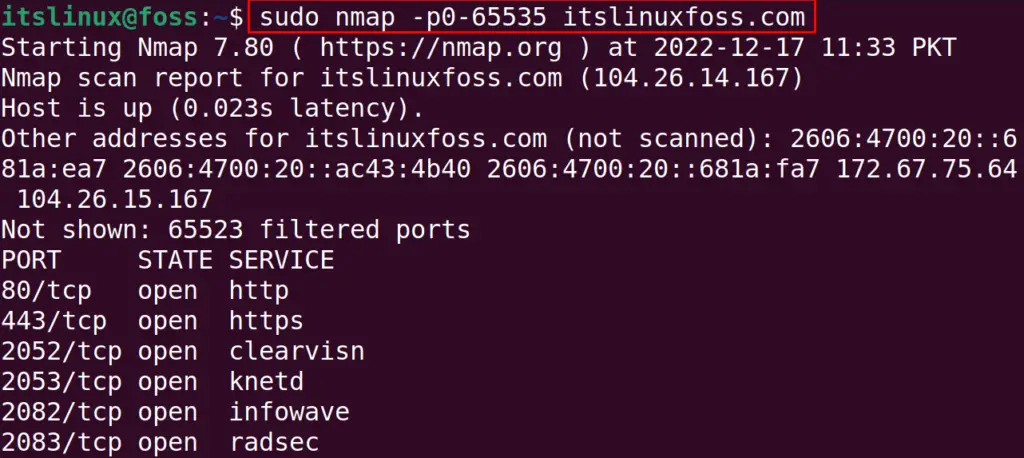
The above figure explains that we have completed the scan in 140.33 seconds. The scan results show that 65523 ports are filtered whereas the 80, 443, 2052, 2053, 2082, 2083, 2086, 2087, 2095, 2096, 8080, 8443, and 8880 ports are in used by different processes.
Scan All the UDP Ports
UDP ports are connectionless ports, meaning the host can send information to the client machine without establishing the connection. To scan all the UDP ports, we run the command:
$ sudo nmap -sU itslinuxfoss.com
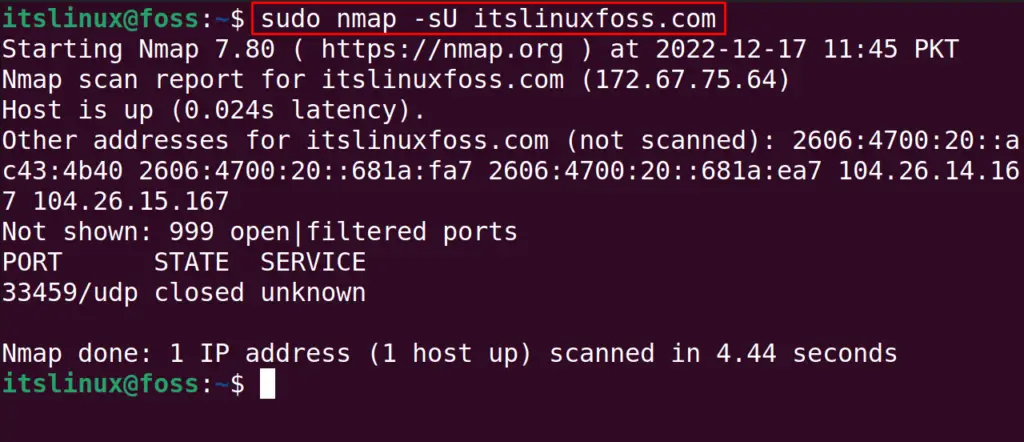
The UDP scan is important as it can carry many security bugs to the machine. Also, in the above-executed command,”sU” is used to specify the UDP ports.
Scan All the TCP Ports
Similar to the usage of the UDP ports, TCP ports are used to transfer between two machines by establishing the connection. The ports responsible for establishing the connection are known as the TCP ports.
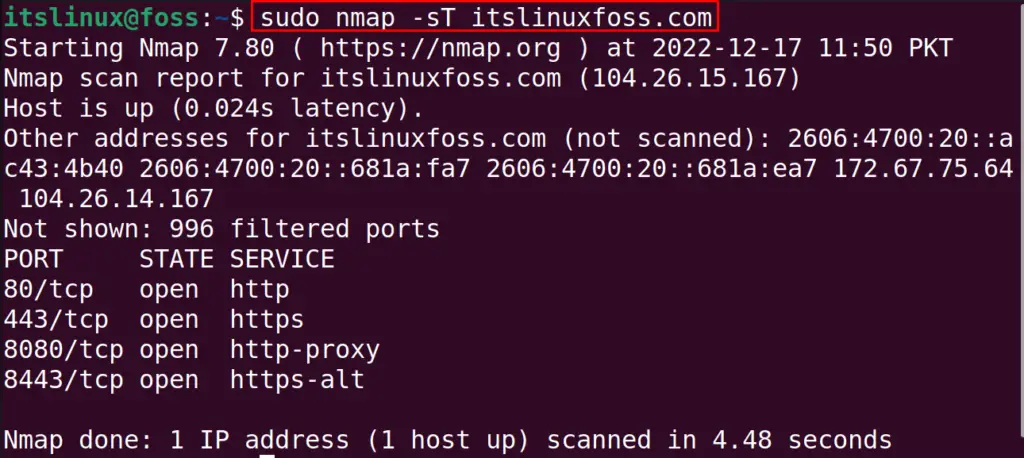
These TCP ports use FTP and SSH services. To scan all the TCP ports of the computer, we can use the “sT” option with the target domain. For example, we will scan all the TCP ports using the command:
$ sudo nmap -sT itslinuxfoss.com
We can also scan the “TCP” with the “UDP” ports using the command:
$ sudo nmap -sT -sU itslinuxfoss.com

The results of both, the TCP and UDP scans, can be obtained by running the above single command.
Scan IP Addresses
Nmap also allows users to scan remote networks using their IP address. For example, we are going to scan the remote machine with its IP address using the Nmap:
$ sudo nmap -sS -Pn 10.0.2.15
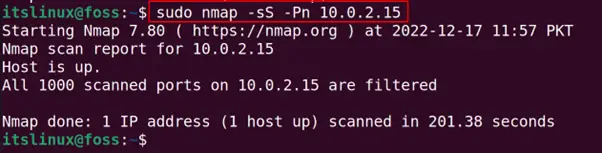
In the above command, the “sS” option is used to specify that we are going to scan the IP address and “Pn” is used to bypass the restriction of the blocking of ping probe.
Scan All Ports in Safe Mode
We can also scan all the ports in safe mode, which can take some time. But it will be safe because it will avoid scanning such services, which can harm the computer information:
$ sudo nmap --script "safe" -p- google.com
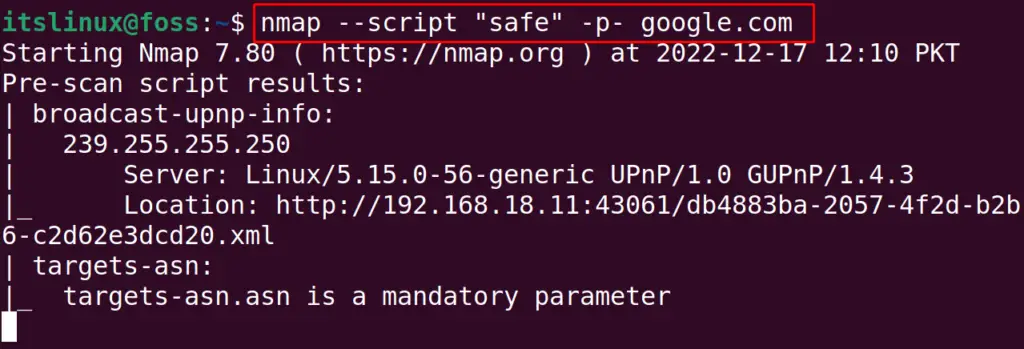
This scan will display the additional useful information which can not be produced by the scans mentioned above. The “–script” is used to run the script of nmap, and “safe” is used to specify the script only in safe mode.
Scan All Ports in Aggressive Mode
This mode of the Nmap will collect the information which may harm the target during its scan. But this will gather as much information which is possible. Again we will scan the google domain by using the command:
$ sudo nmap --script "exploit" -p- google.com
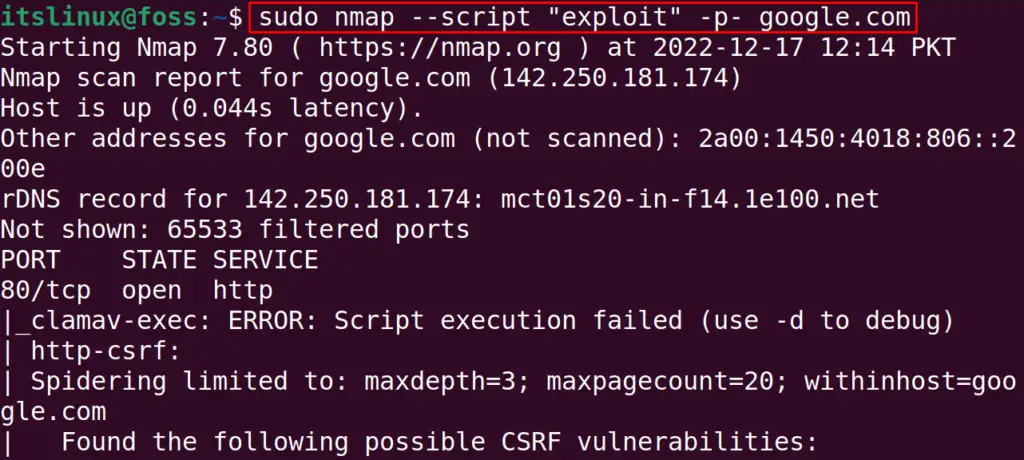
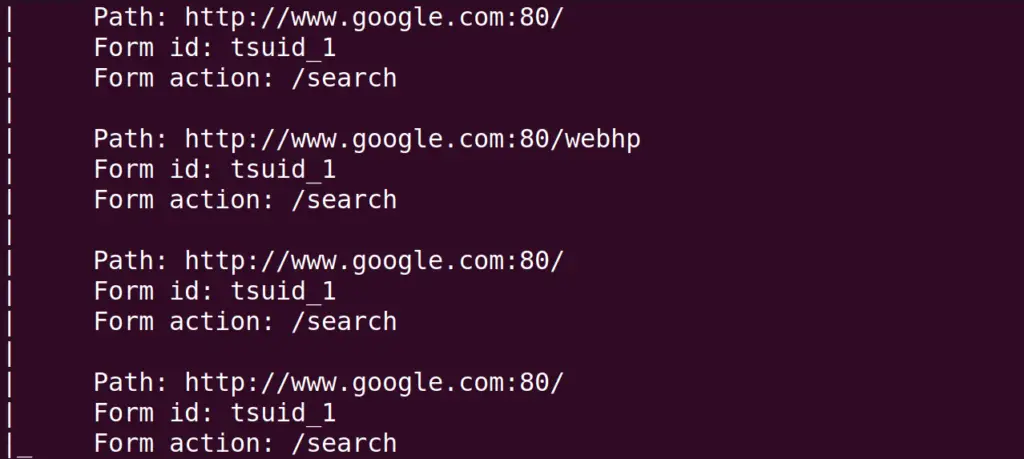
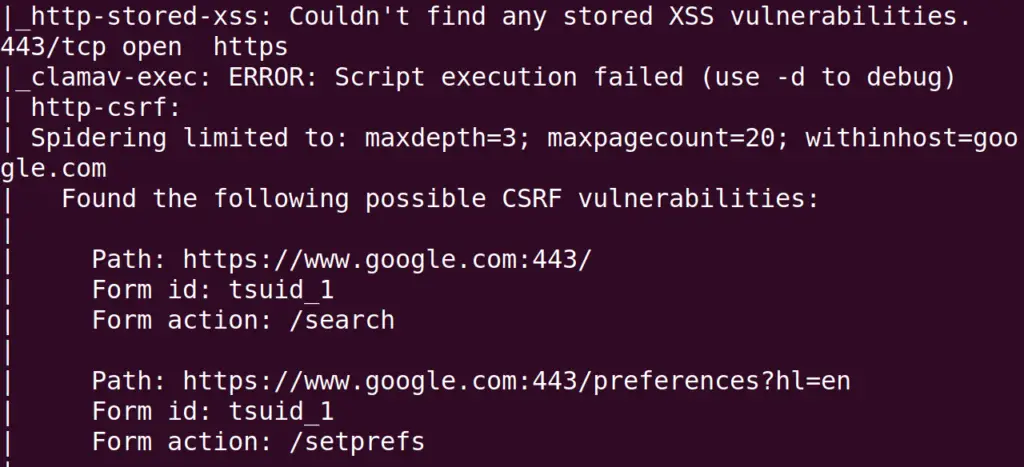
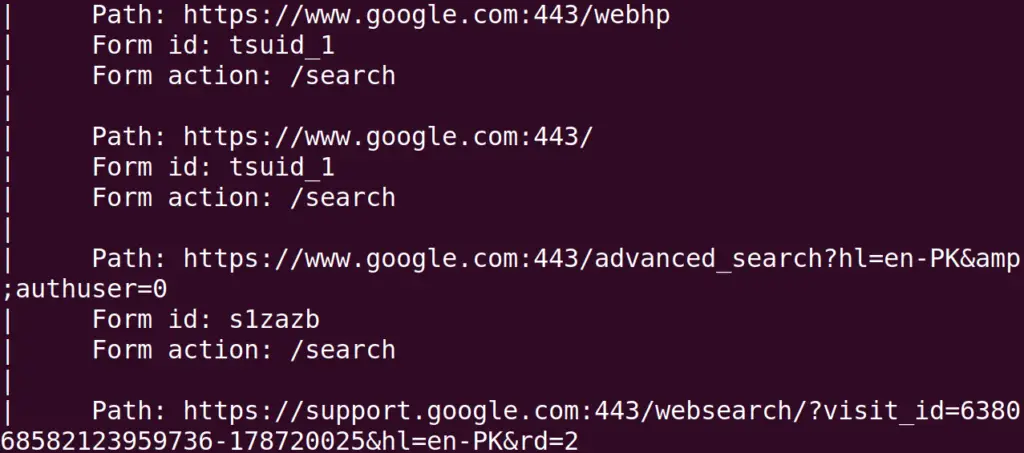
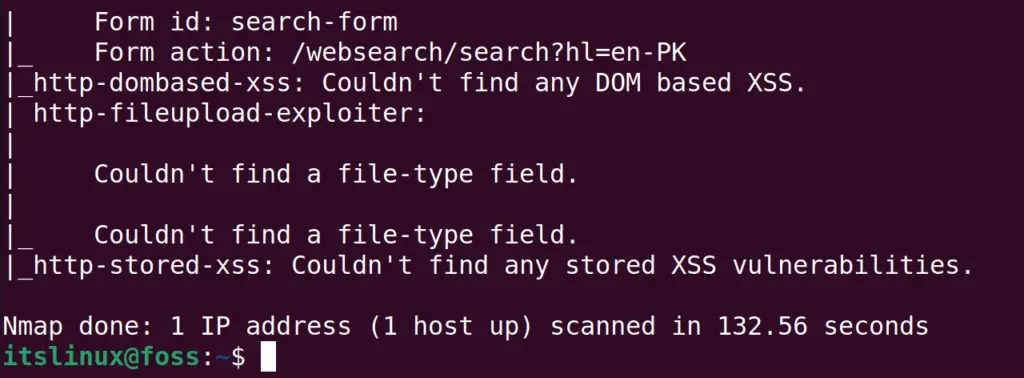
These aggressive scans can be applied to scan the big bandwidth targets. But there is a risk of data corruption or service corruption during the aggressive scan.
That’s how the Nmap can be used to scan all ports on Linux.
Conclusion
To use the nmap for the can of all the ports of the computer from 0 to 65535, run the command “sudo nmap -p0-65535 <target domain>”. In this blog, different methods are explored to scan all the ports of the computer using Nmap. These scans are done to gather information related to the ports and their connections.
