Nginx is a program that delivers web pages and information to your internet browser when you visit a website. Nginx is known for being very efficient, meaning it uses fewer computer resources than some other web servers, like Apache. This is helpful for websites that receive a lot of visitors because it allows them to run smoothly. Nginx can be configured as a reverse proxy to efficiently handle website traffic.
This brief Ubuntu 24.04 article will guide you regarding the Nginx installation.
Table of Contents:
- How To Install Nginx on Ubuntu 24.04
- How to Manage Nginx Process in Ubuntu 24.04
- How to Set up Server Blocks for Nginx in Ubuntu 24.04
- Conclusion
How To Install Nginx on Ubuntu 24.04
To install Nginx in Ubuntu 24.04, use the apt default, Ubuntu’s package manager. Follow these steps to install Nginx.
1. Updating the Ubuntu System
Start by updating your Ubuntu 24.04 system. For this, run the apt update command:
sudo apt update
2. Installing Nginx in Ubuntu 24.04
Now install the Nginx using this command:
sudo apt install nginx

This command will install all the required dependencies in our Ubuntu system and the Nginx server.
Now check the version of Nginx that is installed on Ubuntu using apt:
nginx -v

Note: The latest version of NGINX is 1.26.0 in the stable branch. The mainline version is 1.25.51.
3. Configure the Firewall for Nginx in Ubuntu 24.04
After installation, the Nginx web server automatically registers itself as a service with the Uncomplicated Firewall (ufw) framework. This simplifies the process of granting controlled access to incoming traffic destined for the Nginx service.
To check if your firewall allows traffic for Nginx, open the terminal and run:
sudo ufw app list
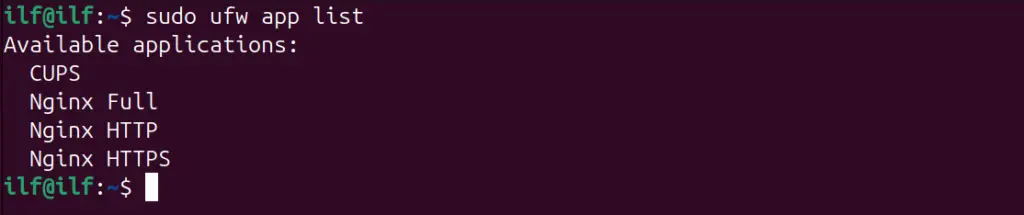
Look for an entry related to Nginx in the output. If you see Nginx listed, it means your firewall is allowing traffic directed towards it. These profiles have permission of predefined rules that dictate whether traffic for specific services or applications is allowed or denied.
You will find the following Nginx services in the above command output:
- CUPS (Common Unix Printing System): This profile allows rules that permit traffic related to printer services.
- Nginx Full: You can use this for the Nginx web server. It grants access to HTTP and HTTPS traffic.
- Nginx HTTP (port 80): This profile offers access solely for HTTP traffic directed towards the Nginx web server.
- Nginx HTTPS (port 443): This profile permits the incoming HTTPS traffic to your NGINX server. It’s essential for communication over SSL/TLS.
Now, you have to allow any of these profiles for the Nginx server by using the ufw command to enable or disable access to the corresponding services. For example, giving Nginx Full profile access allows both HTTP and HTTPS traffic. You can also restrict traffic to HTTP by using the Nginx HTTP profile only.
When configuring access control, it is recommended to use less privilege. This principle allows giving only the minimum level of permissions necessary for an application to function correctly.
Now we will enable access for Nginx HTTP and HTTPS traffic by using this command:
sudo ufw allow 'Nginx Full'

This command authorizes the firewall to permit incoming HTTP and HTTPS traffic bound for the Nginx service.
4. Check the Updated Firewall Status
Now that we have added a new rule to the UFW firewall, you have to confirm it first before proceeding.
If the UFW firewall is not enabled, you can enable it using this command:
sudo ufw enable

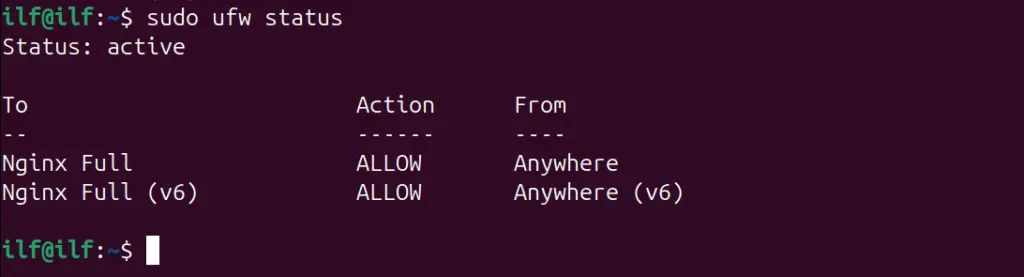
Now check the firewall status and confirm if the new rules are added or not, using this command:
sudo ufw status
5. Verifying the Nginx Installation Status
After setting up the firewall for Nginx, the next step is to confirm the Nginx installation by checking whether its process is running.
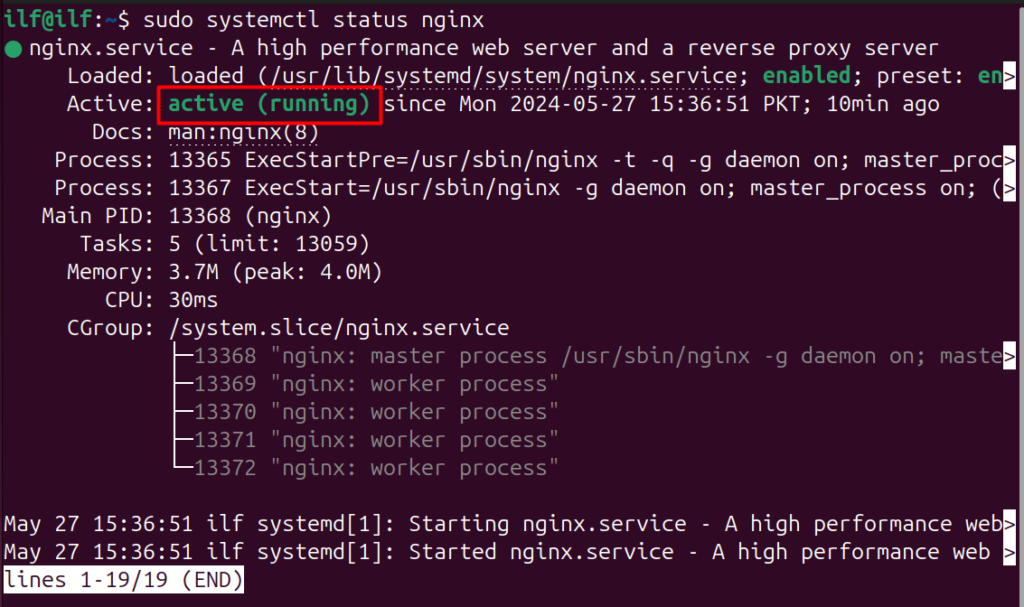
For this purpose, you can run the systemctl status command:
sudo systemctl status nginx
If the status is active (running), this means the Nginx is ready to use with your local host.
Finally, start the Nginx service using this command:
sudo systemctl start nginx

6. Opening the Nginx Server’s Page
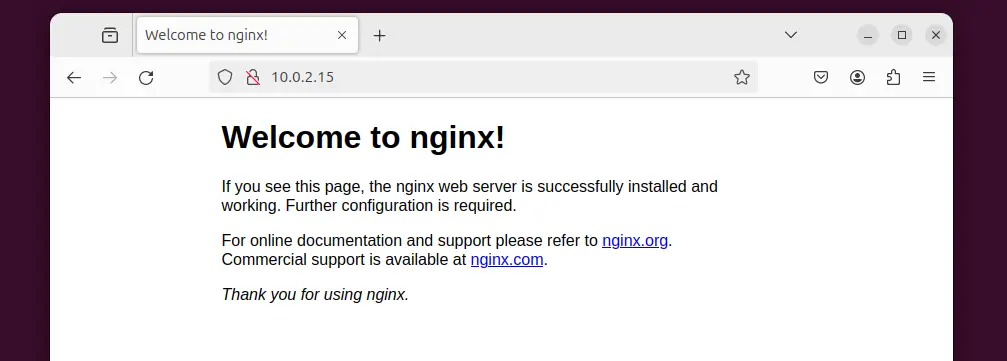
Now, to check if the Nginx web server is receiving the request or not, you can check its home page by entering the local IP address in your web browser:
http://10.0.2.15
Once the IP address is entered, you will be welcome with the Nginx home page. This means it is installed and receives the web requests.
How to Manage Nginx Process in Ubuntu 24.04
Before setting up our first local web page, you must know some systemctl commands to manage the services related to Nginx.
For example, to stop the Nginx service, you can run this command:
sudo systemctl stop nginx
Similarly, if you want to start the Nginx service, then the below command will do the work for you:
sudo systemctl start nginx
For restarting the Nginx service, use the restart command:
sudo systemctl restart nginx
To reload the Nginx system configuration, run this:
sudo systemctl reload nginx
Lastly, to enable and disable the Nginx services, you can try out these two commands:
sudo systemctl enable nginx
sudo systemctl disable nginx
How to Set up Server Blocks for Nginx in Ubuntu 24.04
Nginx uses a section called Server blocks to manage how it handles traffic for different websites. These server blocks, also known as virtual hosts, are configuration files that tell Nginx how to receive and deal with requests for a specific domain name.
Usually, Nginx is set up to handle just one website. You can use default settings or customize these server blocks as needed.
Let’s take a look at the default server block, which is located at the following location:
sudo nano /etc/nginx/sites-enabled/default
To open this you can use any text editor, here I am continuing with the Nano editor.

The below output shows the default configuration for Nginx server blocks. Nginx serves websites from the /var/www/html folder.
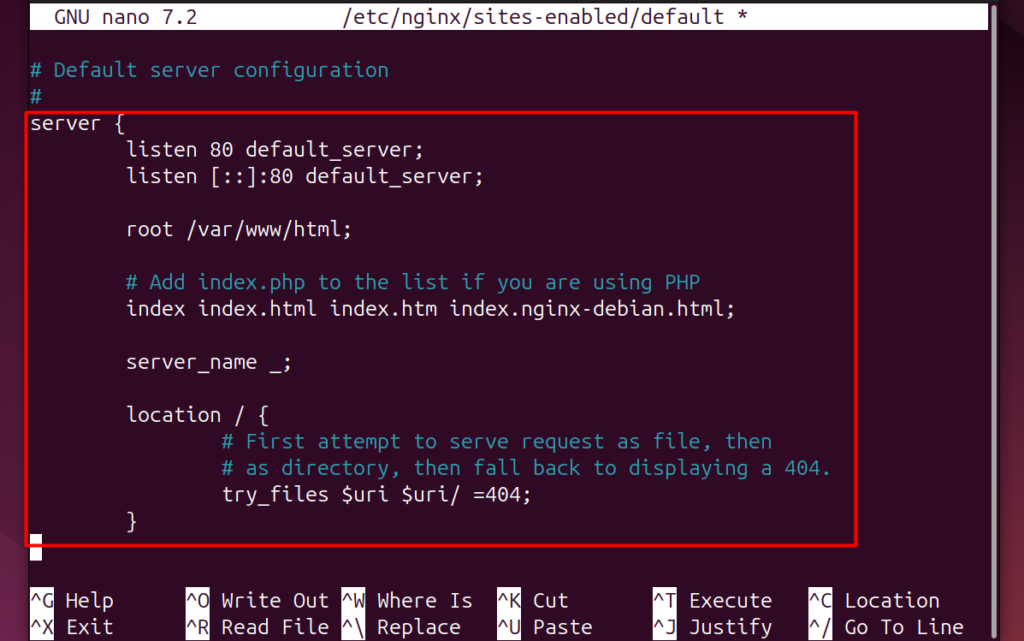
To get your website up and running, you can place all its files and content in that directory.
However, you’re not limited to that folder. Nginx allows you to create your custom directory to organize your website files. For example, if your website is called www.testwebsite.com, and you want to use the /srv/testwebsite/html as the storage location, you’ll need to change the default server block configuration file.
Now, we will see how to host a single server using Nginx and what settings need to be modified inside the Nginx server blocks configuration file.
1. Creating Directories
First, create a separate directory for your website hosted by Nginx. Here, store all the necessary files for this test or demo site.
To create a directory, you can run the mkdir command:
sudo mkdir -p /srv/testwebsite/html

2. Allows Permission to Directories
Now assign the owner with all the necessary permissions to read, write, and modify the contents inside the above-created directory:
sudo chmod -R 755 /srv/testwebsite/html
3. Creating a Test HTML Page for the Nginx Server
After giving the necessary permissions, the next step is to create a test HTML page for your local host site. Create an index.html file.
To create this file, use any text editor tool:
sudo nano /srv/testwebsite/html/index.html

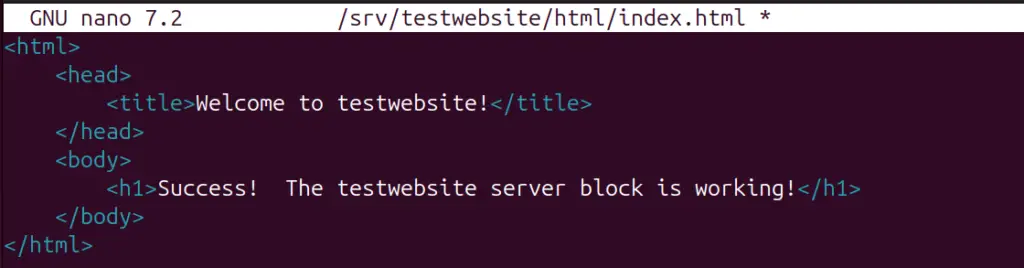
Once the file is created, paste the below content into that file. Customize the content of this file as needed. For example, you can apply custom HTML styling to make it look more prominent.
<html>
    <head>
        <title>Welcome to testwebsite!</title>
    </head>
    <body>
        <h1>Success!  The testwebsite server block is working!</h1>
    </body>
</html>
4. Configuring the Nginx Server Block
The final step is to modify the default server block configuration according to the details of your local host’s custom website.
To edit the default server blocks file, first open it using any text editor:
sudo nano /etc/nginx/sites-enabled/default

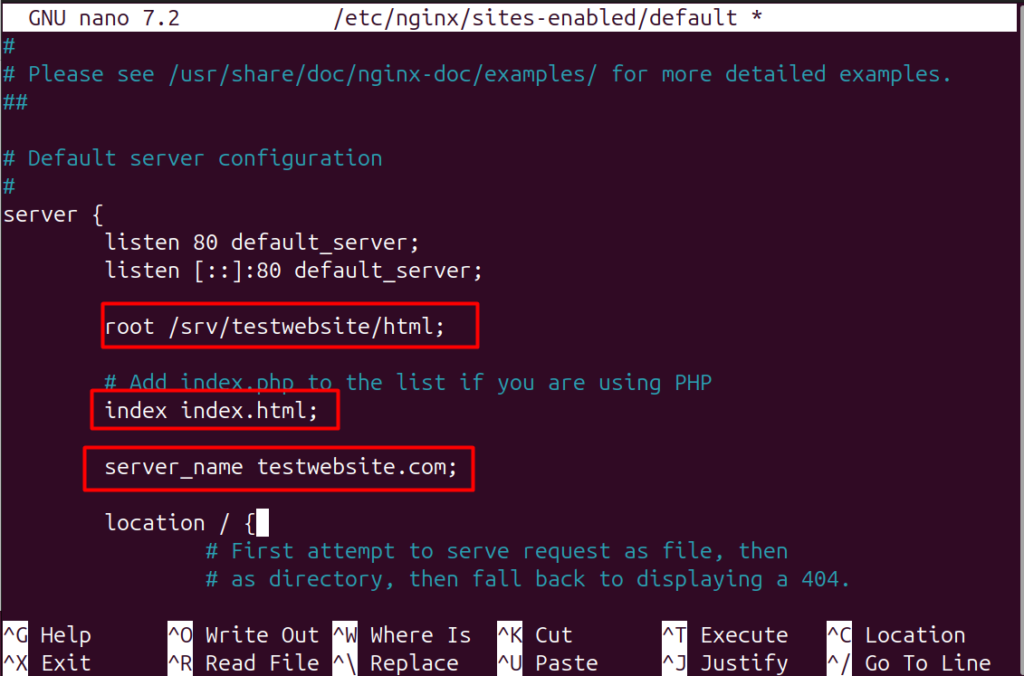
These changes include changing the root directory to your local site (/srv/testwebsite/html) directory, which we created earlier. Similarly, you should update the index page to the index.html page you created in the previous step.
Finally, replace the server_name with your site URL, such as testwebsite.com.
server {
        listen 80 default_server;
        listen [::]:80 default_server;

        root /srv/testwebsite/html;

        # Add index.php to the list if you are using PHP
        index index.html;

        server_name testwebsite.com;

        location / {
After making all the changes, save and exit the server block configuration file.
5. Testing the Nginx Service
Before you can test the Nginx localhost custom site, the last step is to restart the Nginx services. This will help the system to apply all the new configurations access the system:
sudo systemctl restart nginx

Now, to test the Nginx service there are two different ways, first, you can run this command and if it outputs successful then it means your server is working fine:
sudo nginx -t

The second and more preferable way is to visit the localhost inde.html page we created earlier. For this, you can simply open any web browser and run the following URL in the search box:
http://localhost
You can also do the same with the actual IP address for the local host:
http://10.0.2.15
If you see the text or output of the HTML files, the single site is successfully hosted on your Nginx server.

We have successfully set up the Nginx on the Ubuntu 24.04 system.
Conclusion
Nginx is a program that delivers web pages and information to your internet browser when you visit a website. To install Nginx, use the default apt Ubuntu package manager. After installation, you can follow the mentioned steps to set up the Nginx. After following these steps, you will have Nginx up and running on your Ubuntu 24.04 system. Remember to configure the server block to suit your needs and test your configuration before restarting Nginx.
