In Linux, users are created with the “useradd” command that provides different logins and accessibility to the created users. To manage and view each user’s detail, Linux provides multiple tools. The “chage” command is the frequently used tool for controlling the user’s account. The “chage” is the abbreviation “Change Age”. This post will demonstrate the usage of the chage command in Linux. The content for the post is given below:
Let’s get into the basics of chage command in Linux.
What is a chage Command in Linux?
The “chage” is a built-in utility for viewing and changing account information such as password expiry, making an account inactive, or setting a reminder for the user to change the account password. The syntax for using the “chage” command in Linux is shown below:
Syntax
$ chage [options] [UserName]
Write the “chage” keyword, “options” for the command, and then type the username of the created user.
For the options that are used with the “chage” command, run the help command in the terminal:
$ chage --help
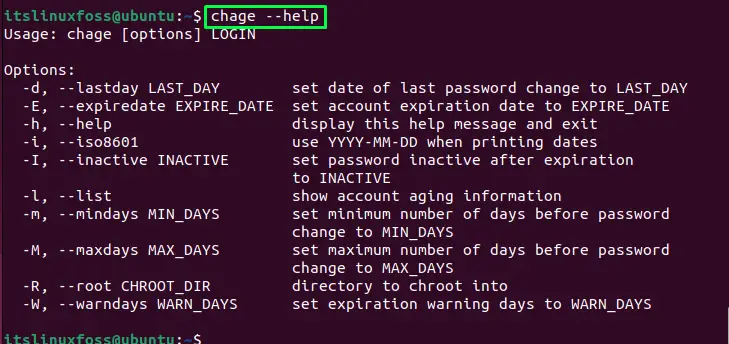
All the options have been listed.
Let’s move and use the “chage” utility.
How the chage Command is Used in Linux?
To use the chage command in Linux, we have implemented the below examples with various options for the user “HenryUser”.
Example 1: Retrieving the User Information
To list the user-created details, use the “l” option in the command with the user name (HenryUser):
$ sudo chage -l HenryUser
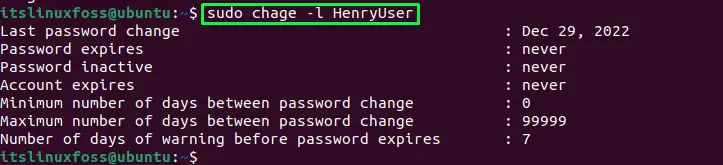
The details of the user will be listed.
Example 2: Updating the Last Password Change Date
For updating the last password change date for the user, use the “d” flag with the date to be updated:
$ sudo chage -d 2022-12-31 HenryUser

The last password change date will be updated.
To verify it, list down the user detail:
$ sudo chage -l HenryUser
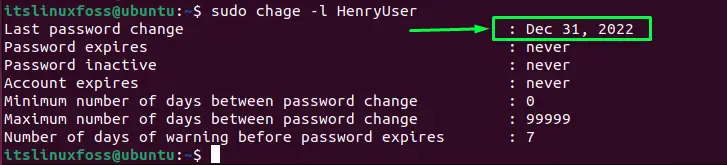
The last password change date has been updated.
Example 3: Locking/Expiring the User Account
For expiring or locking the account, the user can use the “E” flag with the date for expiring the account:
$ sudo chage -E 2023-01-12 HenryUser

The account will expire after the given date.
Let’s display the user details:
$ sudo chage -l HenryUser
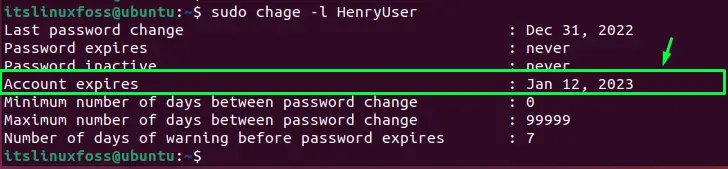
The account expiration date has been set, as shown in the above image.
Example 4: Setting the Validity and Warning For Password Change
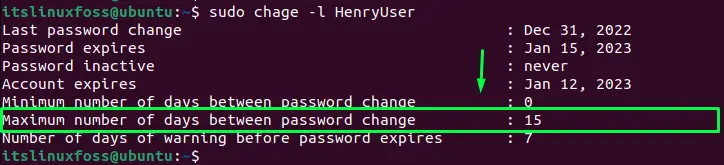
For setting the validity to the user to update the password for the account, use the “M” flag in the command with the number of days. Here we are setting the 15 days validity to change the password:
$ sudo chage -M 15 HenryUser

The validity of the password will be set to 15 days.
To verify it, open the list of the user account details:
$ sudo chage -l HenryUser
To give the warning to the user before ending the maximum number of days, use the “W” option with the number of days before ending the validity:
$ sudo chage -W 4 HenryUser

The warning will be given to the user to update the password when the last 4 days remain.
To check the warning has been set, list the detail of the user account:
$ sudo chage -l HenryUser
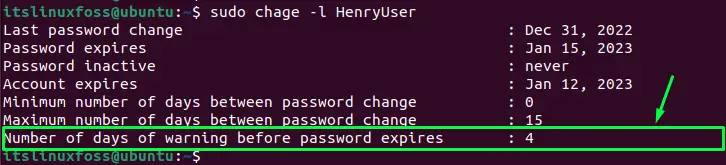
The warning has been set.
Example 5: Setting the Number of Days For Account Inactive
To inactive the user account after the account password expires, use the “I” flag with the number of days. We have given 3 days to the user to change the password. After that, the account will be inactive, and the user has to contact the administrator to activate the account:
$ sudo chage -I 3 HenryUser

The 3 days will be set after running the above command.
Let’s verify it by displaying the user details:
$ sudo chage -l HenryUser
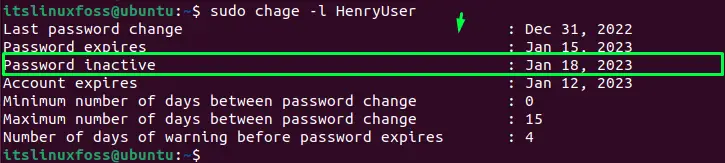
The inactive password days have been set.
That’s how the chage command works in Linux.
Conclusion
In Linux, the “chage” is a built-in utility that is used to manage the user’s accounts, such as setting the password expiry, password inactive, warnings, etc. Various options are used for doing the above-stated operations. This write-up has briefly illustrated the usage of the “chage” command in Linux.
