The gdm3, kdm, and lightdm are different display managers that also can alter other display properties such as resolution, orientation, and user-account switching.
In Linux, a display manager is a graphical login manager that provides a login interface after the system boots up. Their primary use is to provide users with a consistent login screen, and a session is started after each successful user login.
This guide discusses everything about gdm3, kdm, and lightdm, including the ways to install and uninstall them.
What is gdm3?
The default display manager for the GNOME desktop is gdm3. It has a modern look with a sleek user-friendly design. It supports many features, including automatic user login and remote login. It also provides users with accessibility features and multi-language support and can easily be customized.
Pros of Using gdm3
By using gdm3 as a display manager, users get the following perks.
- More user-friendly interface compared to other display managers.
- Stable and integrated with Fedora or other GNOME distributions.
- Easy customization options.
- Session management to prevent illegal entry and screen-lock feature.
Cons of Using gdm3
There are a few cons to using gdm3 as a display manager on the system.
- It is known for having vulnerabilities and poses a security risk
- Some users reported that it slows down the system, which could be the case with users with a low-end system
How to Install gdm3 on Ubuntu?
To install gdm3 and set it as the default display manager, use this command:
$ sudo apt install gdm3
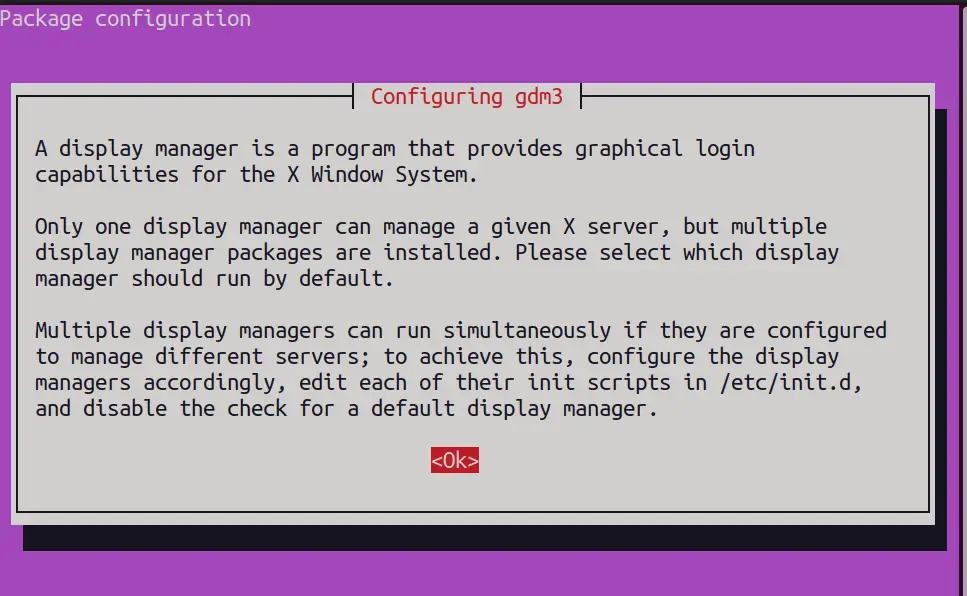
When the command “$ sudo apt install gdm3” is executed, a new screen will appear on the terminal. It is the package (gdm3). Press the “enter” key to continue from here:
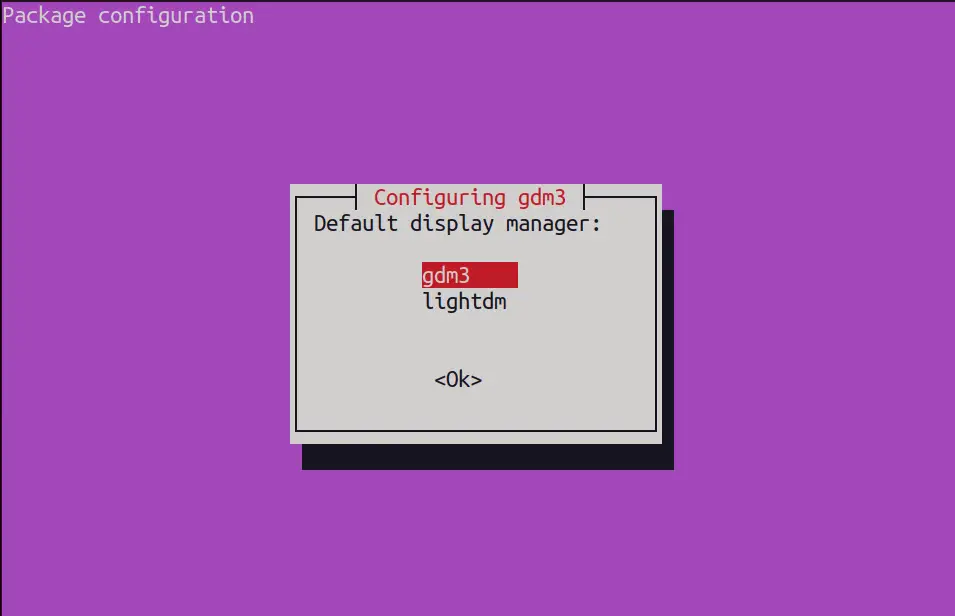
Here, two display managers are installed on the system, and gdm3 is selected by pressing the “enter” key.
Note: After selection, the display manager should automatically be changed, but if there is a black screen, reboot the system for the changes to take effect.
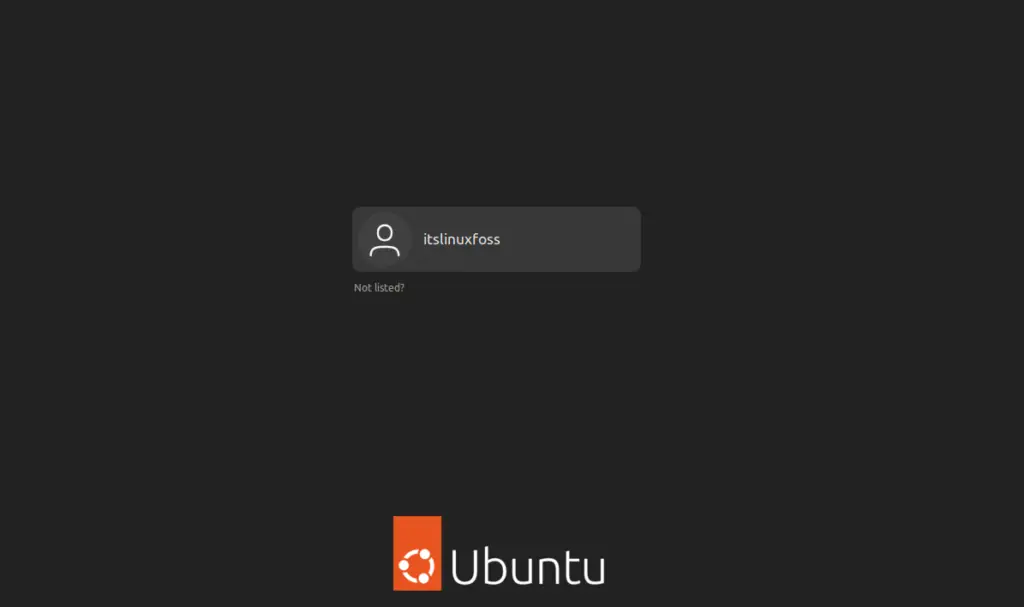
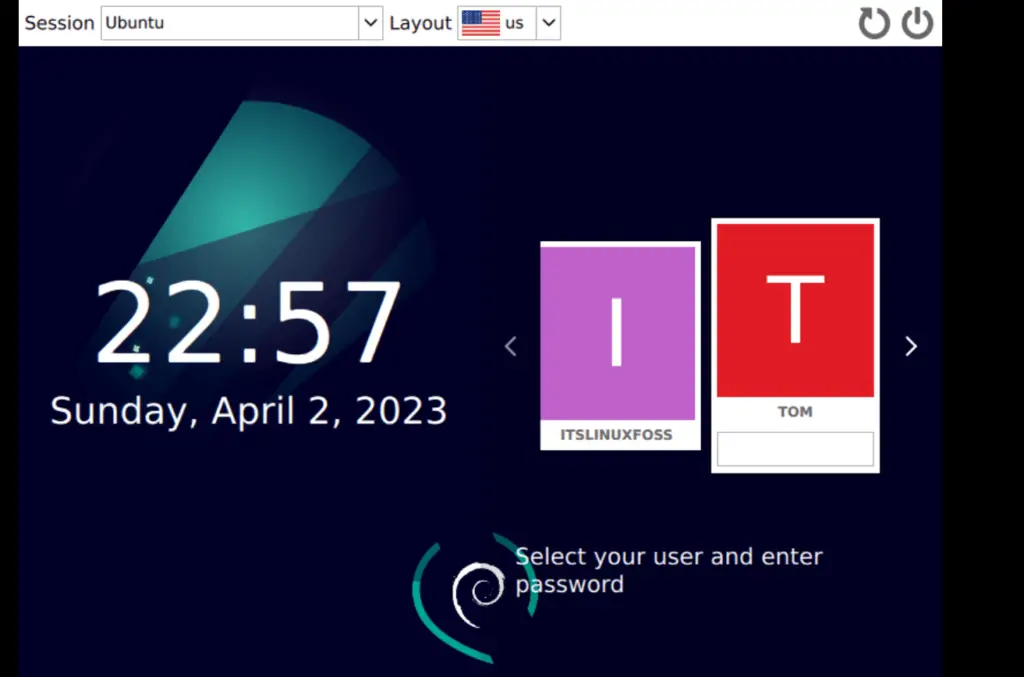
Here is how the login screen on the system (with no customization) after installing gdm3:
How to Remove gdm3 From Ubuntu?
To get rid of gdm3, use this command, and after removing the gdm3, the system automatically uses the other available display manager:
$ sudo apt remove gdm3
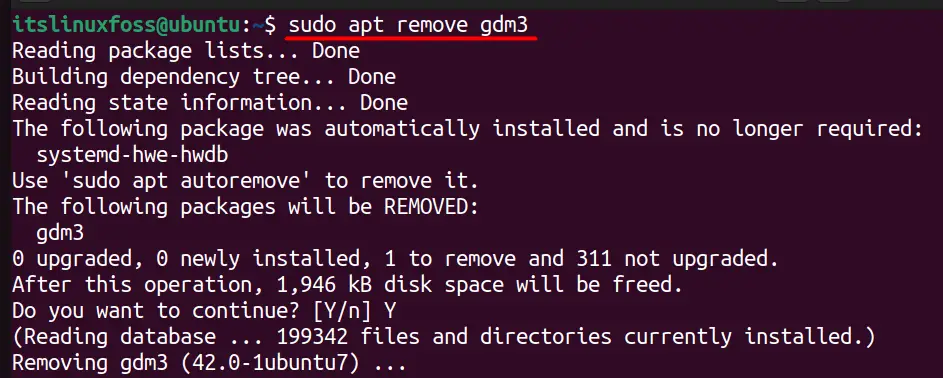
Note: After removing the currently set display manager from the system, users may experience a delay on the next login.
What is kdm?
The default display manager for KDE desktop environments is kdm. It is designed to be highly customizable and user-friendly. The kdm supports automatic login and session management and can easily be integrated with KDE applications thanks to KDE Plasma Workspace.
Note: The kdm display manager is retired in KDE Plasma 5 and is replaced by sddm.
What is sddm?
Simple Desktop Display Manager, or sddm, is a beautifully designed desktop manager offering next-level customization through several enchanting themes. It is recommended for LXQT and Plasma 5 desktop environments.
Pros of Using sddm
By using sddm as a display manager, users get the following perks.
- Excellent customization options through gifs, videos, and custom themes
- Can work with Wayland and X11 (LXDE) desktop environments.
Cons of Using sddm
There are a few cons to using sddm as a display manager on the system.
- Not very lightweight as it could take 15-40 seconds to load the system after login
- Buggy (Random crashes, freezes, and issues with NVIDIA display drivers)
- The keyboard control needs improvements.
How to Install sddm on Ubuntu?
To install the sddm display manager on the system, use this command:
$ sudo apt install sddm

After executing the above command, the terminal will download the required packages and show the above screen. Select the desired display manager (sddm in this case) by pressing the “enter” key.
Now, reboot the system for the changes to take effect, and it will show you the login screen like this:
The sddm is now installed on the system, let’s remove it.
How to Remove sddm From Ubuntu?
If the sddm display manager is not upto mark, use this command to remove it from the system completely:
$ sudo apt autoremove sddm
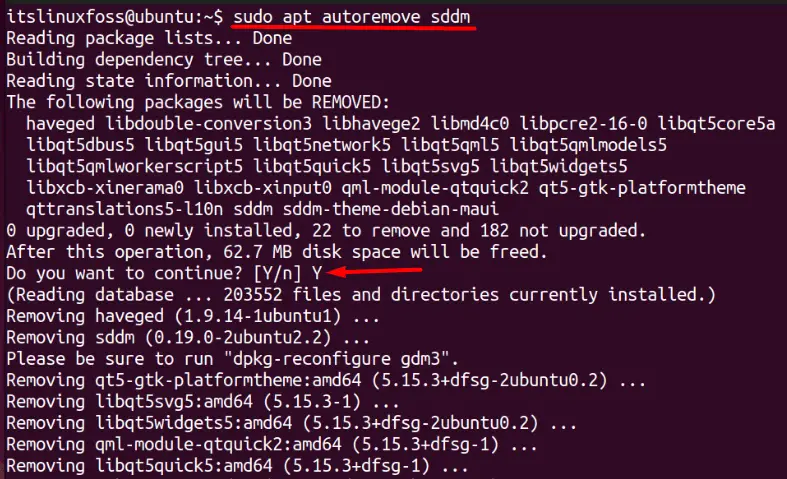
The sddm is now removed from the system, and the default display manager is used on the following system login.
What is lightdm?
The lightdm, as expected by looking at its name, is a lightweight display manager. It is highly customizable and the fastest and has a low resource consumption compared to gdm3 and kdm. A variety of desktop environments like GNOME, LXDE, Xfce, KDE, and many others are supported by lightdm. It can be used in desktop environments without a display manager.
Pros of Using lightdm
The pros of using lightdm as a display manager include the following:
- Lightweight and fast as it uses lesser resources compared to other display managers
- Easy customization through various commands that can change themes and background images
- Multi-desktop environment supported (GNOME, KDE, Xfce
- Attractive interface with various themes
Cons of Using lightdm
The cons of using lightdm as a display manager include the following:
- Poor documentation
- No autologin feature to directly load the system without logging in
- Have stability issues like dark screen, unable to log in after suspending the current session, and no login screen shown
How to Install lightdm on Ubuntu?
To install lightdm on Ubuntu, use this command, and it will take you to the package configuration screen once the download is completed:
$ sudo apt install lightdm
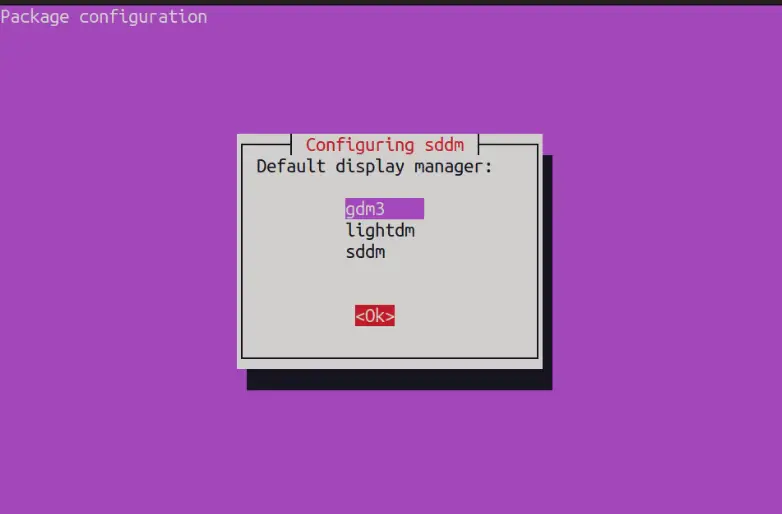
Select “Ok” by pressing the “enter” key from here:
And then select “lightdm”:

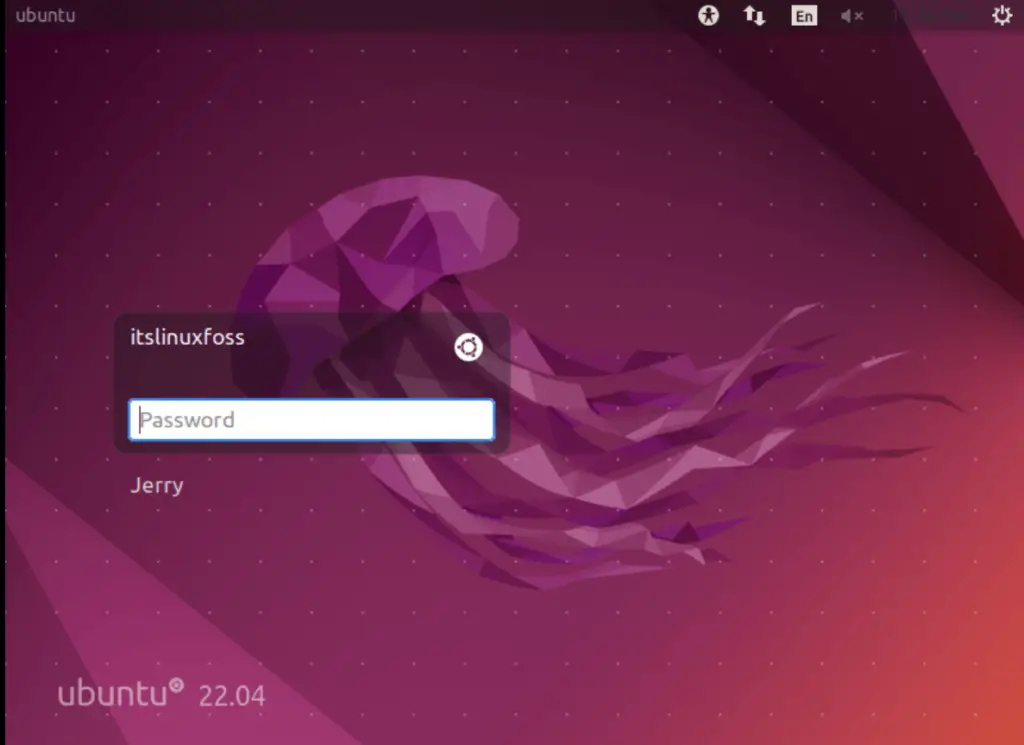
Reboot the system for the changes to take effect, and the login screen will now look like this:
How to Remove lightdm From Ubuntu?
To remove lightdm from the system, use this command:
$ sudo apt autoremove lightdm
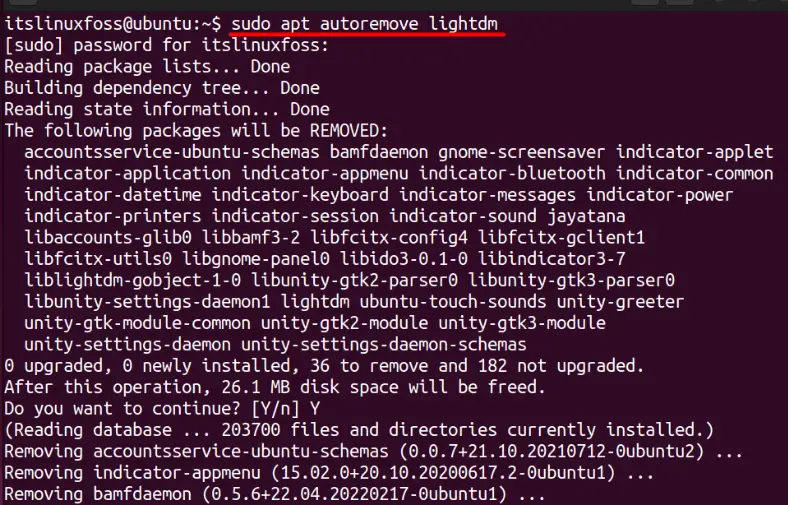
Once the lightdm display manager is removed from the system, the next login will use the default display manager.
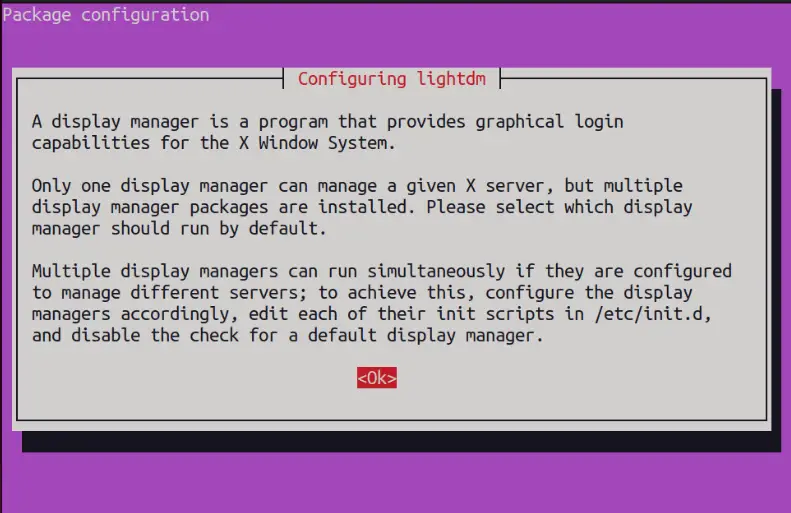
How to Switch Between gdm3, kdm, and lightdm?
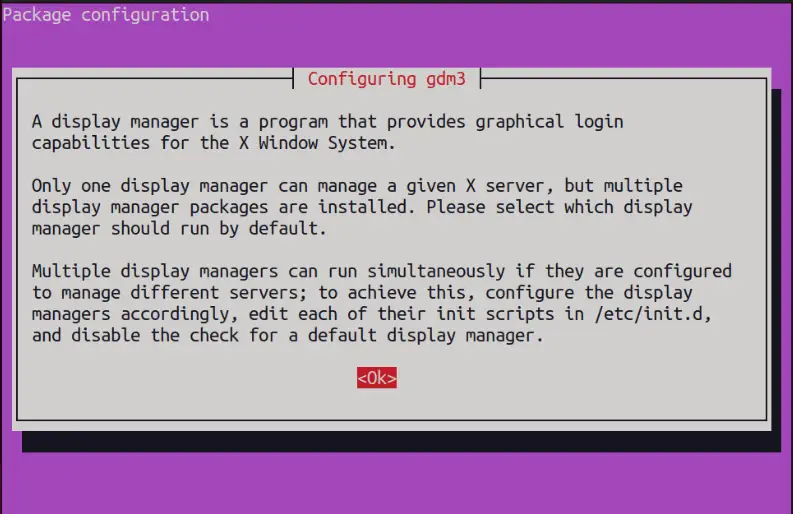
To switch between the display managers such as gdm3, kdm, and lightdm on Ubuntu, use this command, and it will take you to the gdm configuration screen:
$ sudo dpkg-reconfigure gdm3
Note: If you do not have gdm installed on the system, but have lightdm installed, replace gdm with lightdm like this:
$ sudo dpkg-reconfigure lightdm
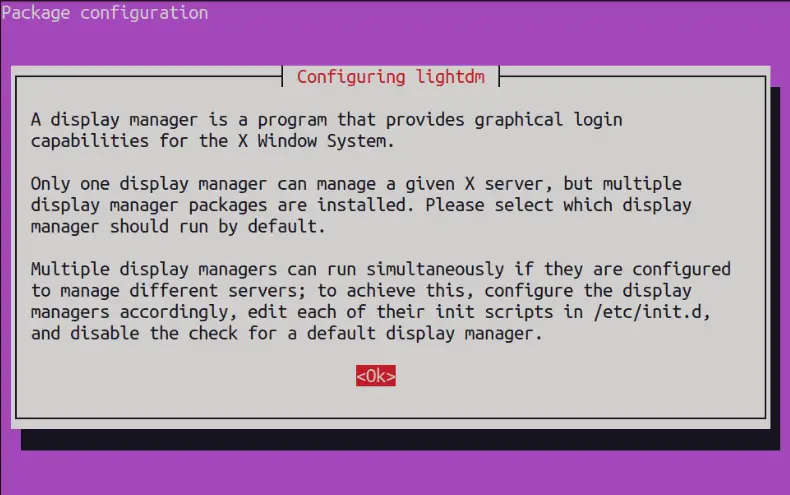
Press the “enter” key to select “Ok.” Select the desired display manager:
The same procedure will be followed for all desktop environments.
Conclusion
The gdm3, kdm, and lightdm are the three widely used display managers in Ubuntu and other Linux. The gdm3, kdm, and lightdm display managers can be installed on Ubuntu using the “sudo apt install gdm3”, “sudo apt install sddm”, and “sudo apt install lightdm” commands. To remove them, replace the “apt remove” commands instead of the “apt install” in the above commands. This post has briefly explained these three display managers, their pros/cons, features, and installation/removal.

Check our LinkedIn company page