
A DNS server is utilized to translate domain names into their related IP addresses. By default, Linux systems obtain DNS server information from the DHCP server by obtaining an IP address. However, it is also possible to manually edit the “/etc/resolv.conf” file to add a custom DNS server to the list. It is beneficial when the default DNS server is not responding, or users want to use a specific DNS server for certain purposes.
Considering its significance, this article will illustrate the step-by-step instructions to add a DNS server via the “resolv.conf” file:
- Add a DNS Server via resolv.conf
- Open the /etc/resolv.conf File
- Add a Nameserver Directive
- Restart Networking Services
- Verify the DNS Server Configuration
How to Add a DNS Server Via resolv.conf?
The “/etc/resolv.conf” file contains a list of nameservers that the system uses to look up domain names. The nameserver is utilized to identify the IP address of the DNS server. To add a DNS server via “/etc/resolv.conf” in Linux, follow these steps:
Step 1: Open the /etc/resolv.conf File
To edit the “/etc/resolv.conf” file, use a text editor, such as “nano”. For instance, open the file in the nano text editor with root privileges:
$ sudo nano /etc/resolv.conf

It navigates to the “resolv.conf” configuration file opened in the “nano” text editor.
Step 2: Add a Nameserver Directive
In the “resolv.conf” configuration file, add a nameserver directive followed by the IP address of the DNS server that the user wants to use. For example, if the user wants to use a DNS server with the IP address “127.0.0.53”, add the following line to the file:
nameserver 127.0.0.53
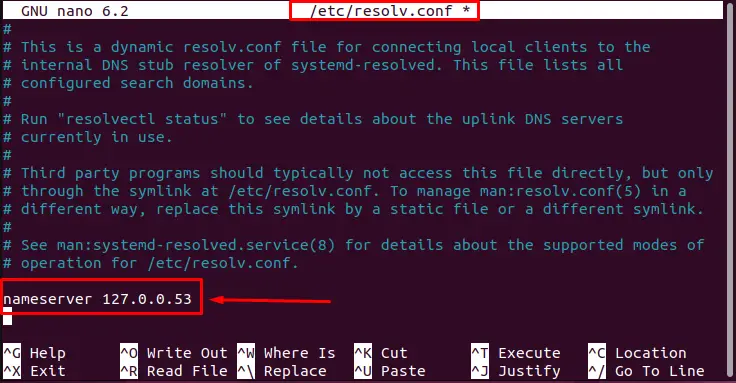
The output shows that the IP address “127.0.0.53” has been added to the “resolv.conf” configuration file.
Once the appropriate nameserver directives have been added to the “resolv.conf” configuration file, save and close the file.
Step 3: Restart Networking Services
To ensure that the new DNS server settings take effect, there is a need to restart the networking services on the current system. For instance, utilize the “systemctl” command by specifying “NetworkManager.service” in Linux:
$ sudo systemctl restart NetworkManager.service

The above-executed command restarts the network management services.
Step 4: Verify the DNS Server Configuration
To verify the specified DNS servers to resolve domain names, utilize the “dig” command by specifying the URL website. For instance, specify the “itslinuxfoss.com” to check the DNS server configuration:
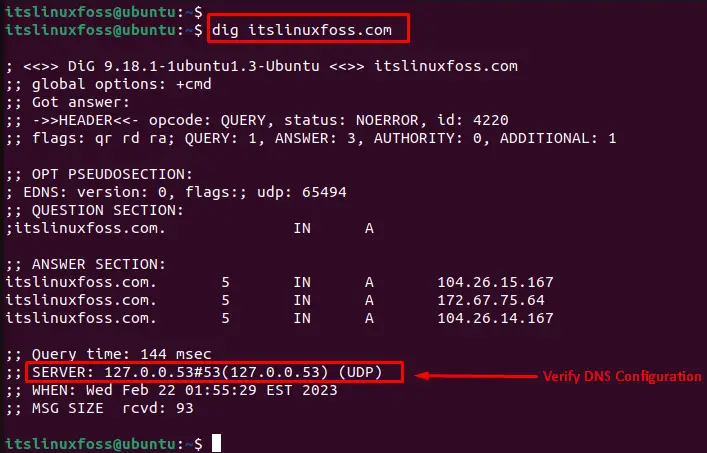
The output shows that the DNS server has been added with the IP address “127.0.0.53”.
Conclusion
To add a DNS server via resolv.conf configuration file, add a nameserver directive followed by the IP address of the DNS server. After saving and exiting the “resolv.conf” configuration file, restart the network services by executing the “sudo systemctl restart NetworkManager.service” command.
This article has illustrated step-by-step instructions to add a DNS server via the “resolv.conf” configuration file in Linux.
