
The tcpdump command-line utility captures and analyzes the network traffic in real-time. The users can capture packets from a network interface and display the contents of the packets on the terminal. It includes the headers of packets and the payload data of certain types of packets. It has various applications to monitor network traffic for debugging, security, and troubleshooting purposes.
This article will illustrate the procedure to capture all UDP packets using the tcpdump in Linux.
- How to Capture All the UDP Packets Using tcpdump?
- List All the Available Network Interfaces
- Capture All the UDP Packets
- Capture UDP Packets of a Specific Address
- Display Contents of Captured UDP Packets
- Filter Packets Based on the Active Port
How to Capture All the UDP Packets Using tcpdump?
By default, the tcpdump captures all the UDP packets on the specified interface. To capture all the UDP packets via the “tcpdump” command, follow the below instructions:
Prerequisite: List All the Available Network Interfaces
Before capturing the UDP packets; it is necessary to know about the network interface. To list all the available network interfaces on the system, execute the “tcpdump” command with the “list-interfaces” option as below:
$ sudo tcpdump --list-interfaces
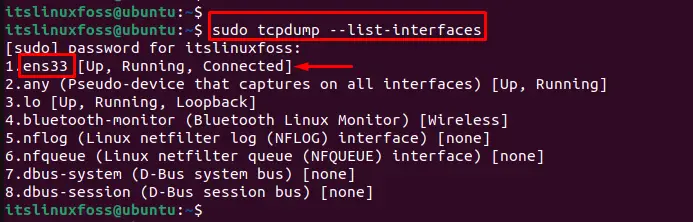
The output shows that the network interfaces of the current system.
For example, the “ens33” network interface will be used for further examples.
Example 1: Capture All the UDP Packets
To capture all UDP packets, utilize the “tcpdump” command with the “i” option and specify the machine’s network interface. Here, “ens33” is the name of the network interface:
$ sudo tcpdump -i ens33 udp
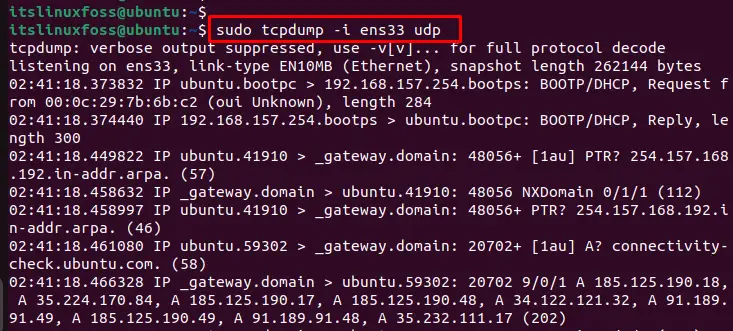
After executing the command, scroll down to the terminal. The user can display that the UDP packets have been captured in the below-highlighted figure:
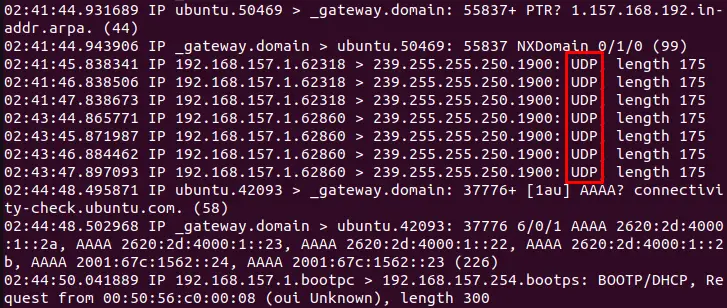
The output includes information such as the source and destination IP addresses, the protocol, the port numbers, and the payload data.
Example 2: Capture All UDP Packets of a Specific Address
To capture UDP packets with a specific source or destination IP address, the command followed in this section is described below:
Use the “i” option to display the network interface and the “src” option to filter the source address. For instance, capture the UDP packets with a source IP address of “192.168.157.149” in the following command:
$ sudo tcpdump -i ens33 src 192.168.157.149
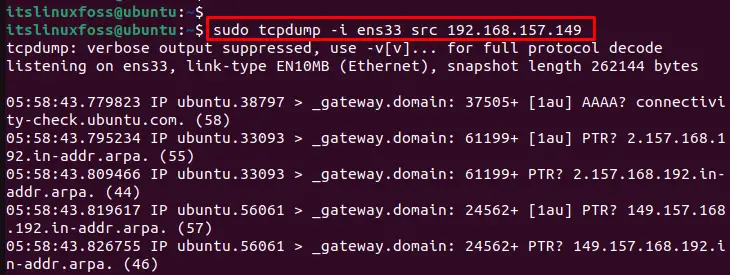
The output shows that the UDP packets have been captured with a source IP address “192.168.157.149”.
Example 3: Display Contents of Captured UDP Packets
To display the content of the packages, utilize the tcpdump command with the “c” option to capture frames. For instance, specify the “5 frames” of UDP packets to visualize in the terminal:
$ sudo tcpdump -c 5 -x
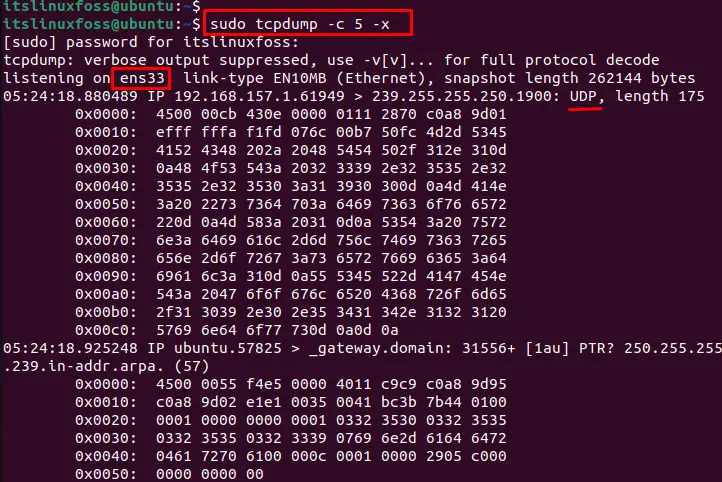
The output shows the content of captured UDP packets in the terminal.
Example 4: Filter Packets Based on the Active Port
Users can filter packets based on the active port via the “tcpdump” command. To do so, specify the port number “80” in the following command:
$ sudo tcpdump -c 5 port 80
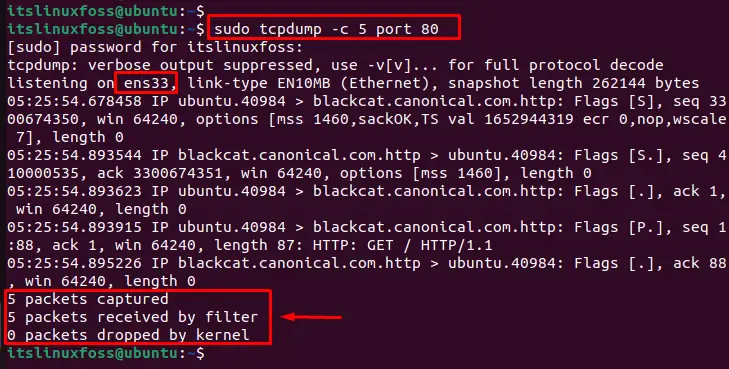
The output shows that the 5 packets have been captured and received via the “port 80”.
Advanced Features
Tcpdump is a powerful tool with many advanced features. Users can familiarize themselves with its syntax and options to use it effectively by executing the “man tcpdump” command:
$ man tcpdump
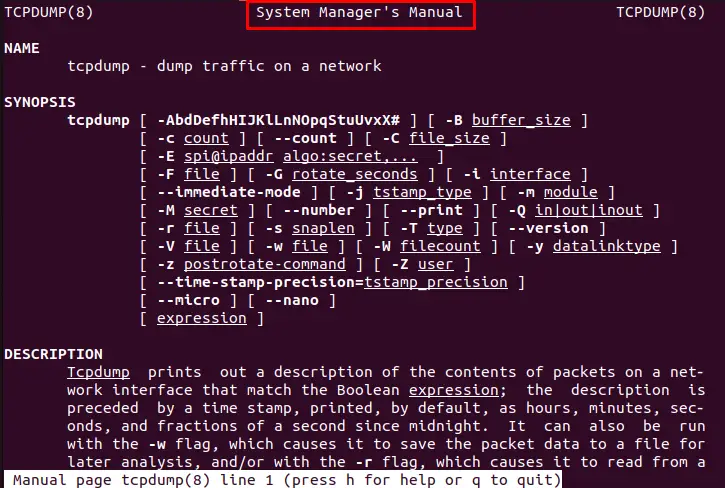
The above command accesses the tcpdump manual page and learns more about its capabilities.
Conclusion
To capture all the UDP packets using the tcpdump command, execute the “sudo tcpdump -i <network_interface> udp” command. This way, the tcpdump captures UDP packets on the specified interface and displays them on the terminal in real-time. The available network interfaces can be visualized via the “sudo tcpdump –list-interfaces” command.
This article has explained the procedure to capture all the UDP packets and various applications using the tcpdump command.
