Apache Maven is a widely used open-source management tool to build and document projects. Maven is also known as build tool: any build tool helps to perform several tasks related to source code management in a project. The Core functioning part of Maven is based on Project Object Model (POM): A POM file (an XML file) contains the configuration details and other information related to project. While working on a task, Maven retrieves important configuration details from POM file and then executes a task.
Moreover, Maven can also perform all those tasks that a build tool can perform: For instance, it generates source code, source code documentation, Source code compilation, compiled source code into JAR files and then installing packaged code on a repository.
Linux is an open-source operating system that has long list of supported distributions like Debian, Ubuntu, Linux Mint etc. Among these, Debian is a widely used operating Linux-based distribution and it is suitable for beginners as well as advanced level users.
In this descriptive post, we will demonstrate the installation process of Apache Maven on Debian 11.
Why Apache Maven is important for Java based projects
As discussed earlier, Maven primarily focuses and manages Java based projects, there are few distinctive achievements of Maven while managing Java based projects that helped Maven to become a handy and useful tool for Java developers. The notable contributions of Maven are listed below:
- Difficult task to locate correct JAR files in a version conflict situation: Maven ensures the presence the JAR files in respective repositories and thus nullifies the version conflicts:
- Instead of looking for dependencies on several websites, Maven provides support to access the JAR files using a central repository available on “mvnrepository.com”
- Maven assists in building an effective project structure that allow smooth deployment and execution of a project
Pre-requisites to install Apache Maven on Debian 11
There are following pre-requisites that must be present on your computing machine to install Apache Maven on Debian 11:
- Latest version of Java
- Running Debian 11 system
How to install Apache Maven on Debian 11
This section list down the methods and steps followed to install Maven on Debian 11:
- Method1: Install Apache Maven using apt
- Method 2: Download and install it from Maven official website
We have provided two methods to install Apache Maven on Debian 11: So, Let’s dig into them one by one:
Method 1: How to install Apache Maven using apt on Debian 11
This method uses apt command to install Apache Maven on Debian 11:
Step 1: Install Java on Debian 11
The latest version of Maven requires pre-installed Java; if you do not have it; use the below-mentioned command to install Java on your Debian 11:
Note: It is recommended to update the system’s repository first by issuing the below mentioned command:
$ sudo apt update
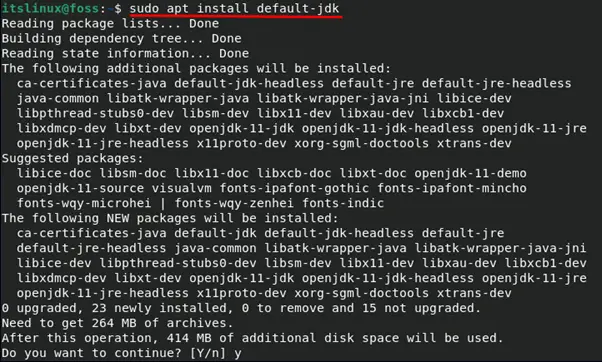
Now, install Java JDK on your Debian 11 by using the command mentioned below:
$ sudo apt install default-jdk
Verify the installation by checking the installed version of Java; For this use the following command:
$ java --version
Step 2: Install Maven
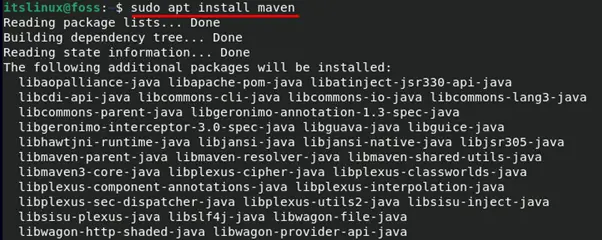
Once you are done with step 1: you can install Apache Maven by executing the command mentioned below in your terminal of Debian 11:
$ sudo apt install maven
Method 2: Download and install Apache Maven on Debian 11
You can download and install Apache Maven from official website of Maven:
Firstly, download the “.tar” file by executing the below-mentioned command:
$ curl -O https://dlcdn.apache.org/maven/maven-3/3.8.2/binaries/apache-maven-3.8.2-bin.tar.gz
After downloading, extract the .tar file by issuing the below-mentioned command:
$ sudo tar -zxvf apache-maven-3.8.2-bin.tar.gz
After extraction, move the files to “/opt/’ by using the following command:
$ sudo mv apache-maven-3.8.2 /opt/mavenHow to set environment variables for Maven on Debian 11
Environment variables enables any program to get information about installation directory of files, temporary file storage or to find user profile settings: Here few environment variables are set for Apache Maven.
Create and edit the “maven.sh” file in directory “/etc/profile.d/”; the following command will assist you in this regard:
$ sudo nano /etc/profile.d/maven.shAfter accessing “maven.sh” file; write the following lines to create environment variables that will help to build Java environment for Maven and path to locate executable programs:
export JAVA_HOME=/usr/lib/jvm/java-1.11.0-openjdk-amd64
export M2_HOME=/opt/maven
export PATH=${M2_HOME}/bin:${PATH}
Press “Ctrl+S” to save the changes and “Ctrl+X” to exit the editing mood:

Once changes are made; you must refresh the shell environment by running the “./maven.sh” file: You can do so by using the following command:
$ source /etc/profile.d/maven.sh
How to remove Apache Maven from Debian 11
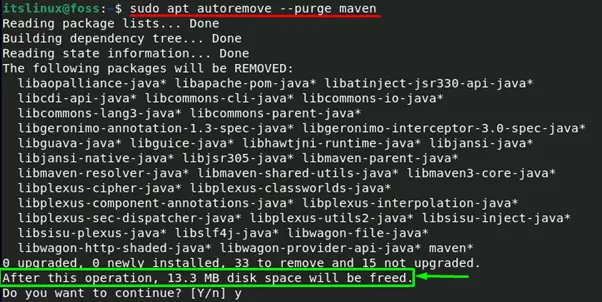
In case you want to remove the installed Maven from your Debian 11 system; you must execute the below-mentioned command:
By using this command, configuration and data files will be removed from your Debian 11. Moreover, it also removes dependencies from your system:
$ sudo apt autoremove --purge maven
Conclusion
Apache Maven acts as a build automation and project management tool that assist organizations to effectively handle Java based projects. Maven helps to manage all processes of a project from building to deployment, therefore, Maven is widely used in corporate sectors to simplify the project development. In this guide, we have demonstrated two different ways to install Maven on your Debian 11. You can follow Method 1 to install using apt command whereas Method 2 helps to install it from their official site.

TUTORIALS ON LINUX, PROGRAMMING & TECHNOLOGY