An envelope is a flat paper container that carries items, messages, documents, etc. Google Docs does not keep the functionalities of creating an envelope. However, it supports a third-party extension to make the envelope and then process it for printing. This Google Docs guide will demonstrate how to create and print an envelope in Google Docs.
The content of this post is as follows:
Let’s start with the first method.
How to Create an Envelope in Google Docs?
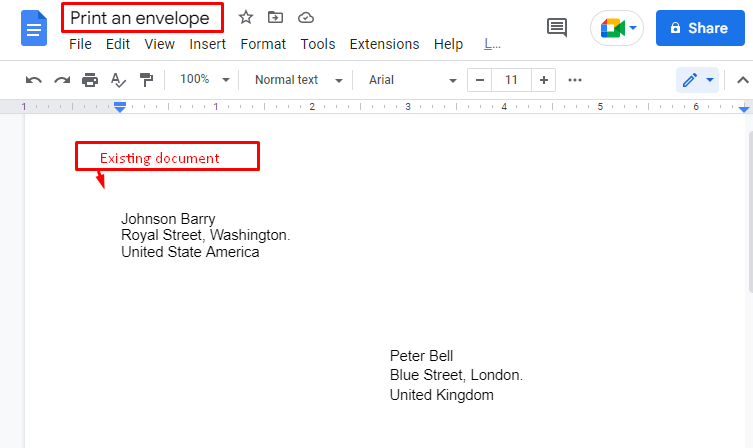
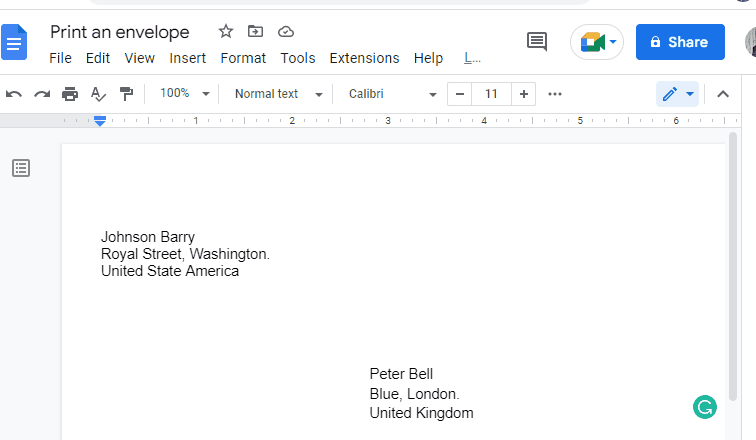
A method is considered with the help of a third-party extension for printing the envelope. It is applied to an existing document in which some dummy information is already written, which can be seen in the below figure.
Now, follow the steps for creating an envelope in Docs using an extension.
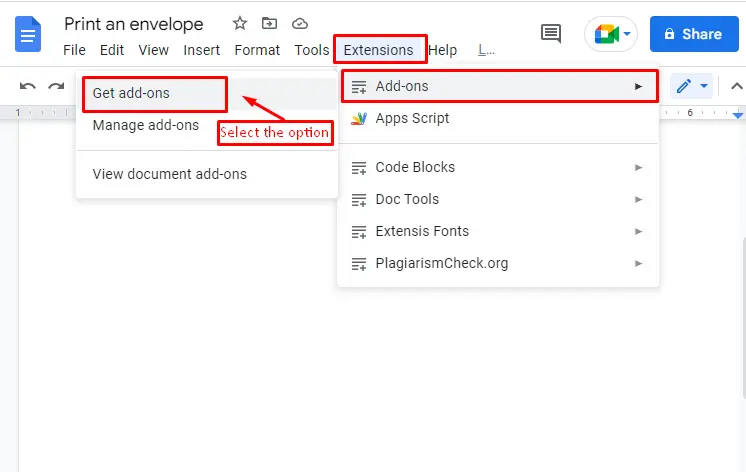
Step 1: Search Extension
For installing the extension, choose the “Get add-ons” option by selecting the button “Add-ons”. It comes from by pressing the “Extensions” tab located in the menubar of Google Docs.
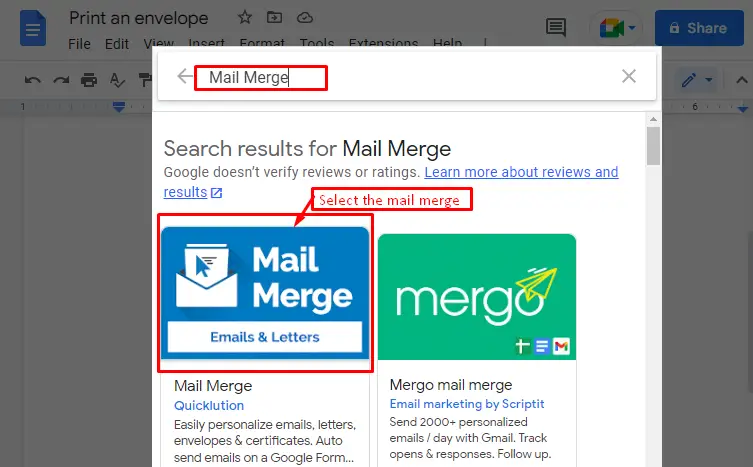
It goes to the new window on which to write “Mail Merge” in the box and chooses the application that can be seen below.
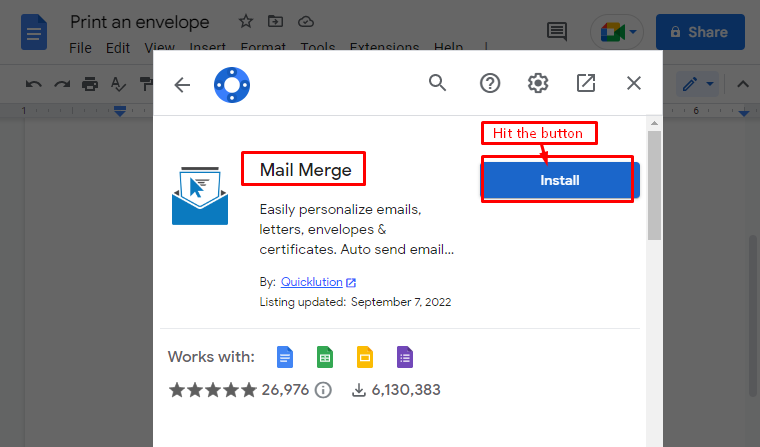
Step 2: Install Extension
Start the initialization process of the “Mail Merge” by pressing the “Install” button.
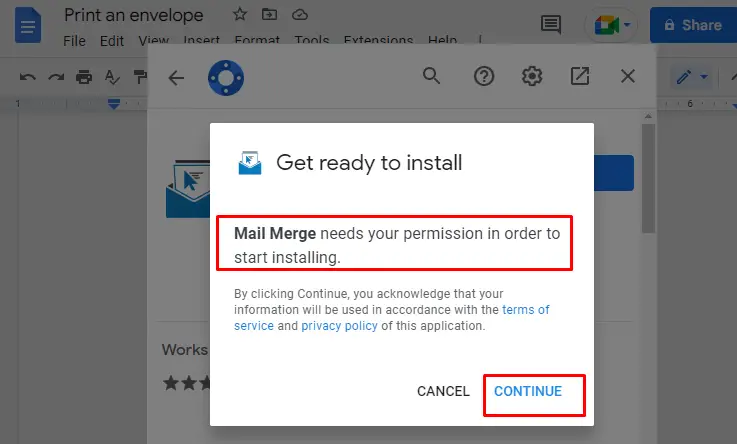
Press the “CONTINUE” button to grant the permission and enable the extension.
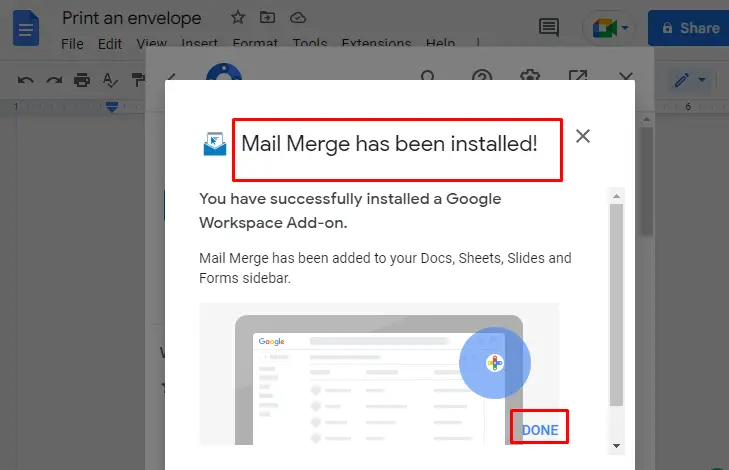
Finally, the “Mail Merge” extension has been installed, which can be verified in the below figure.
Step 3: Enable the Extension
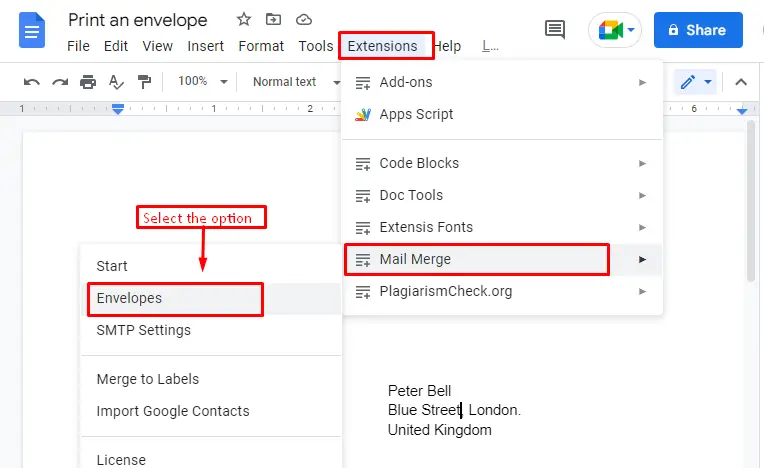
Finally, select the “Envelopes” option by hovering over the “Mail Merge”. It is available by hitting the “Extensions” tab in Google Docs.
Step 4: Set the Envelope Size
It navigates to the “Envelope Size” window. In this window, the default setting of the envelope is already set at 4 ⅛ * 9 ½ inches. After that, hit the “Done” button to apply the setting in the current document of Google Docs.

Finally, the envelope is ready for the printing process, which can be shown in the image.

Method 1: How to Print an Envelope Using Print Option?
For printing the envelope, navigate to the “File” tab in the menu bar and select the “Print” option in the drop-down list.

Now, the user can verify the size of the document is according to the envelope. So, hit the “Print” button in a pop-up window.

That it! You are done with the first method to print the envelope in Google Docs.
Method 2: How to Print an Envelope Using CTRL+P?
An alternative method is considered for printing documents quickly. In this method, the shortcut key “CTRL+P” is utilized to print the envelope. When the “CTRL+P” is pressed, the print window appears where the user requires pressing the “Print” button. The following “GIF” shows the whole process of printing the envelope:
That it! You have experience in printing an envelope in Google Docs.
Conclusion
Google Docs provides a third-party “Mail Merge” extension, a “Print” option from the “File” tab, and a “CTRL+P” shortcut key to print an envelope in Google Docs. The “Mail Merge” extension formats the document size according to the envelope size ( 4 ⅛ * 9 ½ ) inches. Furthermore, the “Print” option from the “File” tab and shortcut key “CTRL+P” allow for printing operations. This guide has provided a detailed demonstration for creating and printing an envelope in Google Docs.

TUTORIALS ON LINUX, PROGRAMMING & TECHNOLOGY