
In Linux, the services are a program that runs in the background outside the system user’s control. The services manage the program as a background operation. The services can be enabled, disabled, restarted, or stopped to perform specific tasks.
Systemd is basically a software suite that assists with an array of system components for Linux-based operating systems. The purpose is to centralize behavior as well as service configuration among Linux distributions.
This guide pens down the guidelines to enable or disable the Ubuntu services using “systemd”:
- What is the Usage of Systemd in Ubuntu?
- How to Manage Systemd Services Using Systemctl in Ubuntu?
- How to Enable Services in Ubuntu Using Systemd?
- How to Disable Services in Ubuntu Using Systemd?
- How to Stop, Re-Enable, and Start a Service in Ubuntu Using Systemd?
- What are Alternative Commands to Enable/Disable Services in Ubuntu?
What is the Usage of Systemd in Ubuntu?
This is the command used to control systemd, the default init system in Ubuntu 16.04 and later versions. Systemd assists replacements for several utilities as well as daemons, such as event logging, device management, network connection management, and login management.
How to Manage Systemd Services Using Systemctl in Ubuntu?
To run a Linux-based program at startup with systemd, create a “service unit file”. It defines how systemd should start and stop the program, and under what conditions. After that, use the “systemctl” command to control the service, such as enabling it, disabling it, starting it, stopping it, or checking its status.
To explore more about it, follow our guide List Services using systemctl Command.
Note: Users can also use the “journalctl” command to view the logs of the service.
How to Enable Services in Ubuntu Using Systemd?
Systemd is a service as well as a system manager that runs as the first process on boot. The “systemd” is an init (initialization) system of Ubuntu. This system is managed through the “systemctl” command.
To enable a service using systemd, create a unit file that defines the service and its dependencies, and then use the “systemctl” command to enable it. You can create a unit file in the “/etc/systemd/system” directory or use an existing one from the “/lib/systemd/system” directory.
Basic Syntax
To enable a service using systemctl, users need to run the below command:
sudo systemctl enable service_name
In the above syntax, the “service_name” is the service name that users want to enable. This will create a symbolic link from the “/etc/systemd/system” directory to the unit file of the service. It means that the service will start automatically on boot.
Let us follow the below steps to enable the cron job services in Ubuntu via the systemd:
Step 1: Check the Service Status
The “systemctl” command with the “status” option shows the current status of the service, active, failed, or inactive. Let us check the status of the cron service, which will be enabled later in this guide:
sudo systemctl status cron.service
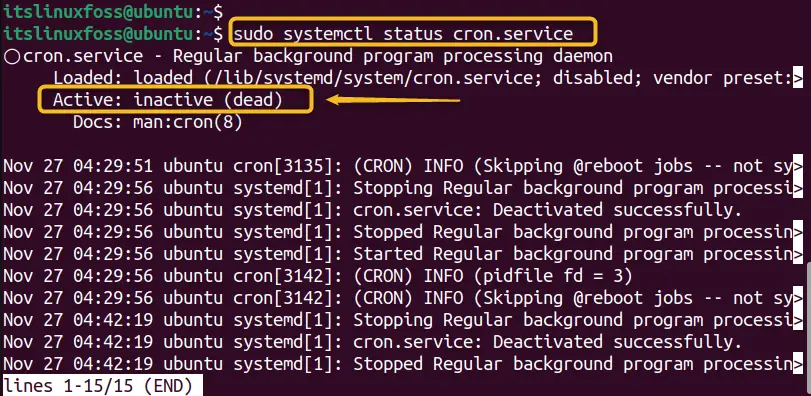
The output shows that the “cron.service” is disabled.
Step 2: Enable the Service
To enable the services in Ubuntu, use the “systemctl” command with the “enable” keyword and the service name. For instance, the service name in our case is “cron.service” as shown in the image:
sudo systemctl enable cron.service

The above output confirms that the “cron.service” is enabled now and currently in active status.
Step 3: Restart the Service
To restart the services, users are required to mention the service name along with the “restart” option. Let us execute the below-mentioned command to restart the “cron” services to make the changes effective:
sudo systemctl restart cron.service

In this way, cron services have been enabled.
Step 4: Verify the Service Status
Finally, users need to confirm the service status either enable or disable. For this, check the specified service status again for verification purposes:
sudo systemctl status cron.service

The green indicator verifies that the “cron.service” has been enabled successfully.
How to Disable Services in Ubuntu Using Systemd?
One of the features of systemd is that it allows users to disable services that are not needed or wanted. It can improve the performance and security of the system. Let us check out the syntax and practical example:
Basic Syntax
To disable a service in Ubuntu using systemd, use the following syntax:
sudo systemctl disable service_name
This command prevents the service from starting automatically at boot time, but it will not stop it if it is already running.
This section enlists the recommended steps to disable services in Ubuntu:
Step 1: View the Service Status
To view the status of any services in a Linux-based operating system, use the “systemctl” command along with the “status” option by mentioning the service name. In our case, the “systemctl” command is used to check the “bluetooth.service” status:
sudo systemctl status bluetooth.service
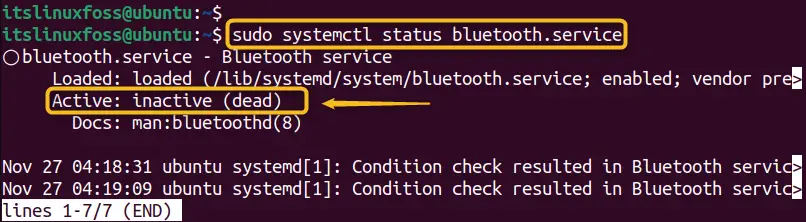
The above output shows that the “bluetooth.service” is enabled.
Step 2: Disable the Service
To disable the service, use the “systemctl” command with the “disable” option by specifying the service name. For this, type the “bluetooth.service” name with the “systemctl” command:
sudo systemctl disable bluetooth.service
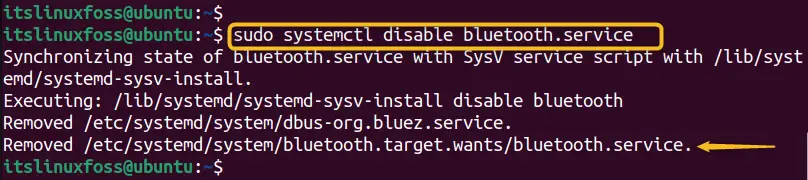
The command was executed successfully and shows that current services have been disabled.
Step 3: Restart the Service
To restart the service, utilize the “systemctl” command along with the “restart” option by specifying the service name. It makes the changes effective:
sudo systemctl restart bluetooth.service

Step 4: Confirm the Service Status
Check the status of the “bluetooth.service” again for verification, use the below-mentioned command:
sudo systemctl status bluetooth.service
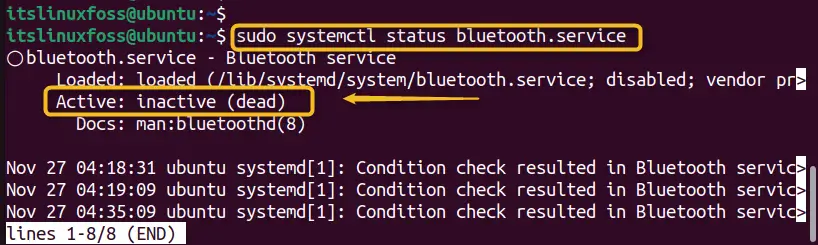
The “bluetooth.service” has been disabled permanently.
That is all from this guide to enable or disable the services in Ubuntu.
Tip 1: How to Stop, Re-Enable, and Start a Service in Ubuntu Using Systemd?
To stop a running service, users can utilize the “systemctl” command with the “stop” keyword specifying the service name:
sudo systemctl stop service_name
In this way, the “systemctl” command will stop the service instantly.
Re-enable a Service
To re-enable a service that was disabled, you can use the “systemctl” command with the “enable” keyword by mentioning the service name:
sudo systemctl enable service_name
This command will create a symbolic link that tells systemd to start the service at boot time.
Start a Service
To start a service manually, users can utilize the “systemctl” command with the “start” keyword by specifying the service name. The basic syntax is given below:
sudo systemctl start service_name
This will start the service instantly.
To explore more about service activity, follow our guide.
What are Alternative Commands to Enable/Disable Services in Ubuntu?
In Ubuntu, there are different ways to enable or disable services, depending on the version and the init system used. Here are some of the alternative commands to enable or disable services in Ubuntu:
- Using Service Command
This is a legacy command that is still available in Ubuntu for compatibility reasons. It can be used to control services that use Upstart, the previous init system in Ubuntu 14.04, and earlier versions.
To enable or disable a service with the “service” command, you can use the commands:
sudo update-rc.d service_name enable   # enable the service.
sudo update-rc.d service_name disable  # disable the service.
sudo service service_name start        # start the service instantly.
sudo service service_name stop         # stop the service instantly.
sudo service service_name status       # show the status of the service
- Using /etc/init.d Directory
This directory contains scripts for each service that can be controlled by upstart. These scripts are called init scripts and they accept parameters such as start, stop, restart, etc. To enable or disable a service with /etc/init.d, you can use the commands:
sudo /etc/init.d/service_name enable   # enable the service
sudo /etc/init.d/service_name disable  # disable the service
sudo /etc/init.d/service_name start    # start the service instantly.
sudo /etc/init.d/service_name stop     # stop the service instantly.
sudo /etc/init.d/service_name status   # shows the current status of the service
That is all from the possible methods to enable or disable services in Ubuntu using systemd and other alternative commands.
Conclusion
Ubuntu/Debian-based Linux systems offer the “systemctl” command to enable and disable the services. To enable any service, use the syntax “sudo systemctl enable service_name” and to disable any service, use the command “sudo systemctl disable service_name”. The “systemctl” command with the “status” option also shows the status of the service(active, failed, or inactive). This post briefly describes the complete procedure to enable as well as disabled services in Ubuntu.
