
Python is a popular high-level programming language that is widely utilized for web development, scientific computing, data analysis, artificial intelligence, and many other applications. Python is available on CentOS as a system package, which means that users can install it using the YUM/DNF package managers or build it from the source.
The latest version of Python on CentOS can provide several benefits, including security, new features, compatibility, performance, and community support.
This article will demonstrate all possible methods to install the latest Python on CentOS.
Method 1: Using the YUM Package Manager
CentOS provides an official repository for installing Python. Users can install the latest version of Python by following the below-mentioned steps:
Step 1: Update Package Repository
It is a better practice to update the package repository before installing any package in the operating system:
$ sudo yum update
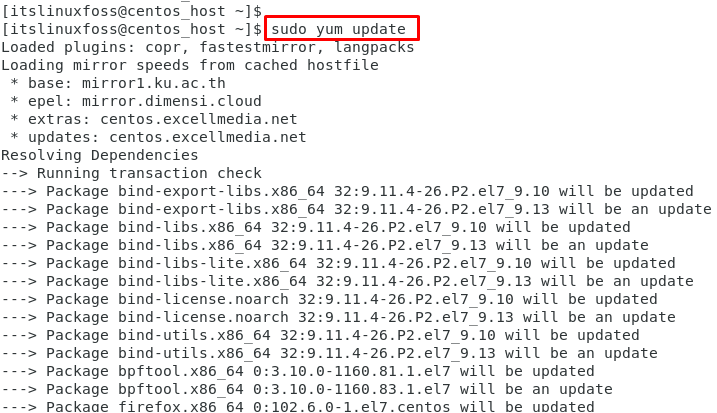
The output shows that the CentOS package repository has been updated.
Step 2: Install Latest Python
To install the latest version of Python on the operating system, use the “python3” package with the “install” utility as below:
$ sudo yum install python3
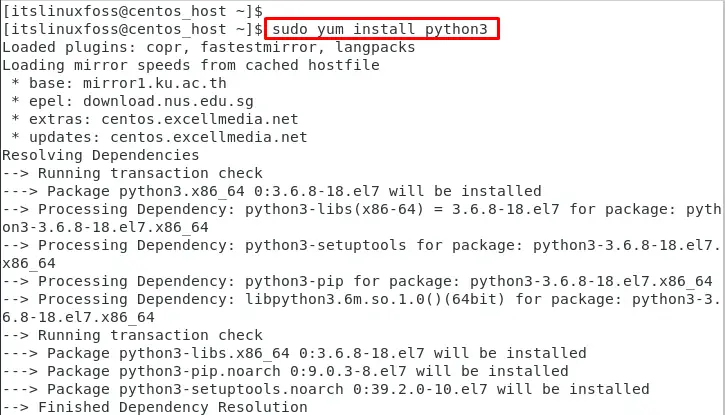
This command installs the latest version of Python 3 which is available in the CentOS repository.
Step 3: Verify the Python Version
To check the installed version of Python on the Operating System, use the “python3” with the “version” option as below:
$ python3 --version

The output shows that the “Python 3.6.8” version has been installed from the CentOS repository.
Method 2: Using the Source Code
Users can also install the latest version of Python by building it from the source code. Here are the steps to follow:
Step 1: Install the Required Dependencies
Before installing the latest Python version, it is required to install the essential dependencies. These dependencies are installed by executing the below script:
$ sudo yum install gcc openssl-devel bzip2-devel libffi-devel
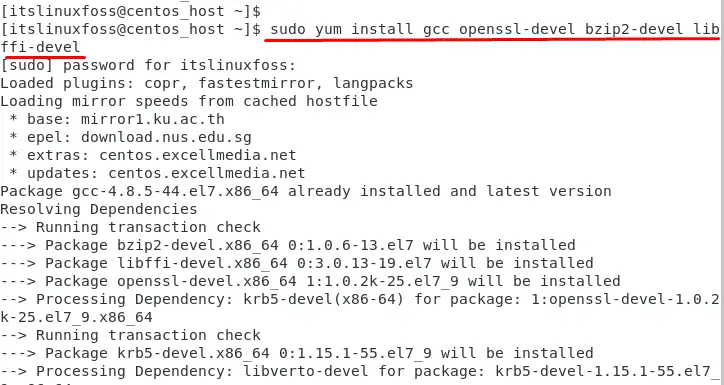
These are the required dependencies to build Python from the source.
Step 2: Download and Extract the Source Code
Go to the Official Python Website and download the latest version of Python source code as shown below:
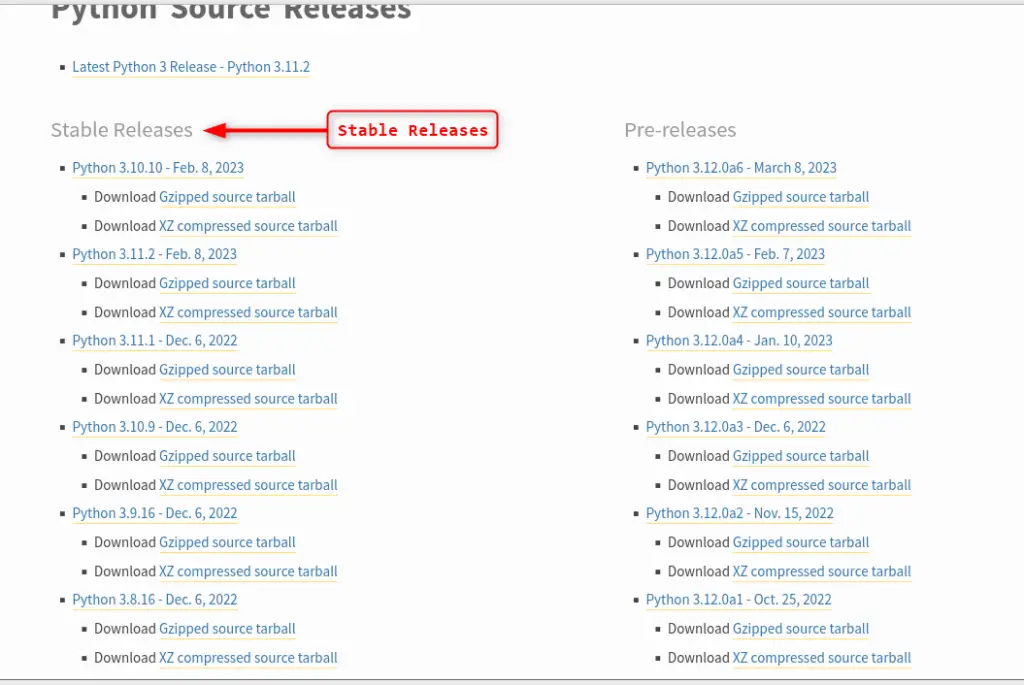
Python “3.10.10” is the latest version available on the website. In this case, select the “Python-3.10.10” version and extract the archive to a directory:
$ tar zxvf Python-3.10.10.tgz
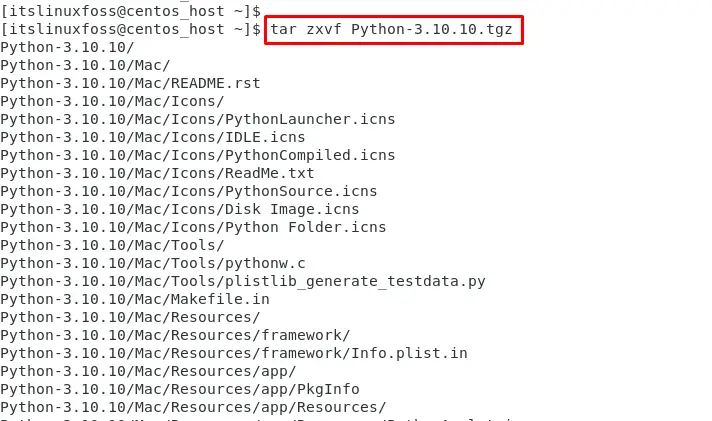
The output confirms that the extraction of the “Python-3.10.10.tgz” folder has been completed.
Step 3: Navigate and Configure Python
Navigate to the extracted Python directory and run the “./configure” command. It configures the downloaded source code files:
$ ./configure --enable-optimizations
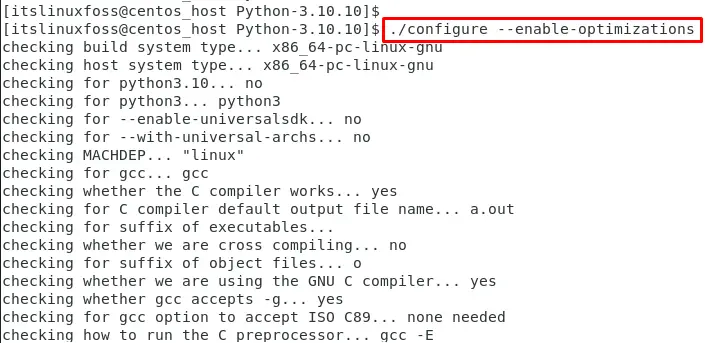
The output shows that the system configuration has been checked and is ready to compile.
Step 4: Compile and Build Python on CentOS
After the configuration is completed, compile and build the Python using the “make” command with the “altinstall” utility:
$ sudo make altinstall
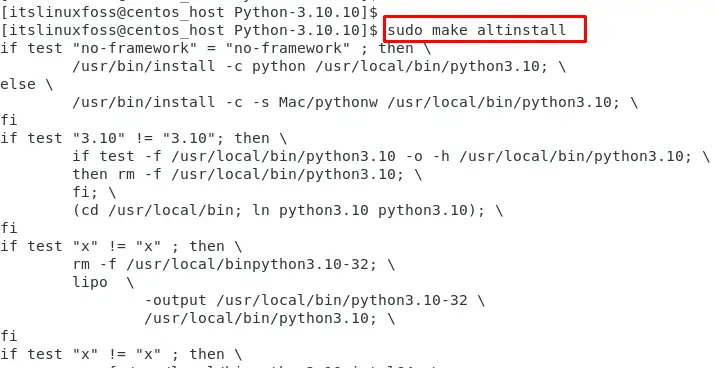
It takes time to compile all Python configuration files.
Step 5: Verify Python Version
To verify the python version, use the “python 3.10” with the “version” option as below:
$ python 3.10 --version

The output confirms that the “python 3.10.10” version has been installed in the operating system.
How to Remove Python From CentOS?
To remove Python from CentOS, use the “remove” command by specifying the package name. In our case, specify the “python3” with the “sudo” privileges:
$ sudo yum remove python3
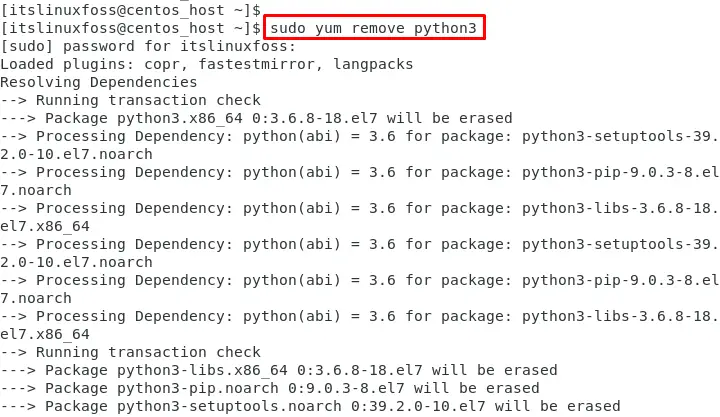
The output shows that Python has been removed from CentOS.
Conclusion
To install the latest version of Python on CentOS, use the YUM package manager, and source code that is provided on the official Python website. These methods install the latest version of Python that ensure that the Python environment is up-to-date and secure.
This article has demonstrated various methods to install the latest Python on CentOS.
